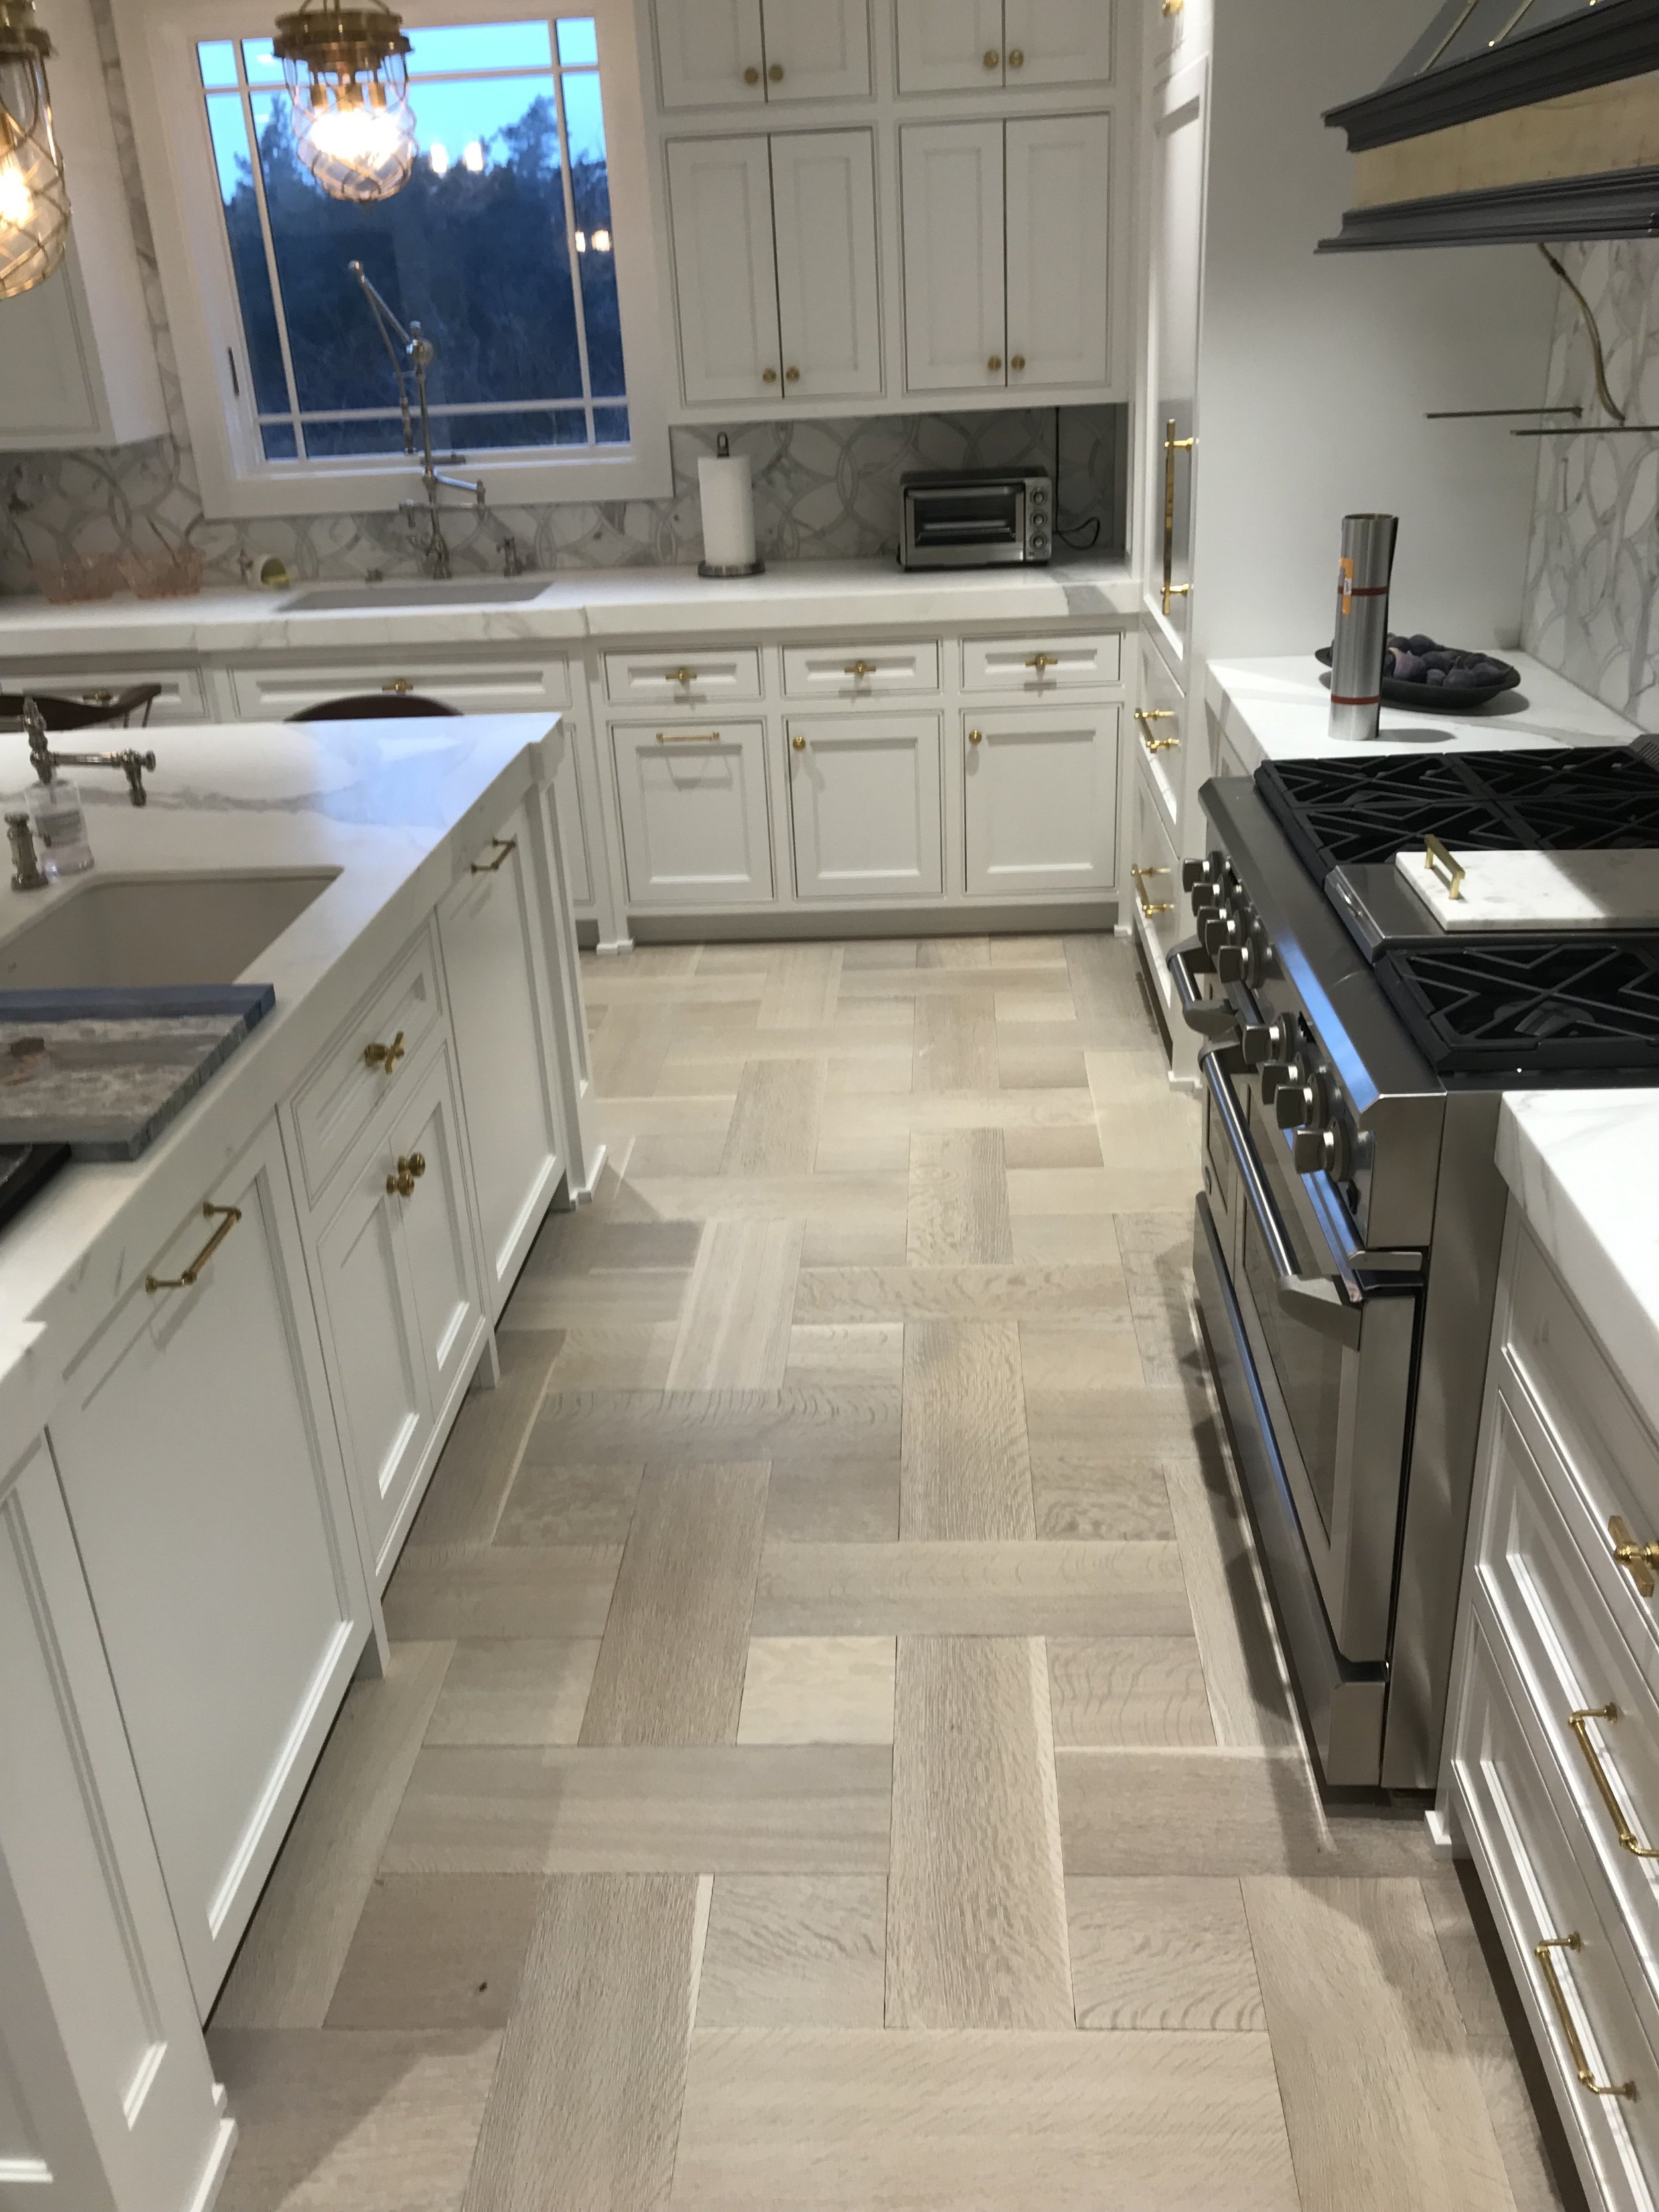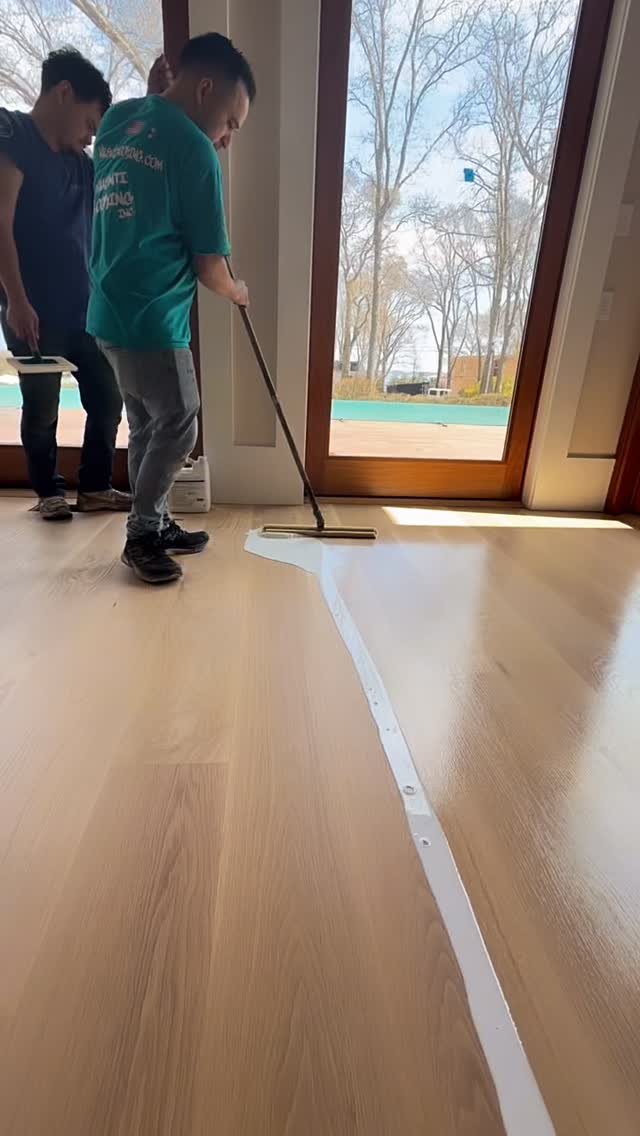

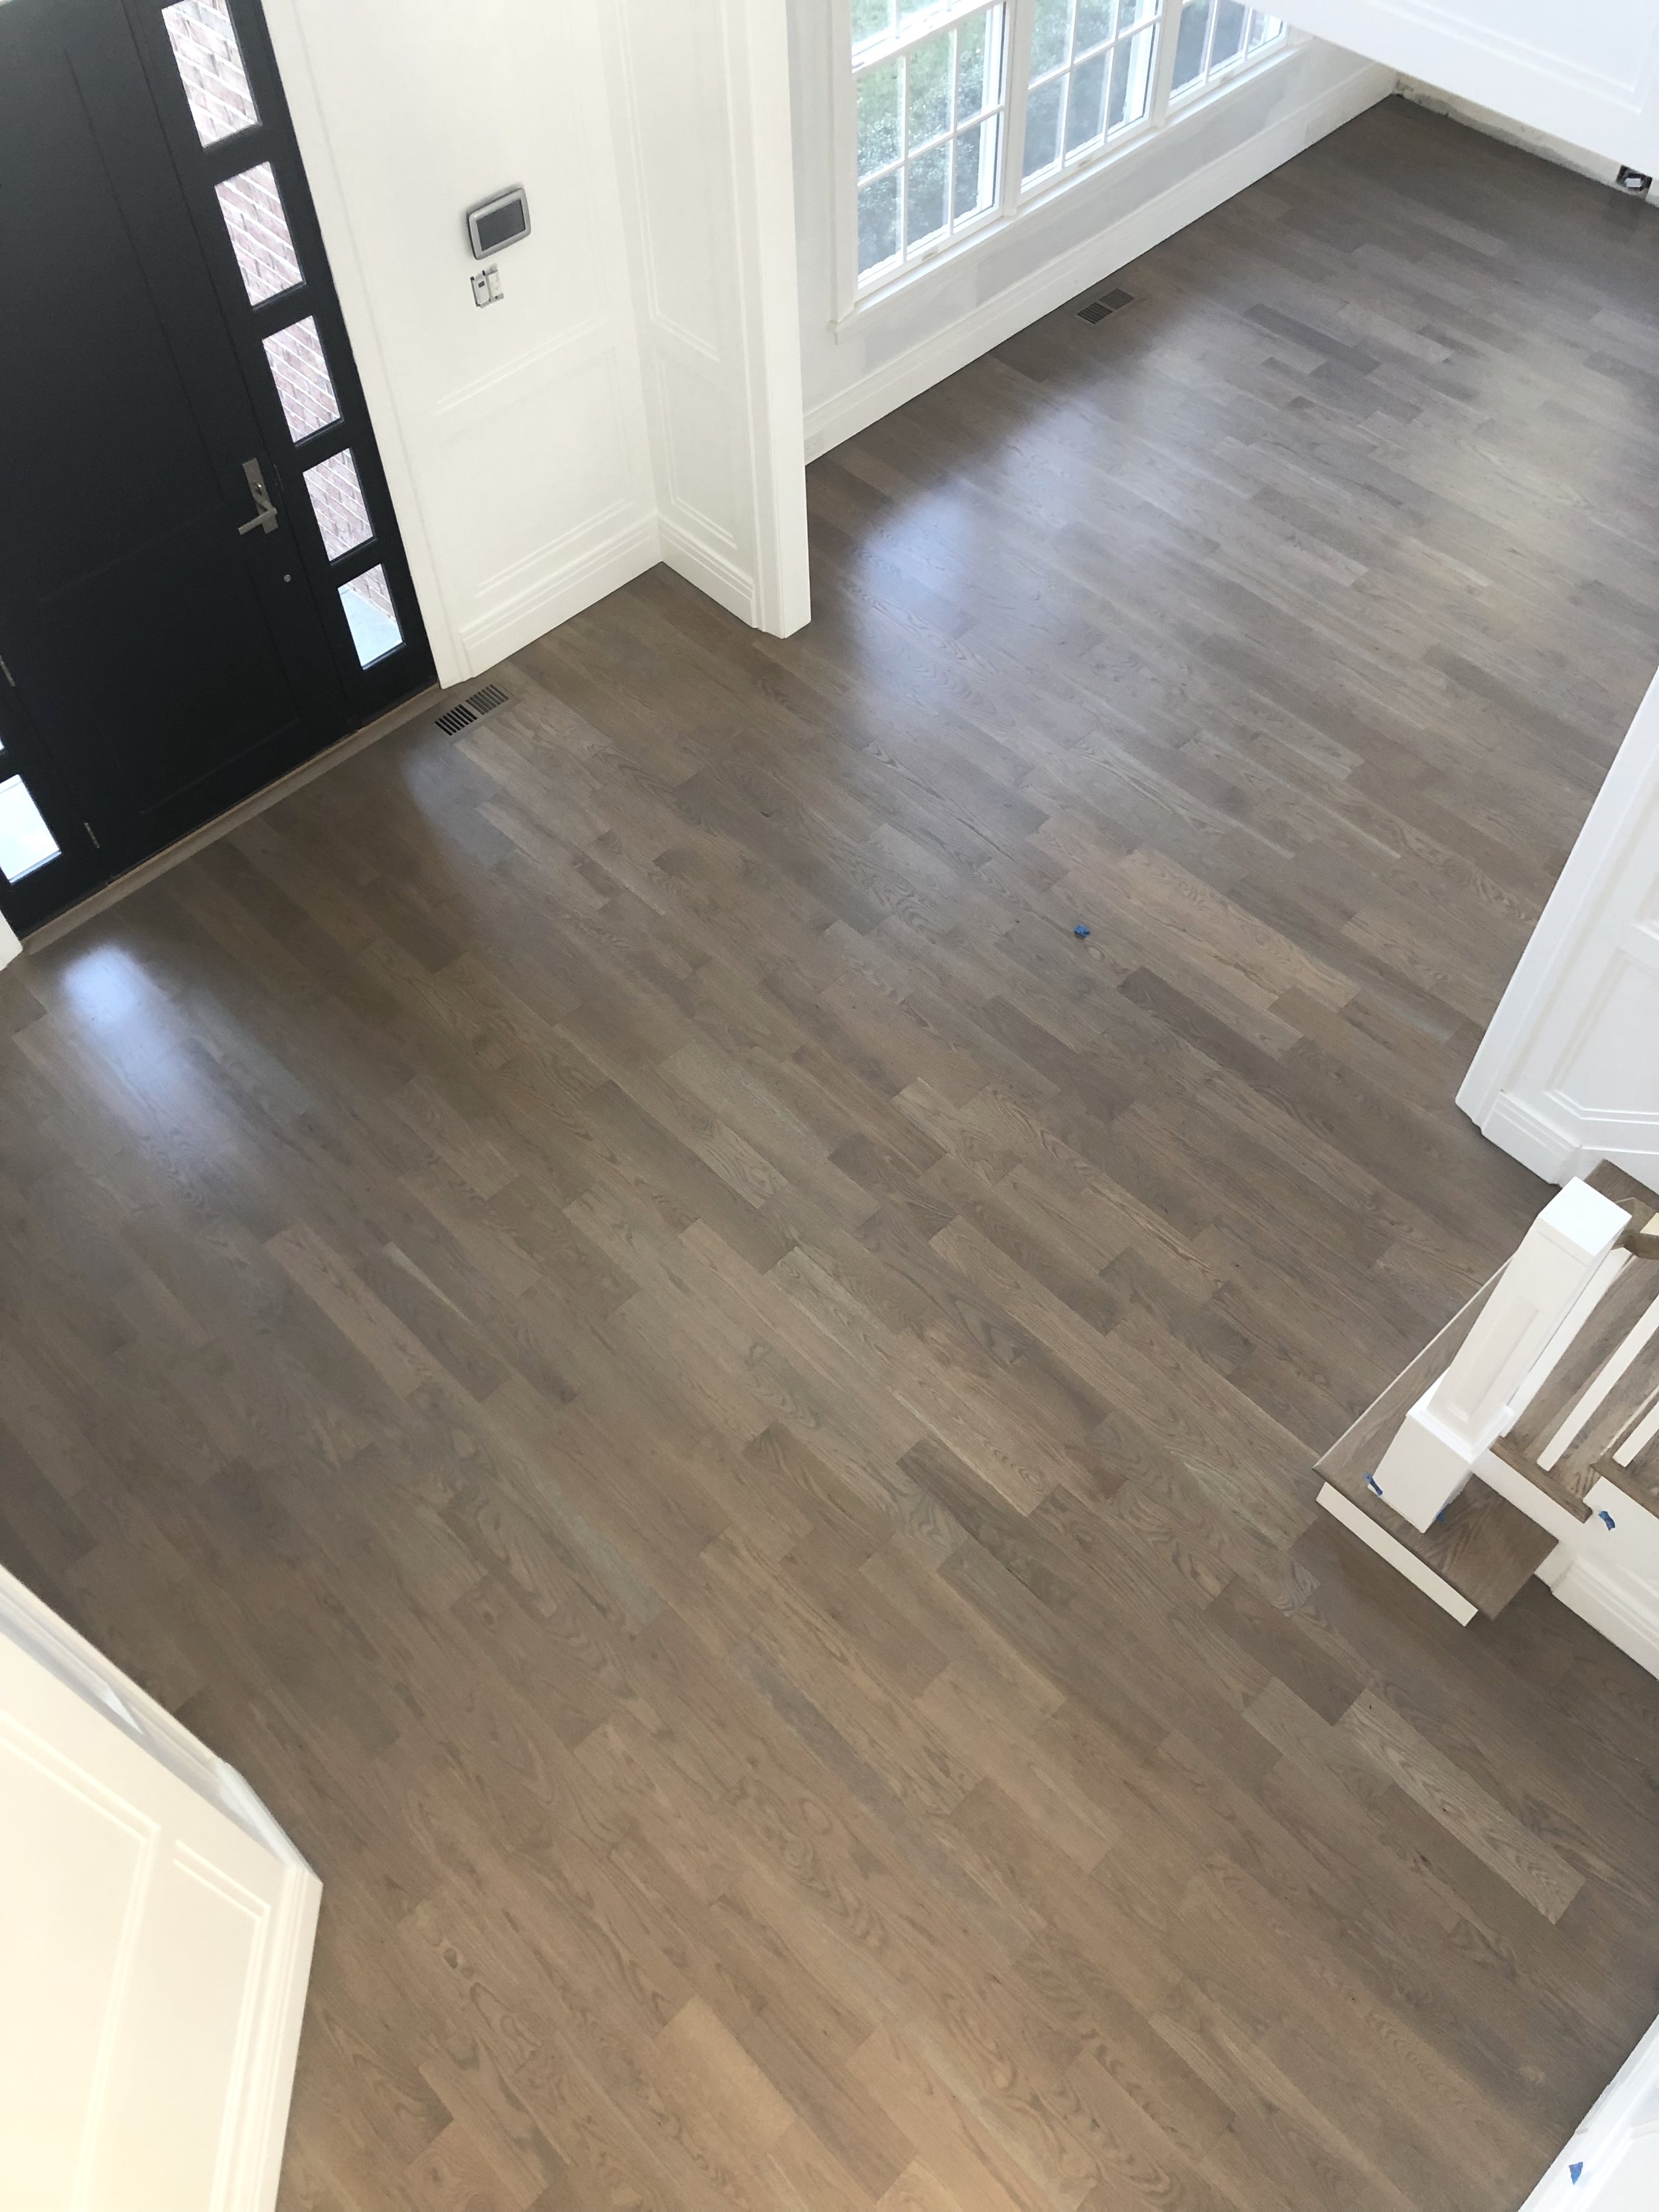
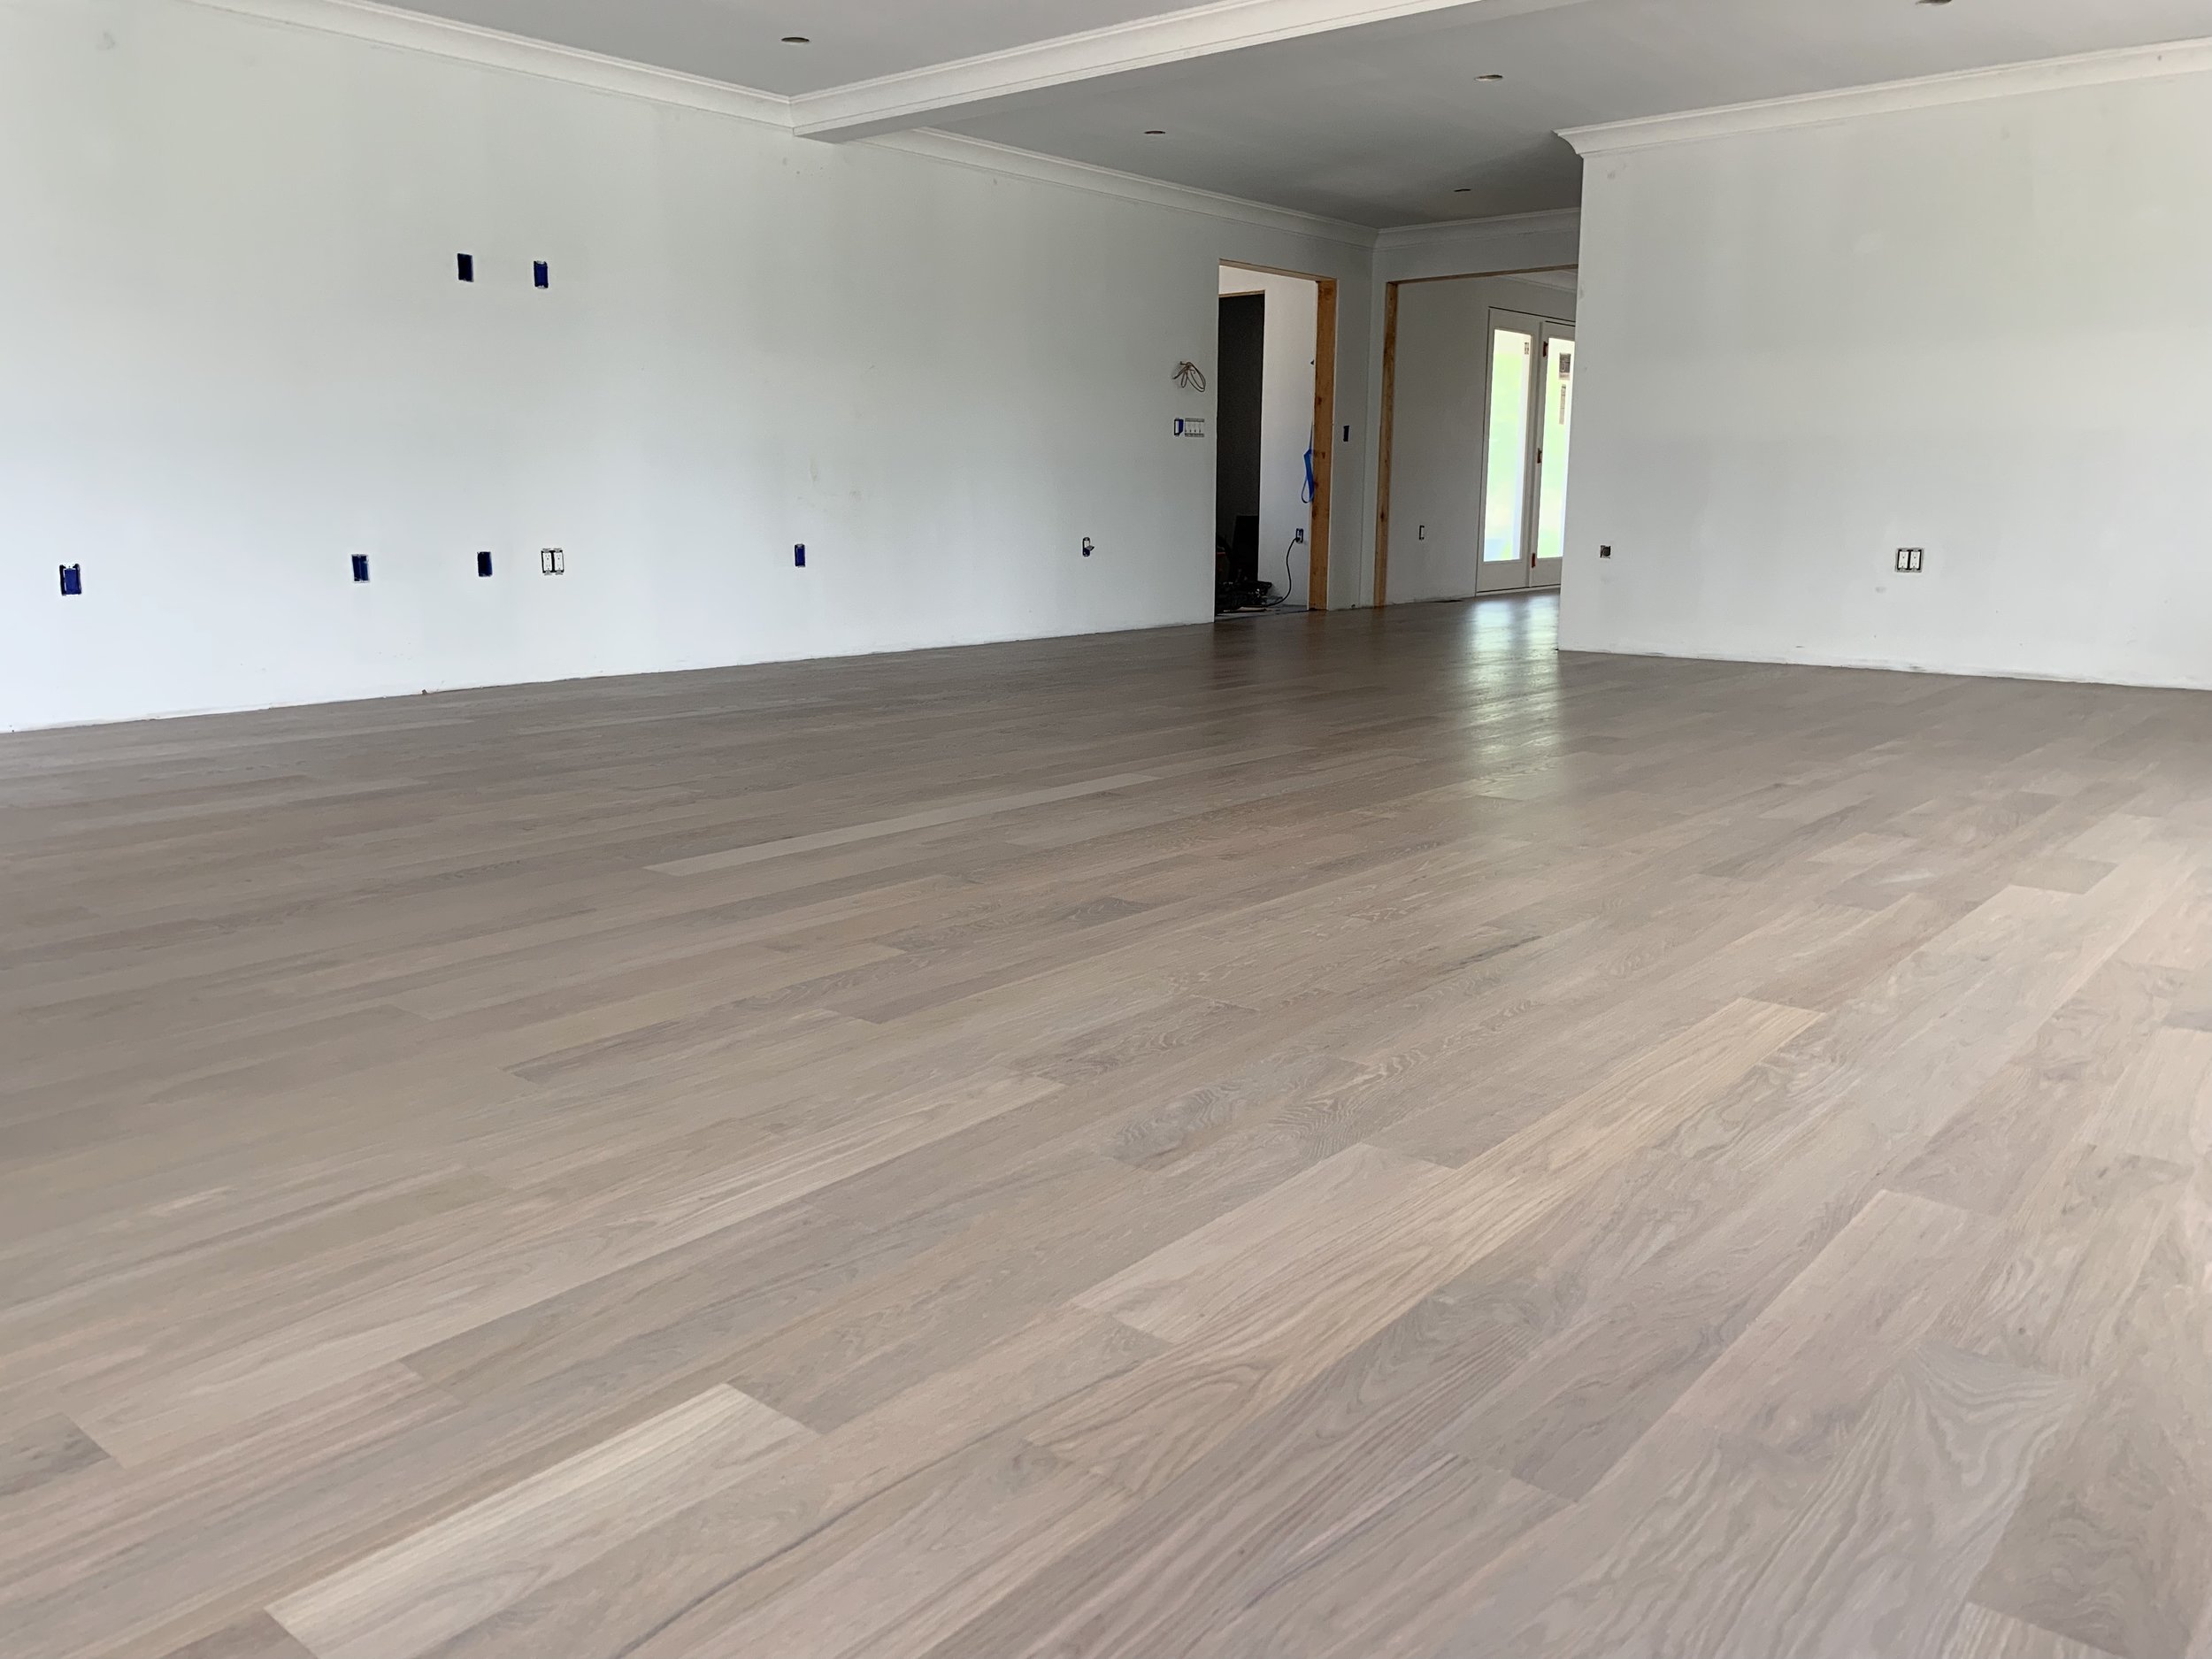
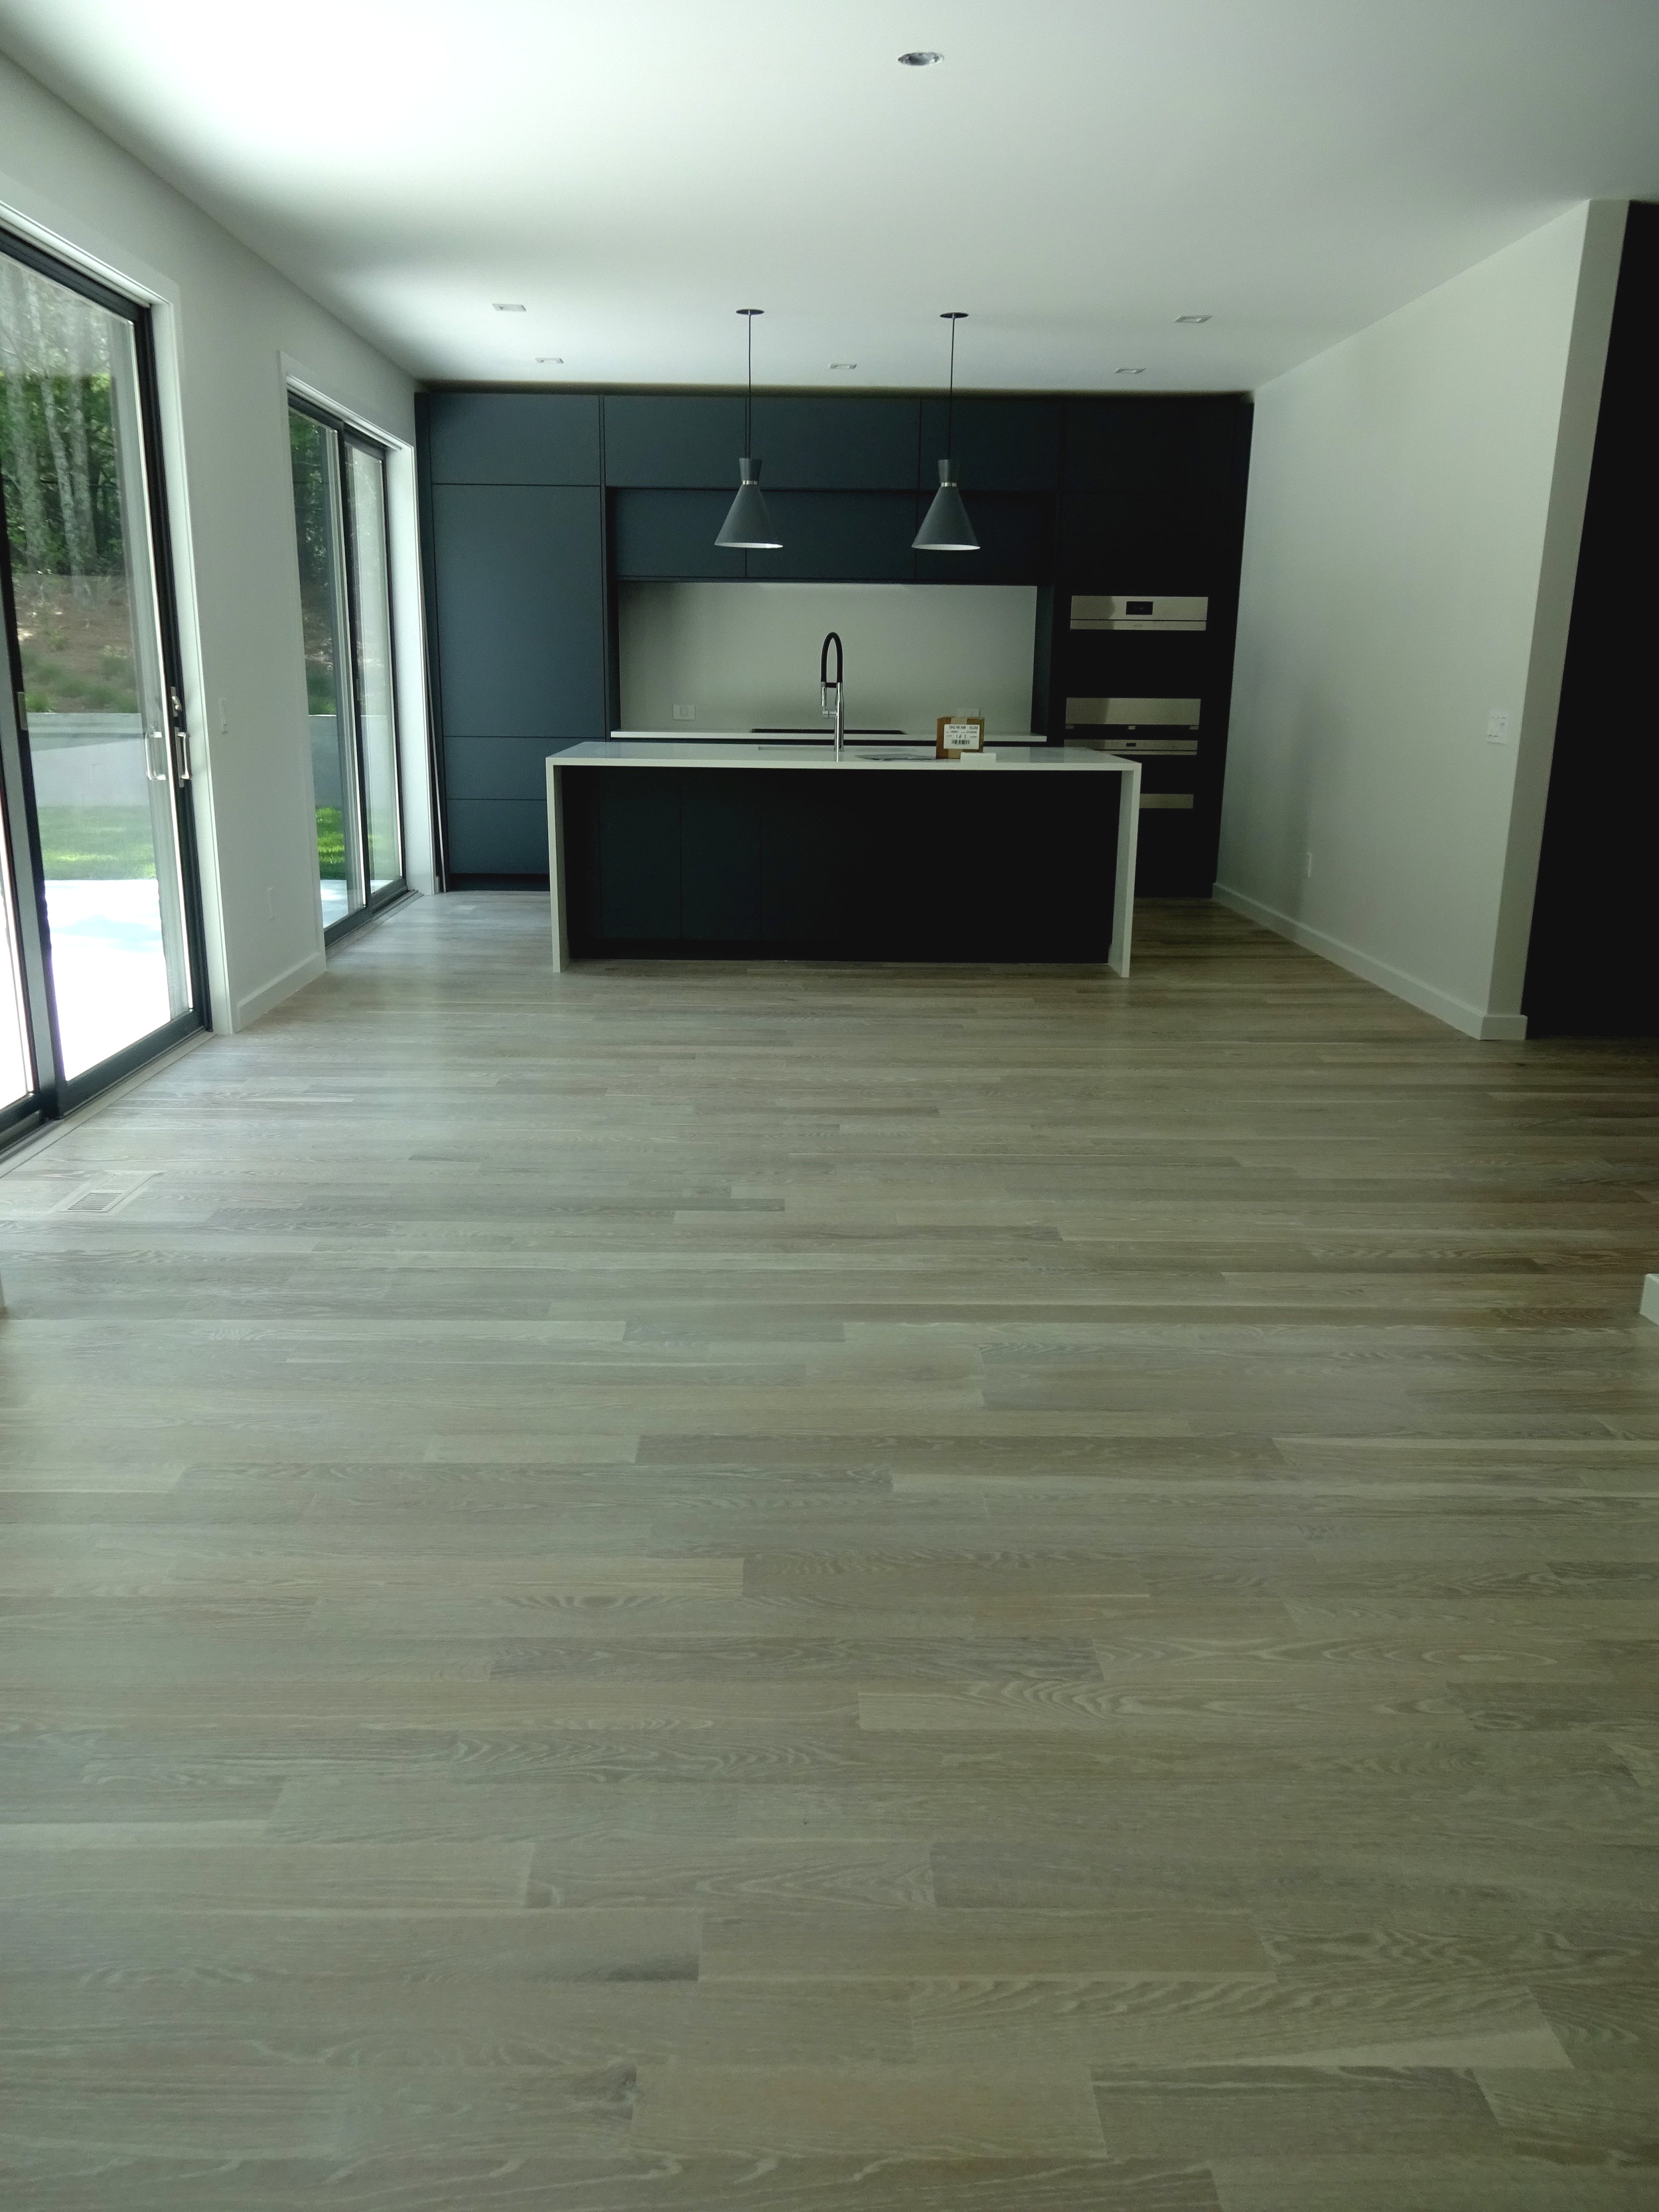
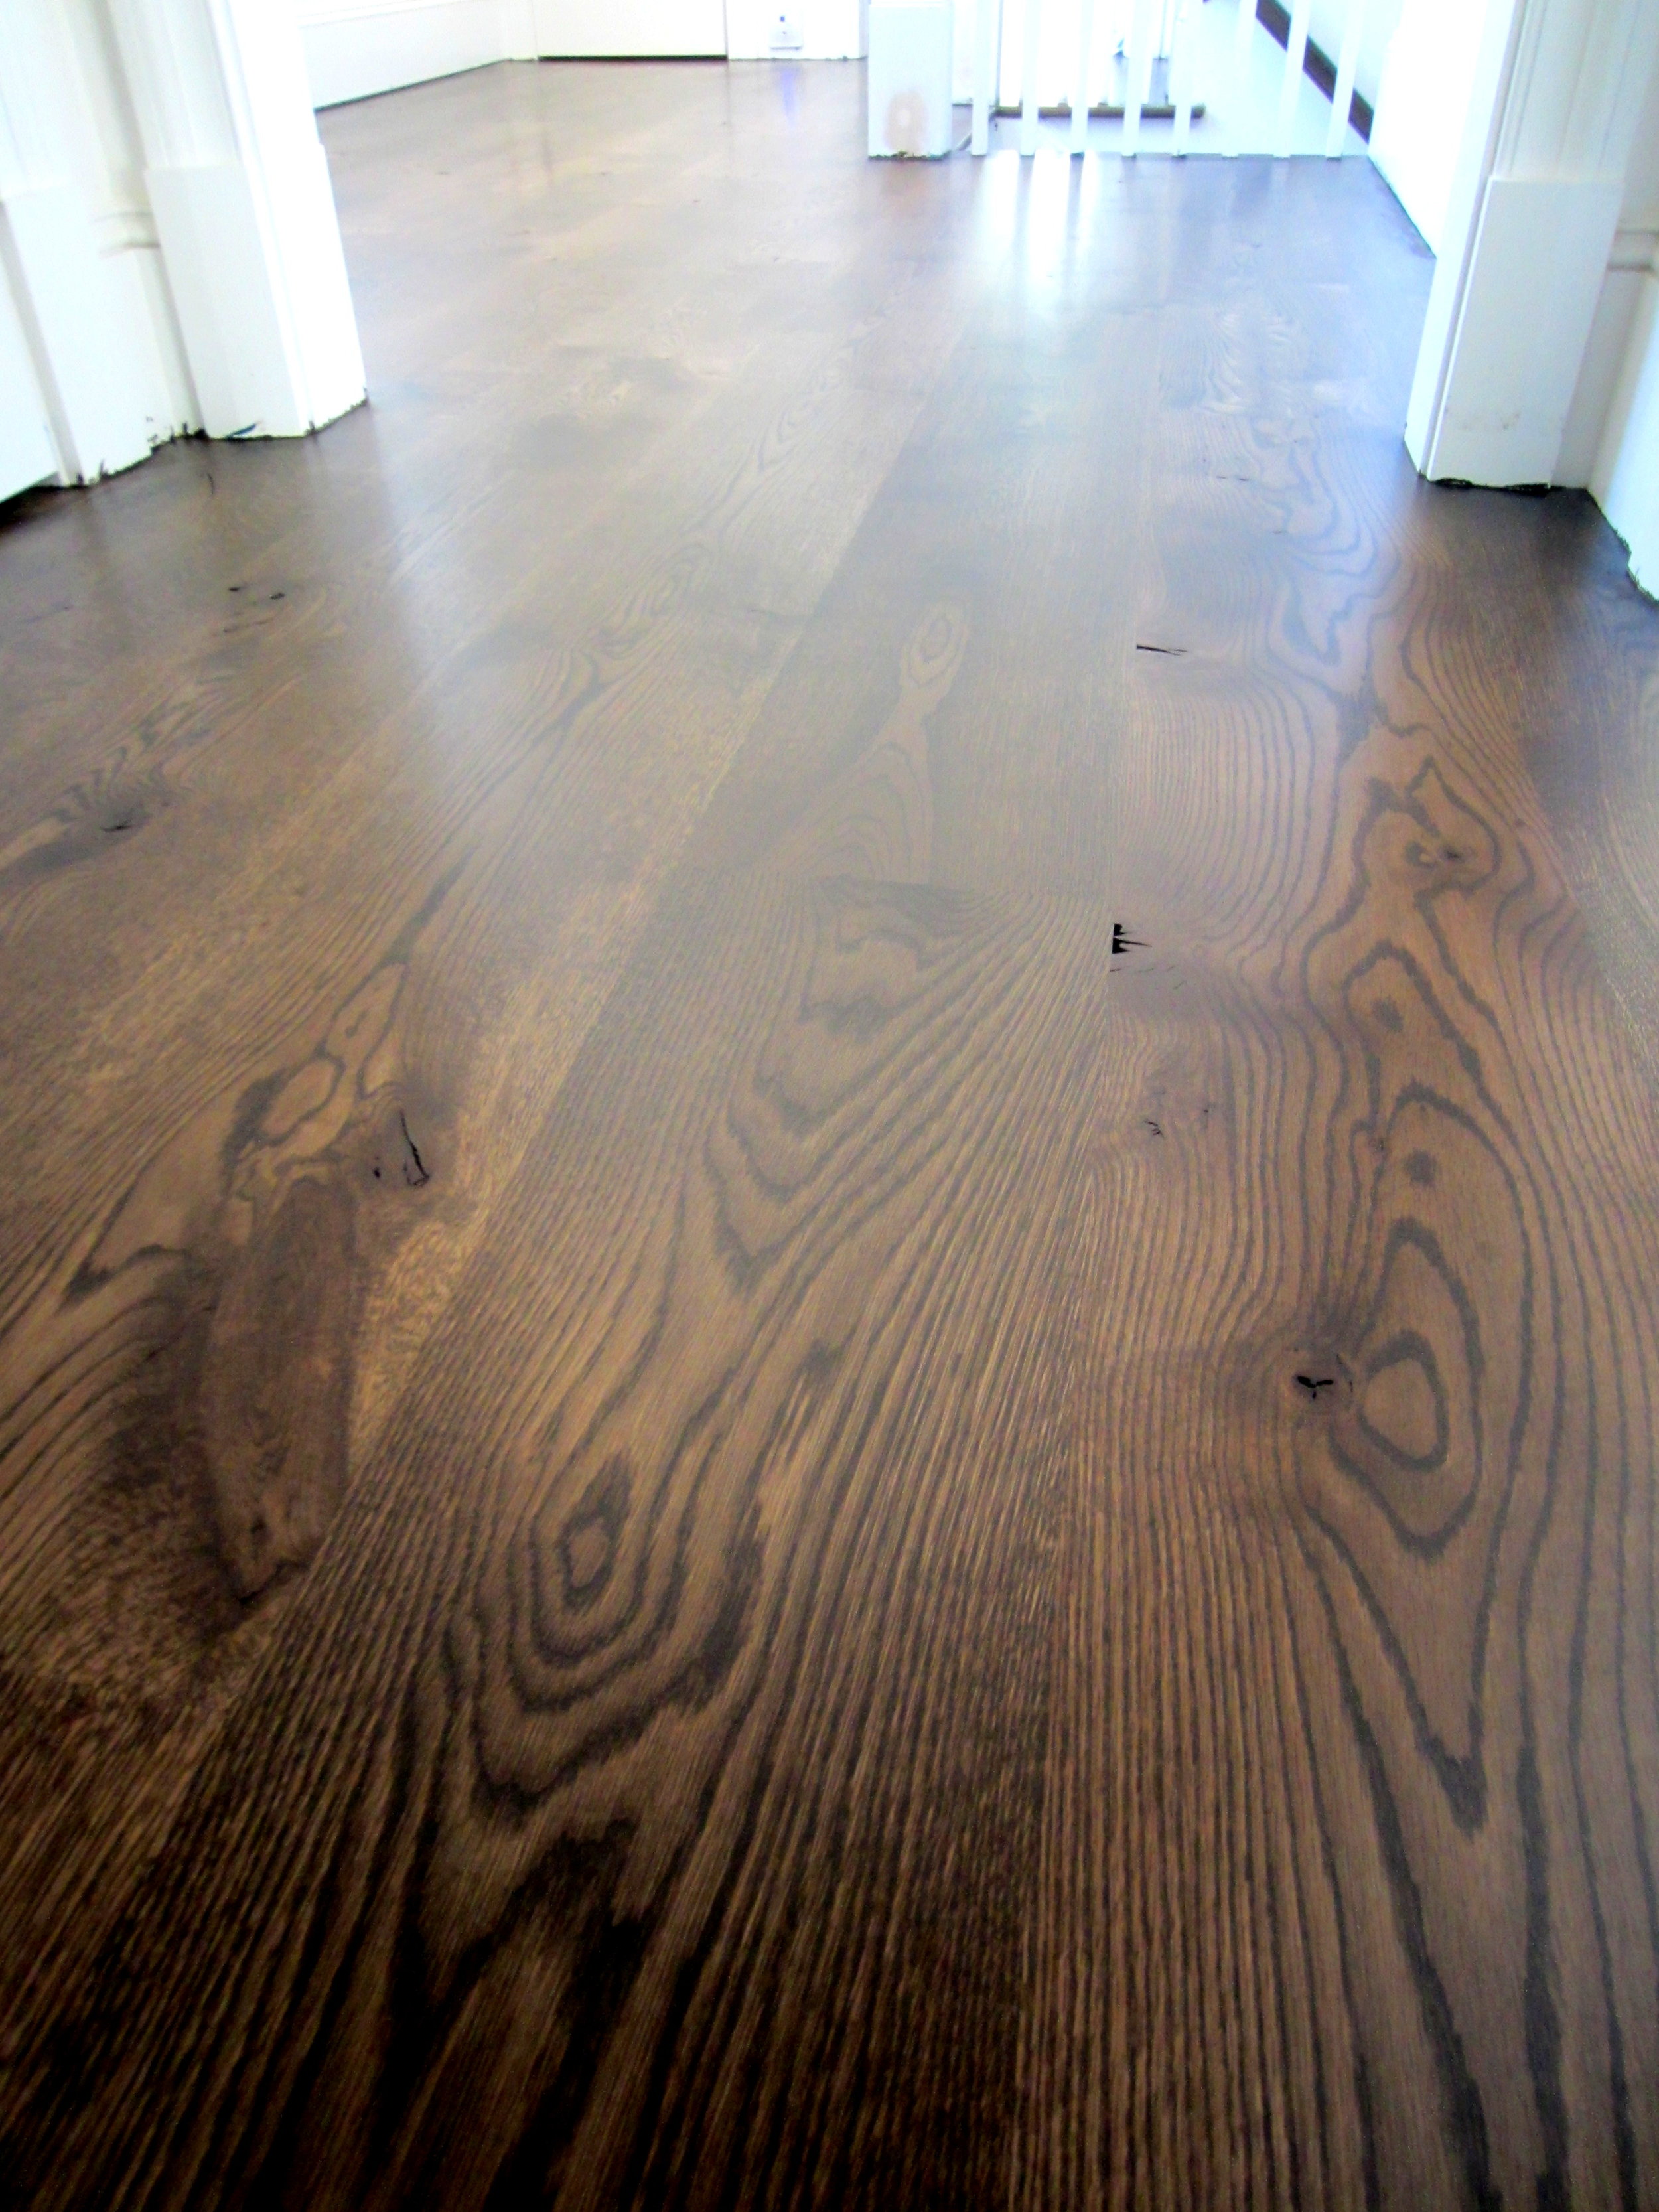
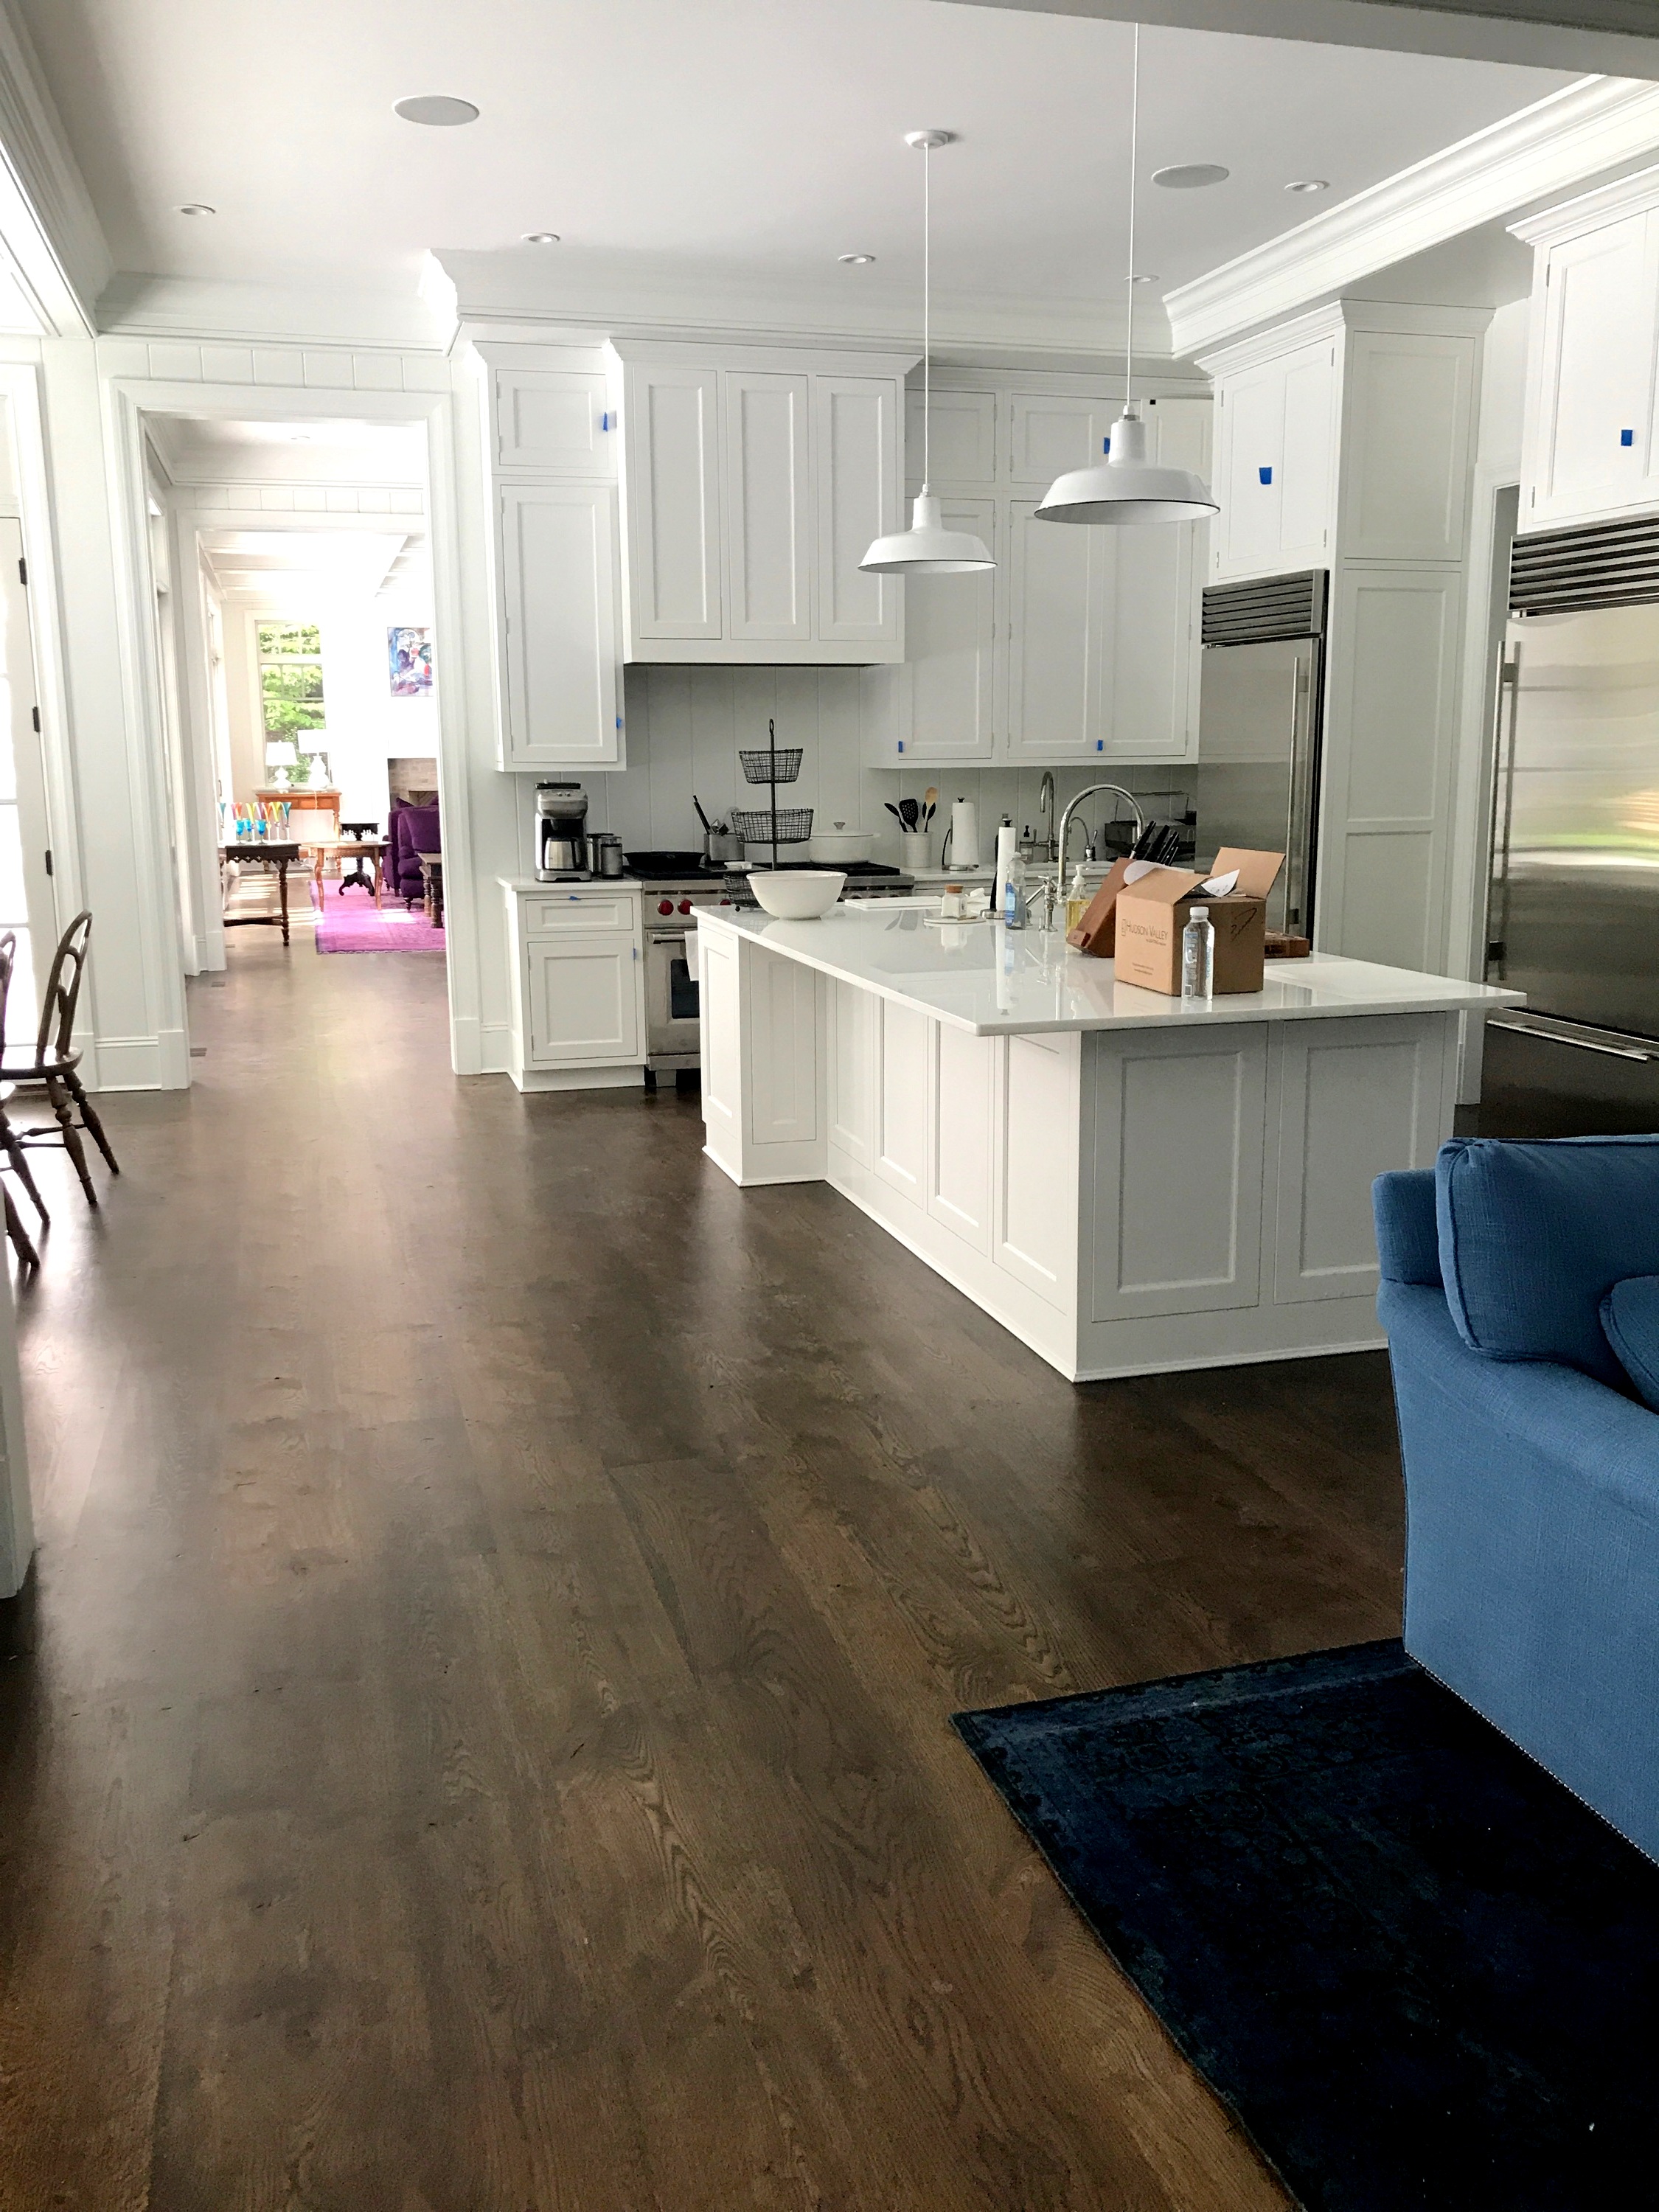
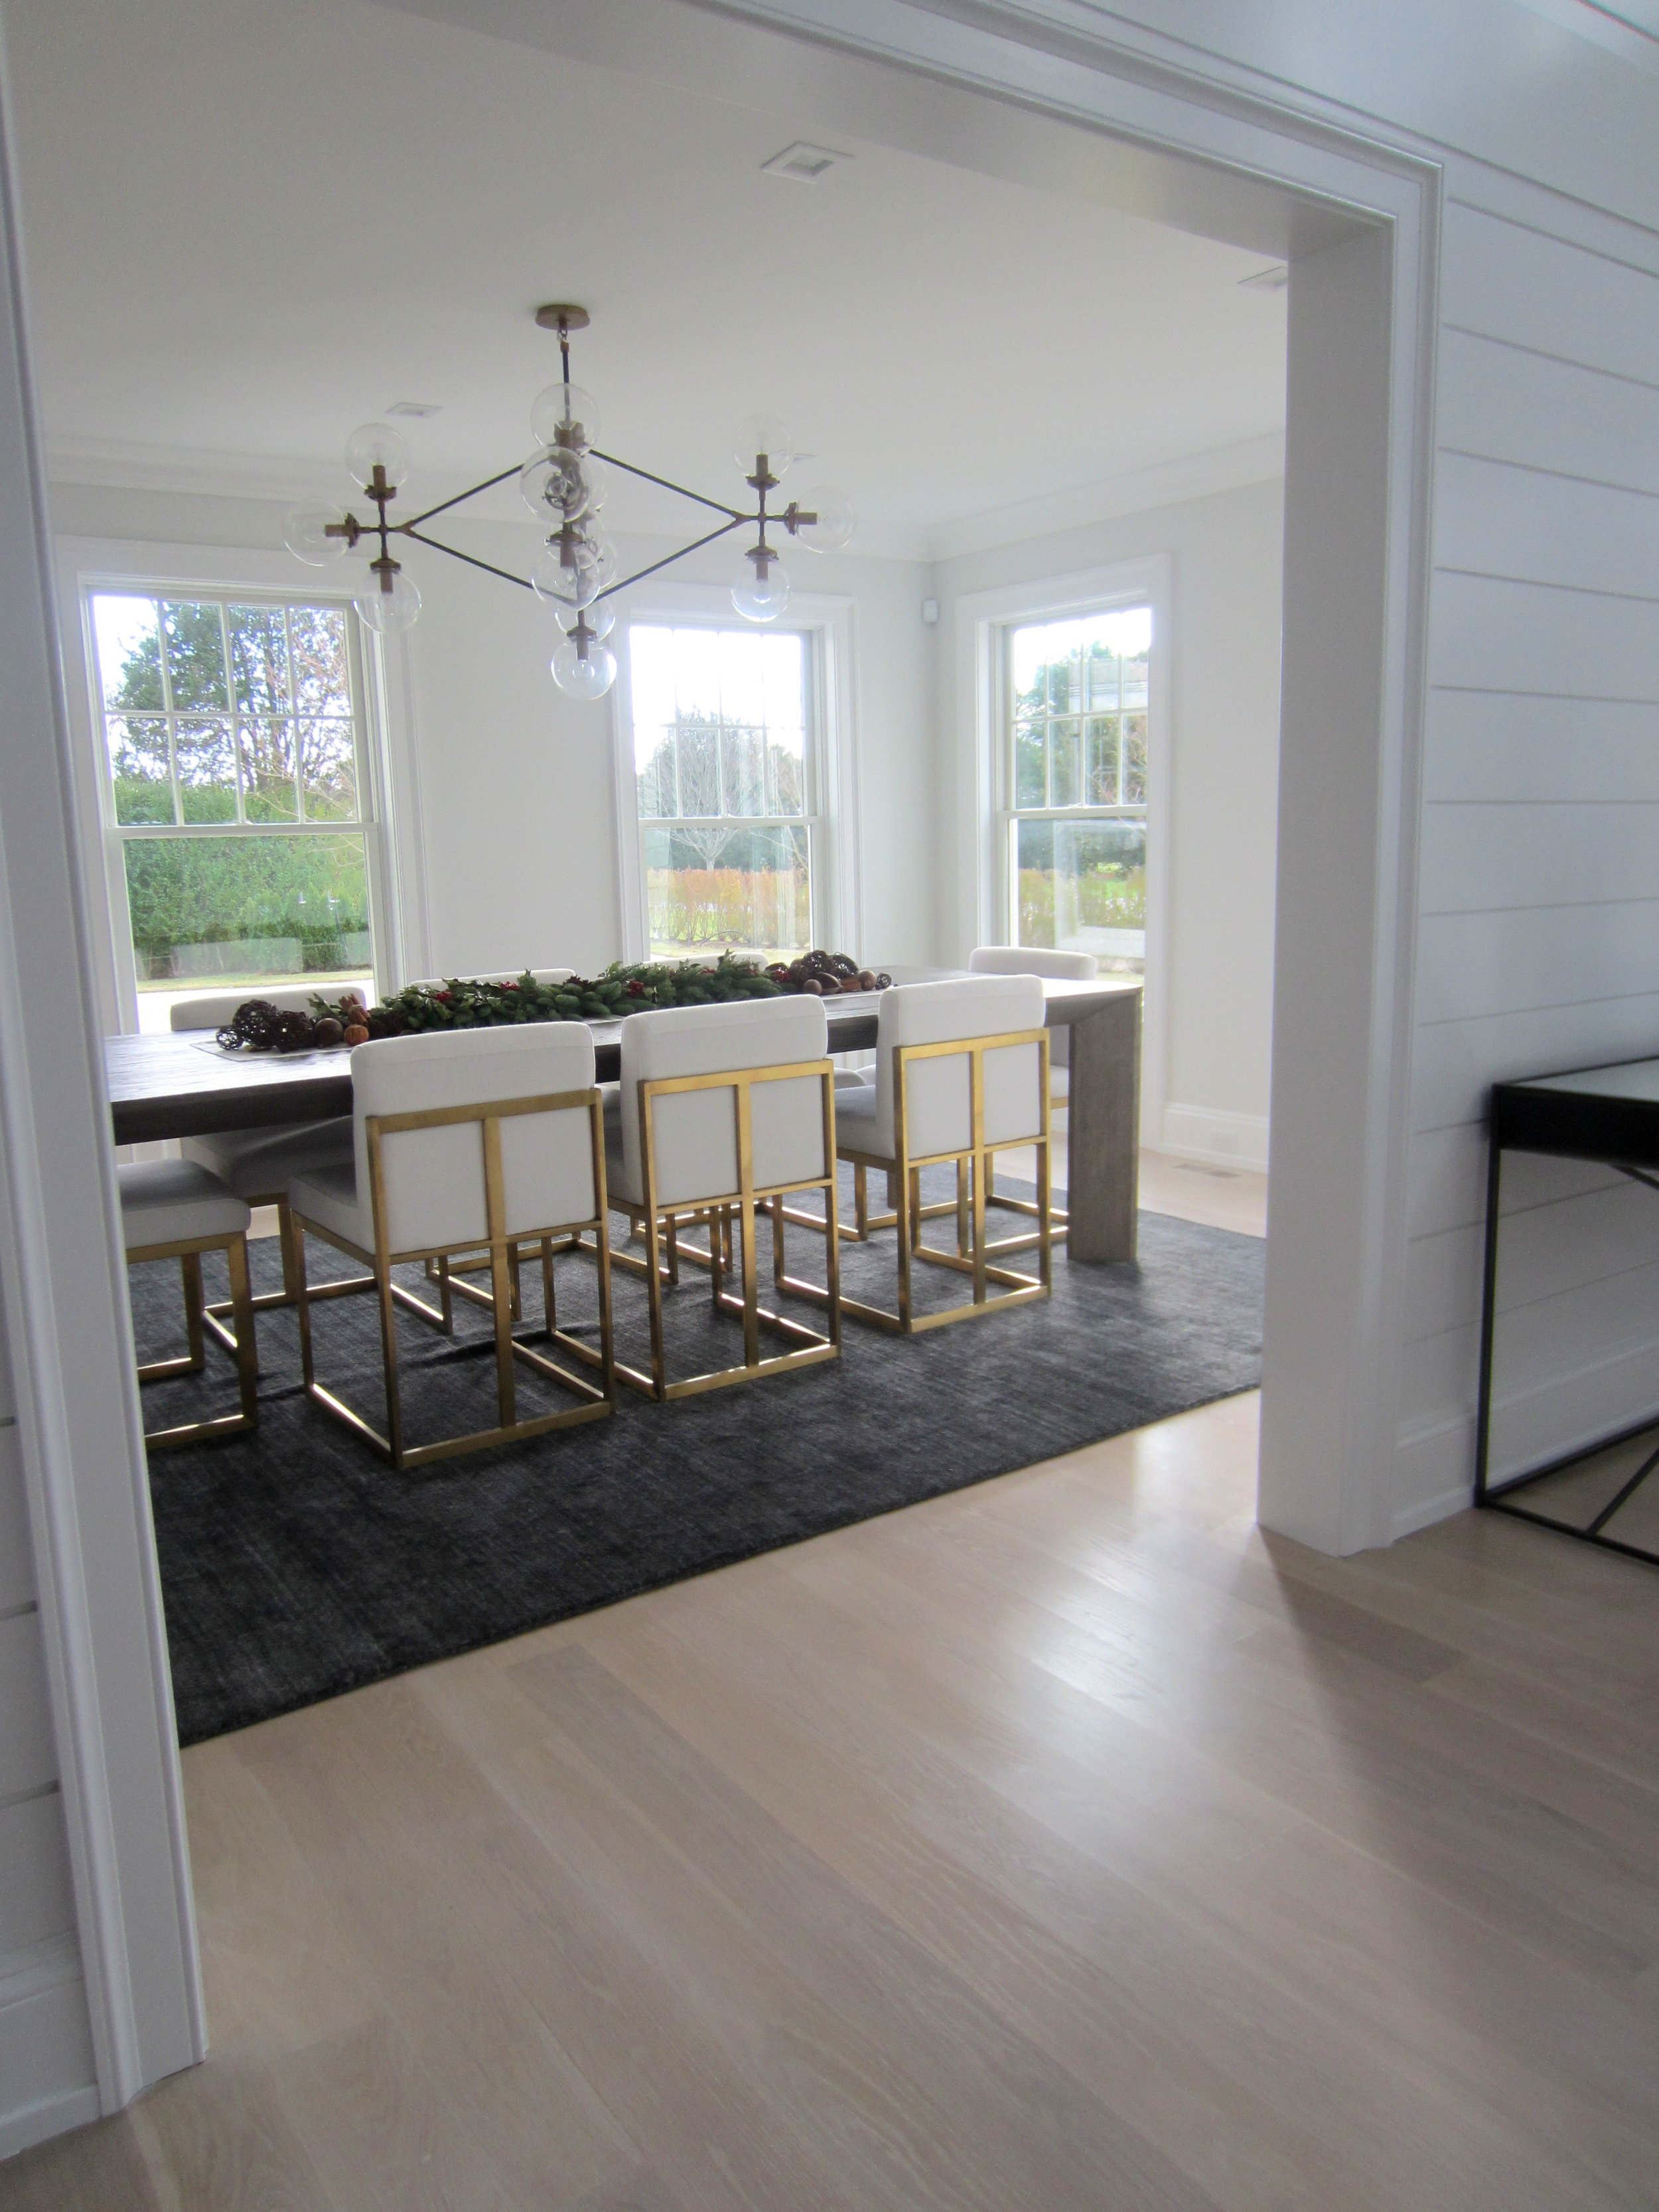
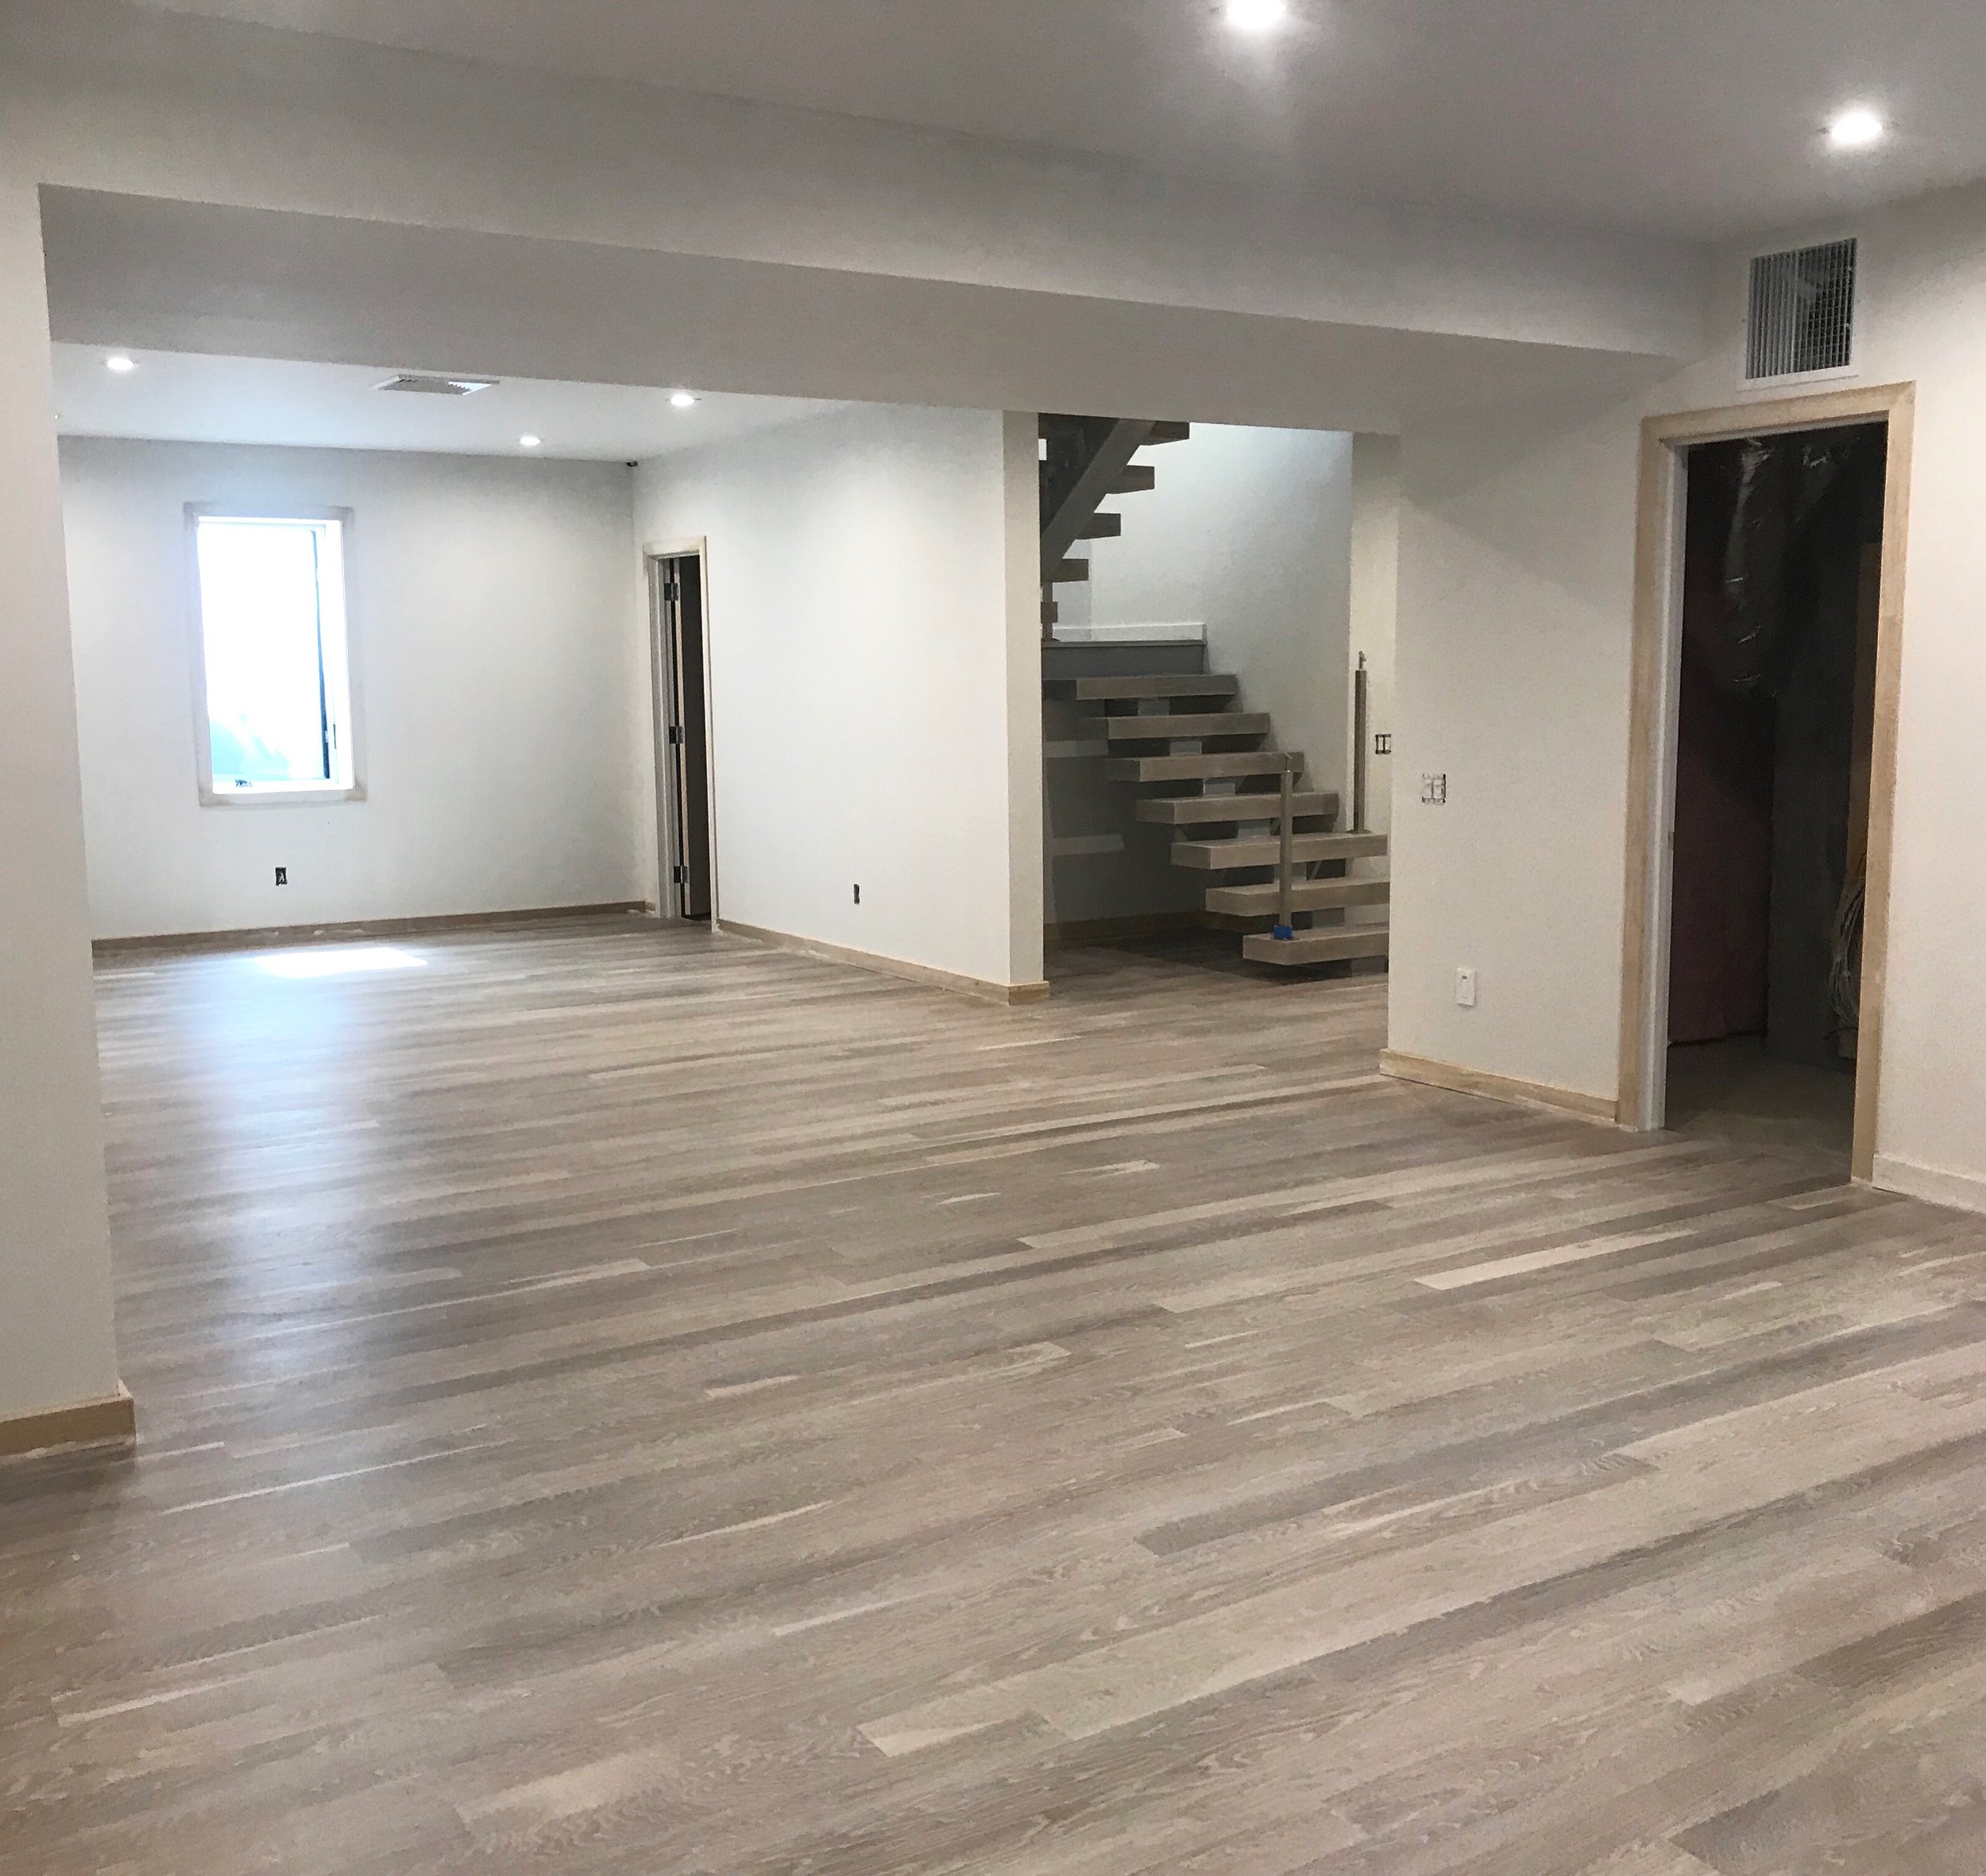
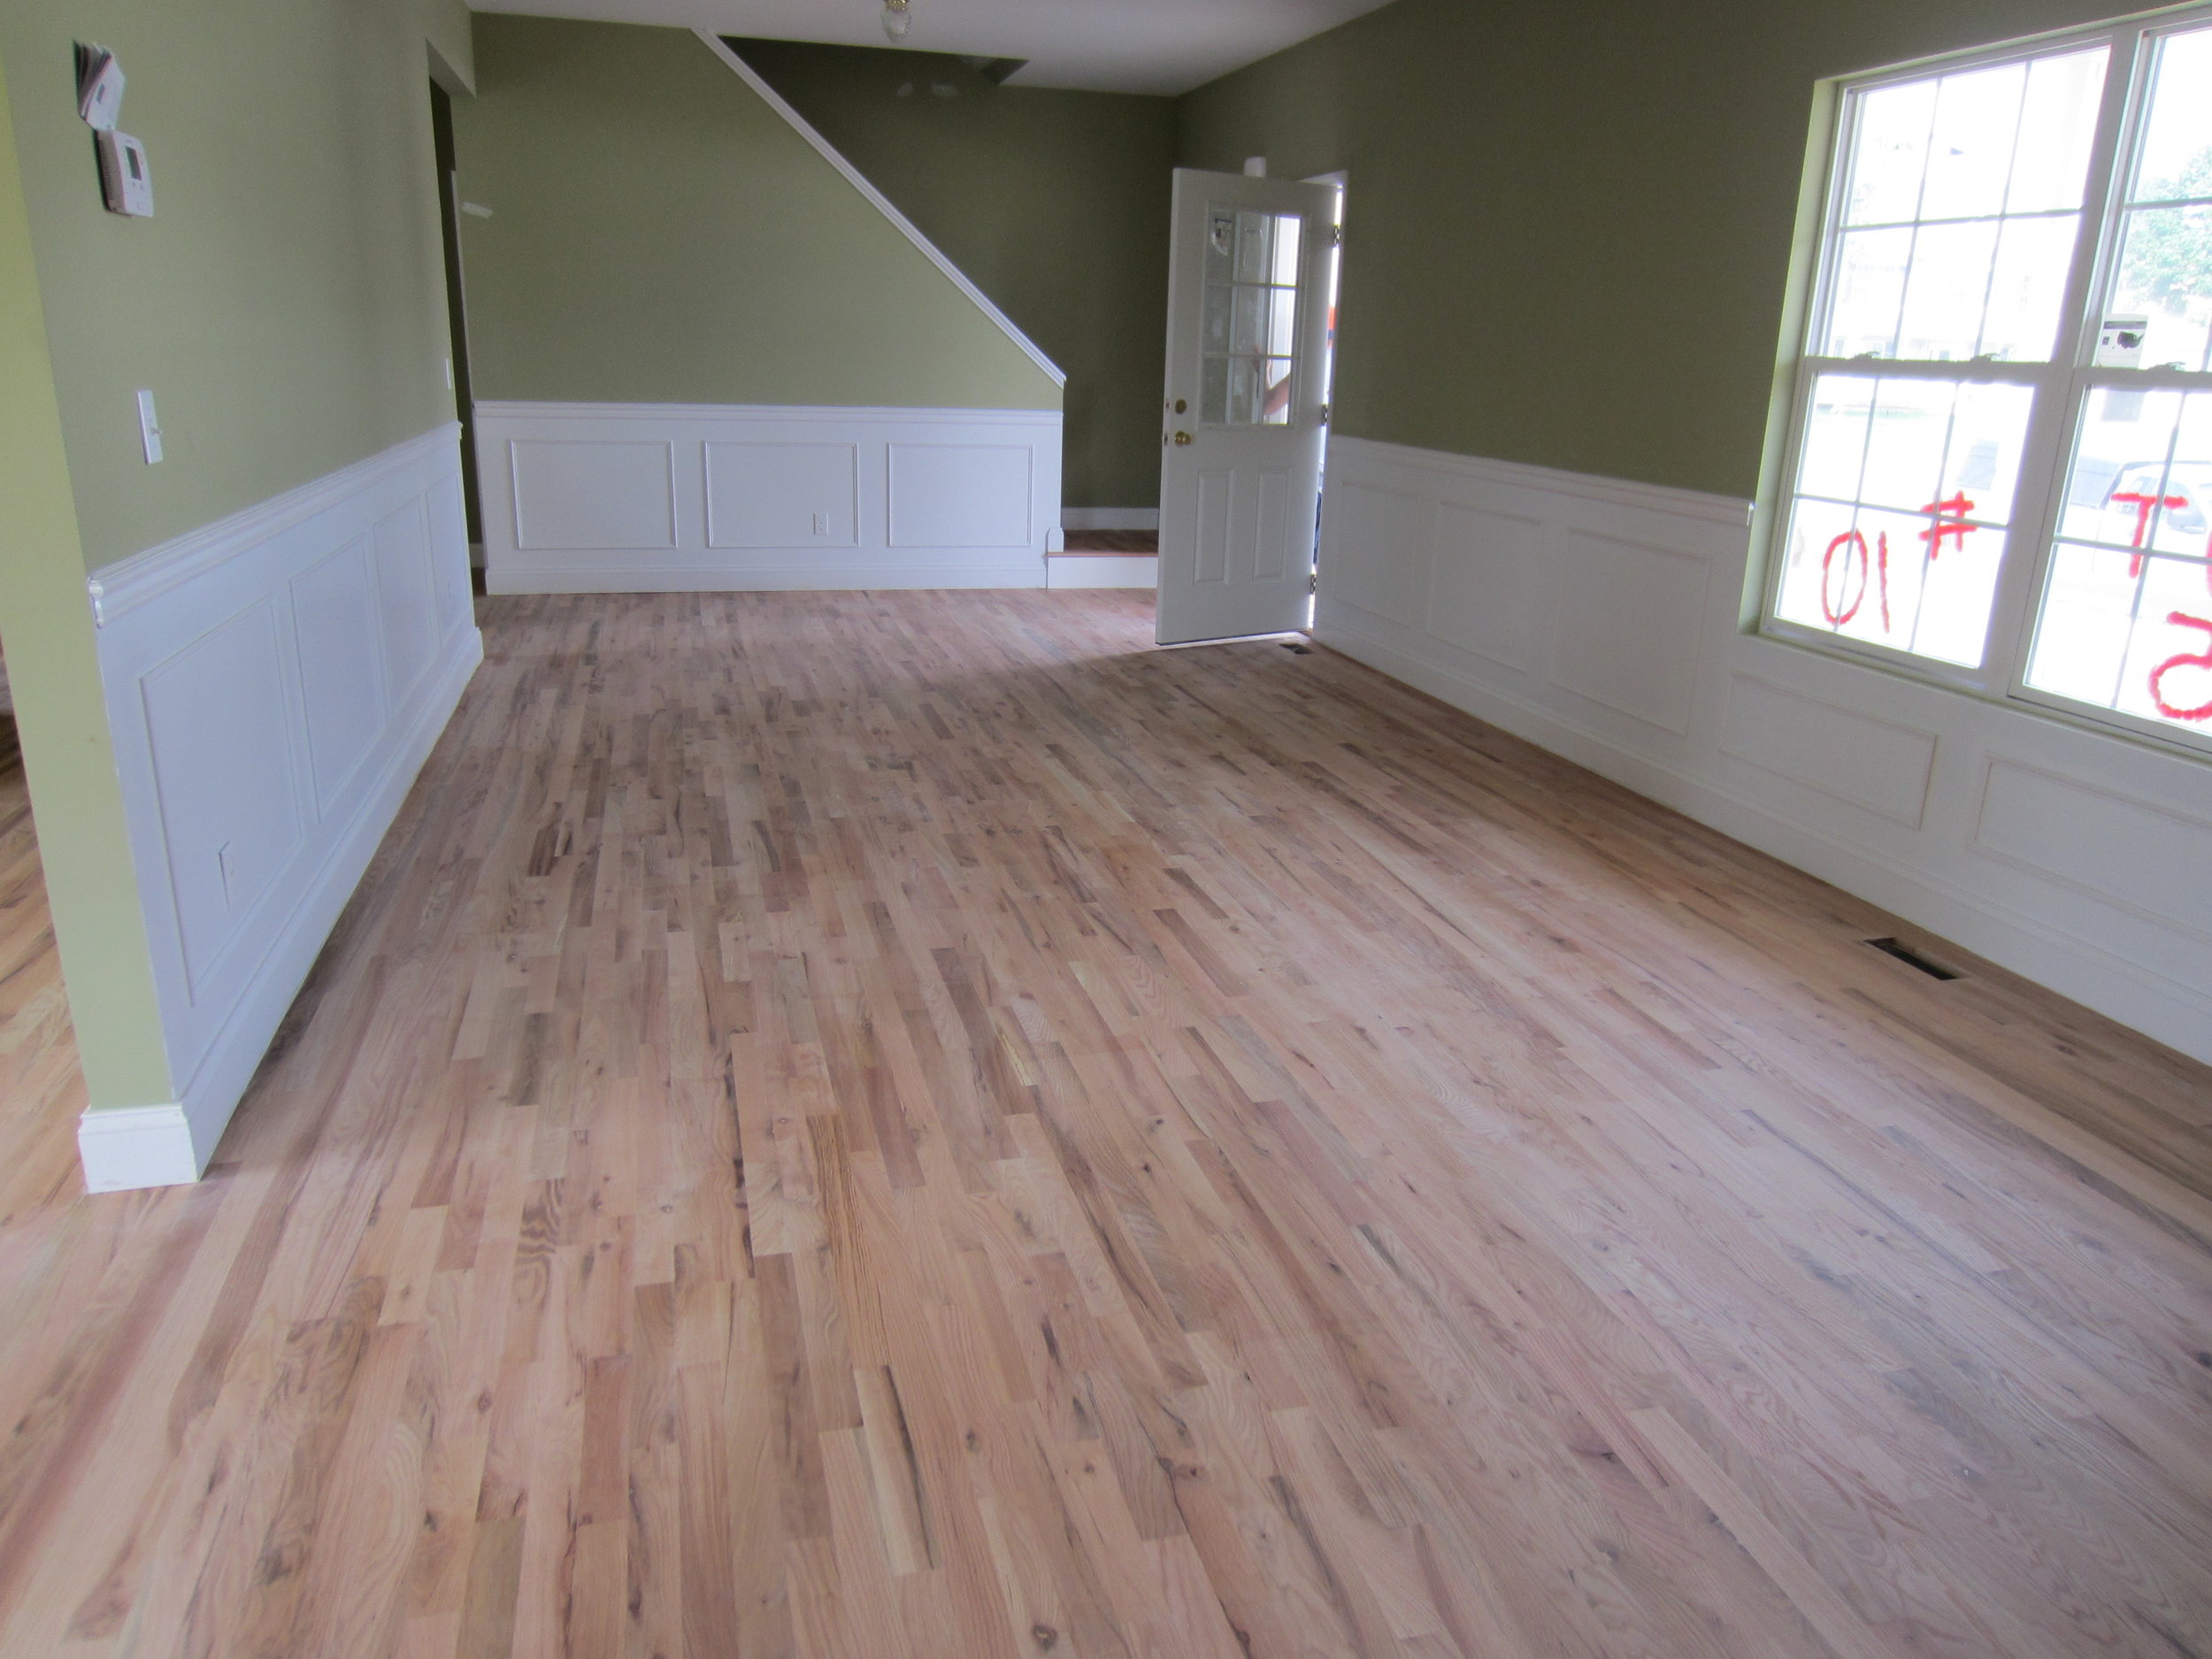
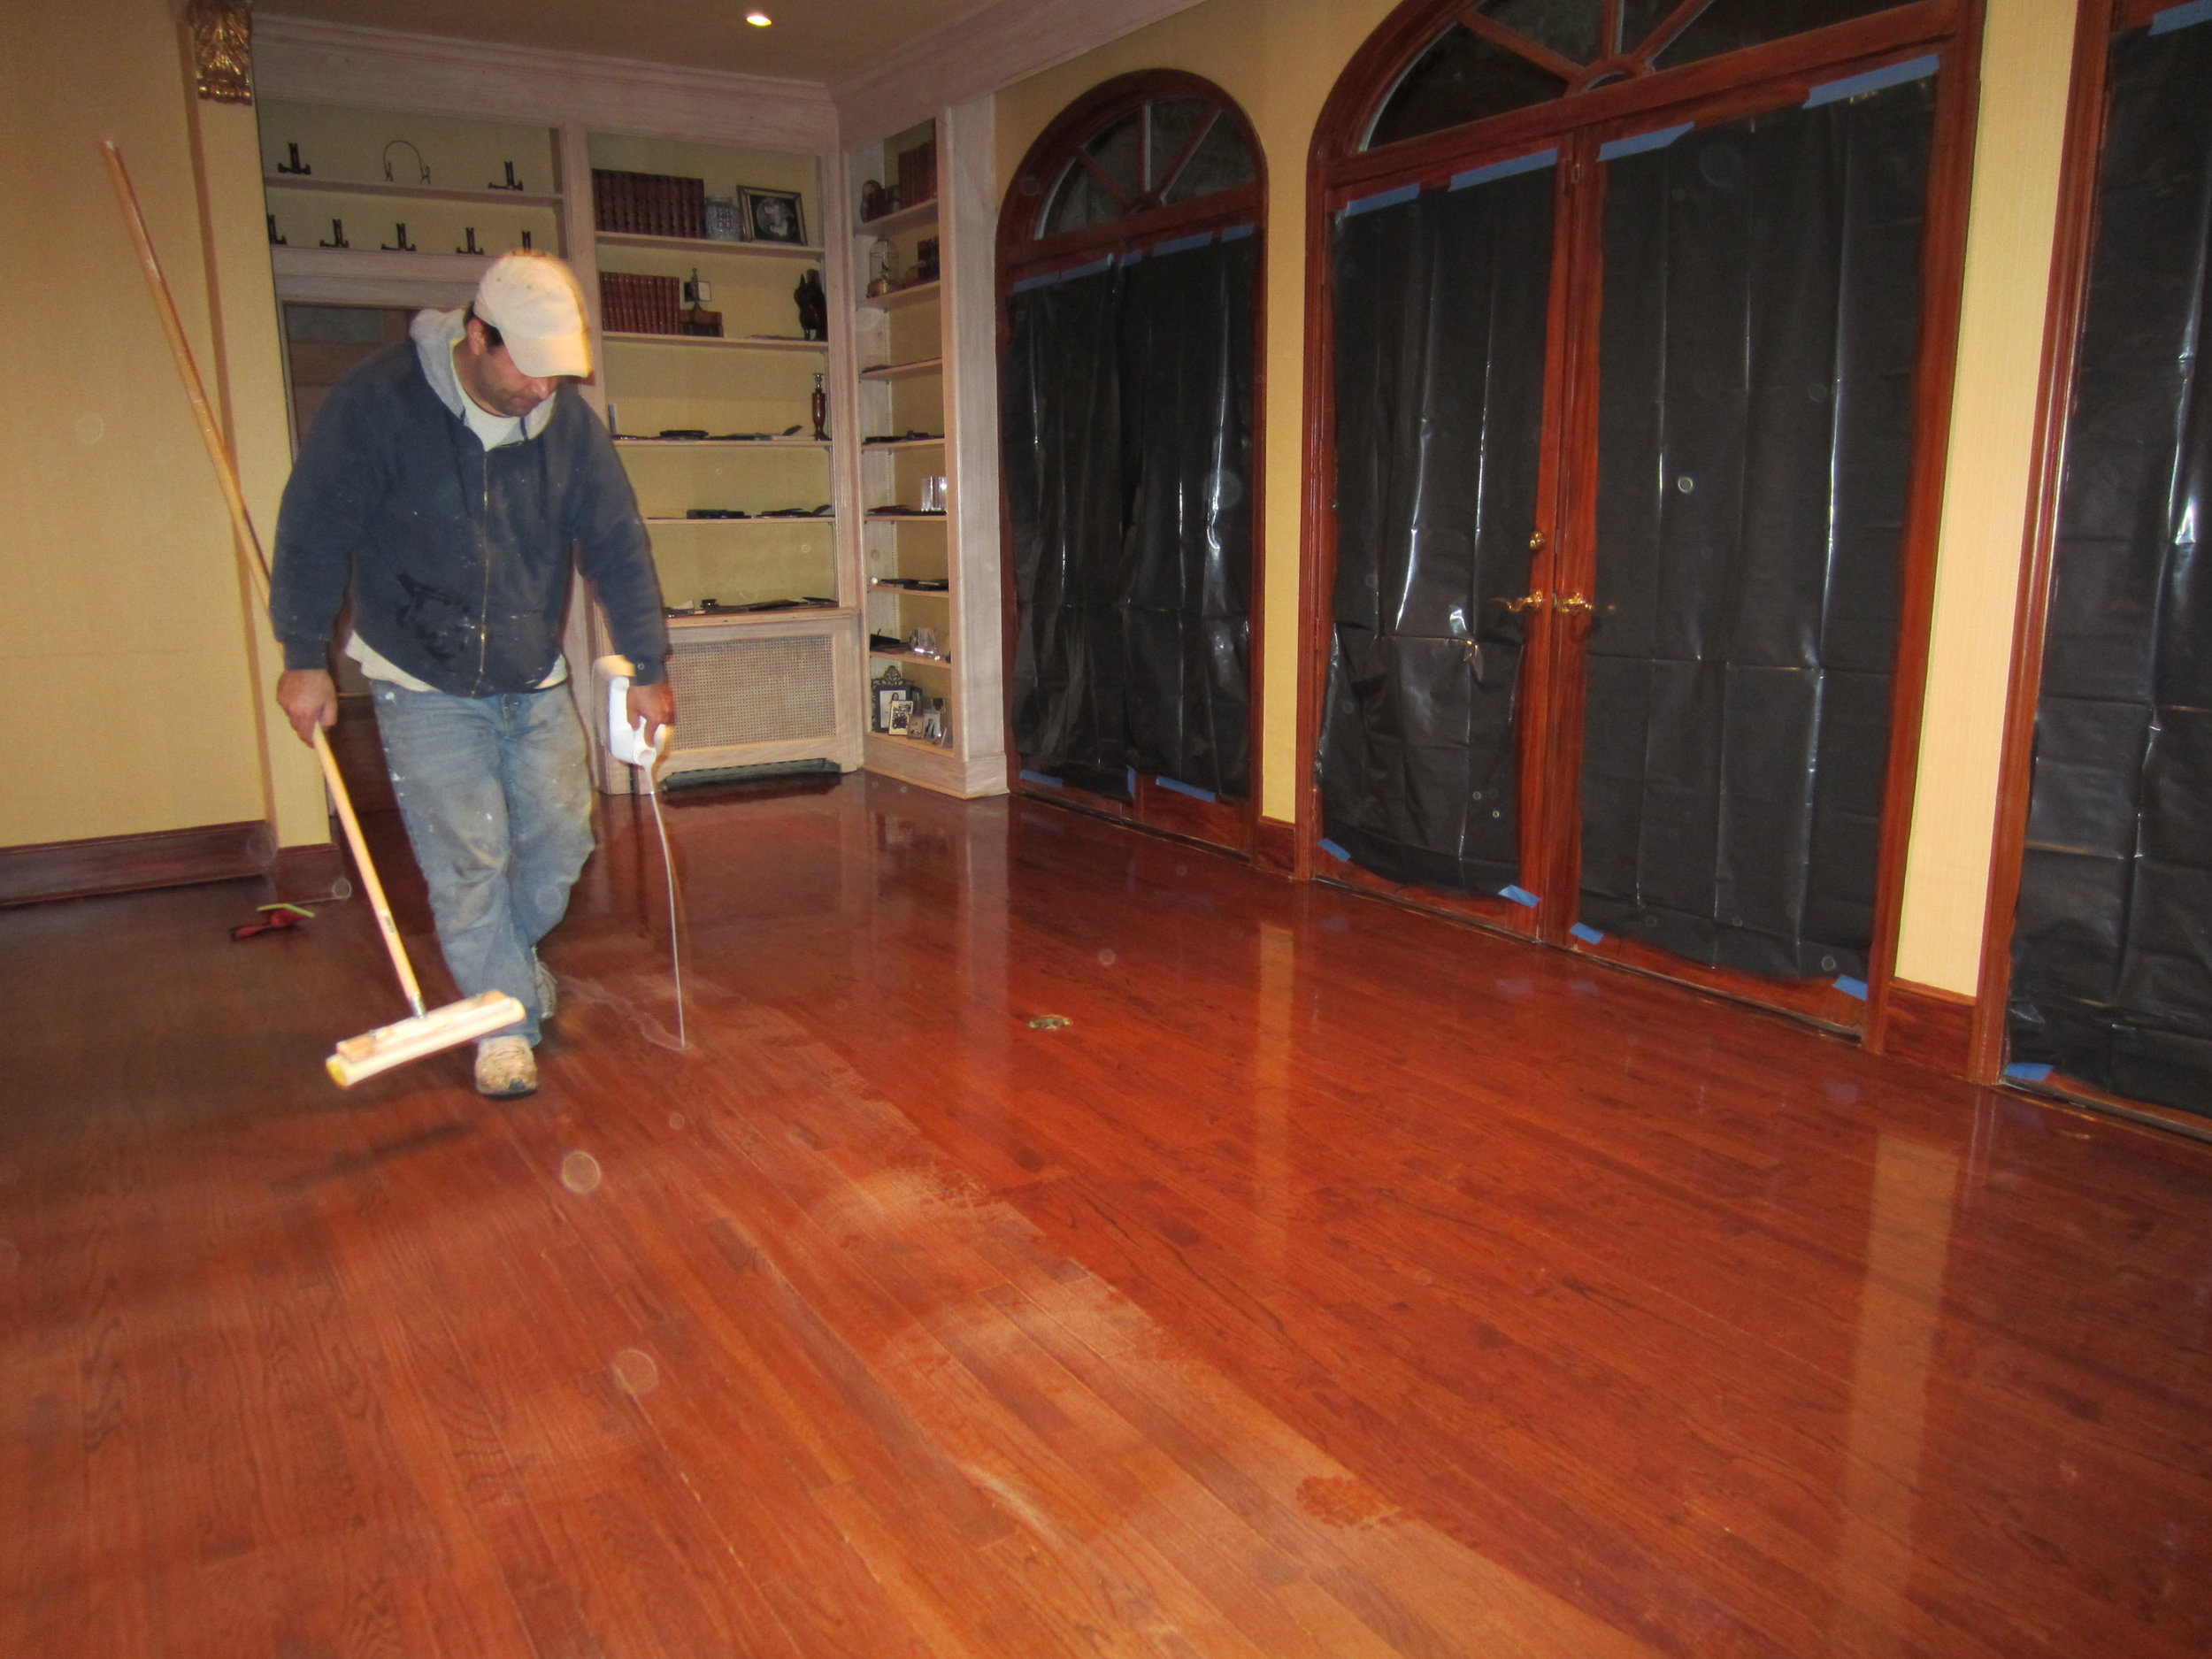
White stained White Oak floors in Water Mill, NY provide the perfect perch for contemporary decor.
The Floor Board Blog
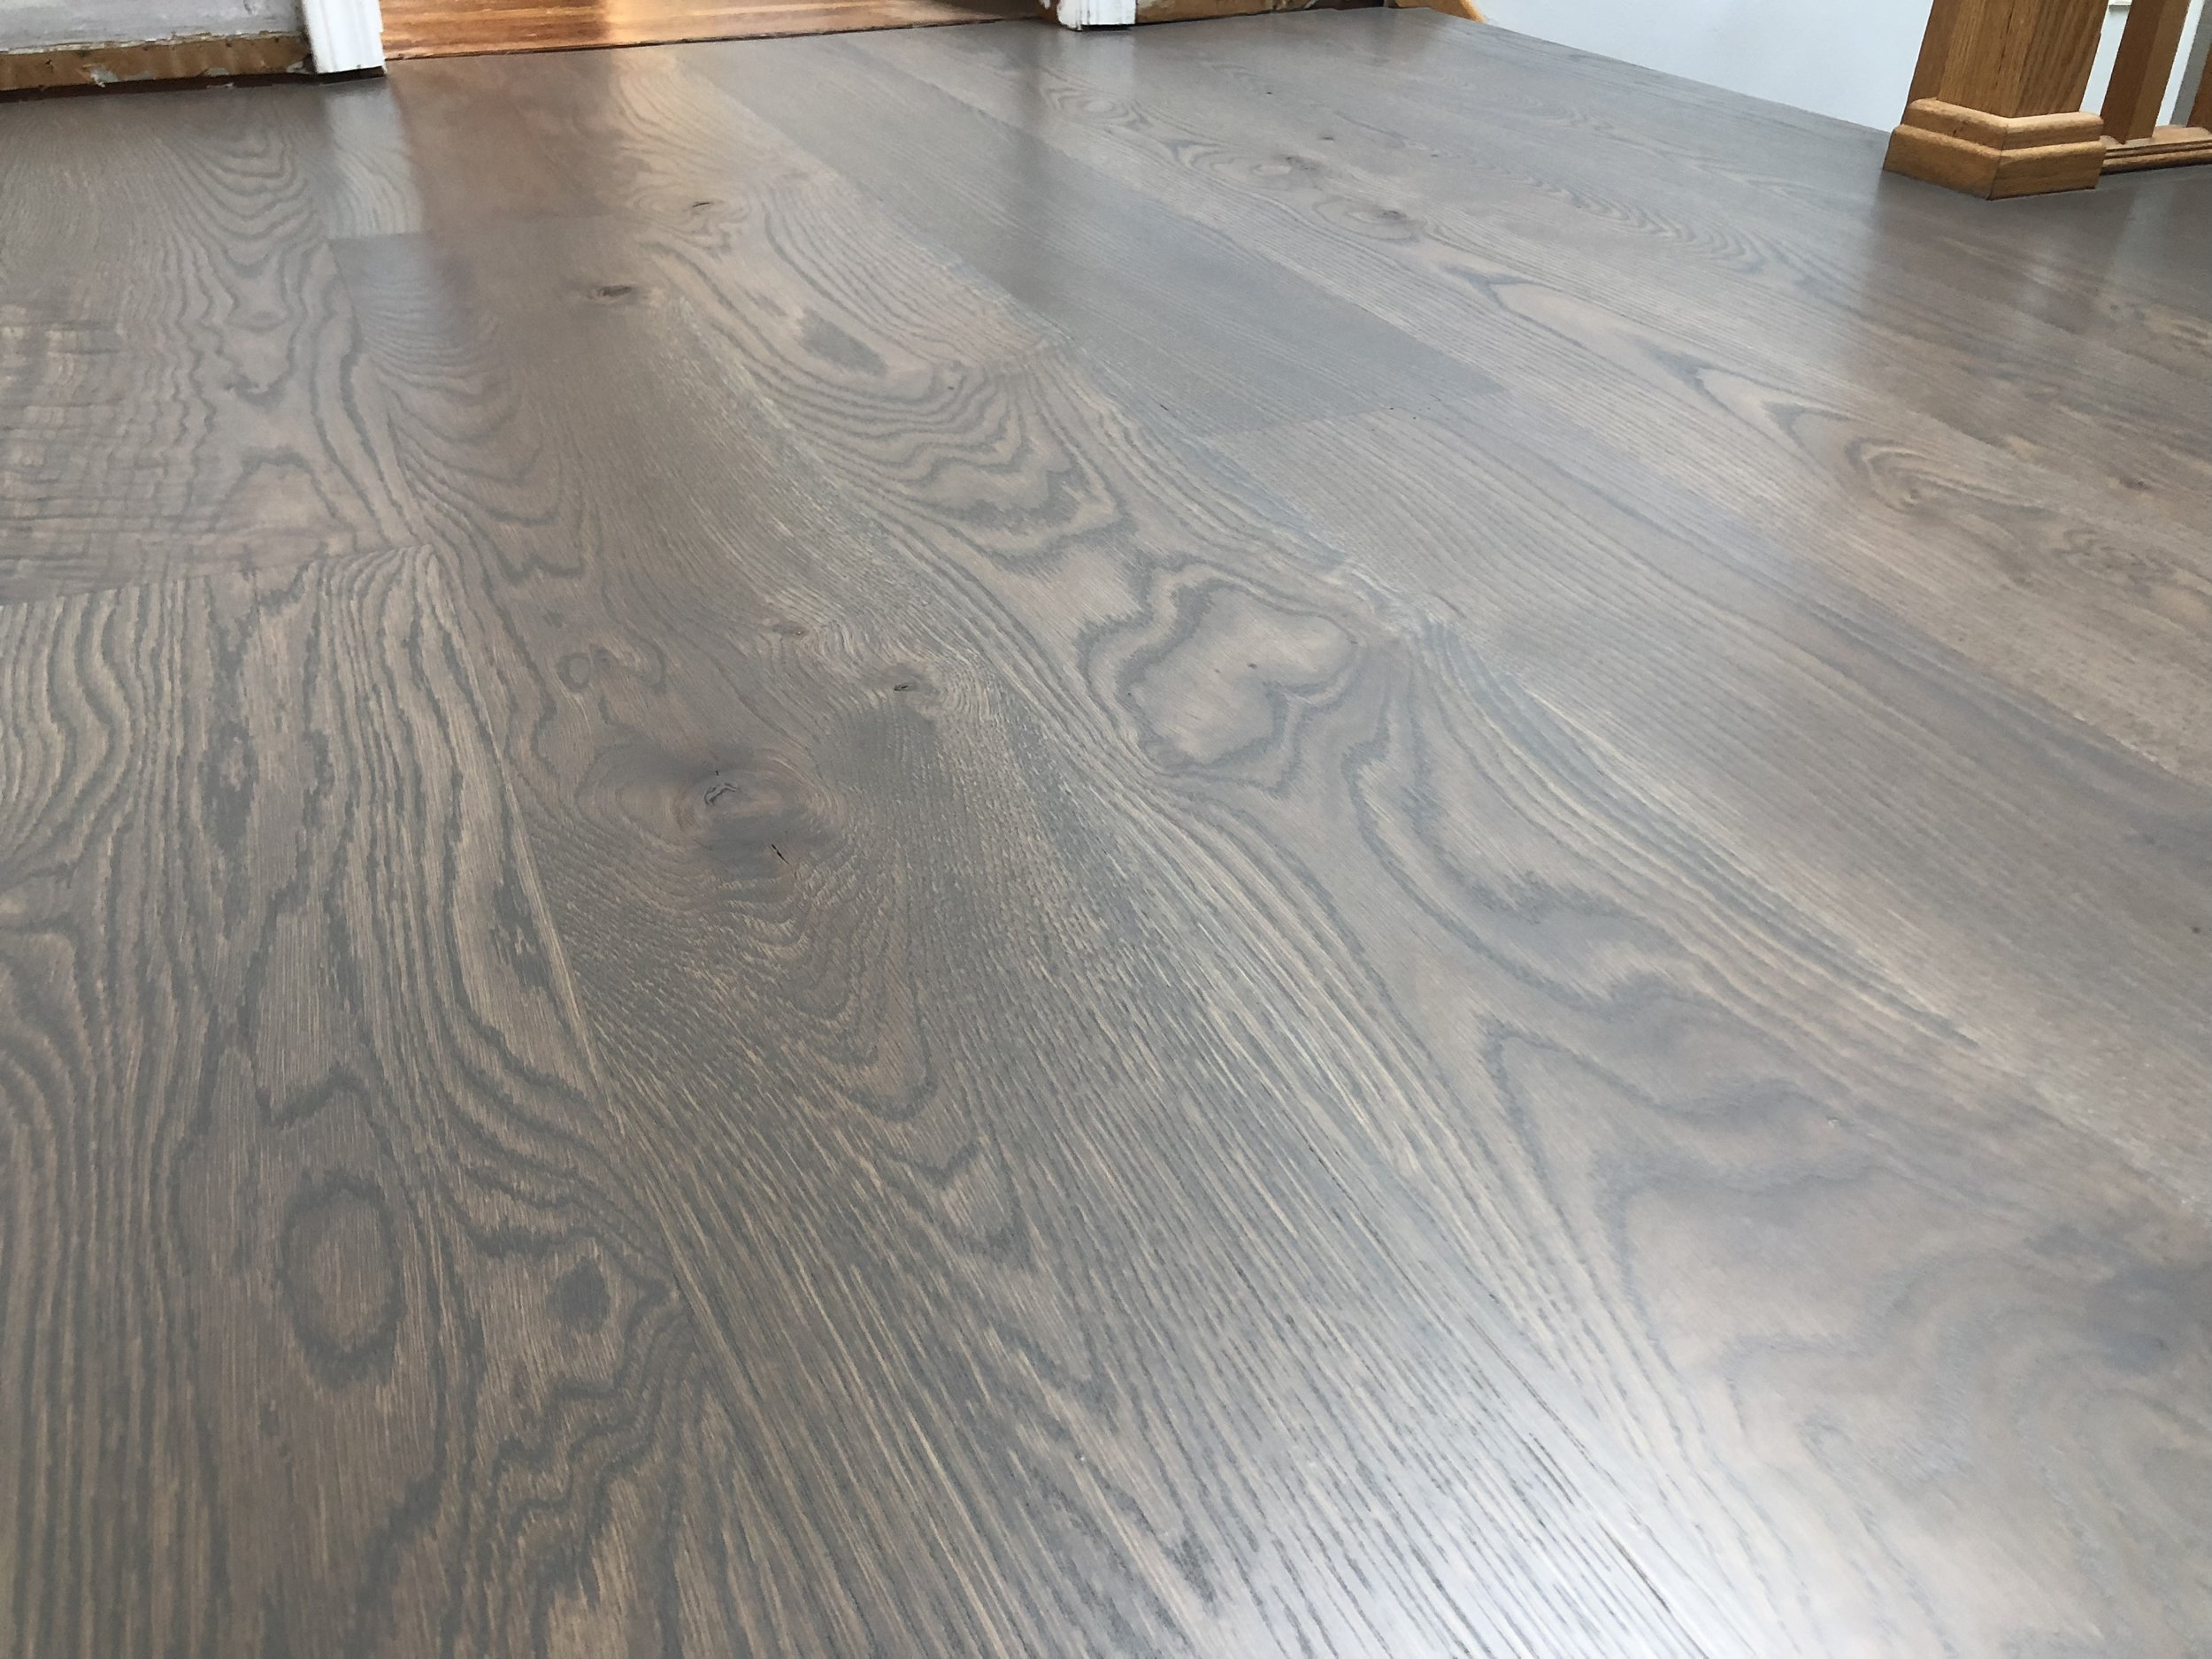
Gray hardwood floors are, in my opinion, hella cool. We do a ton of them. Let’s just get that out there. But are they a passing style trend, or are they here for the long run?
Remember that Gray is a Neutral, like brown or tan…it goes with anything. We do different shades of gray, as well as gray/brown mixed floors frequently, and in all different types of homes. The grayer and less brown that you go, the more your wood floor will skew toward a modern, contemporary style. If your home and furniture are more traditional but you want to modernize things a bit, I would suggest more of a brown / grey or a medium brown stain with a slight gray undertone.
4-Color Custom Gray Blend
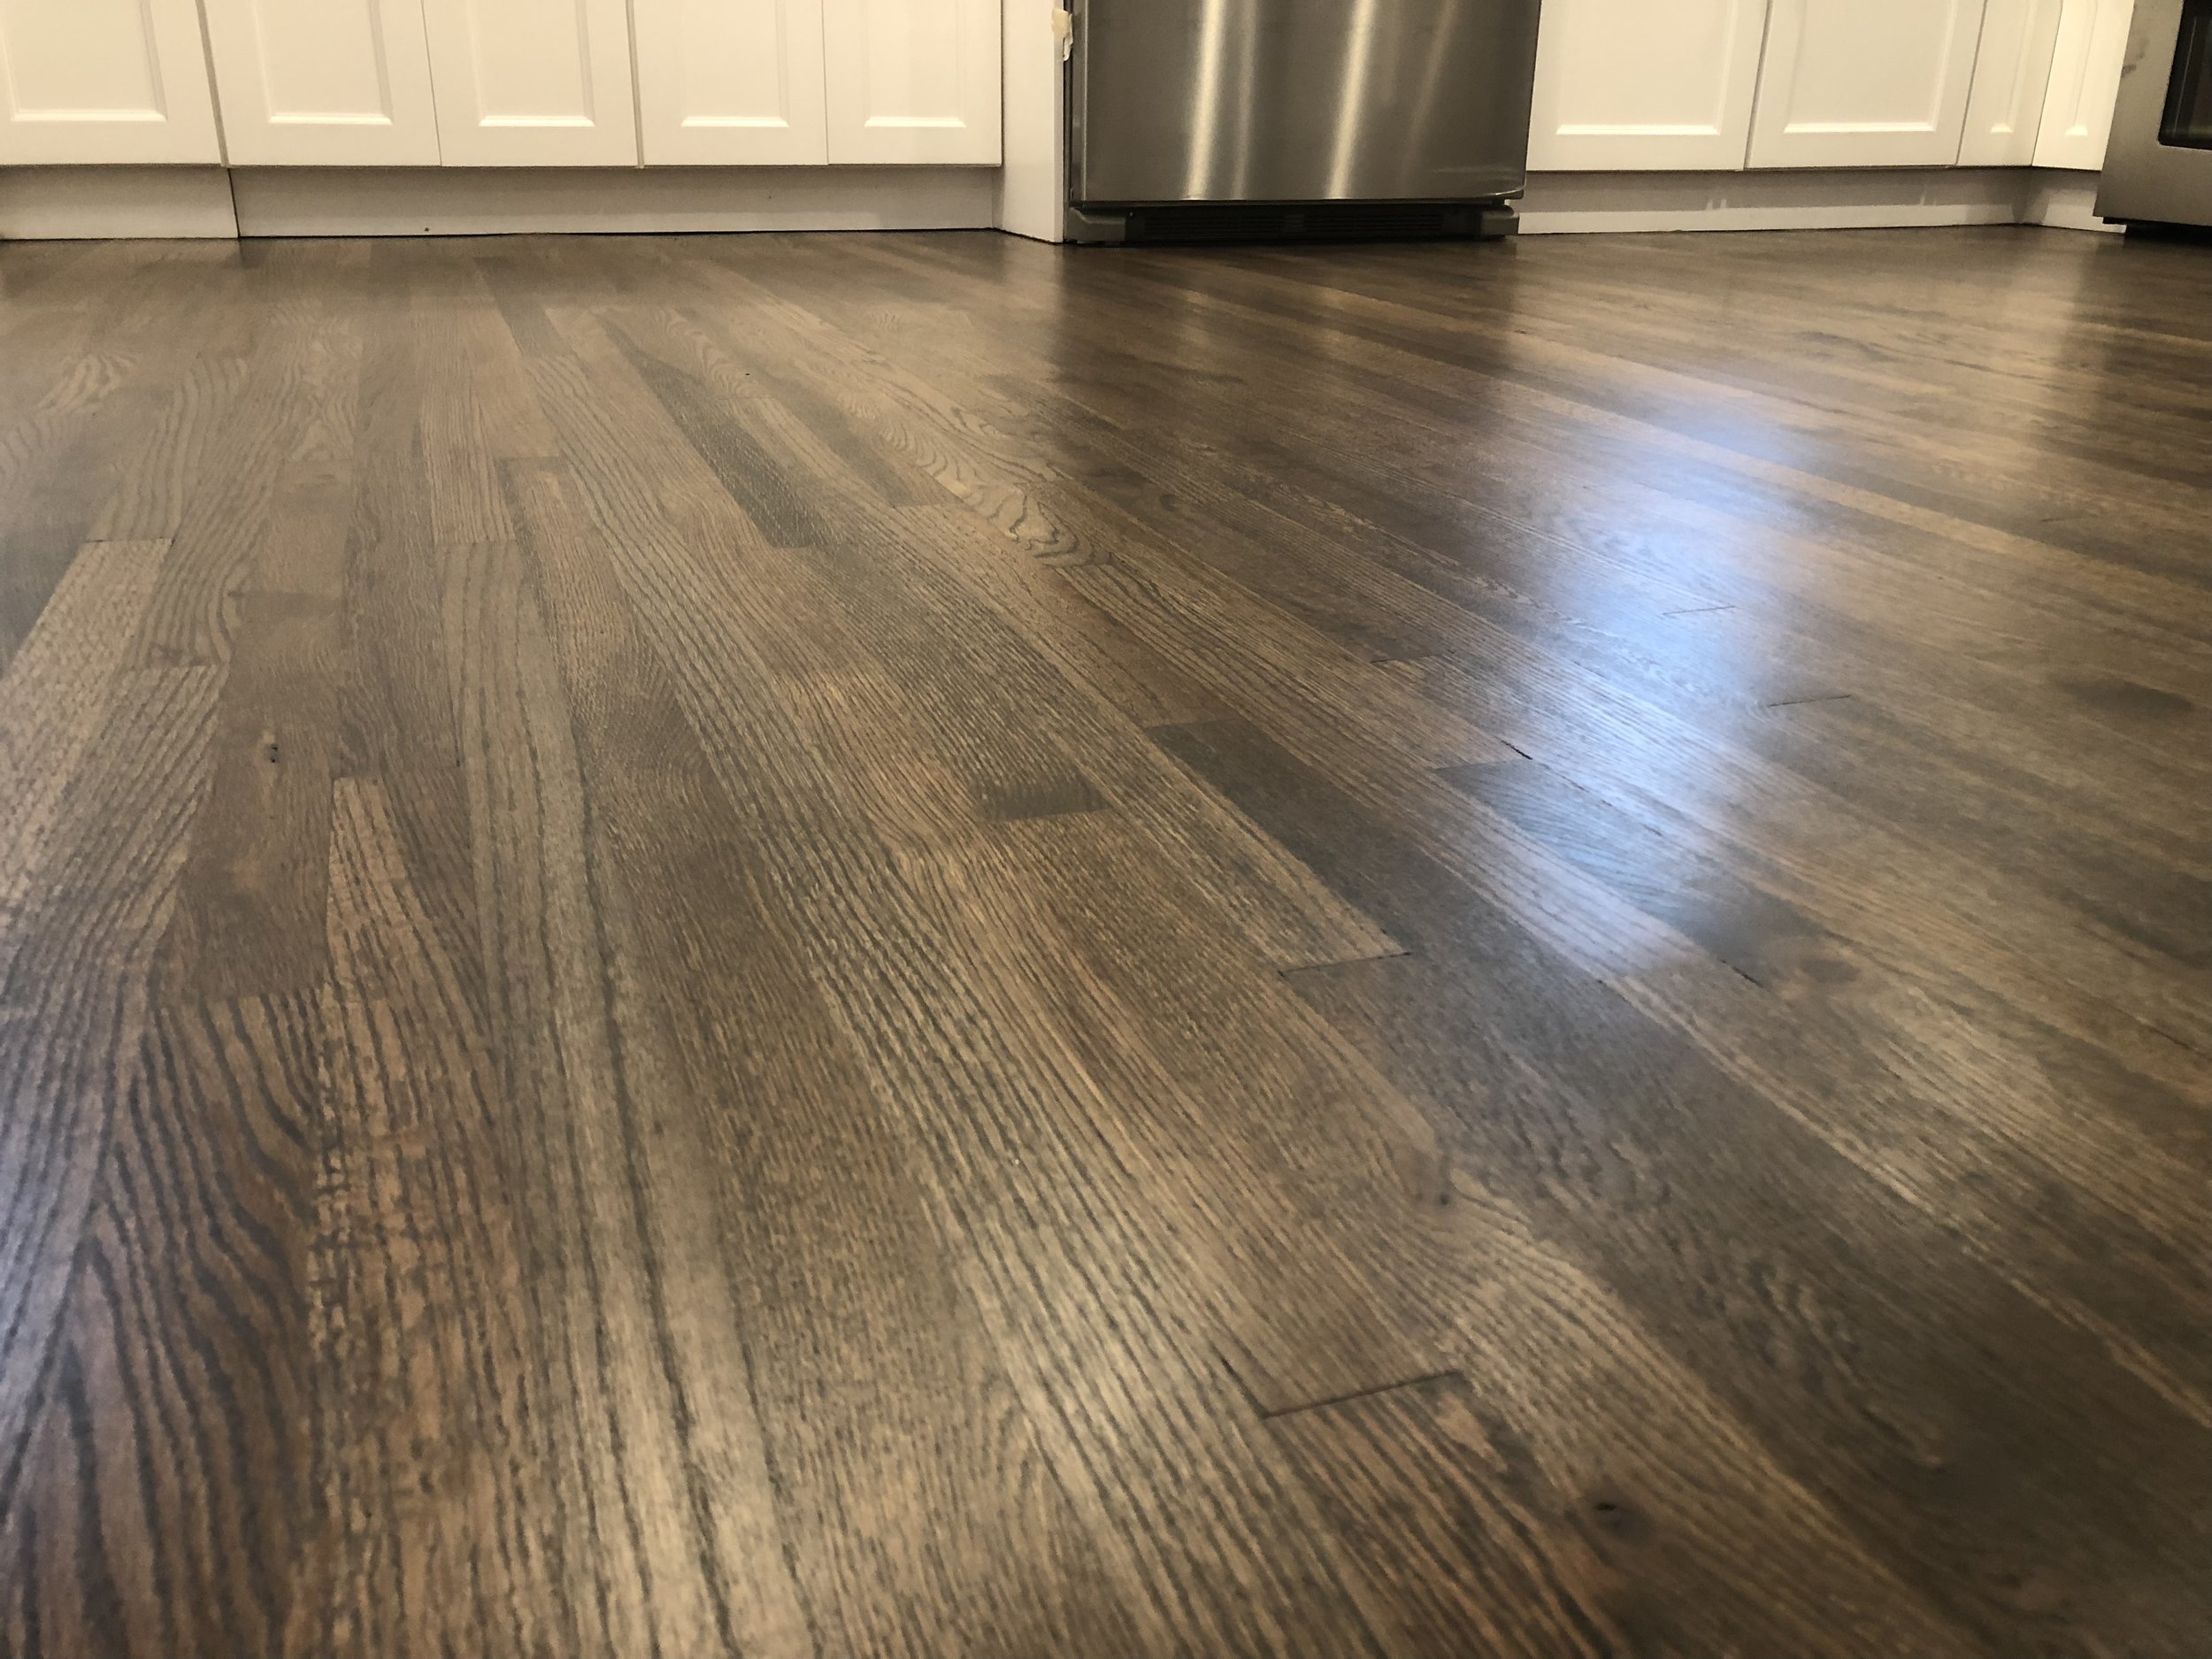
5” White Oak installed & finished in Dix Hills, NY in 2018 with custom gray stain and Satin Bona Traffic HD water based polyurethane.
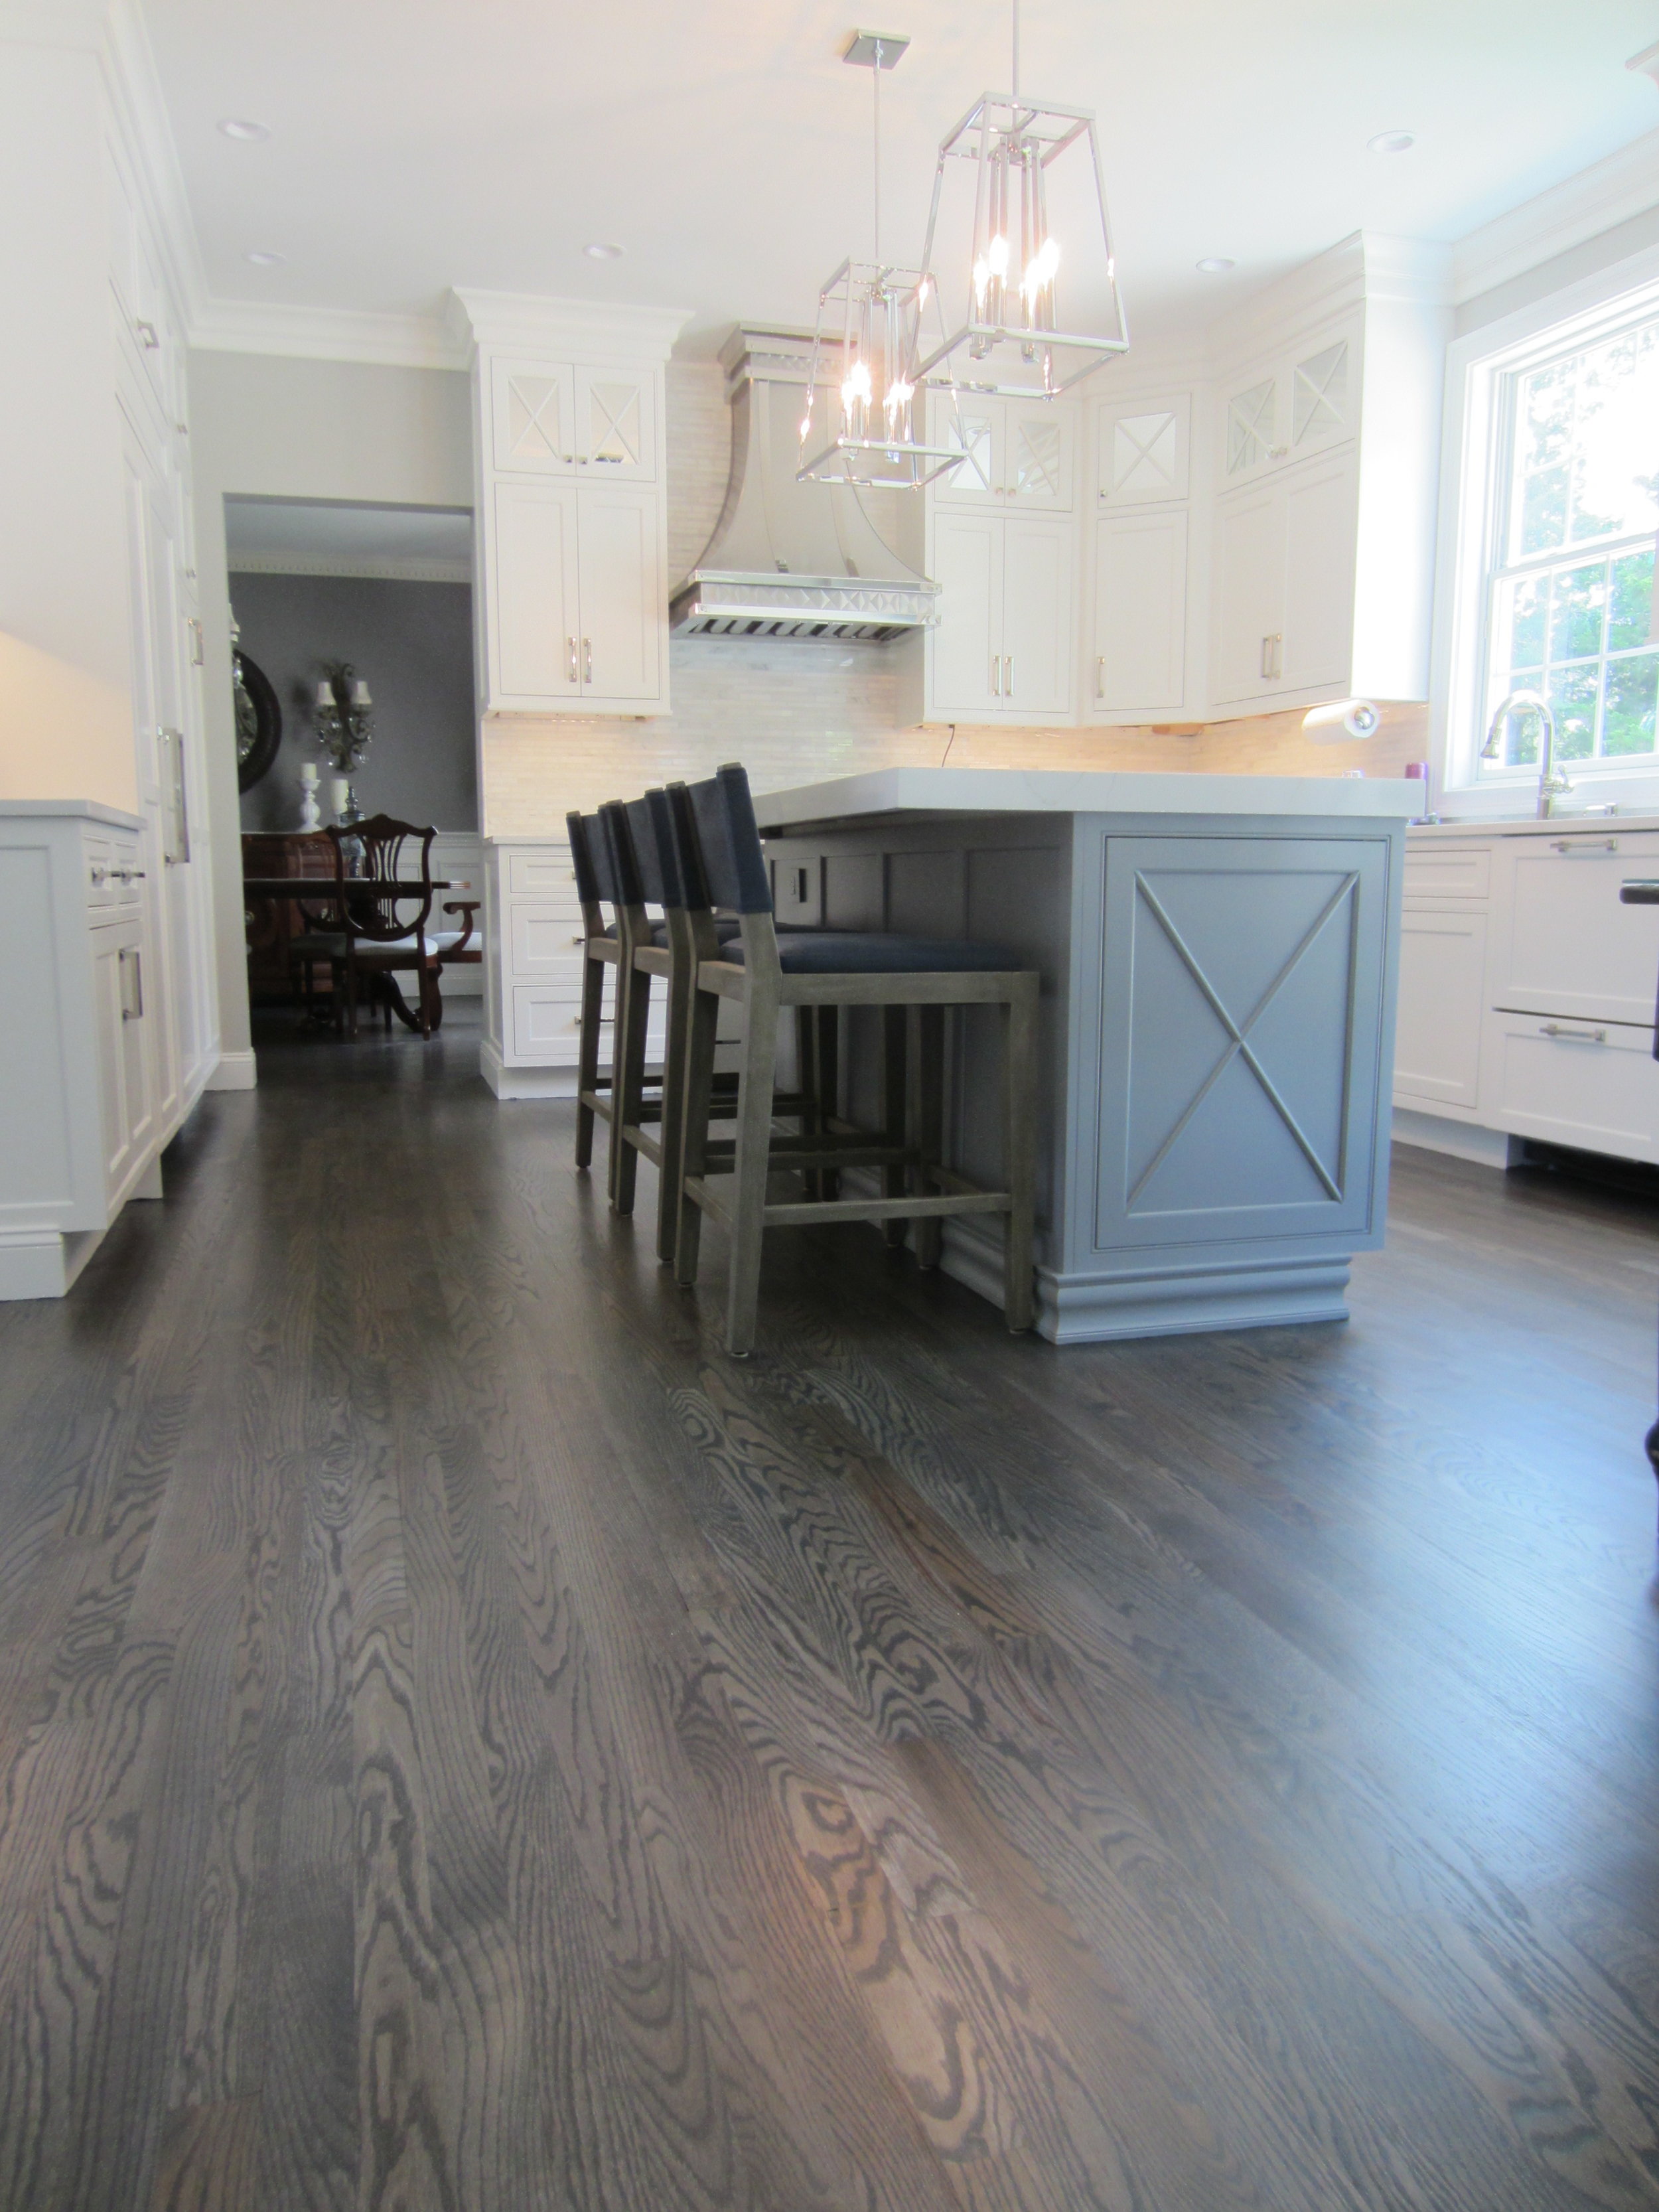
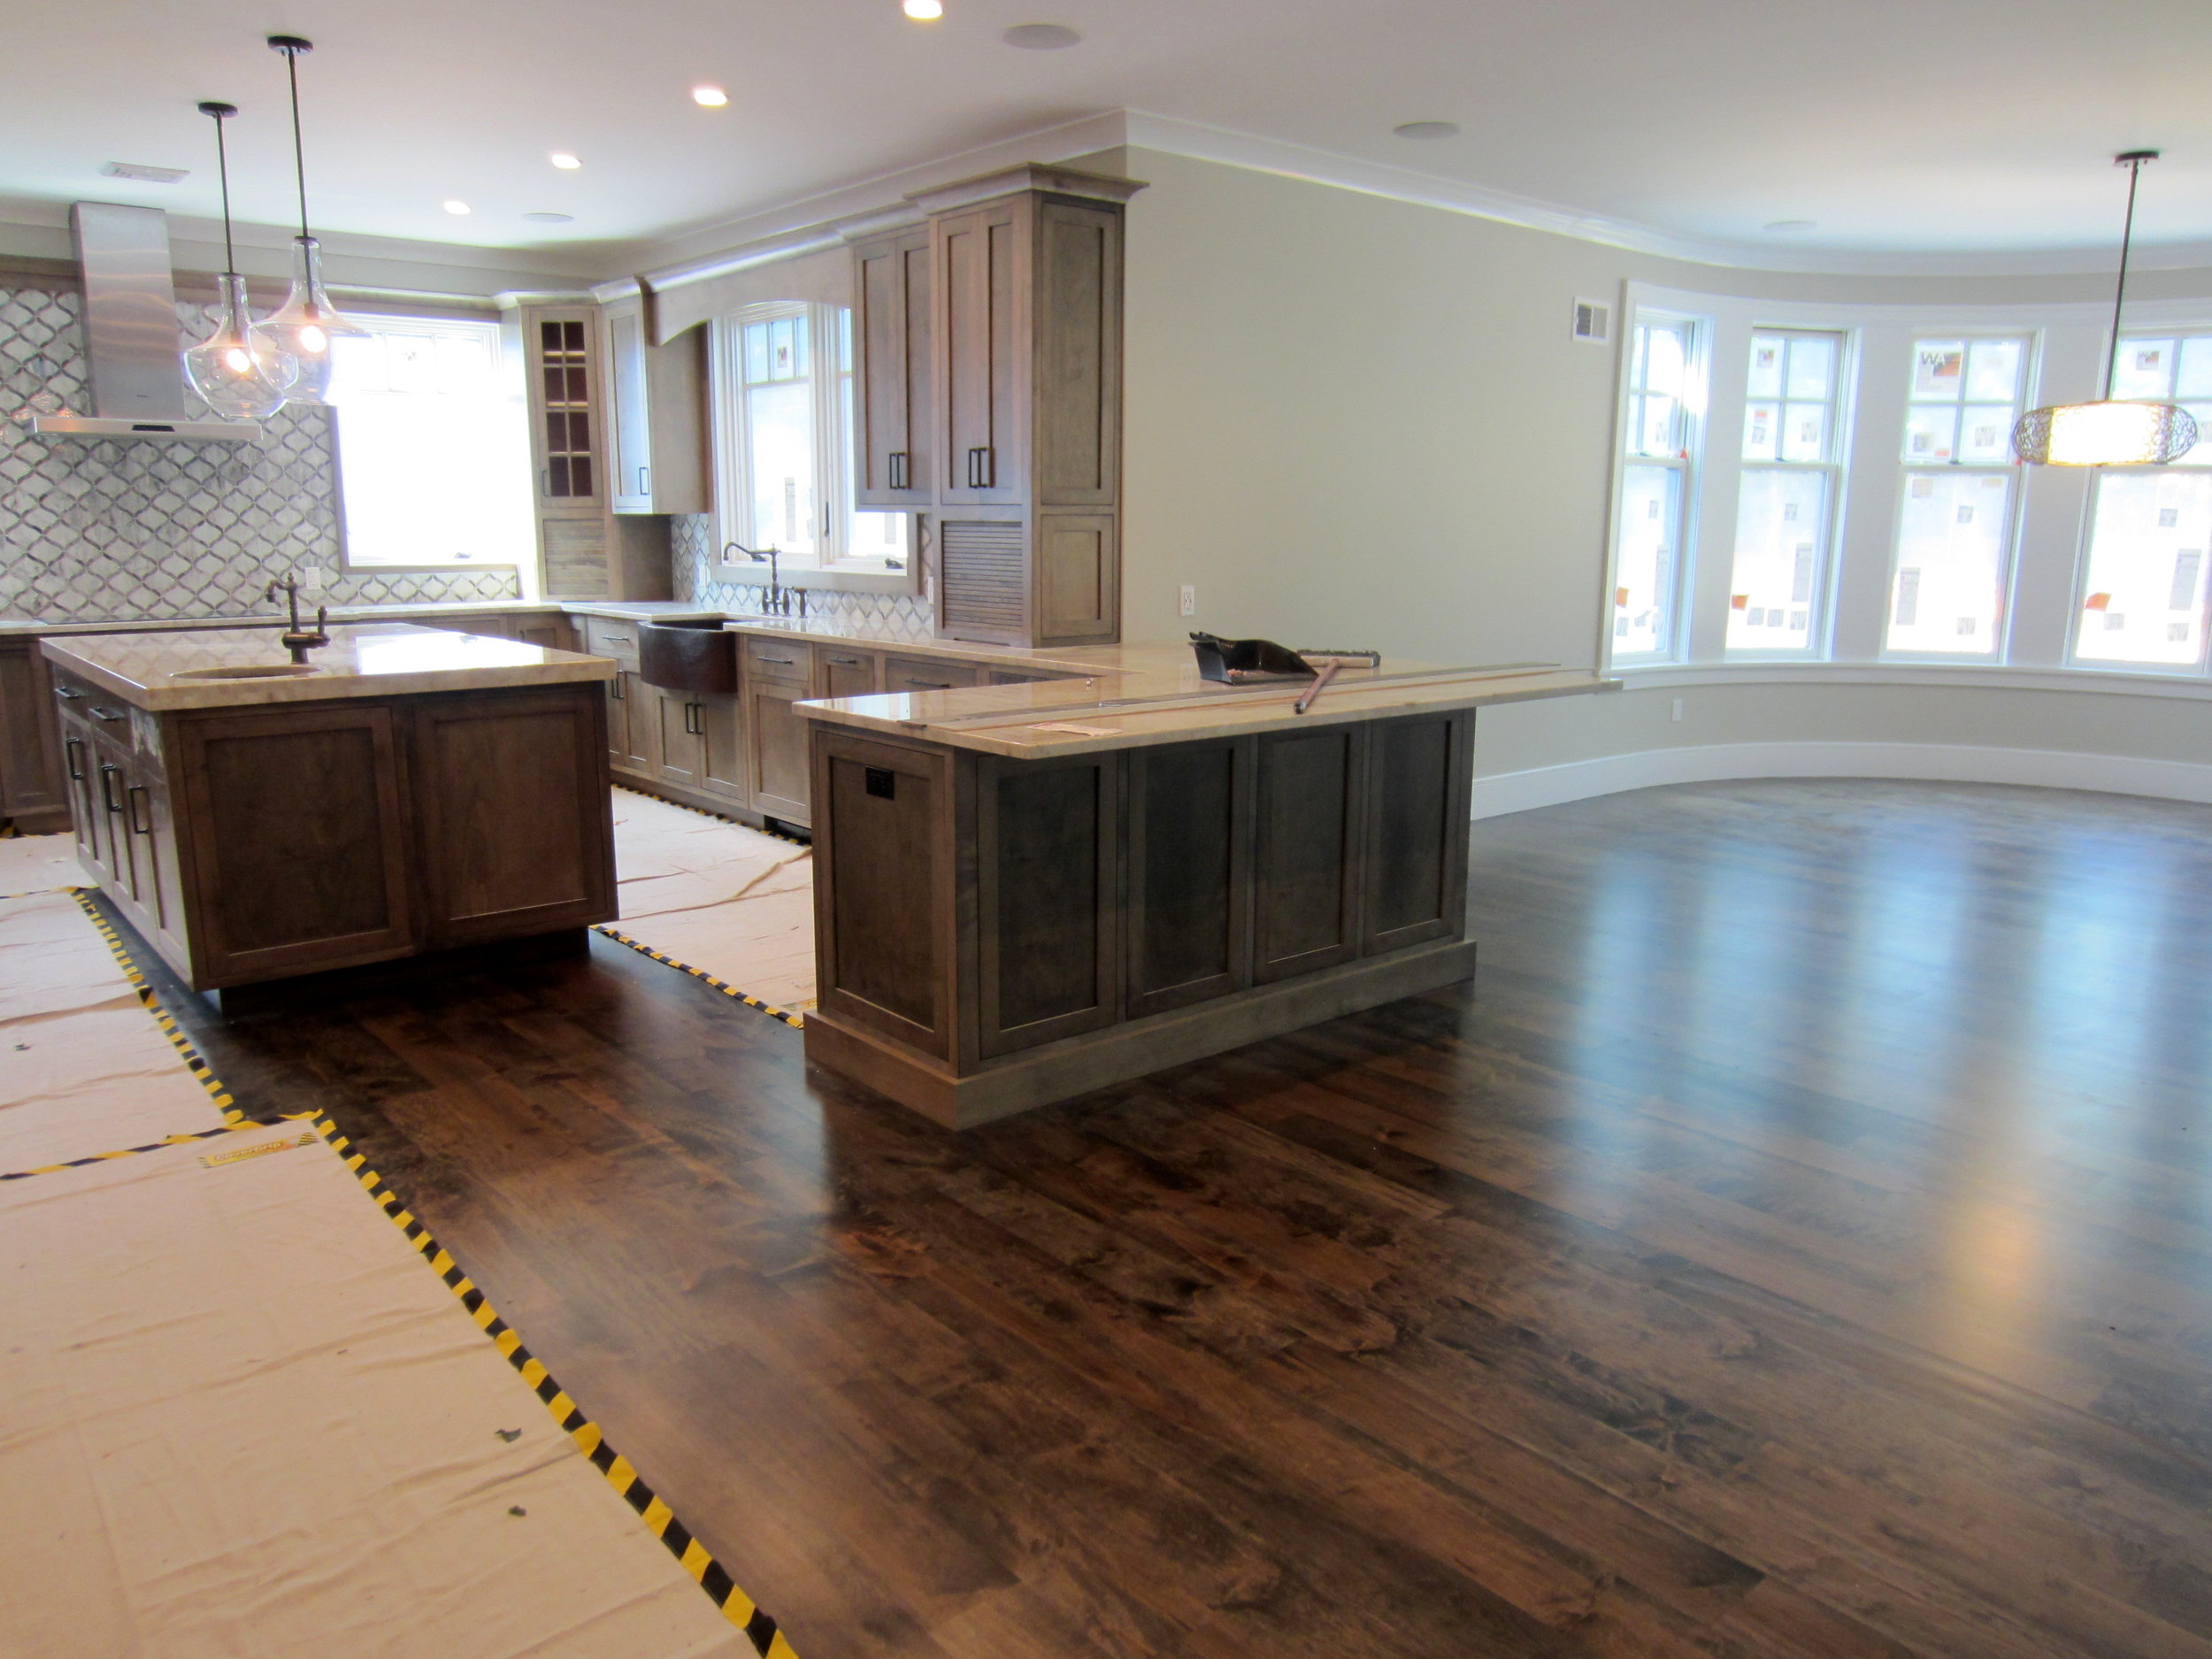
Bona Driftwood Stain & Satin Bona Traffic HD on Red Oak in Nesconset, NY. This kitchen went from drab to fab, with a more contemporary cool style. These floors bring in a dramatic modern edge to this home.
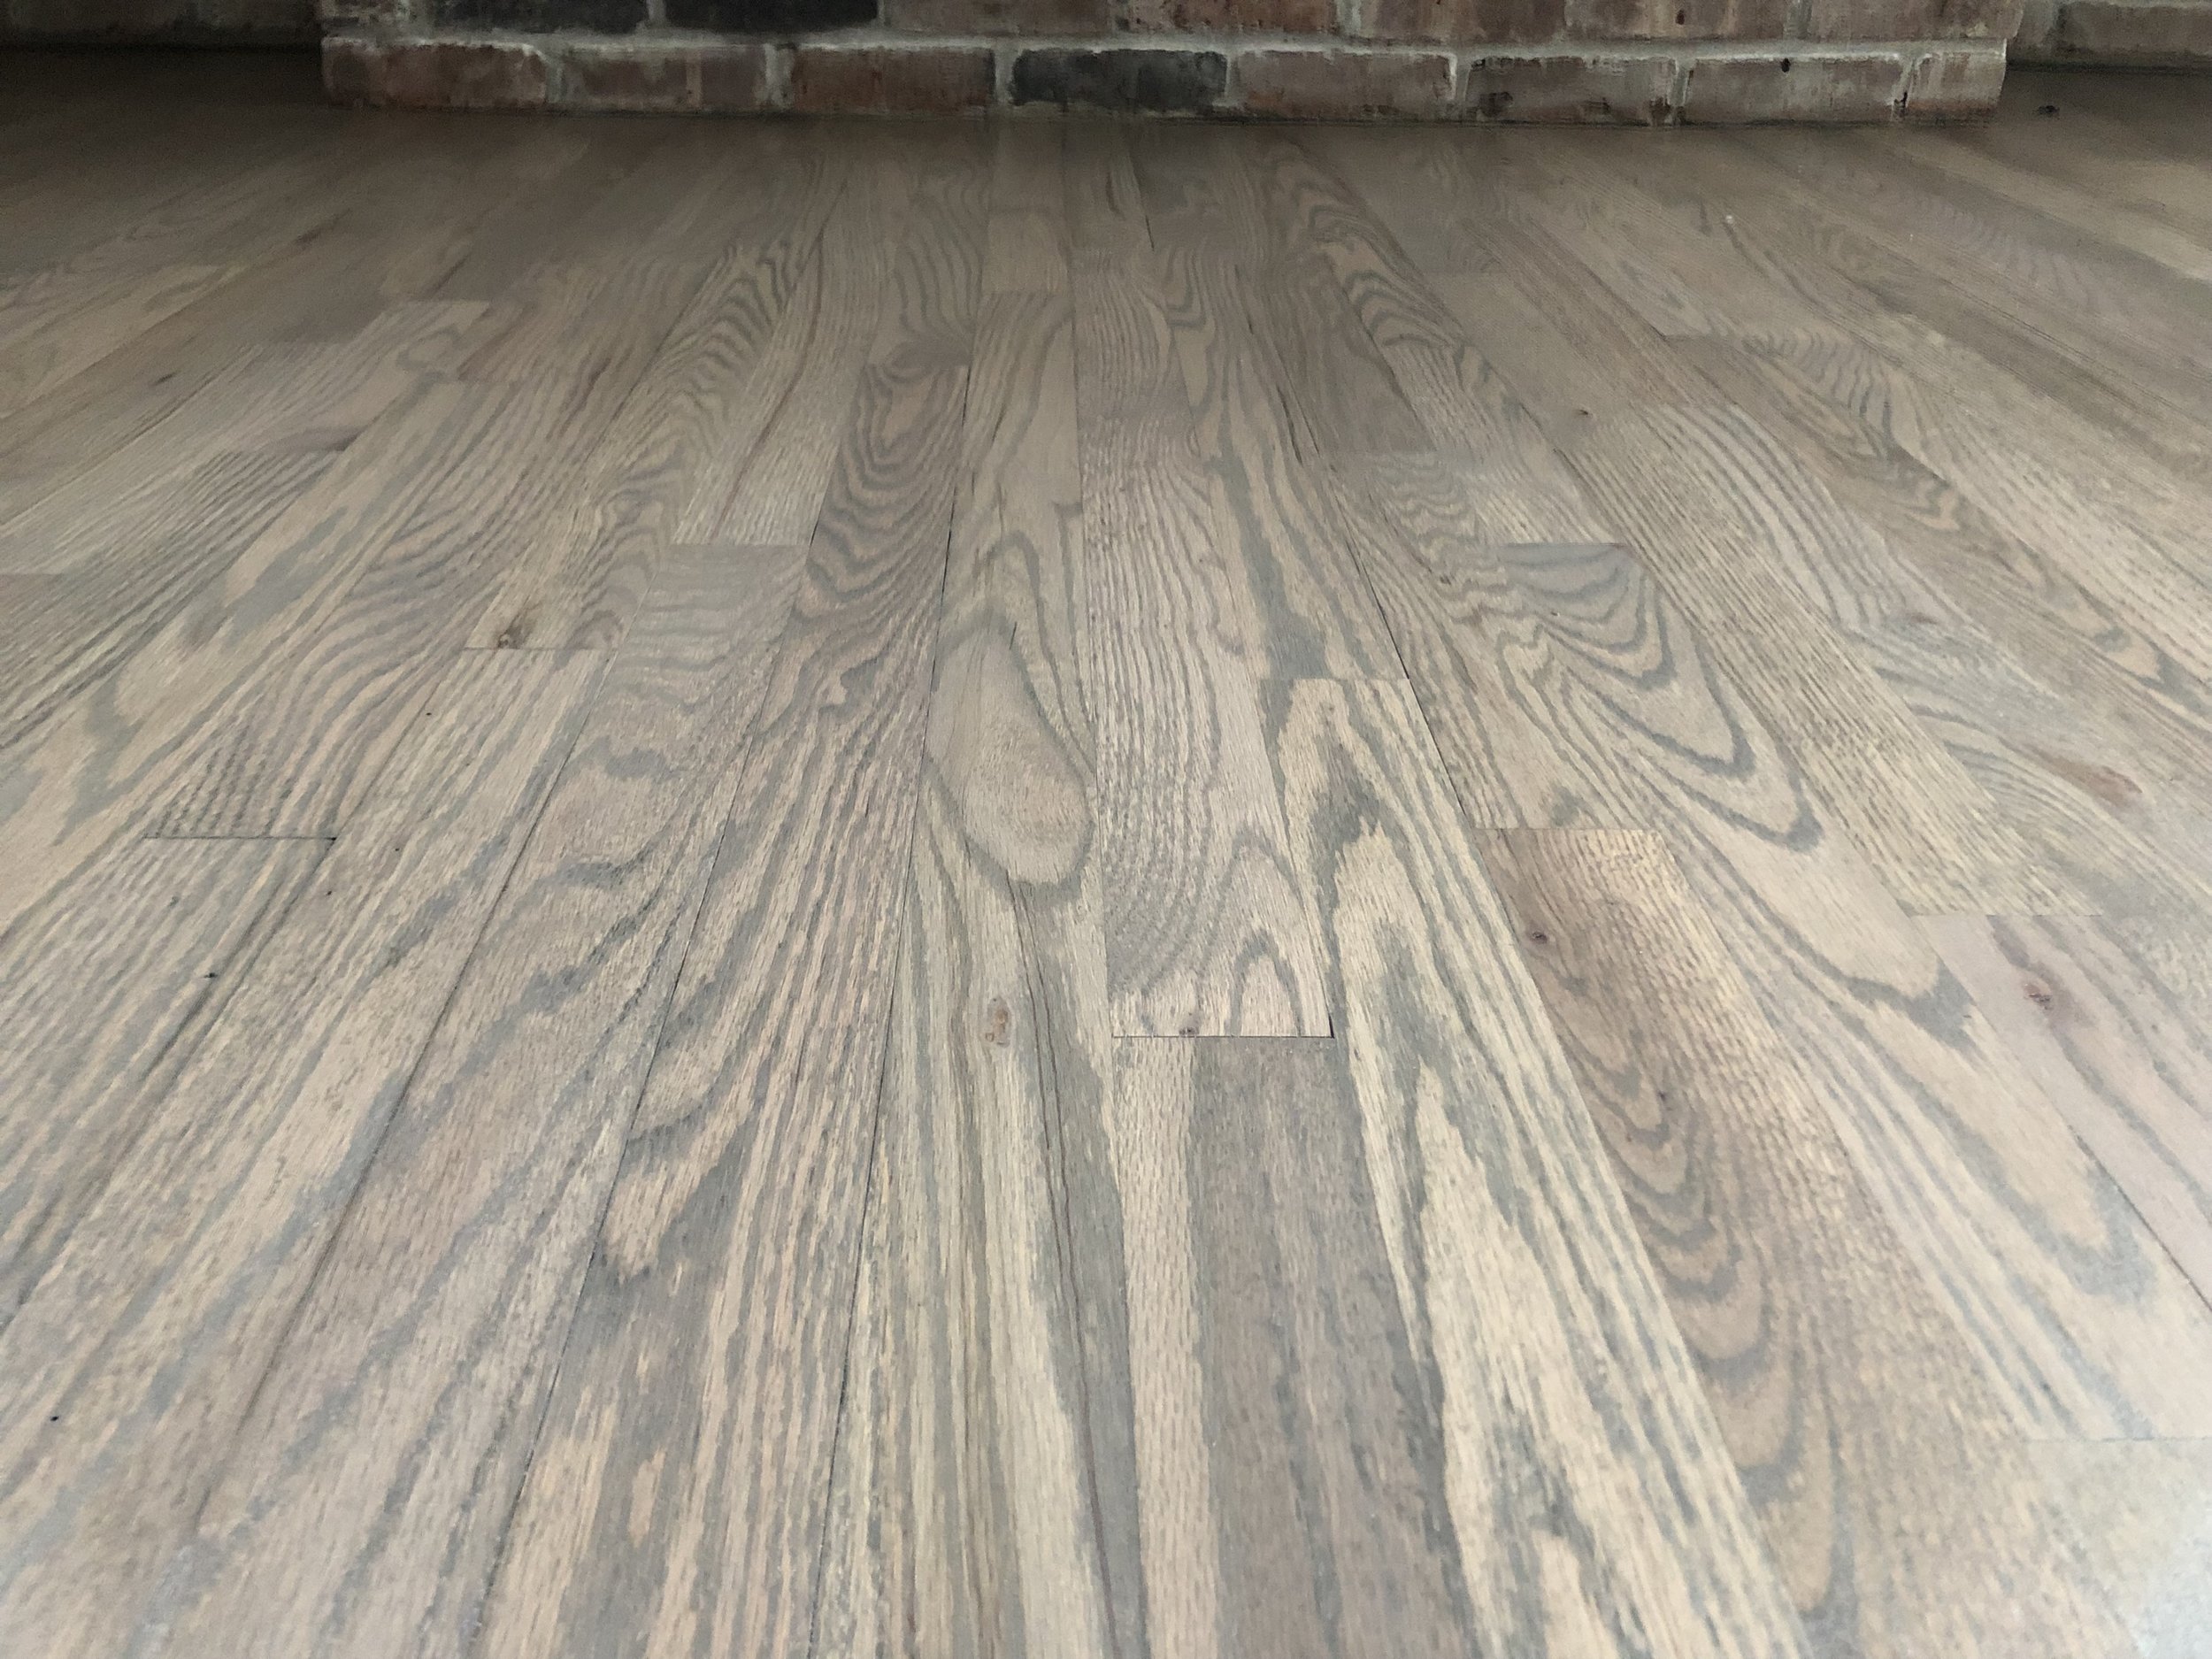
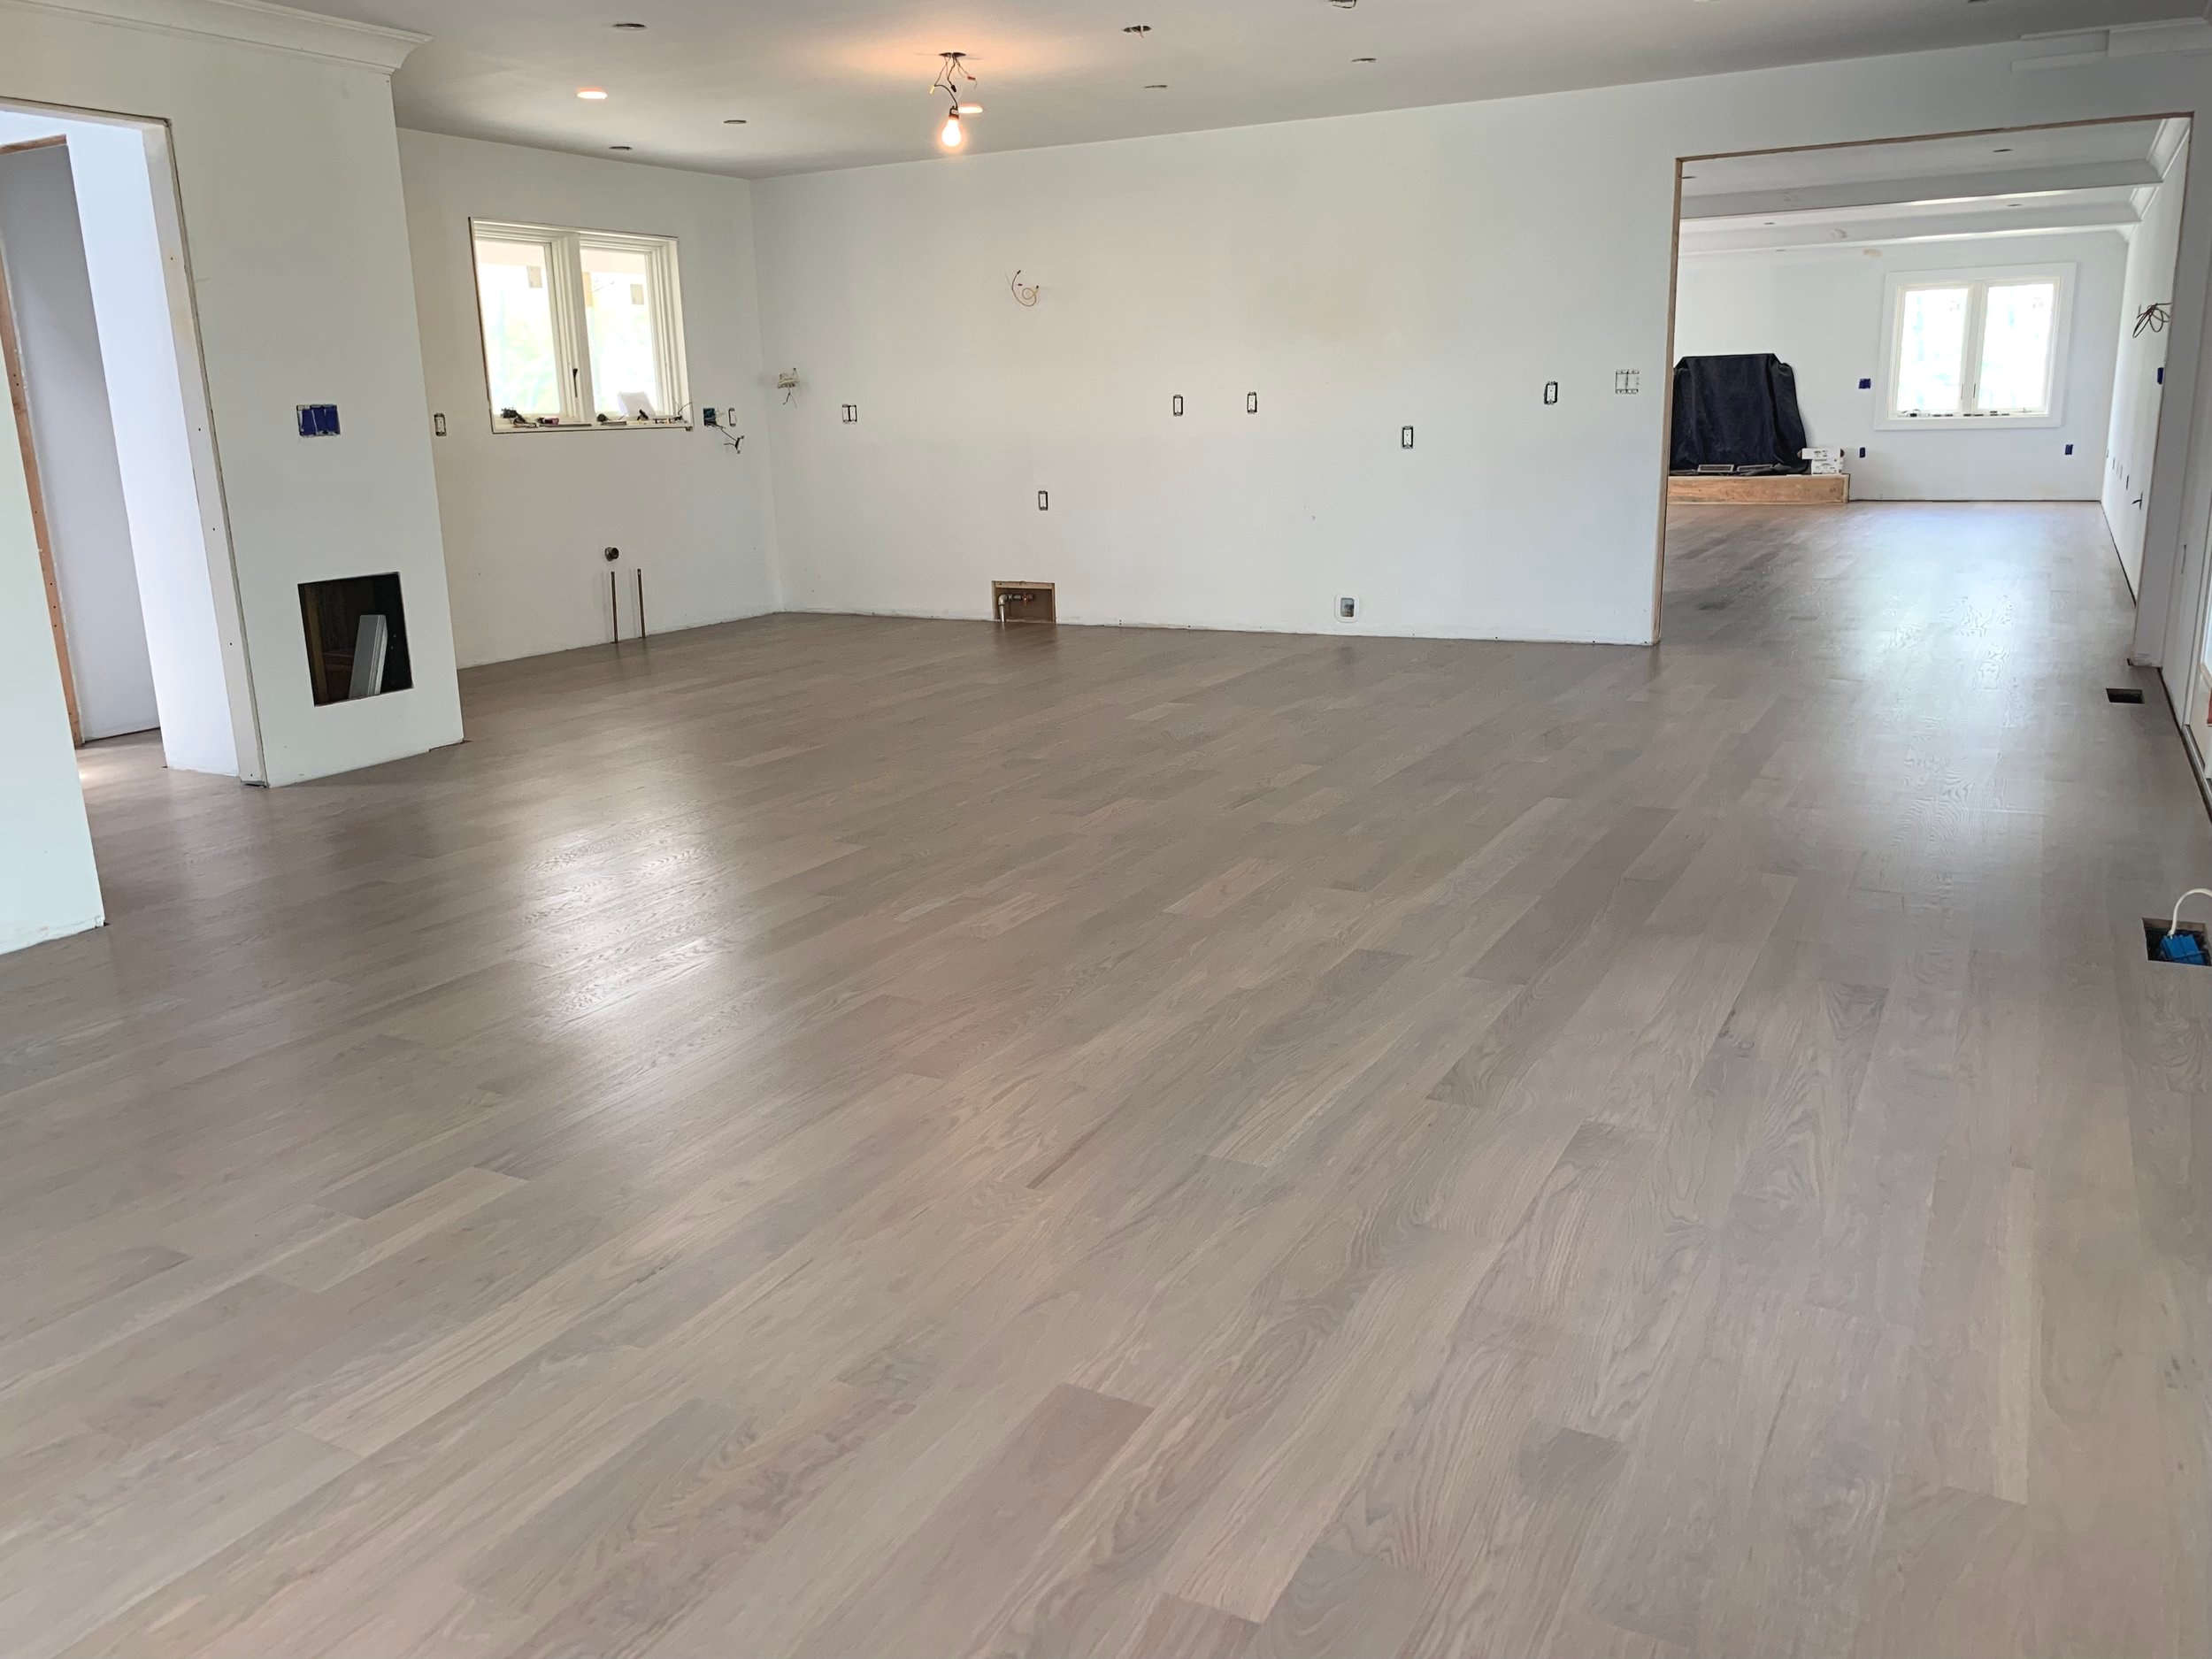
3-color custom blend on Red Oak for a customer in Huntington, NY 2018. Finished with Bona Traffic HD. This lighter, softer gray imparts more of a driftwood tone.
Pro Tip: Adding Weathered Oak to any brown or dark brown stain will give you a hardwood floor with more depth and more of a transitional style, as it gives a slight grey undertone to any stain. If you like gray, but aren’t ready to go all the way gray, try blending any color stain with Weathered Oak! Instantly brings floors into the modern era. :)
Grey floors are easier to keep clean than dark brown hardwood floors because they show less dust. Lighter gray floors can make a room feel open and airy, while darker gray stains can visually reduce the space. Dark gray floors do make for a dramatic contrast with light-colored walls, and dark gray hardwood floors also provide a perfect backdrop for brightly colored furniture and accents, such as red or teal. Gold and honey tones also complement dark gray hardwood floors.
8” Character White Oak installed & finished in Syosset
Love this rich dark gray!

Bold colors really work on dark grey floors! Melville, NY project completed in Spring 2017.
Combine light gray floors with lighter, neutral-toned furniture and accents for an instant beach house style. Cream, beige, silver and sage go very well with light gray wood floors. Camel tones also work very well with a light gray-washed floor, and they impart a shabby-chic, vintage look to a space.
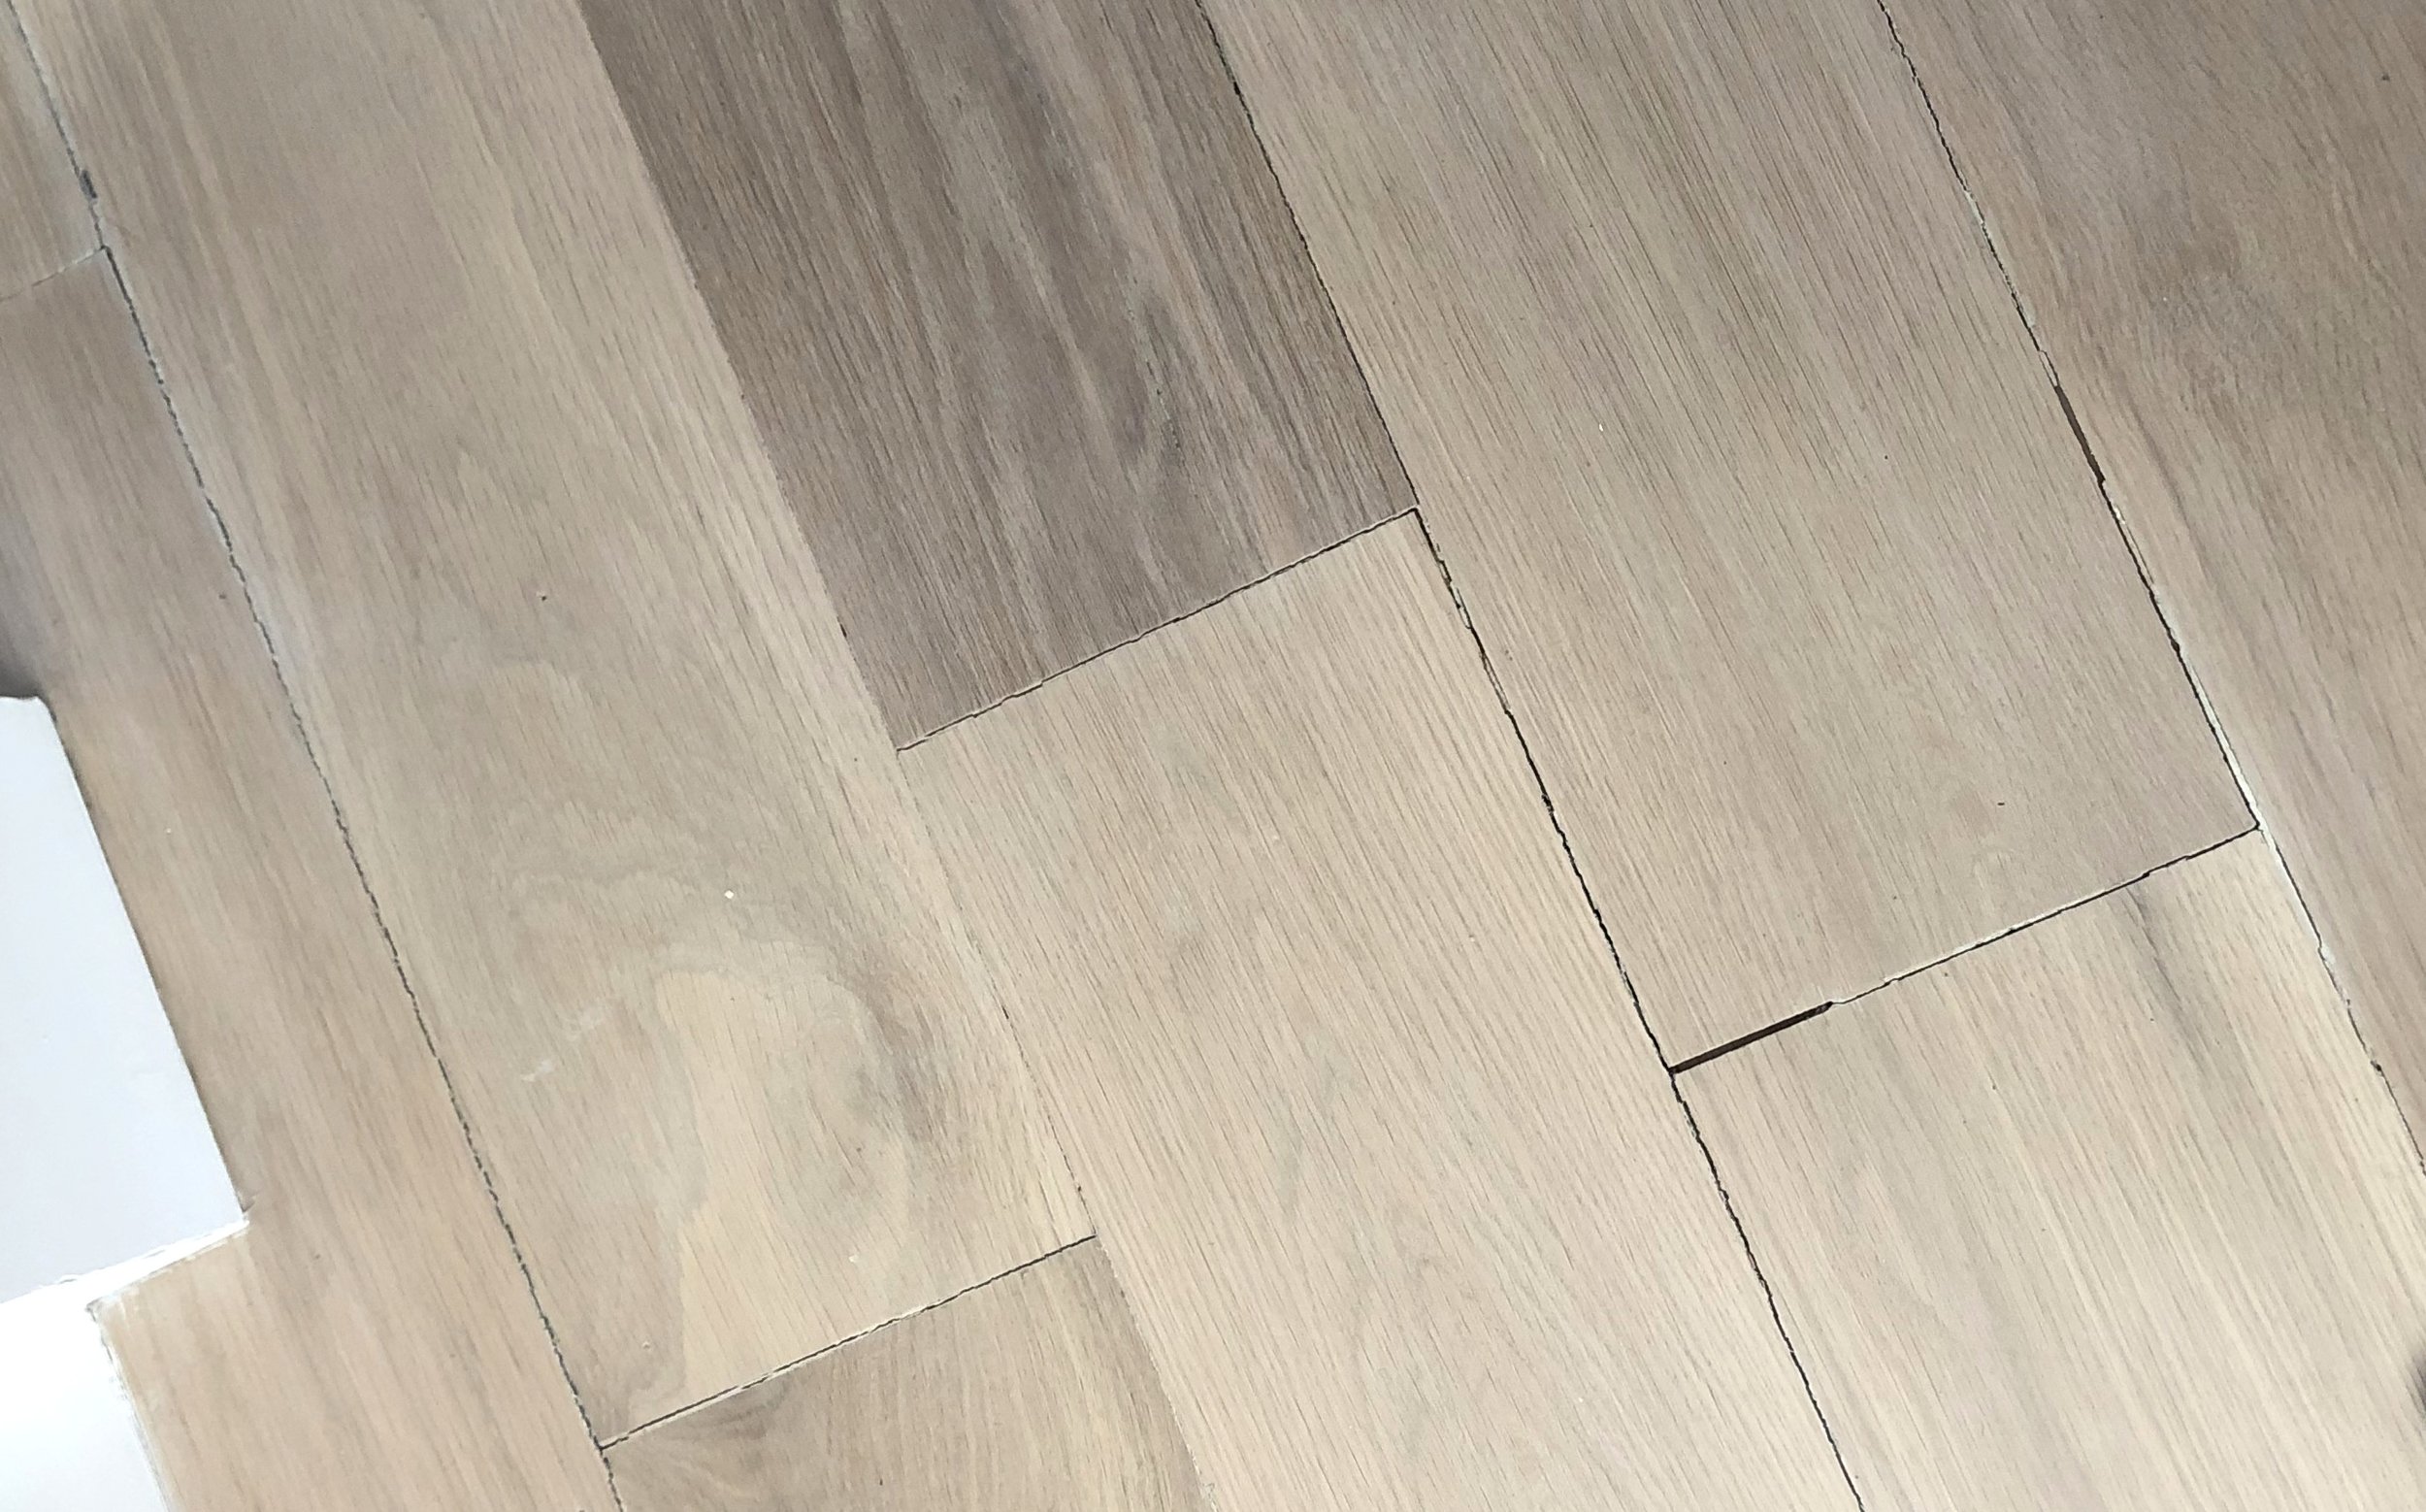
Above photos display Woca Penetrating Oils on basket weave White Oak flooring in Northport, NY. Get the layered gray and white look with Woca pre-treatments and Woca Hardwax Oils! This is a perfect choice for a beach house. Project completed in 2018.
Gray hardwood floors can look contemporary and sleek, or warm and rustic depending on the grade of wood (see Different Grades of Hardwood Flooring) and shade of gray chosen. We frequently mix 4 different colors together to come up with the perfect tone of gray for a hardwood floor! Your flooring contractor should be able to mix colors together to achieve the desired shade of gray. Gray floors are not easy to do, so make sure you hire a reputable hardwood flooring professional.
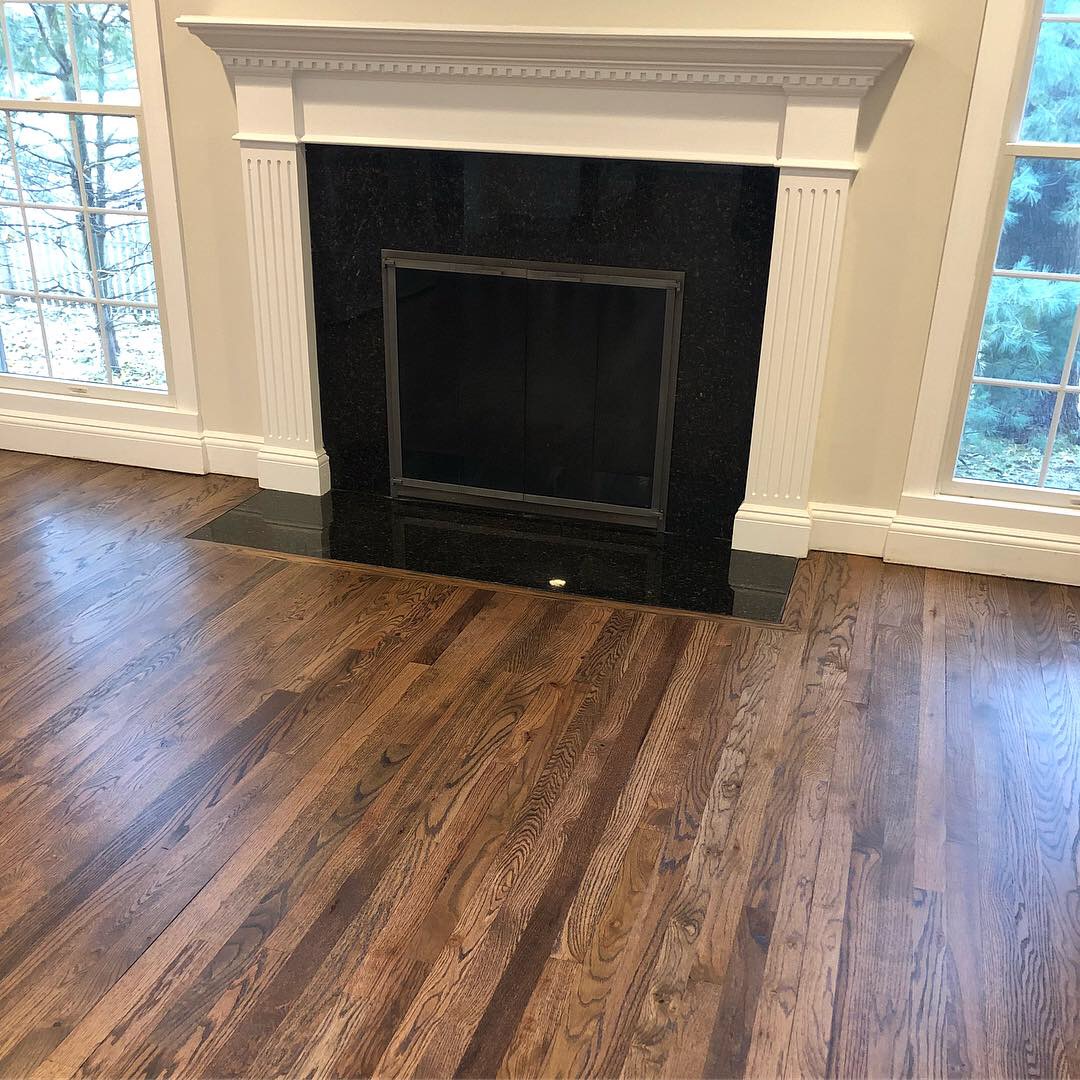
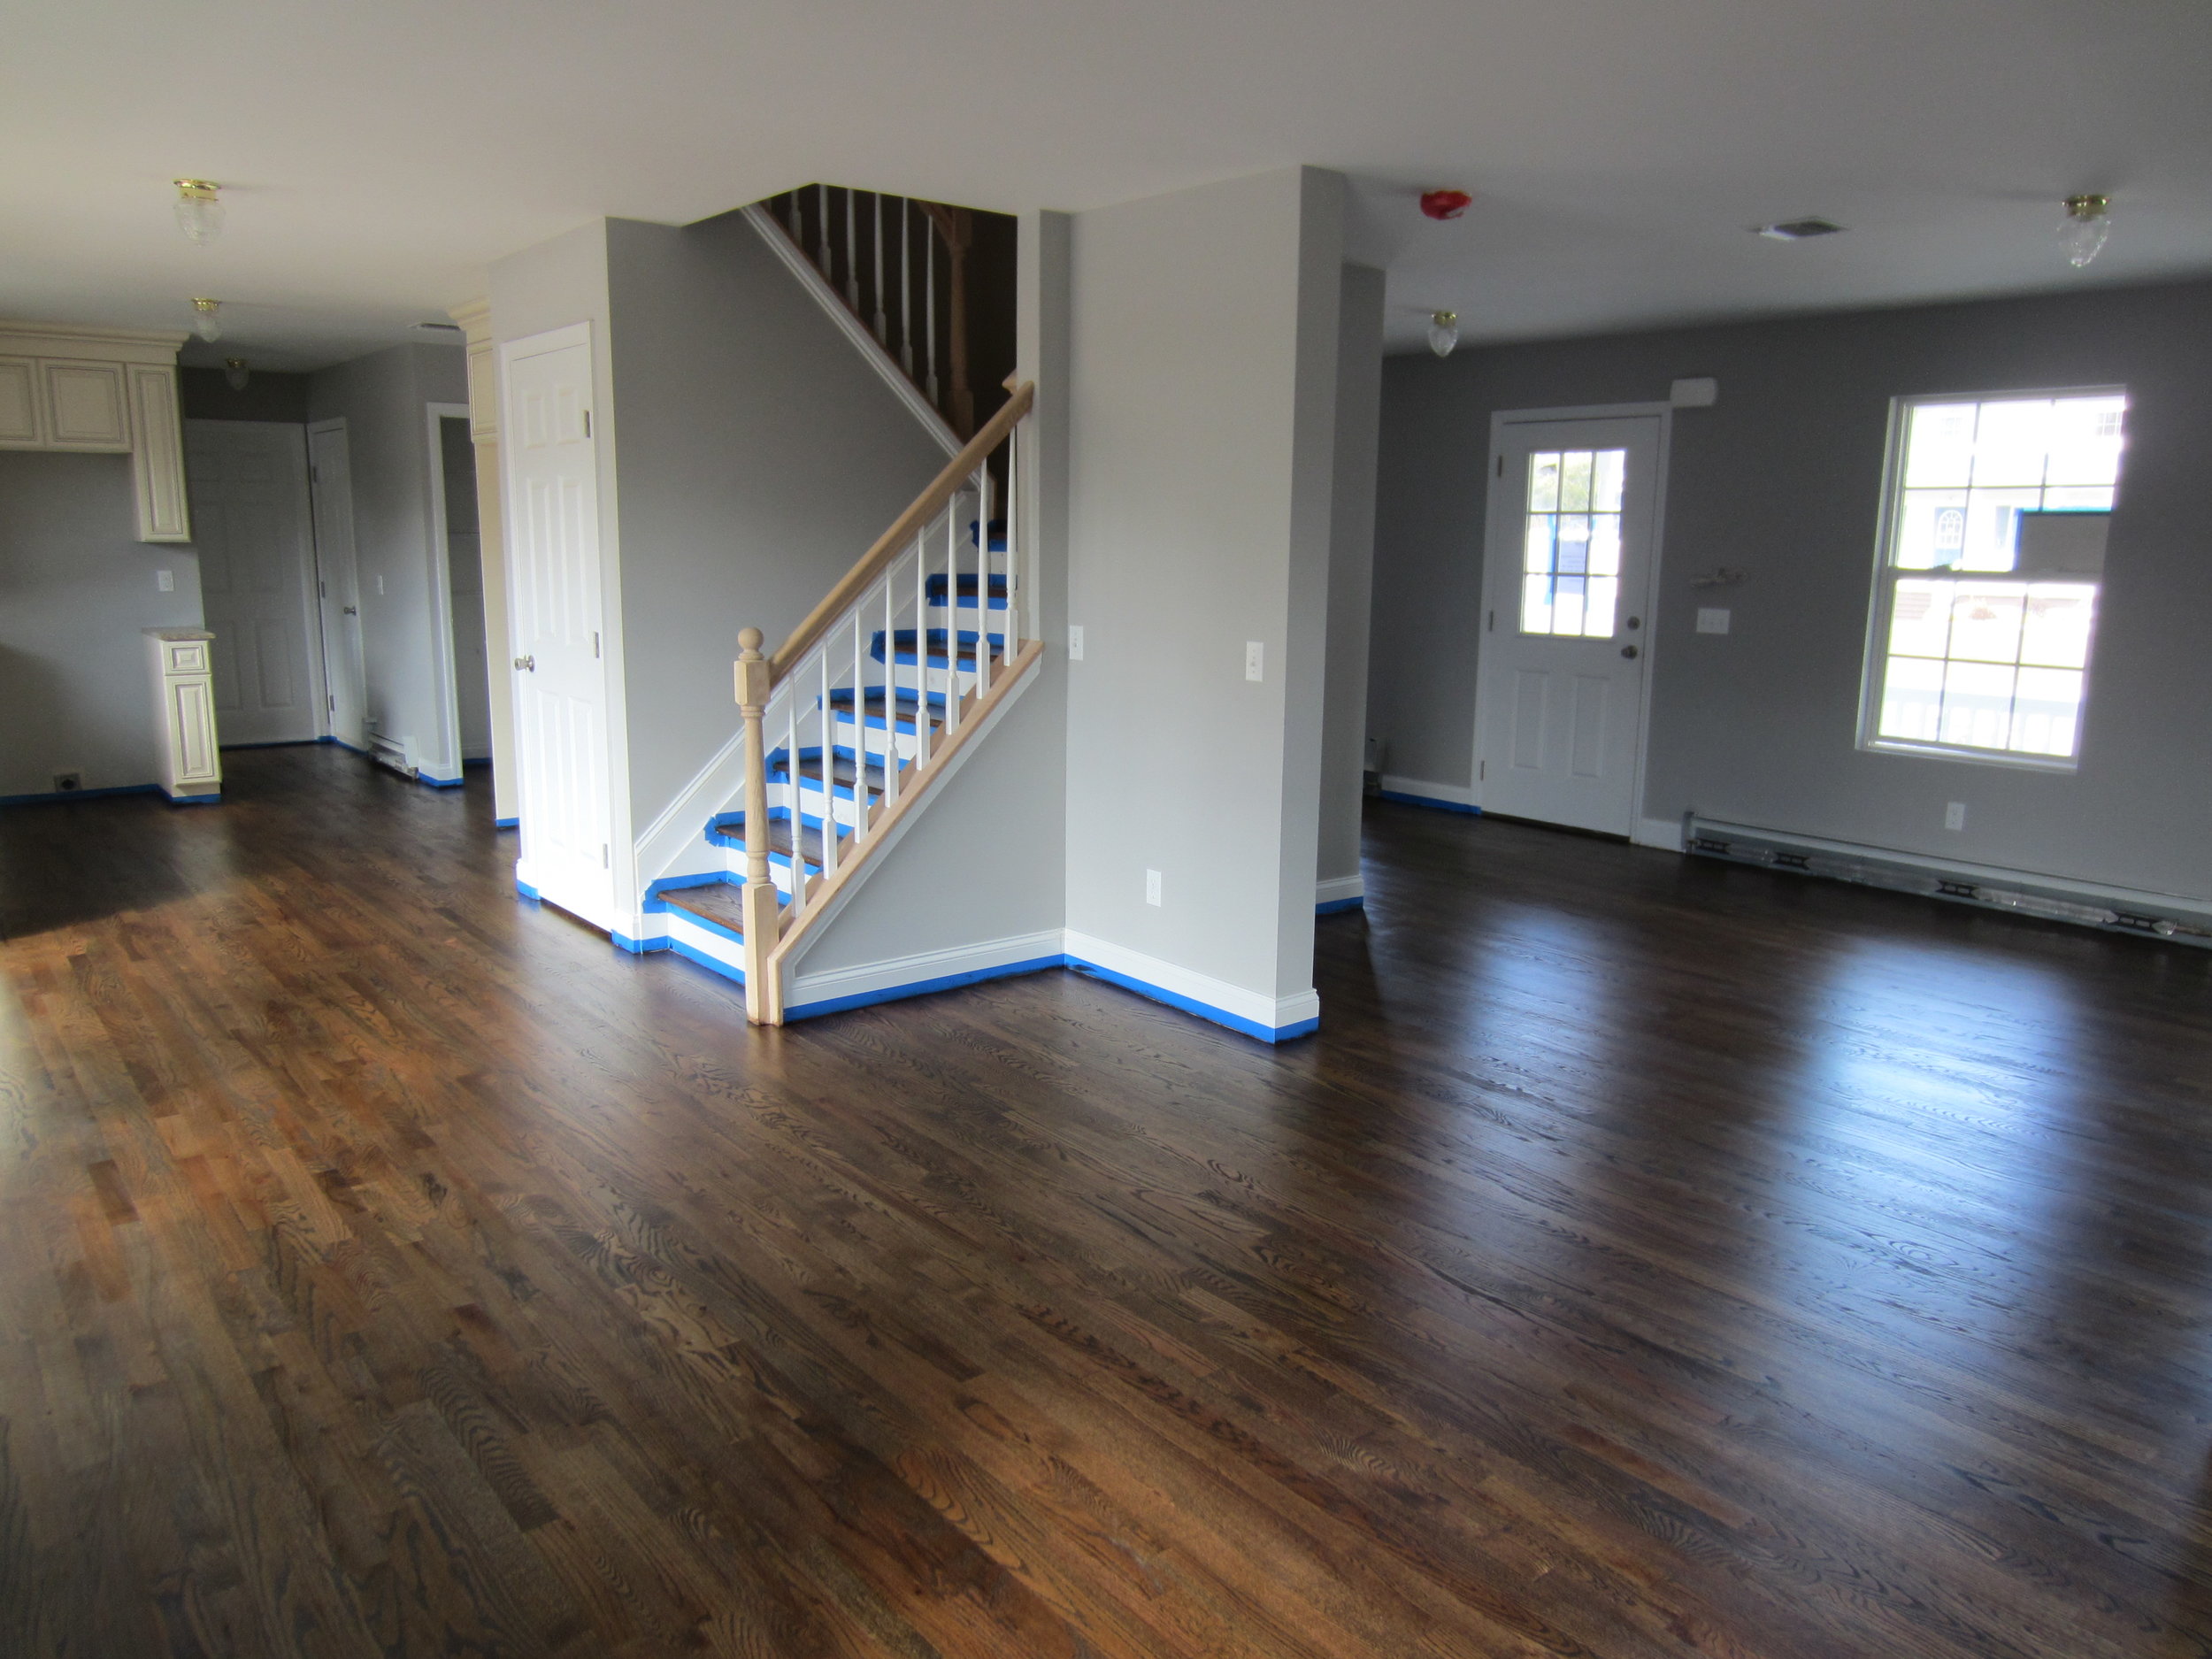
Can you pull off gray hardwood floors in your home? I always think it’s best to think about furniture and décor when considering a grey floor. In my opinion, dark, traditional wood furniture and décor do not work well with grey. Grey floors are more of a transitional style, and can look odd when paired with heavy traditionally styled furniture. Heavy yellow-ish or orange-ish woodwork / trim around windows or doors does not look good with gray hardwood flooring. If you want to go gray, you need to make sure your trim colors will complement the new style. Orange-brown colored molding will look exxxtra dated when paired with new gray wood floors.
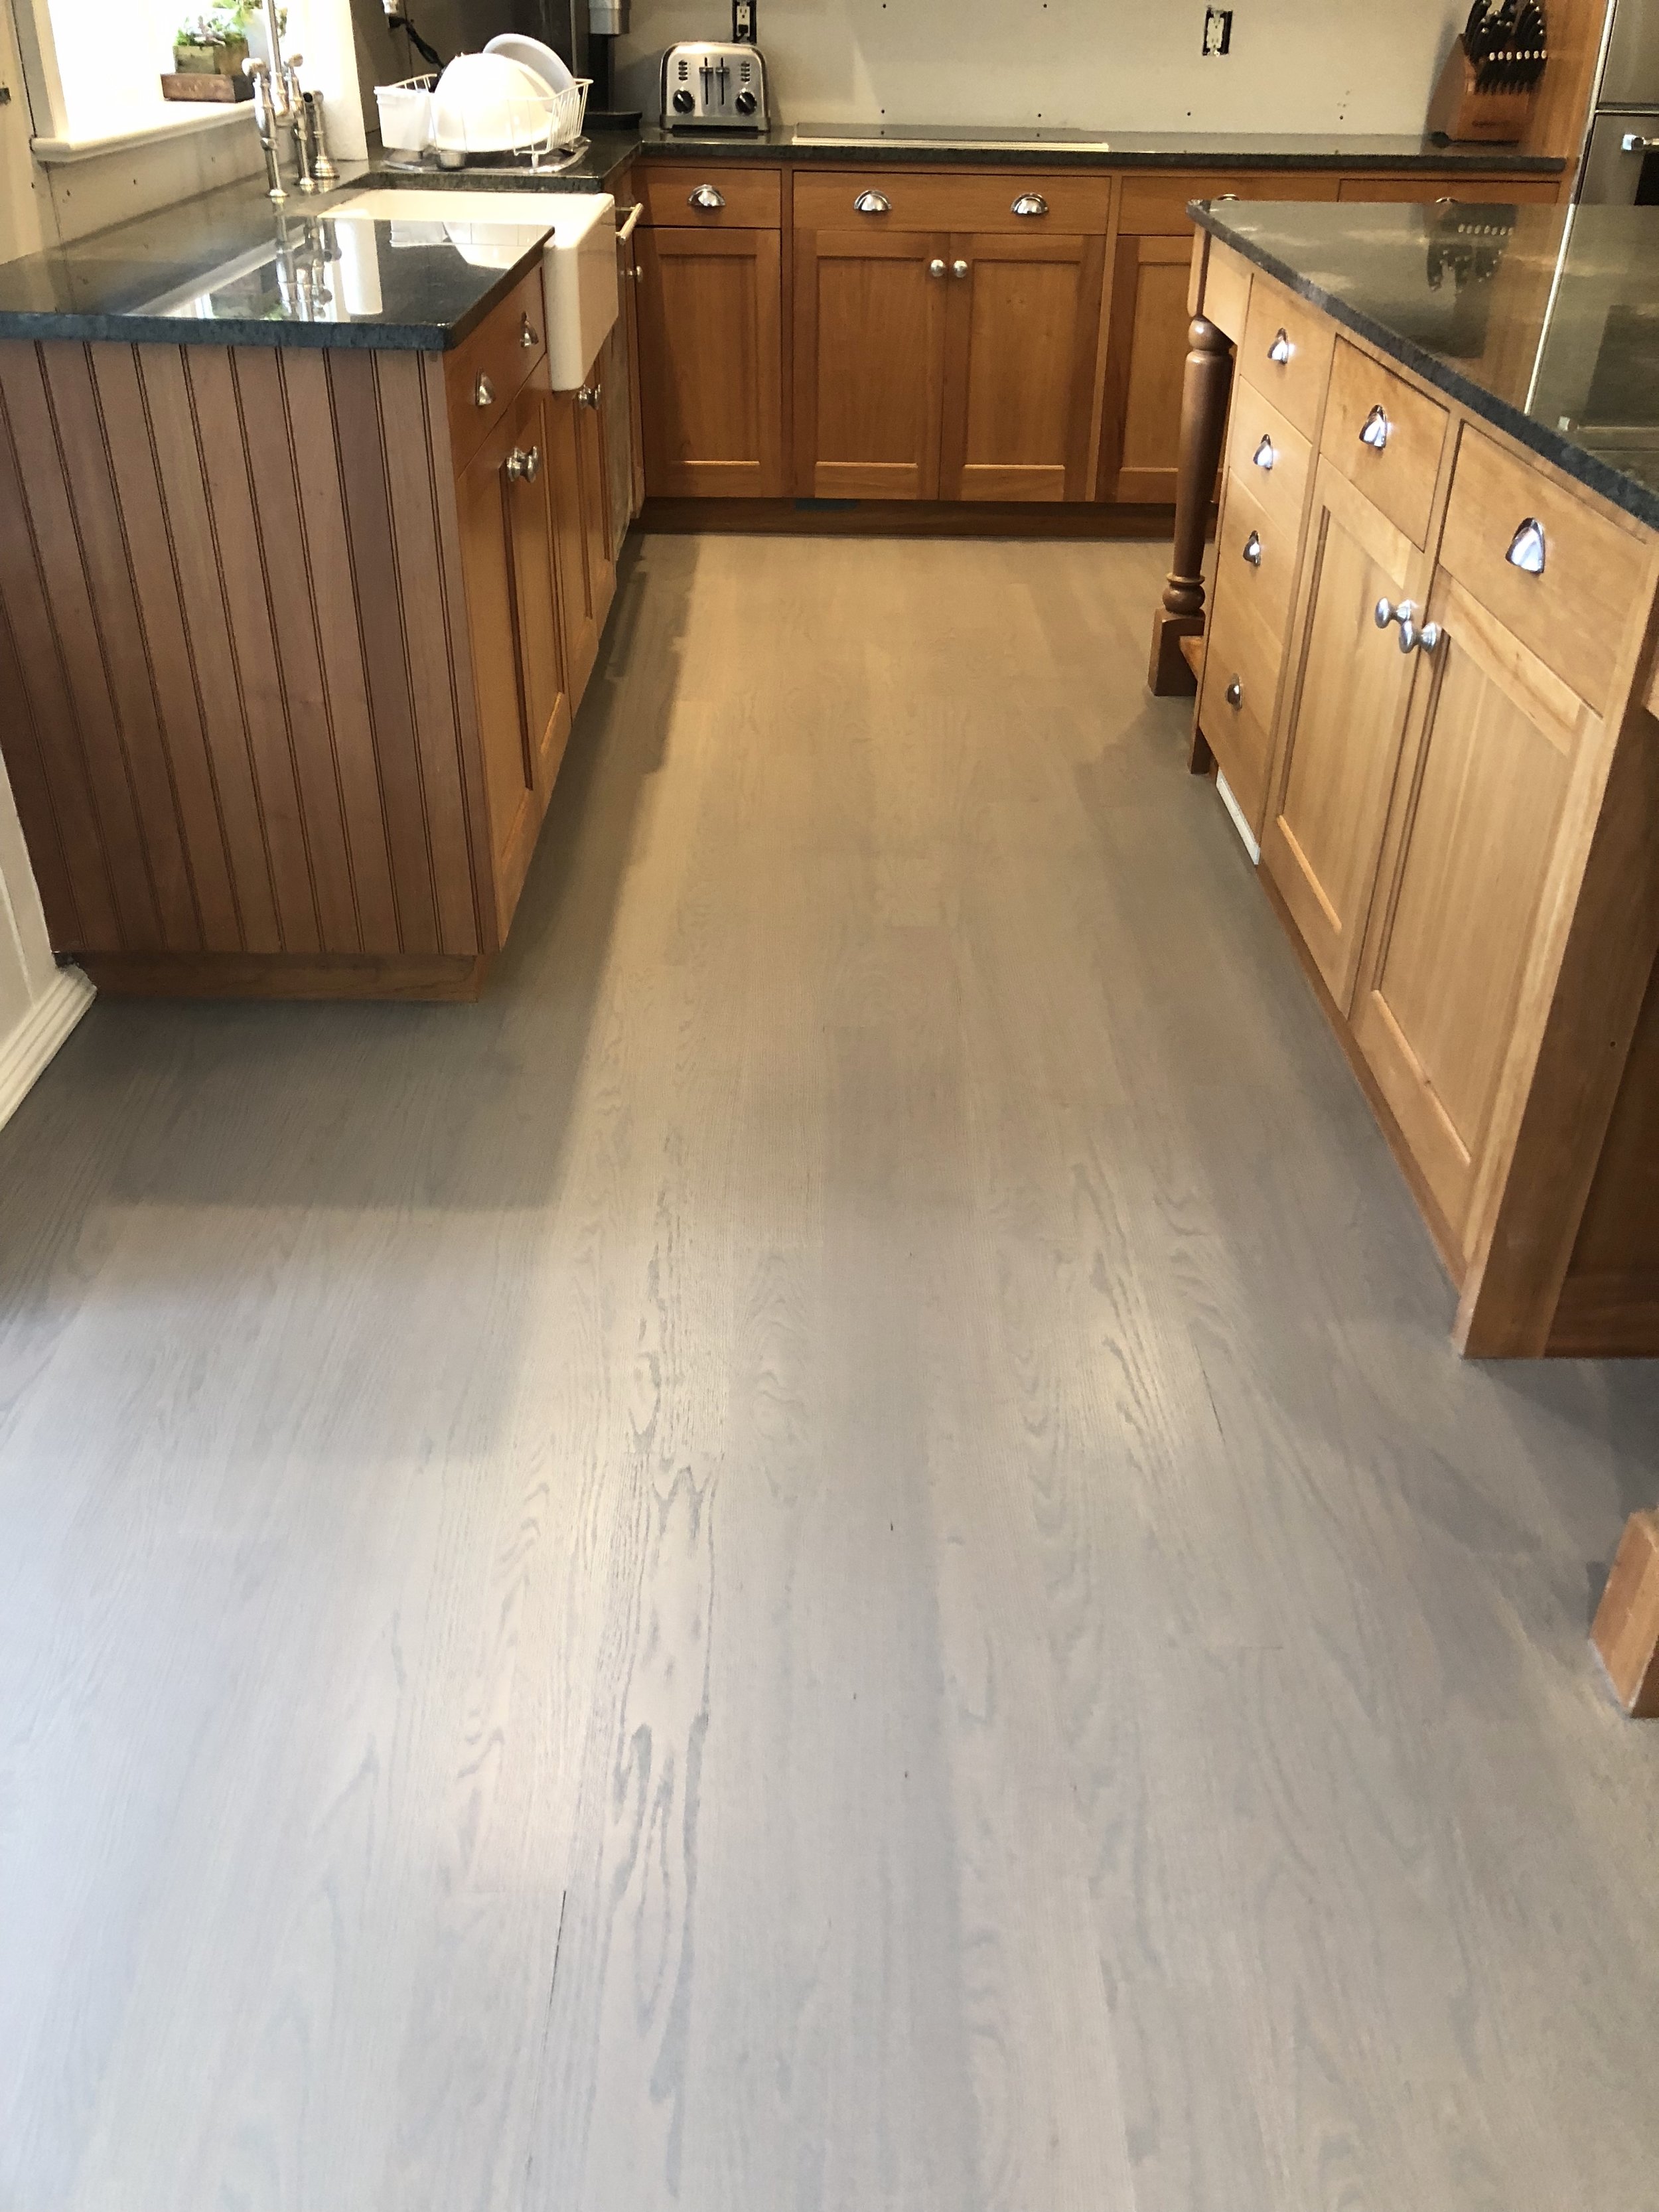
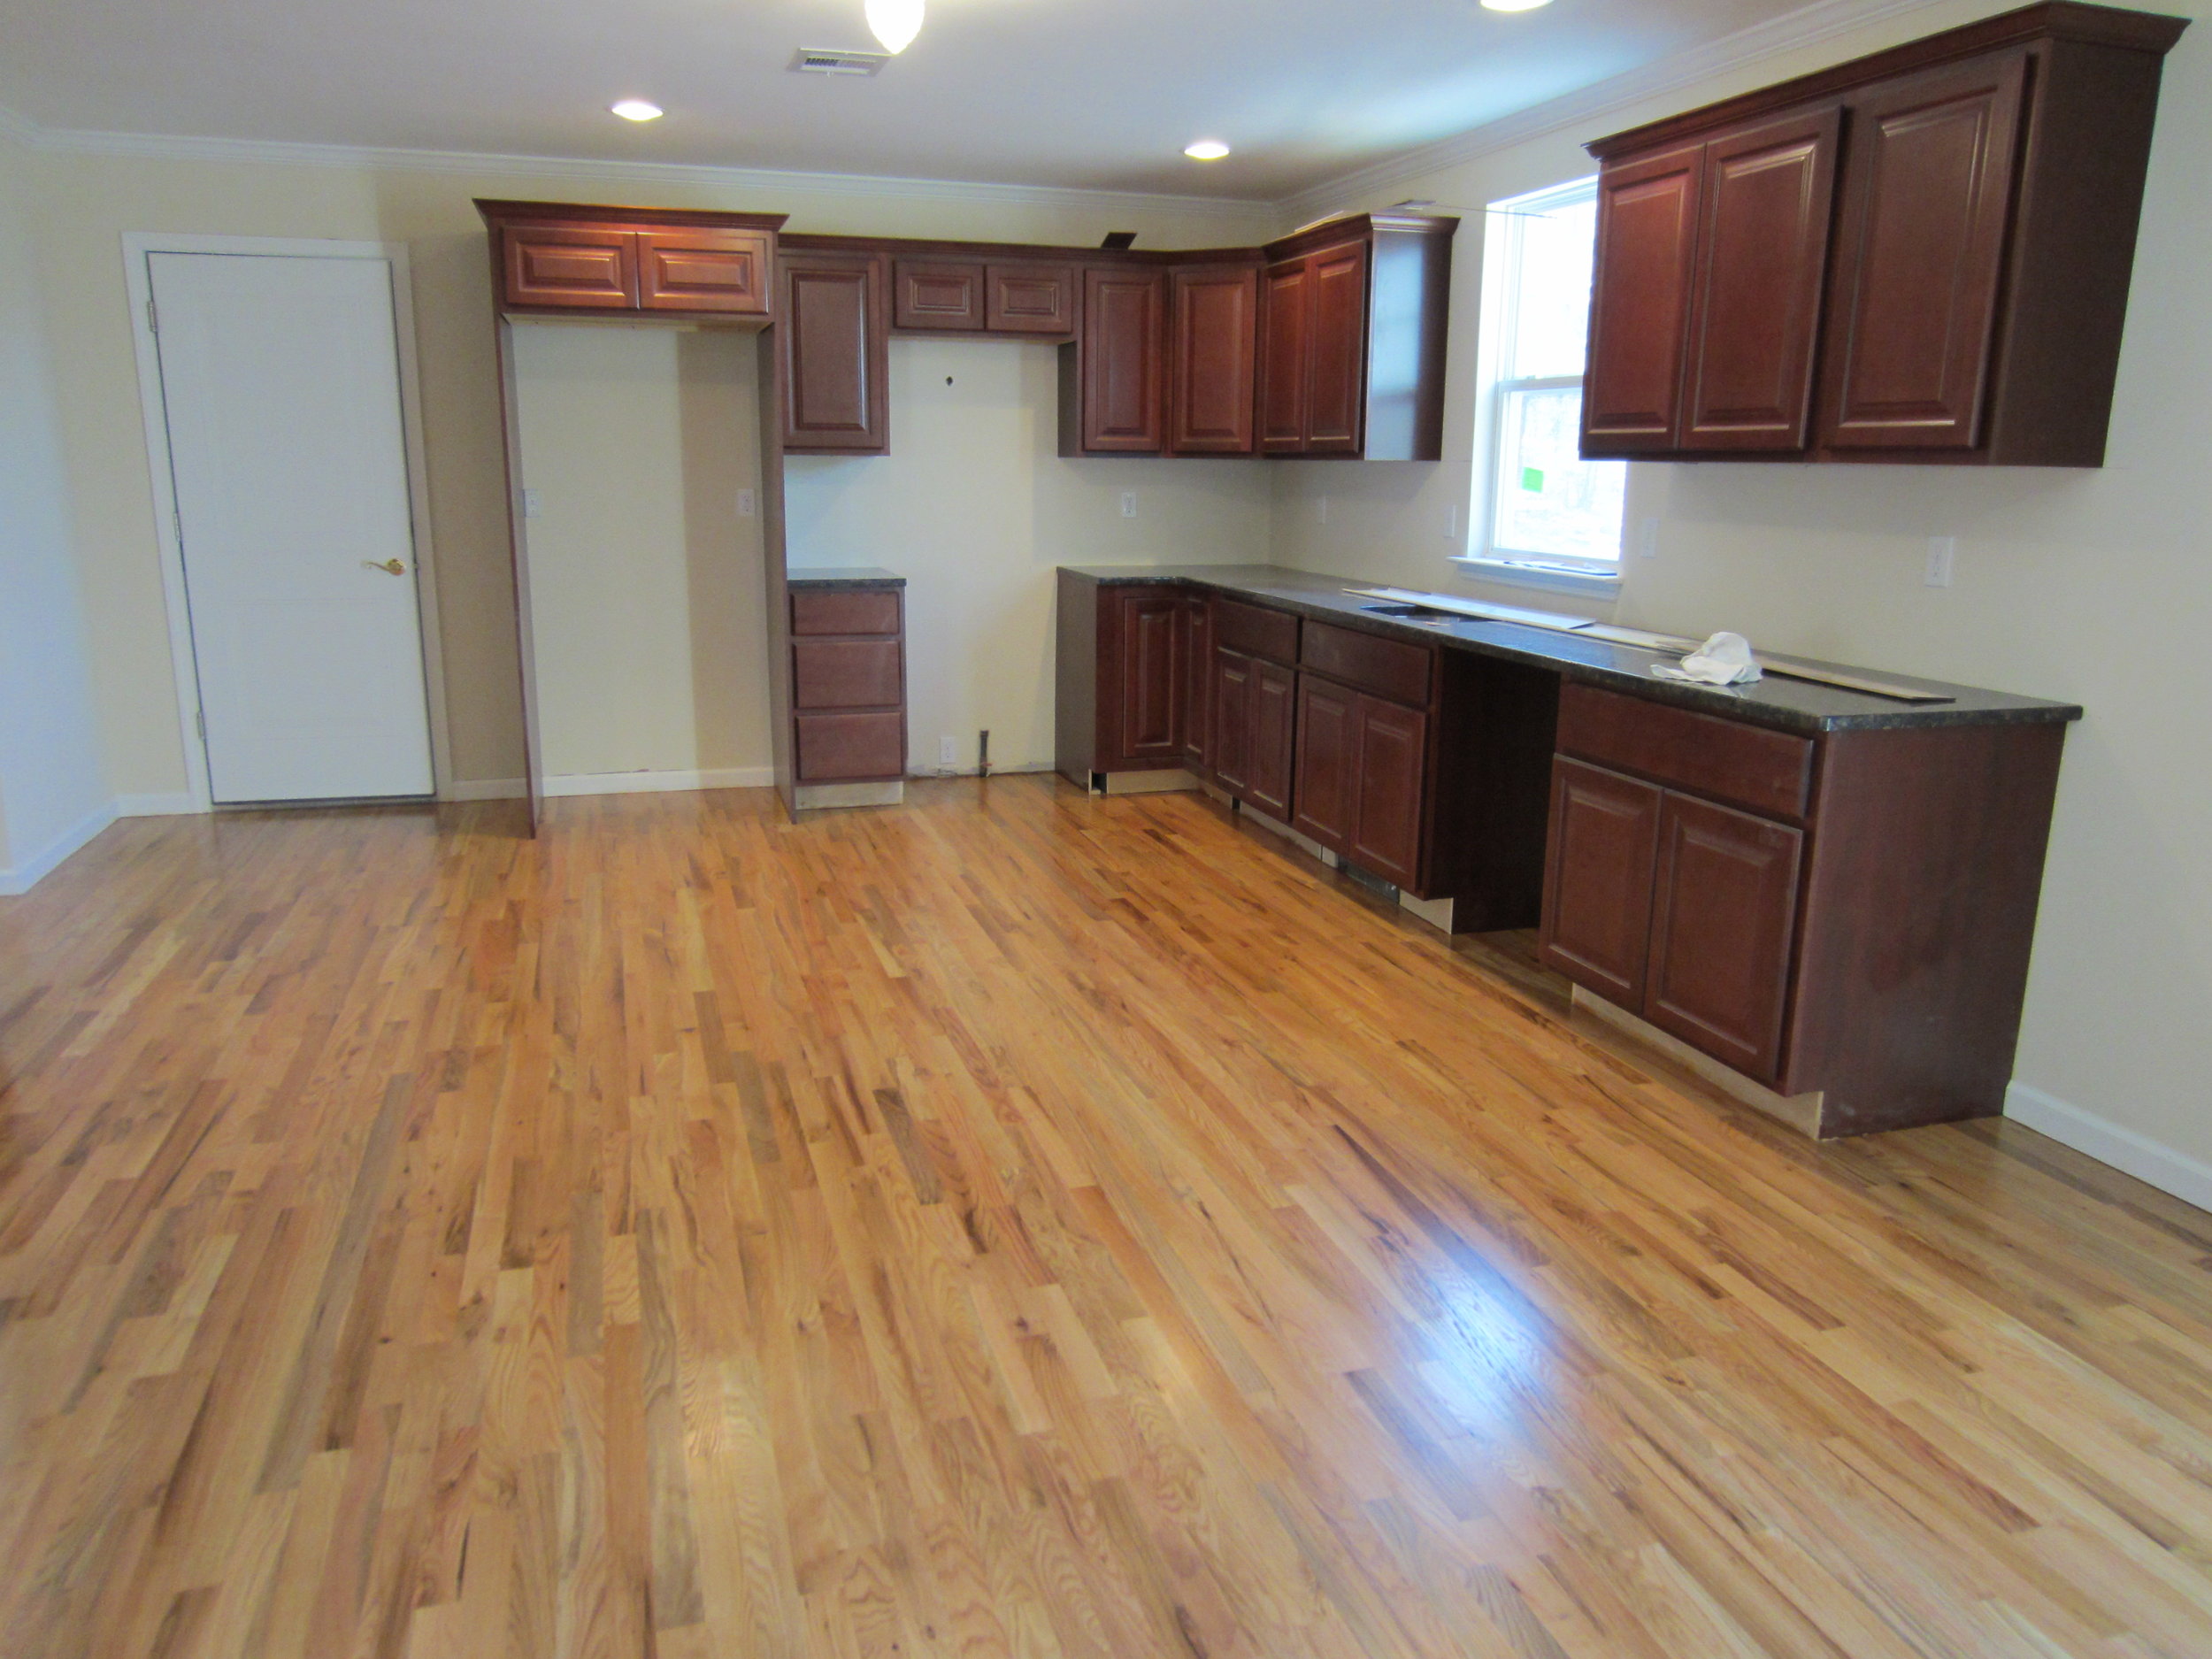
New gray floors + old orange cabinets
We strongly suggest changing trim and cabinets to complement the cool tones of a gray wood floor!
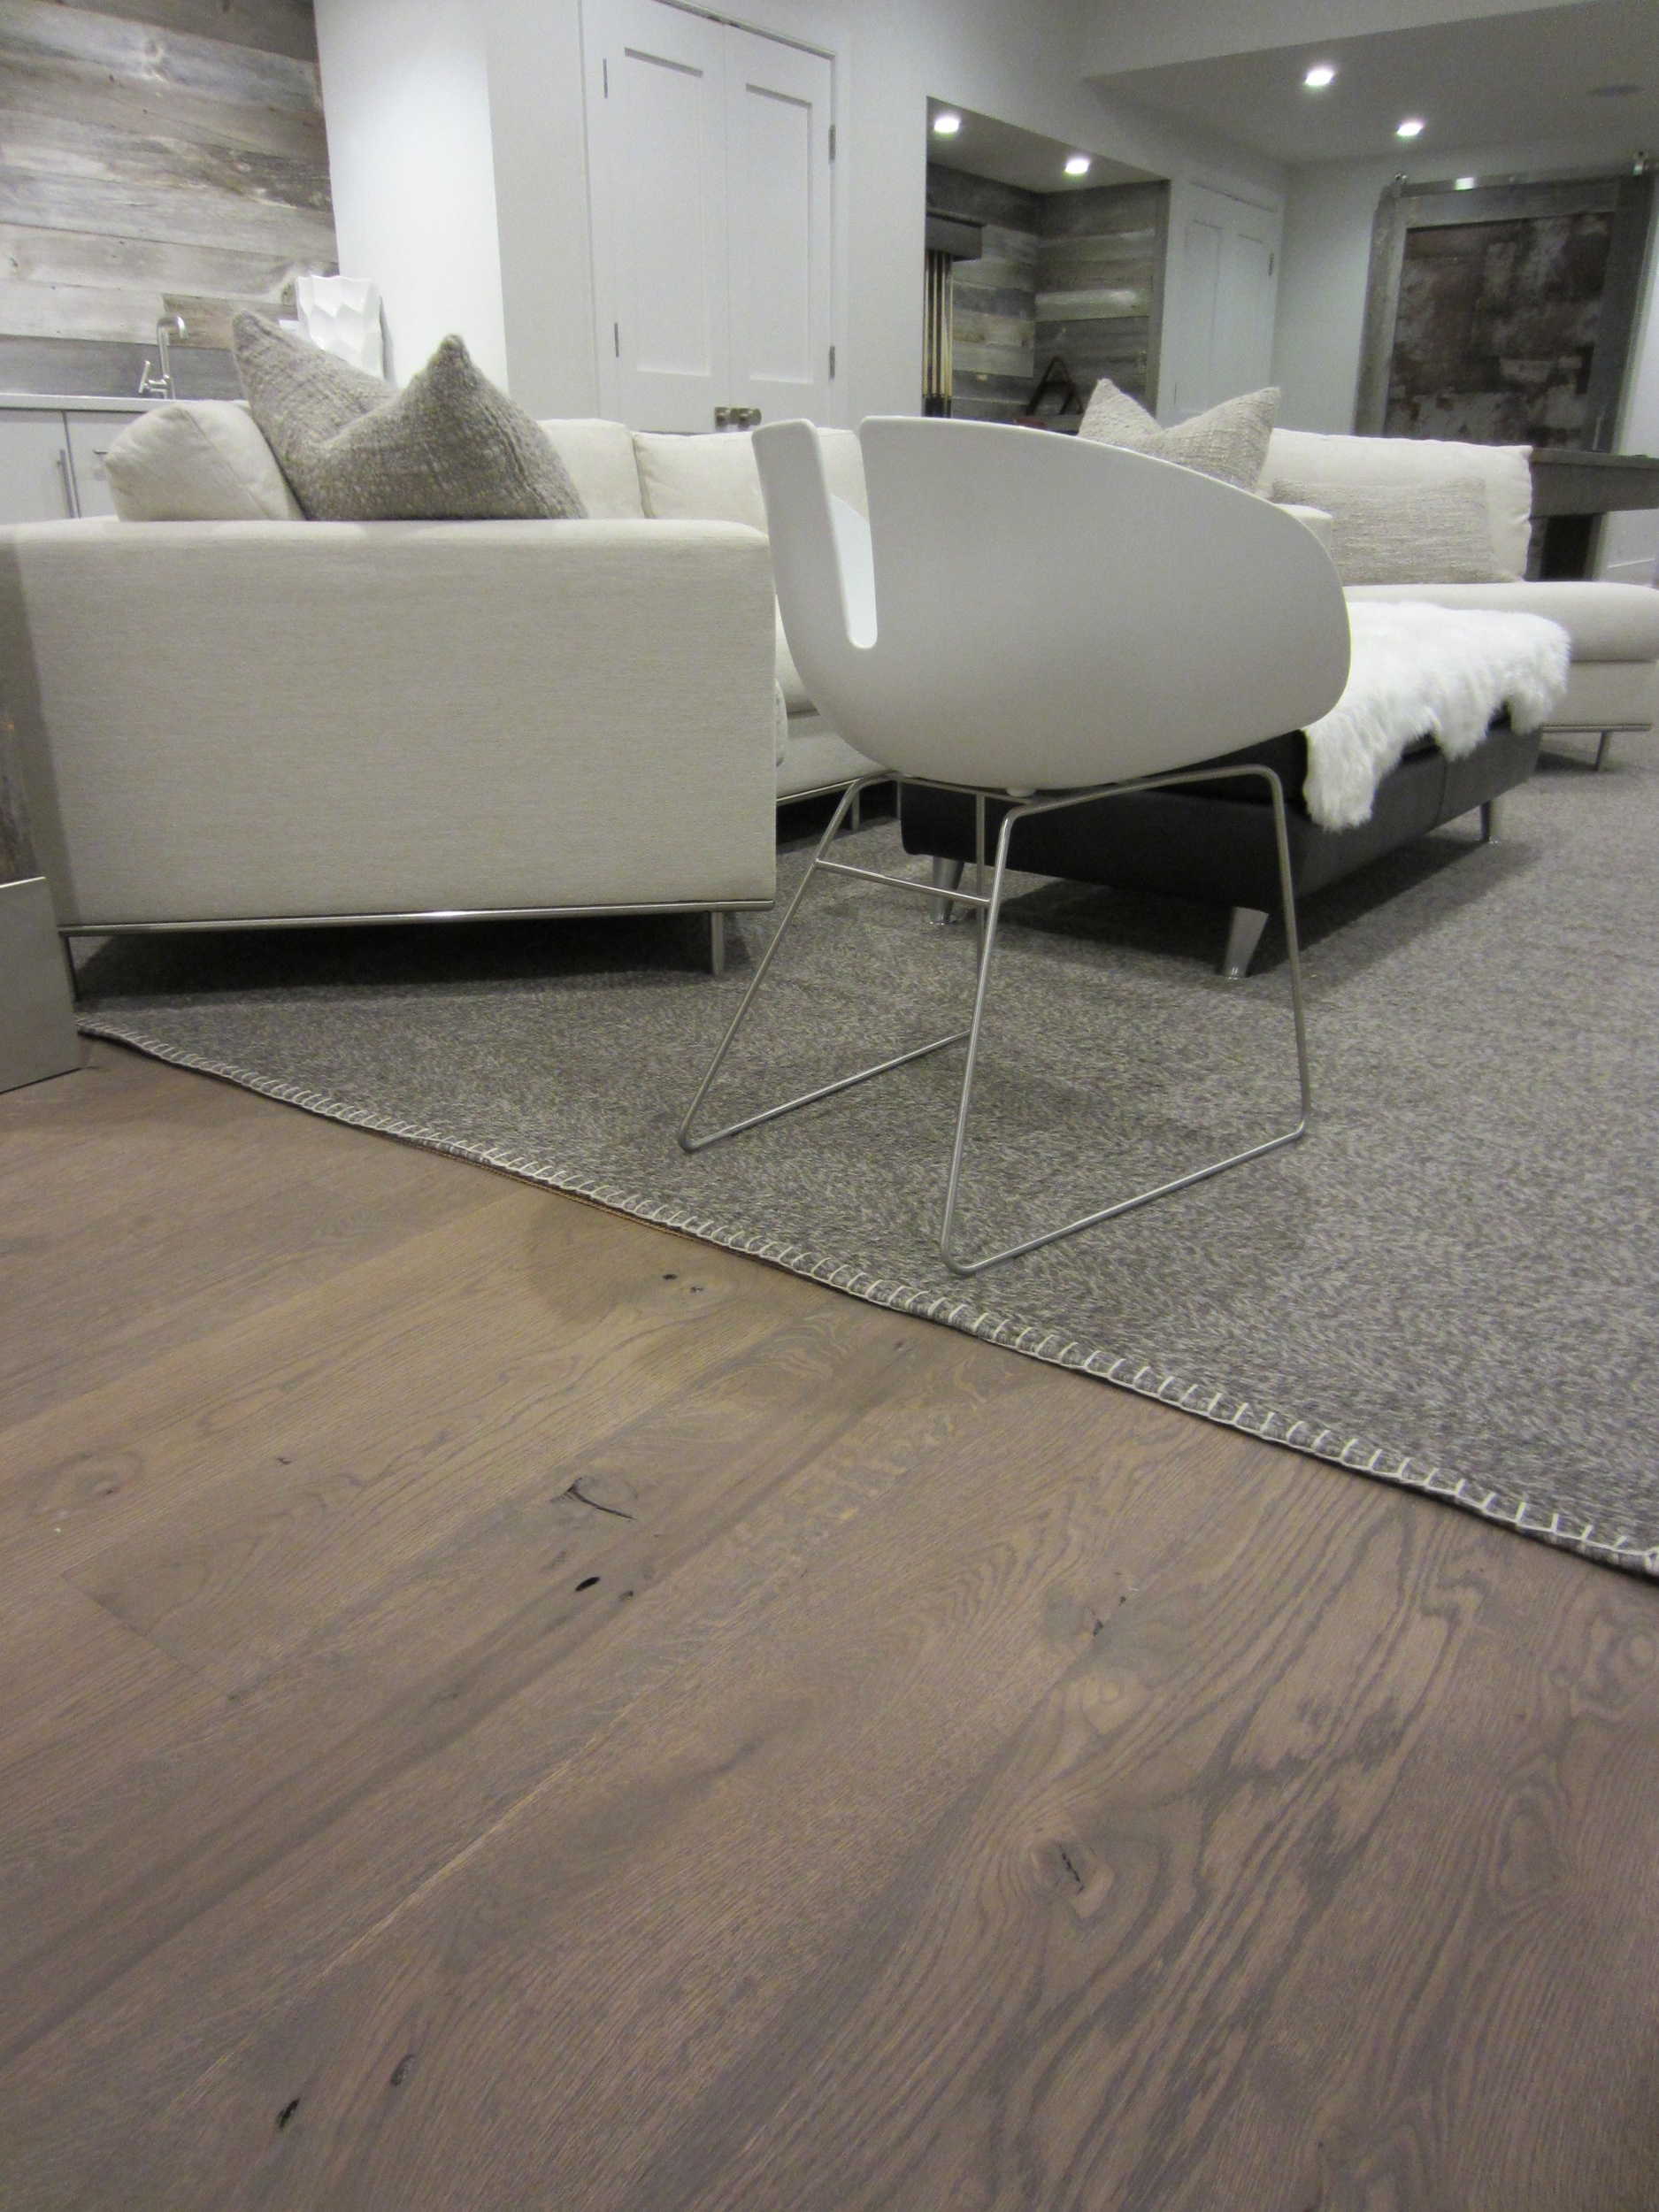
Grey floors have more of an urban, modern look…think funky furniture or minimalist contemporary styles. Turquoise and sky blue work very well with gray, and also white can be very striking depending on the shade of gray. All pastel colors are lovely with gray tones, and really pop against the cool contrast of a gray wood floor.


Do you have an urban style? Gray floors will work very well with an industrial-themed décor or concrete walls. Think exposed duct work or pipes, metal furniture, exposed brick…gray hardwood floors of medium to darker grays work very well with this type of style.
Wide plank grey floors of any shade are a fantastic base for a very modern or minimalist style. Simple, compact furniture looks great on top of wide plank floors. Thin metal or wooden legs on furniture are very striking on top of wide planks. Wide plank rustic (lots of knots and color variation) light gray floors also work very well for a modern farmhouse décor. Choose a warm or light gray to complement this modern rustic style.
As I say to our clients all the time, personal taste is unique to you! At the end of the day, if you just love gray floors, you will love them with any décor. Make sure to pick a reputable contractor. Grey floors are not easy to achieve…the sanding must be perfect and the color is not an easy one to apply evenly. Grey floors are very striking and cool. All your friends will compliment you on your awesome, unique style. In our opinion, hardwood floors that have been stained gray are here to stay!
To piggyback off of my last blog post about gapping, this posting is about wood floor acclimation. Acclimation is defined as the following: the process or result of becoming accustomed to a new climate or to new conditions.

When we are planning a new wood floor installation, we have to plan for sufficient acclimation time for the wood flooring. Why do we do this?
Wood is HYGROSCOPIC. A hygroscopic material is one that readily attracts water from its surroundings, through either absorption or adsorption, with the adsorbing substance becoming physically changed somewhat. When water vapor is absorbed, the water molecules are taken into the molecules of the substance, and changes such as increased volume can occur.
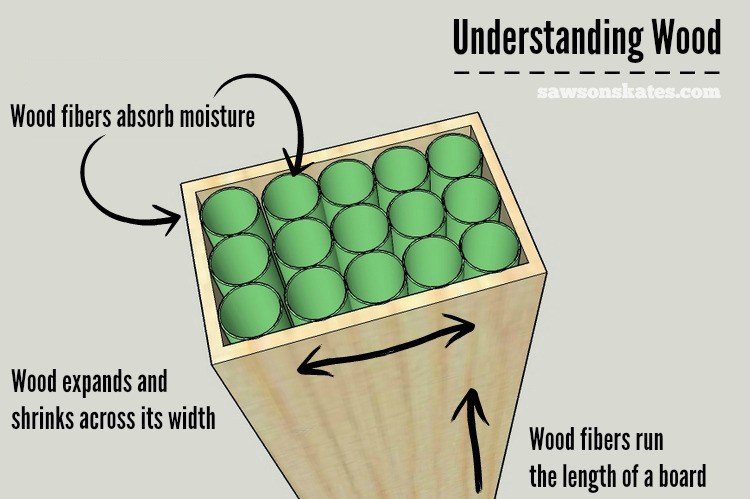
This is an easy-to-understand illustration of wood boards, which are hygroscopic, and how they expand and contract. Thank you, Sawsonskates!
So what are the key takeaways here for your hardwood floors?
When hygroscopic materials attract and hold water molecules from the surrounding environment, they become physically changed.
Physically changed? Think about how some of your doors get “stuck” in summer time when the air is humid. The dimensions of the door have literally increased because the moisture content of the wood has increased. The increased moisture content has caused the wood to swell, and this swelling has caused a measurable change in the size of the door - it has expanded. The same thing happens with the individual boards in your hardwood floor. With the drier and less humid air of winter, the moisture content of the wood will decrease. The cells of the wood will contract, and this causes the wood to shrink up. That same door that sticks a little bit in the summer will open just fine in the winter.

Ever notice how a paperback cover curls up in the summer or when conditions are more humid? That’s right…the paper on the inside of the cover has expanded because of the water molecules it has absorbed!
What does all of this have to do with acclimation?
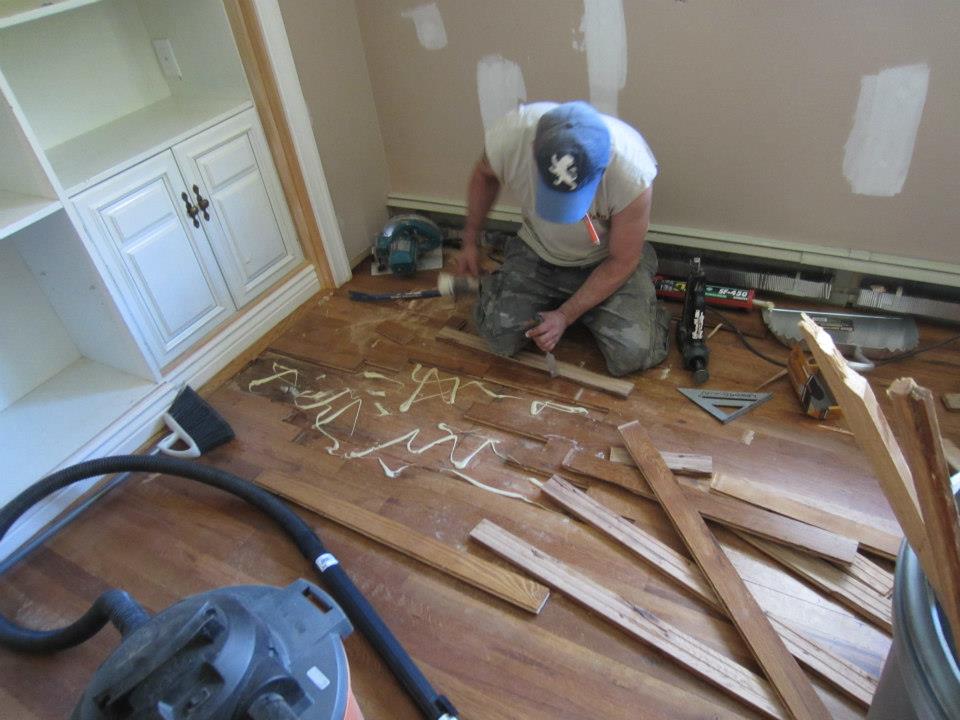
If you deliver a wood floor from a climate-controlled mill into a new home in August with no working climate controls and the hardwood flooring sits there for a week, it will swell up with the increase in moisture content. The boards will be expand and swell to their fullest capacity, their greatest dimensional measurements. Then they are installed in this state. What do you think will happen once the air conditioning is turned on and the relative humidity of the home is significantly reduced? That’s right, the boards will begin to lose their high moisture content and will shrink up/contract. You will be left with gapping (spaces between floor boards) that will never completely go away.
Here’s another scenario: If you bring a wood floor from a climate-controlled mill into an unocuppied home with no heating in January and it sits there for a week, it will shrink up because the moisture content of the wood will decrease with the dry air of the environment. The hardwood floor boards will be in their most contracted state and smallest dimensions. If they are installed in this condition, what do you think can happen once it is a more humid time of year? With a big increase in moisture content, the boards may swell and expand. Since they were installed in a contracted state, this swelling can put pressure on the floor because it is now a floor literally too big for the space. This may lead to cupping, crowning, or buckling.


Acclimation is the process of conditioning your hardwood floor boards so that their naturally occurring moisture content is at or near the moisture content of the environment where they will be installed. Acclimation gives your new floor boards the proper time to adjust to the climate conditions of your home. When we install a wood floor, we want to make sure that it is not moving. That the wood has reached its equilibrium moisture content (EMC): neither losing nor gaining moisture and is stable. As reviewed earlier, installing your wood floor before it has acclimated and reached EMC can lead to a host of problems down the road as displayed in the photos above.
So what do we advise for proper acclimation? To start, the conditions of the home must be closed and stable. Climate controls must be on and running for at least 5 days before wood flooring arrives. If climate controls are not installed and waiting for them would hold up a construction timeline, temporary AC or heating units can be used in particular situations to mimic the conditions of a normal, occupied home, but we would strongly prefer to avoid this situation if possible. Climate controls must be on and running during acclimation, during the installation, and after the floor is installed. Remember, once you make the commitment to having wood flooring in your home, you are making the commitment to keeping the conditions stable inside your home!
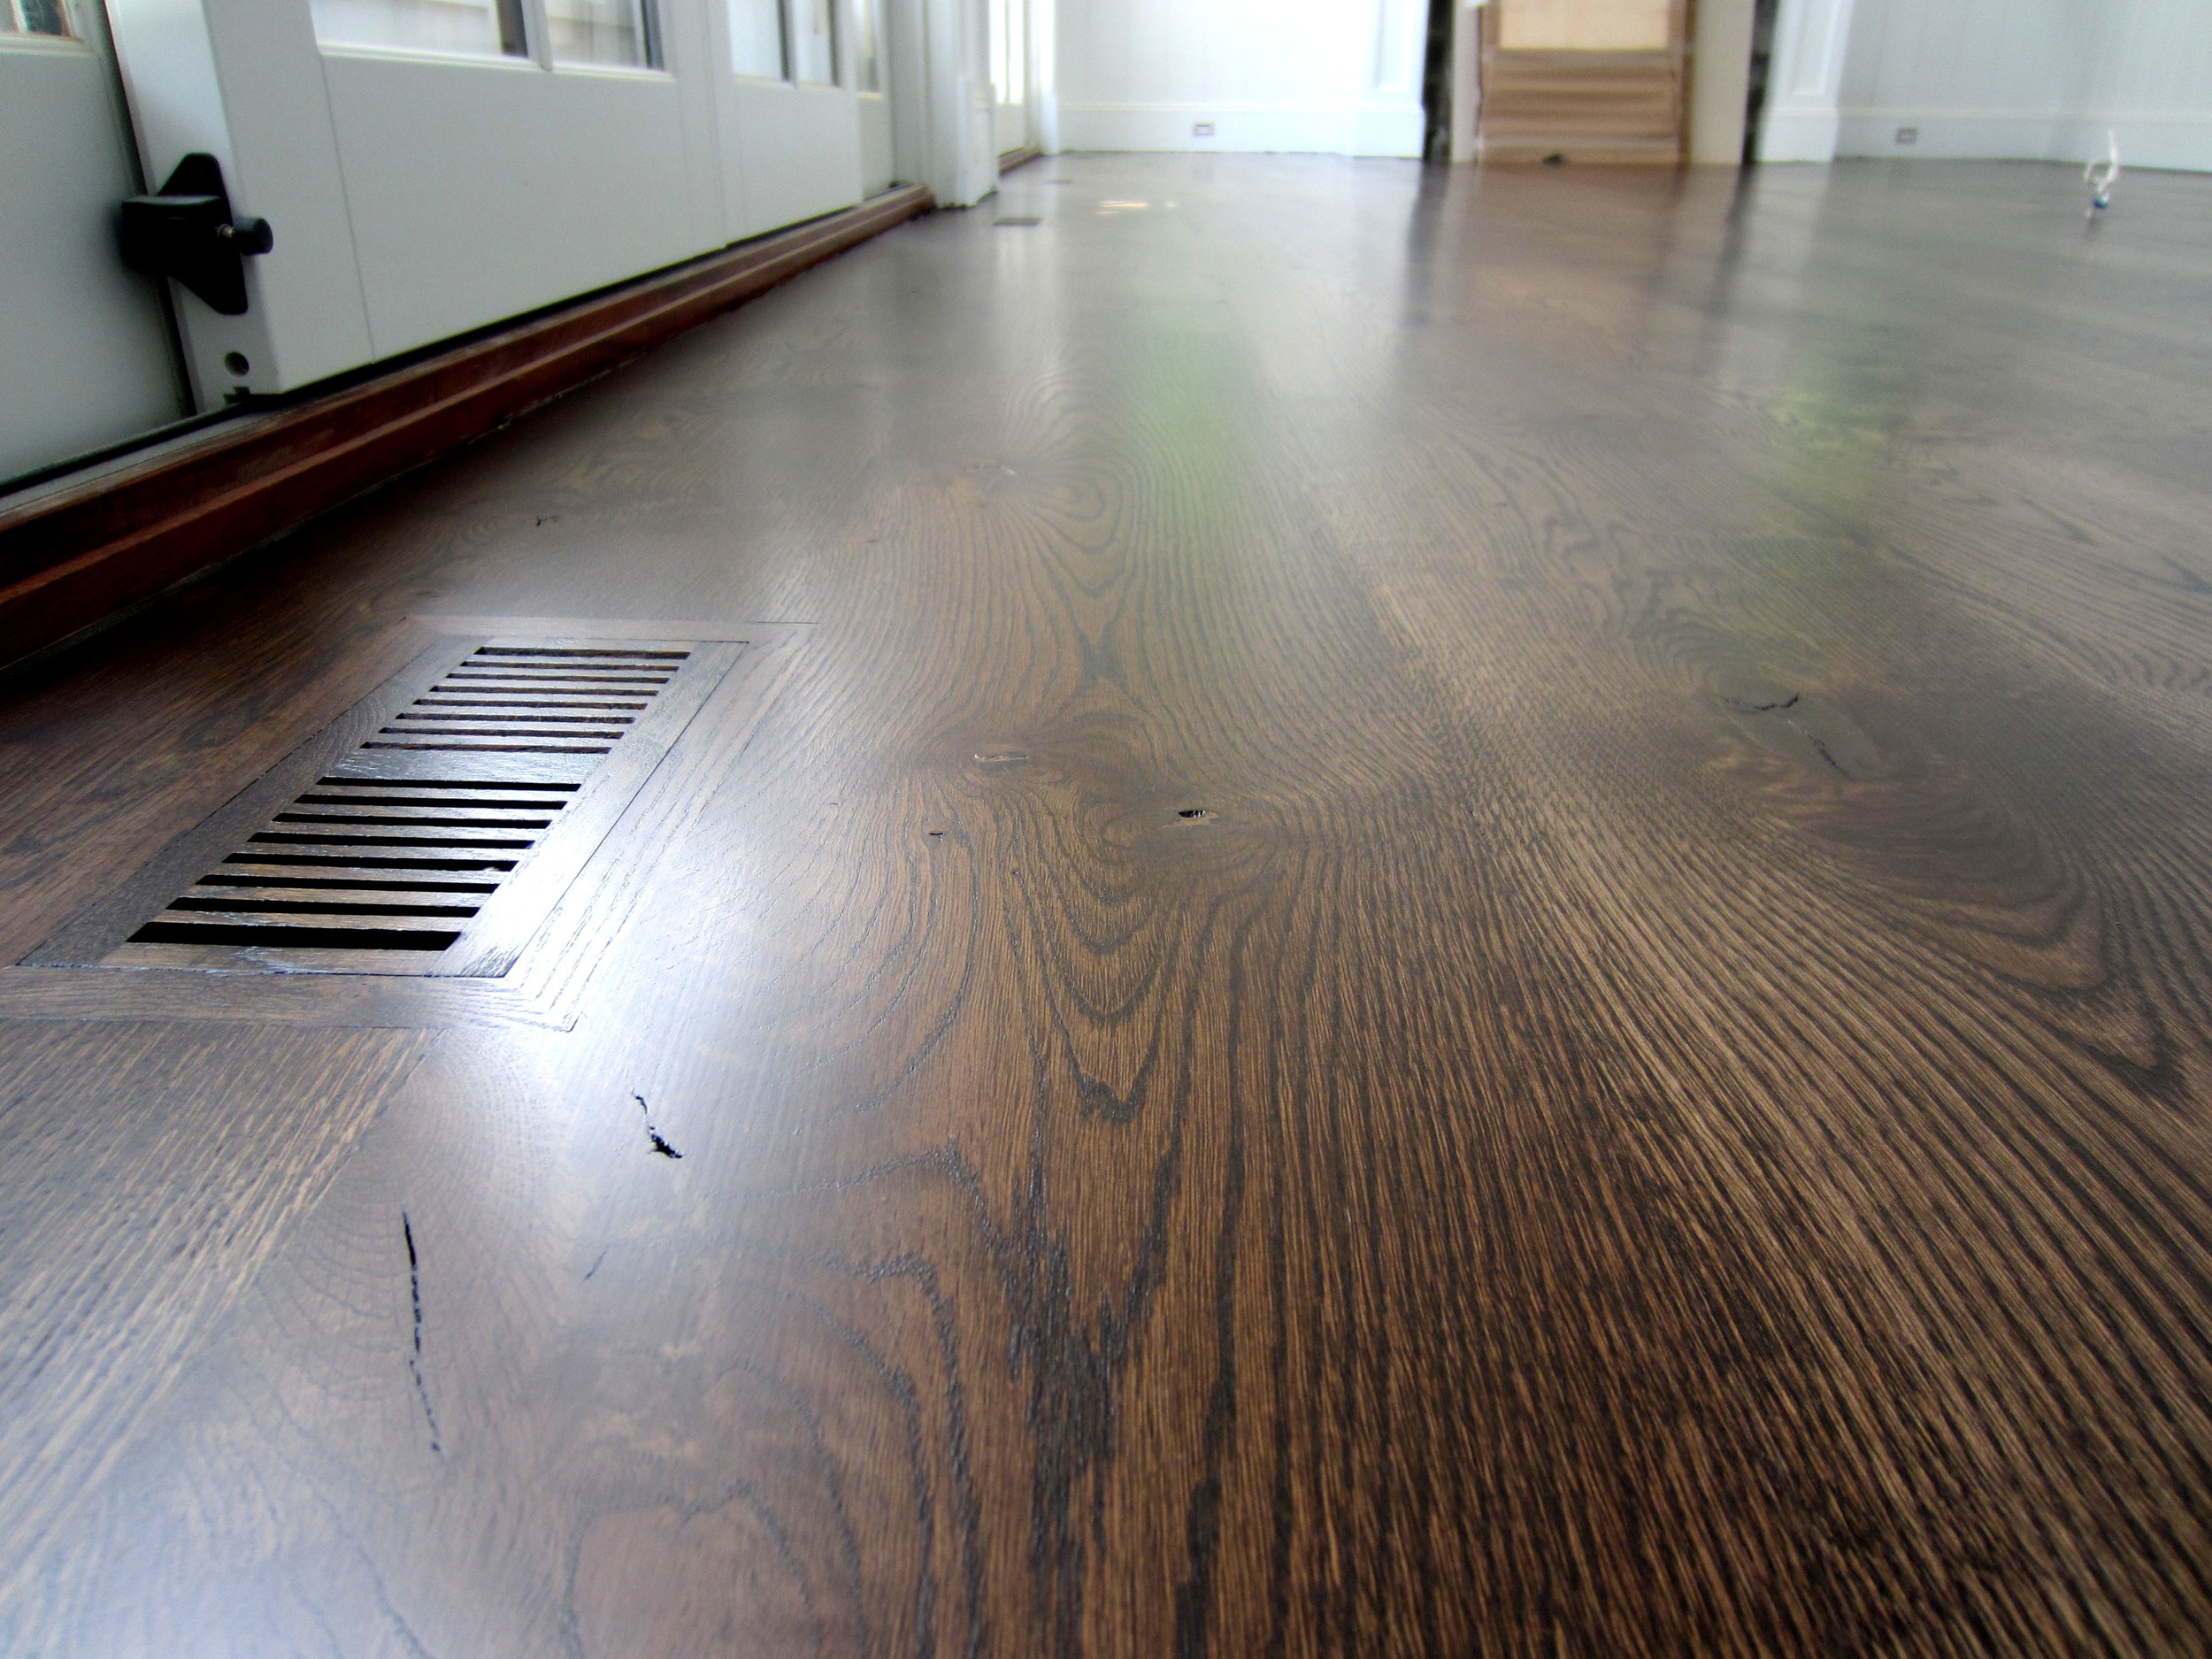
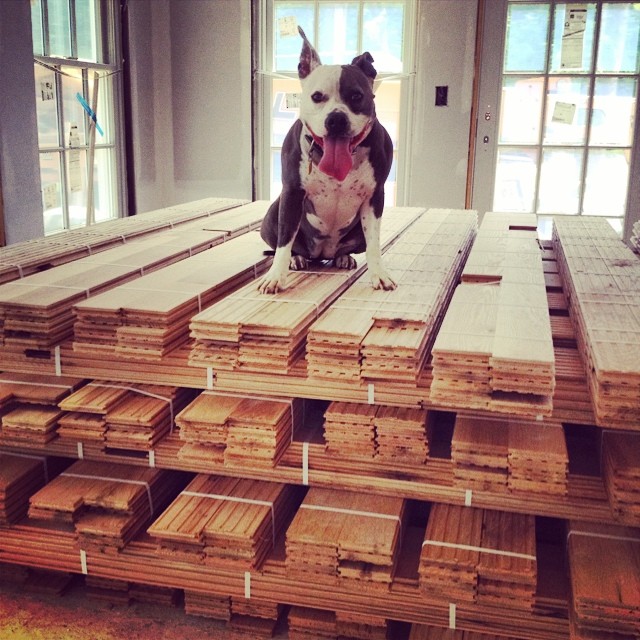
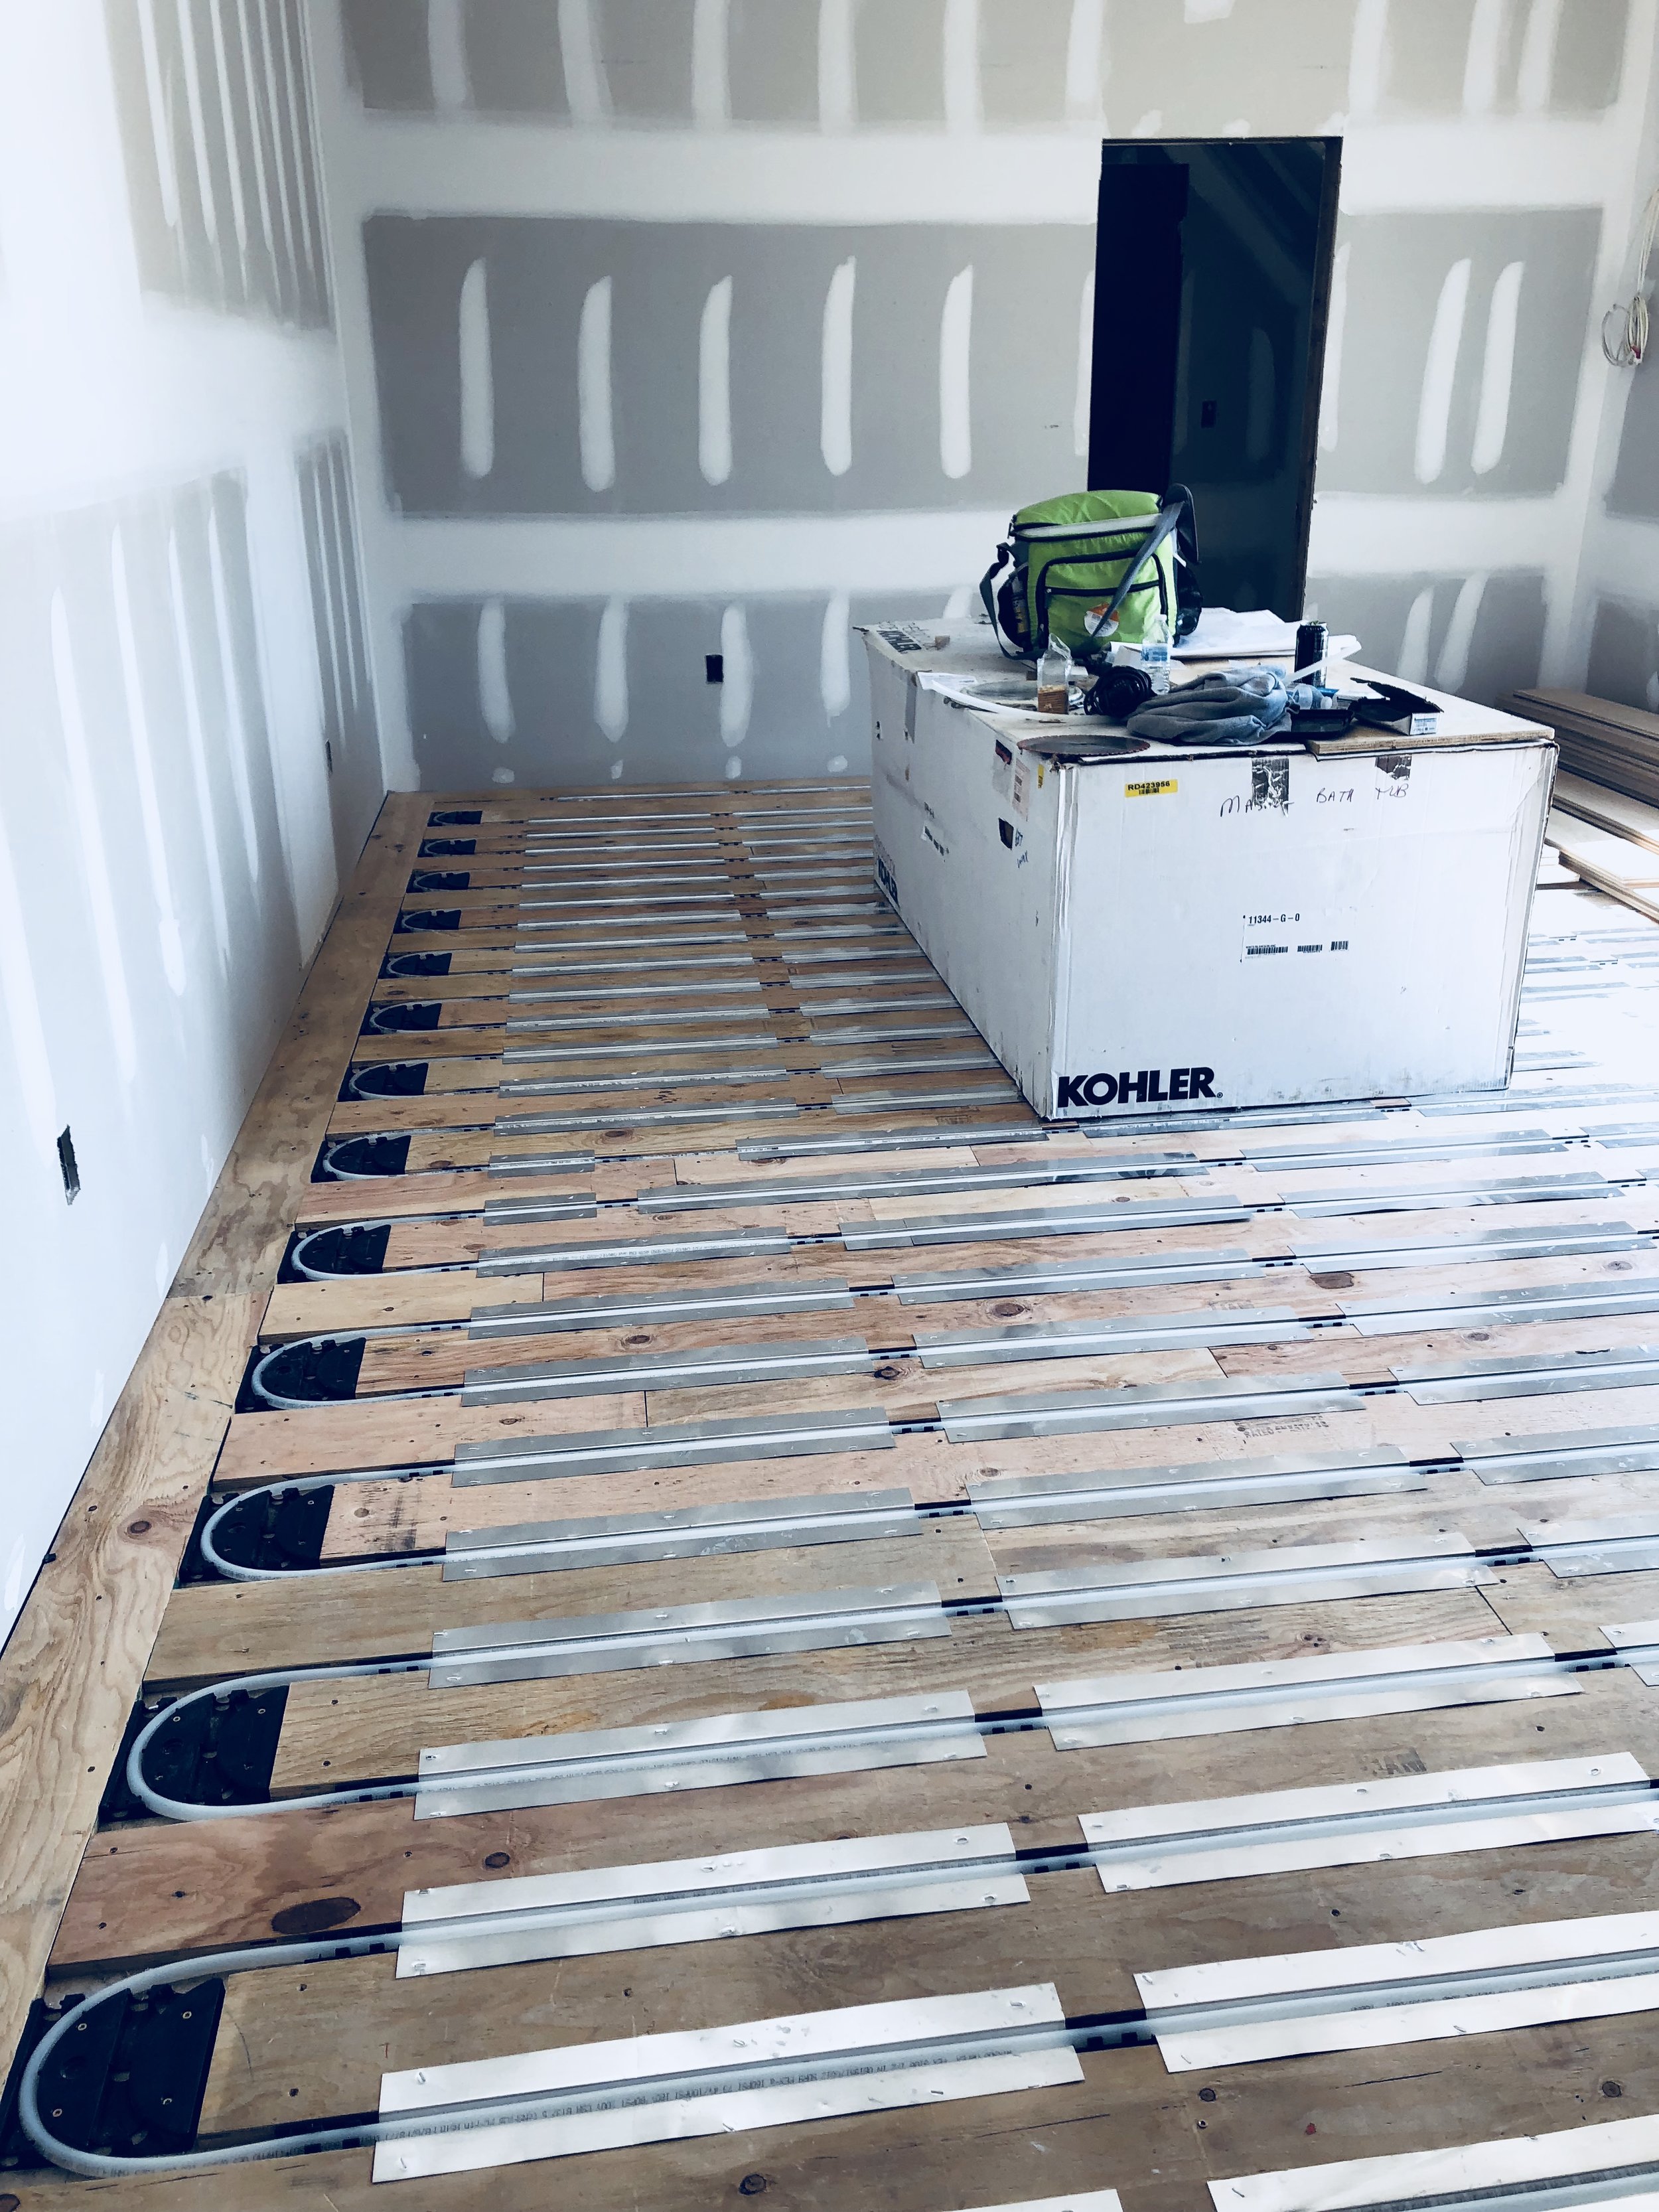
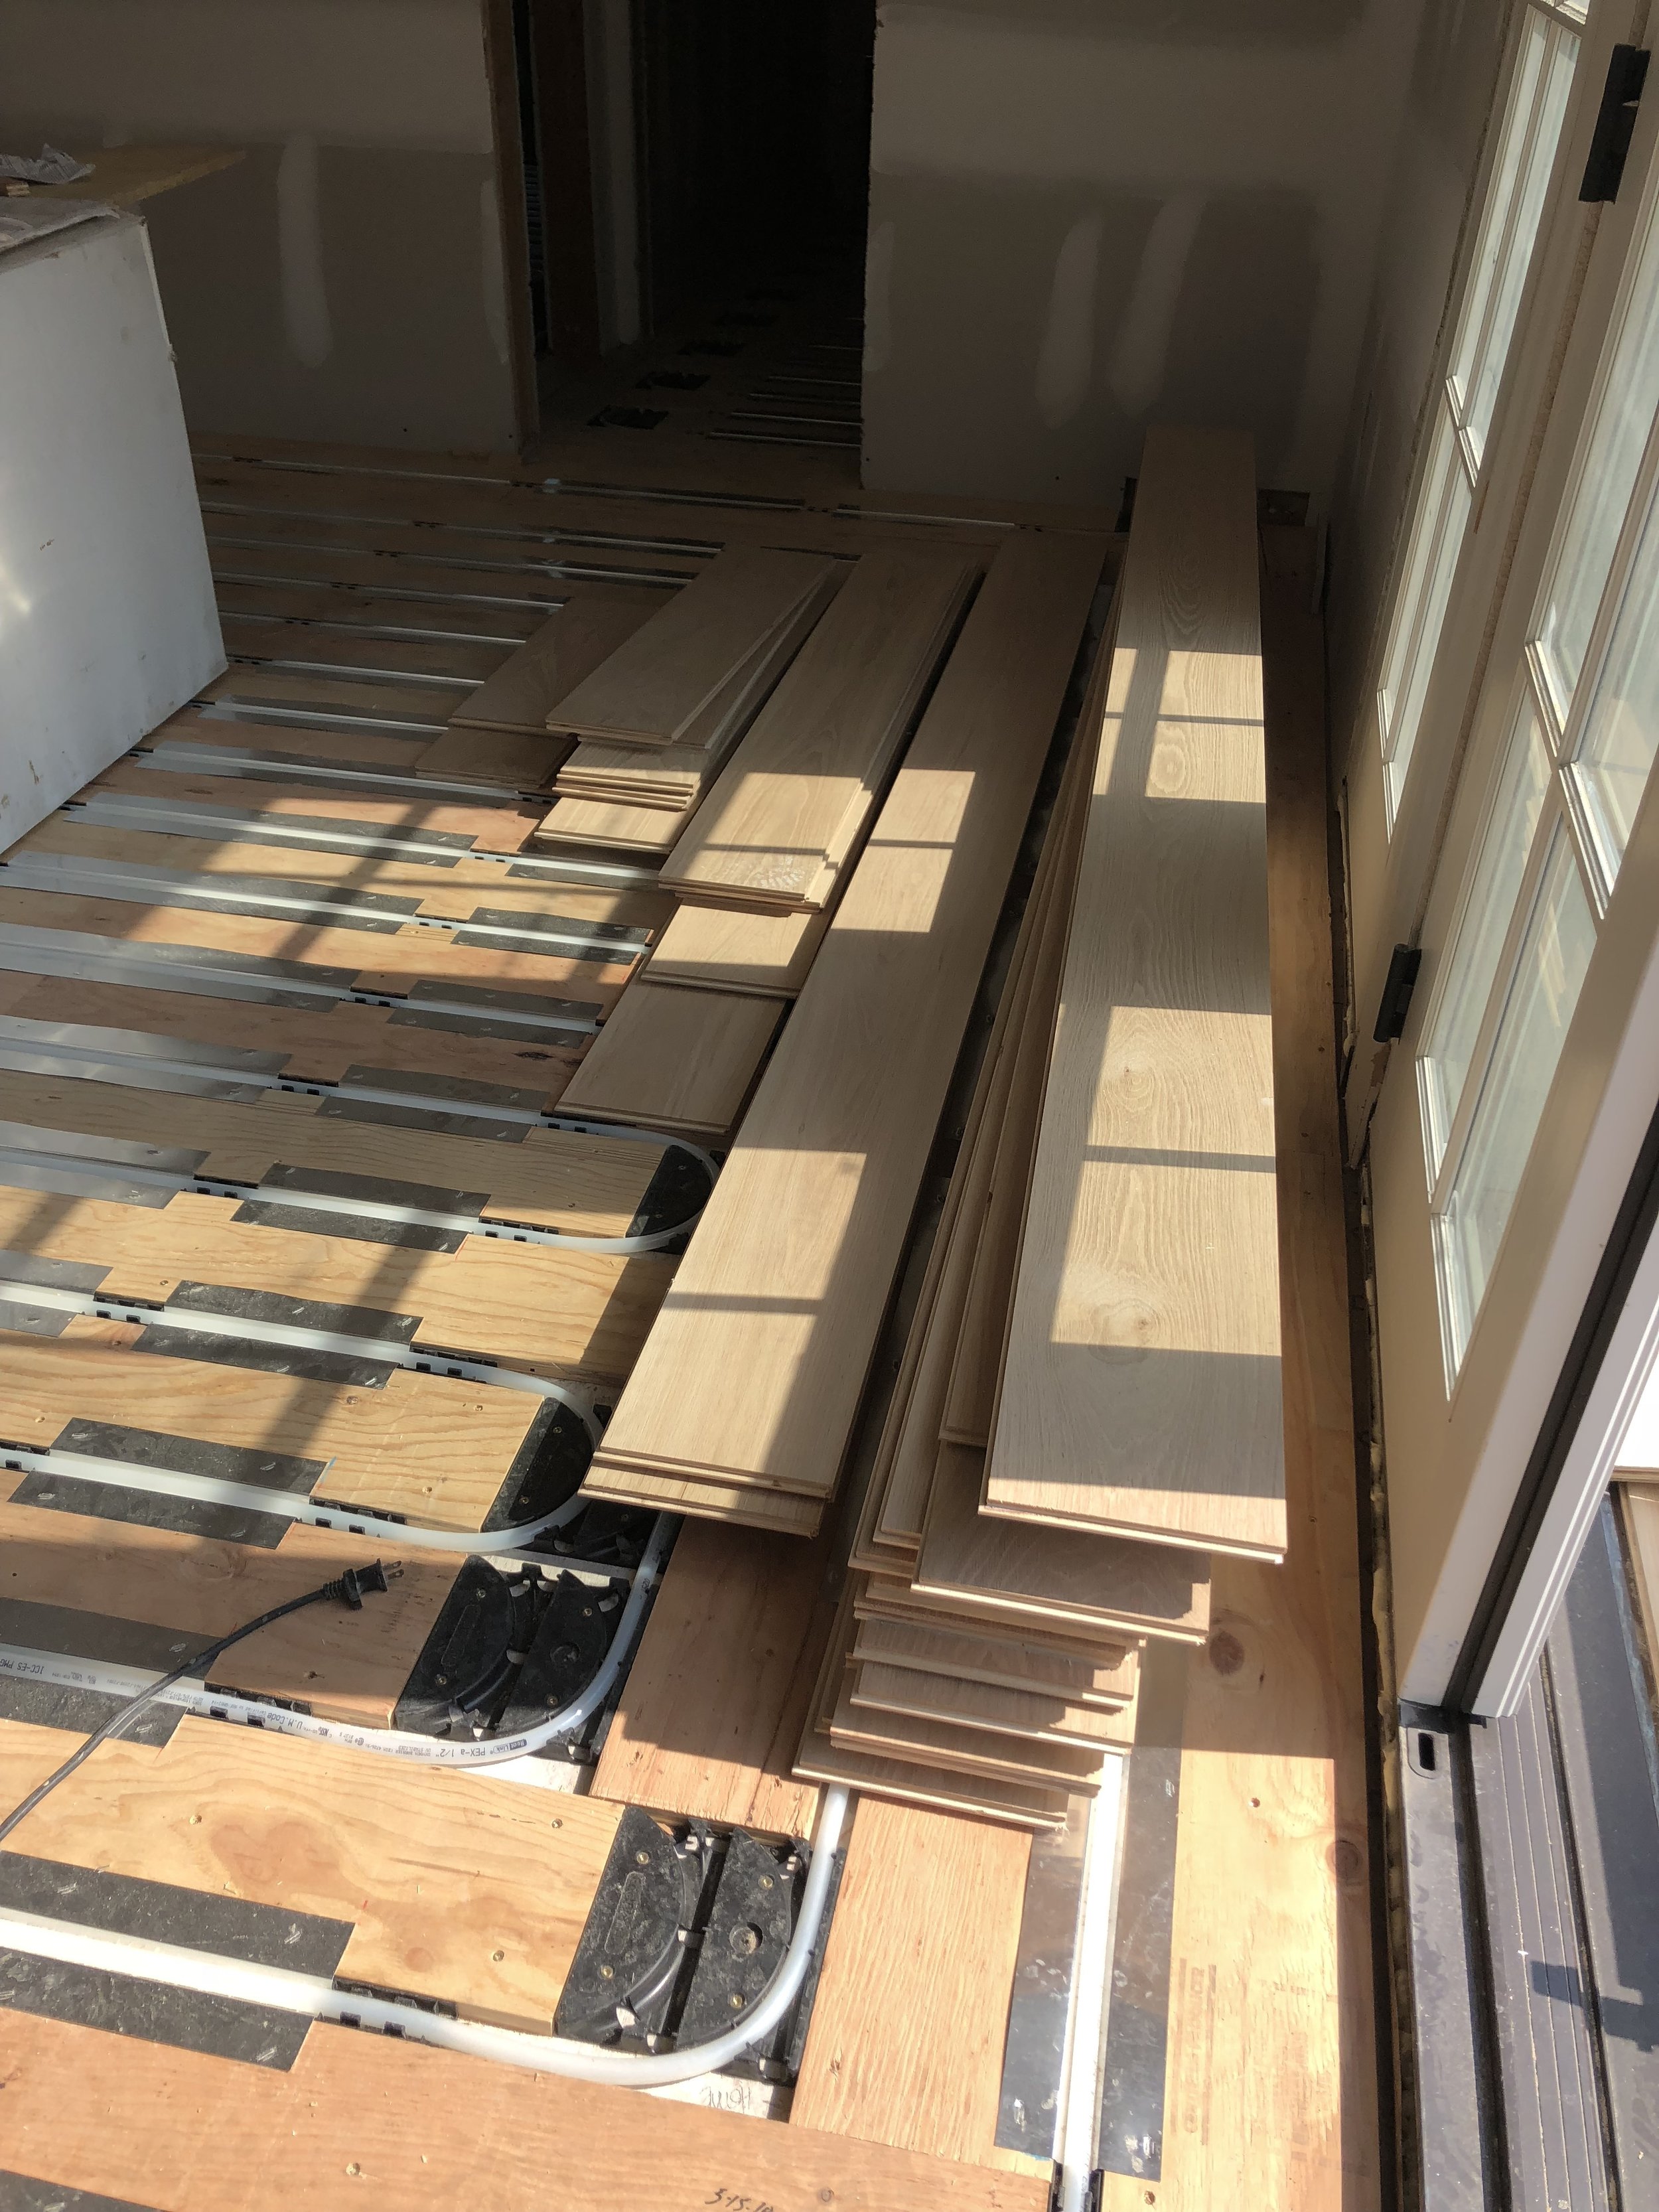
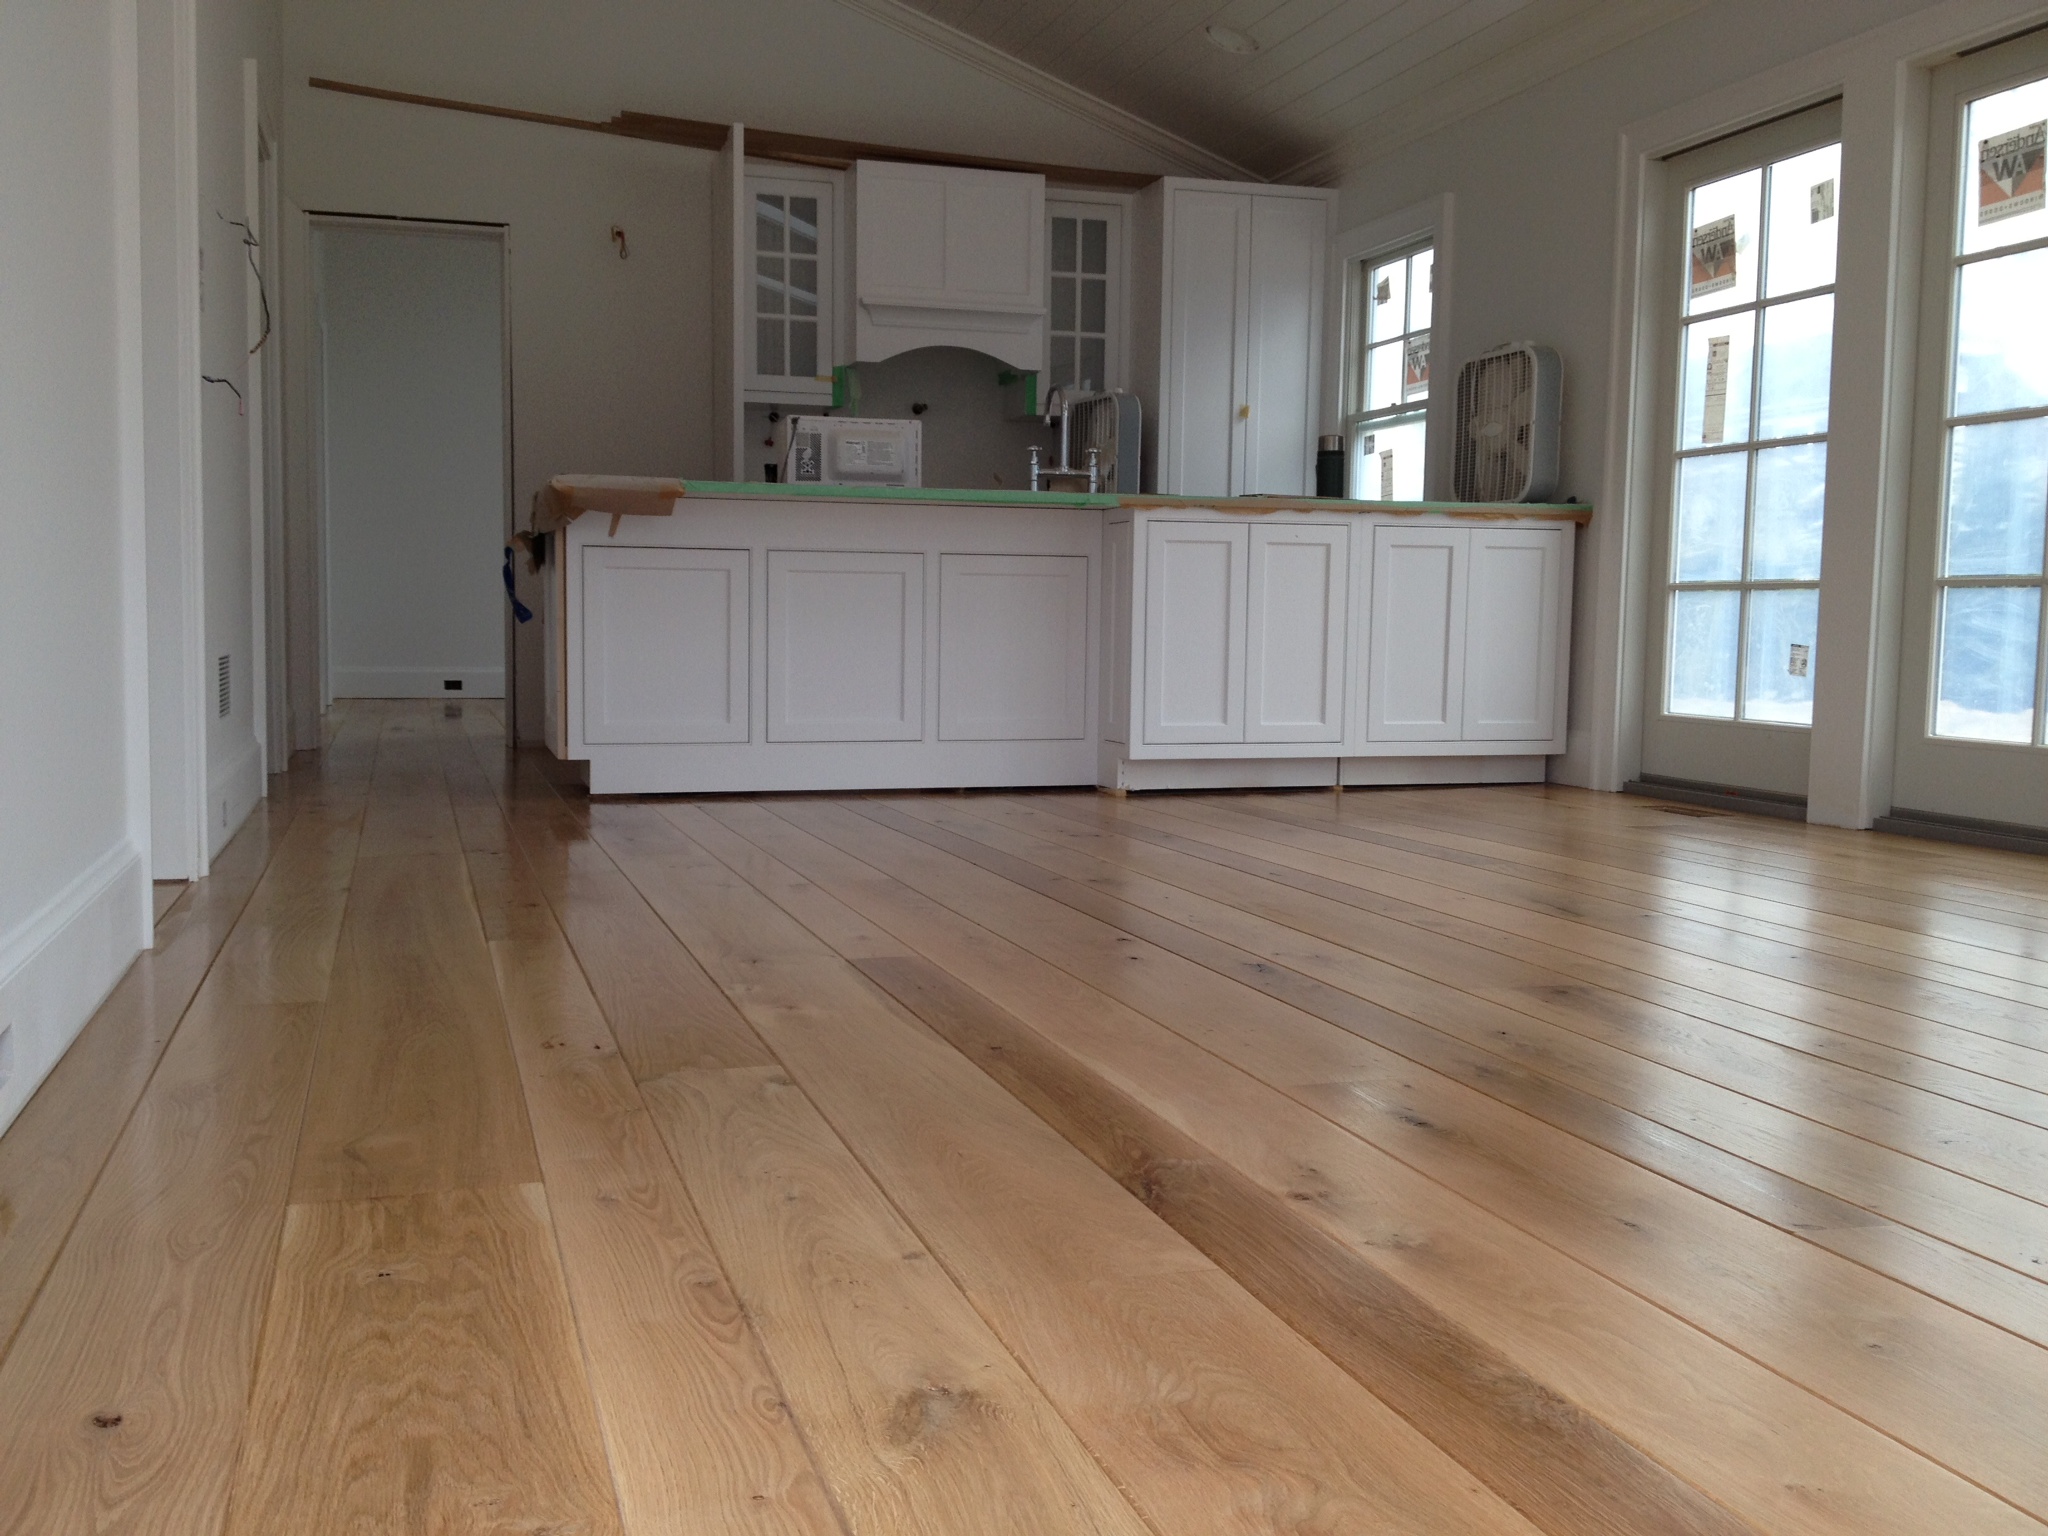
The beautiful 10” Country Grade White Oak hardwood floors above are from a project we installed & finished in Amagansett in 2017. The homeowners will need to keep the house btwn 60-80 degrees and relative humidity levels at 35% - 55% if they want their floors to stay this way! Don’t forget that the wider you go with plank size, the more the boards expand and contract with environmental changes!
When the flooring is delivered, both the flooring and the subfloor should be tested for moisture content. Flooring should be spaced apart adequately so that air can circulate all around the boards. Remember that narrow planks “move” (expand and contract) less than wider planks. Here in the Northeast, with strip (narrower) flooring, you can stack bundles spaced about a foot apart and cross-stacked in a tic-tac-toe pattern so that air can circulate through the bundles. The wider you go with the board size, the more critical is proper acclimation! Wider planks should be stacked with spacers in between each board so that air can circulate on all sides of the boards.
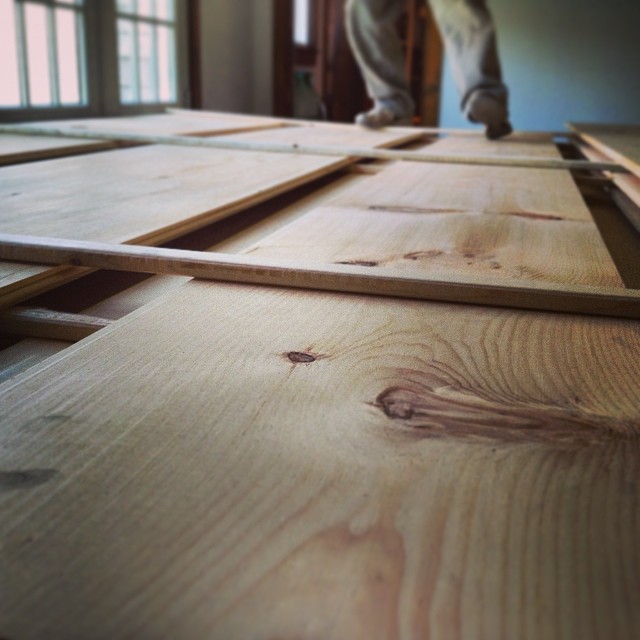
Wide plank Eastern White Pine being properly acclimated
Phil Valenti stands on top of acclimating wide plank Pine for an East Hampton project we installed & finished in 2015.
Jackie atop acclimating bundles in Bridgehampton
Boss lady checking moisture content in cross-stacked bundles acclimating at a project we installed & finished in 2016.
There is no set amount of time for acclimation. Acclimation should be based on moisture content as opposed to time. Generally speaking, you can plan for roughly 3-5 days for 2 ¼” flooring and increase that time period as you go up in board size. For 10” solid Oak planks, we would recommend no less than 2 full weeks for the wood flooring to acclimate properly, and be prepared for it to take longer than that! The plywood or T&G subfloor and hardwood flooring also need to be within the acceptable range. For strip flooring, up to a 4% difference in the MC of the flooring and the wood subfloor is acceptable for installation. For wider planks, the moisture content of the subfloor and hardwood flooring should be within 2%. So again, for the question of how long for proper acclimation? As long as it takes. A few days of being delayed in the construction timeline can save you a lot of time and agony later. It’s no fun to have to empty the house of furniture after you’ve moved it all in to repair a floor that is failing.

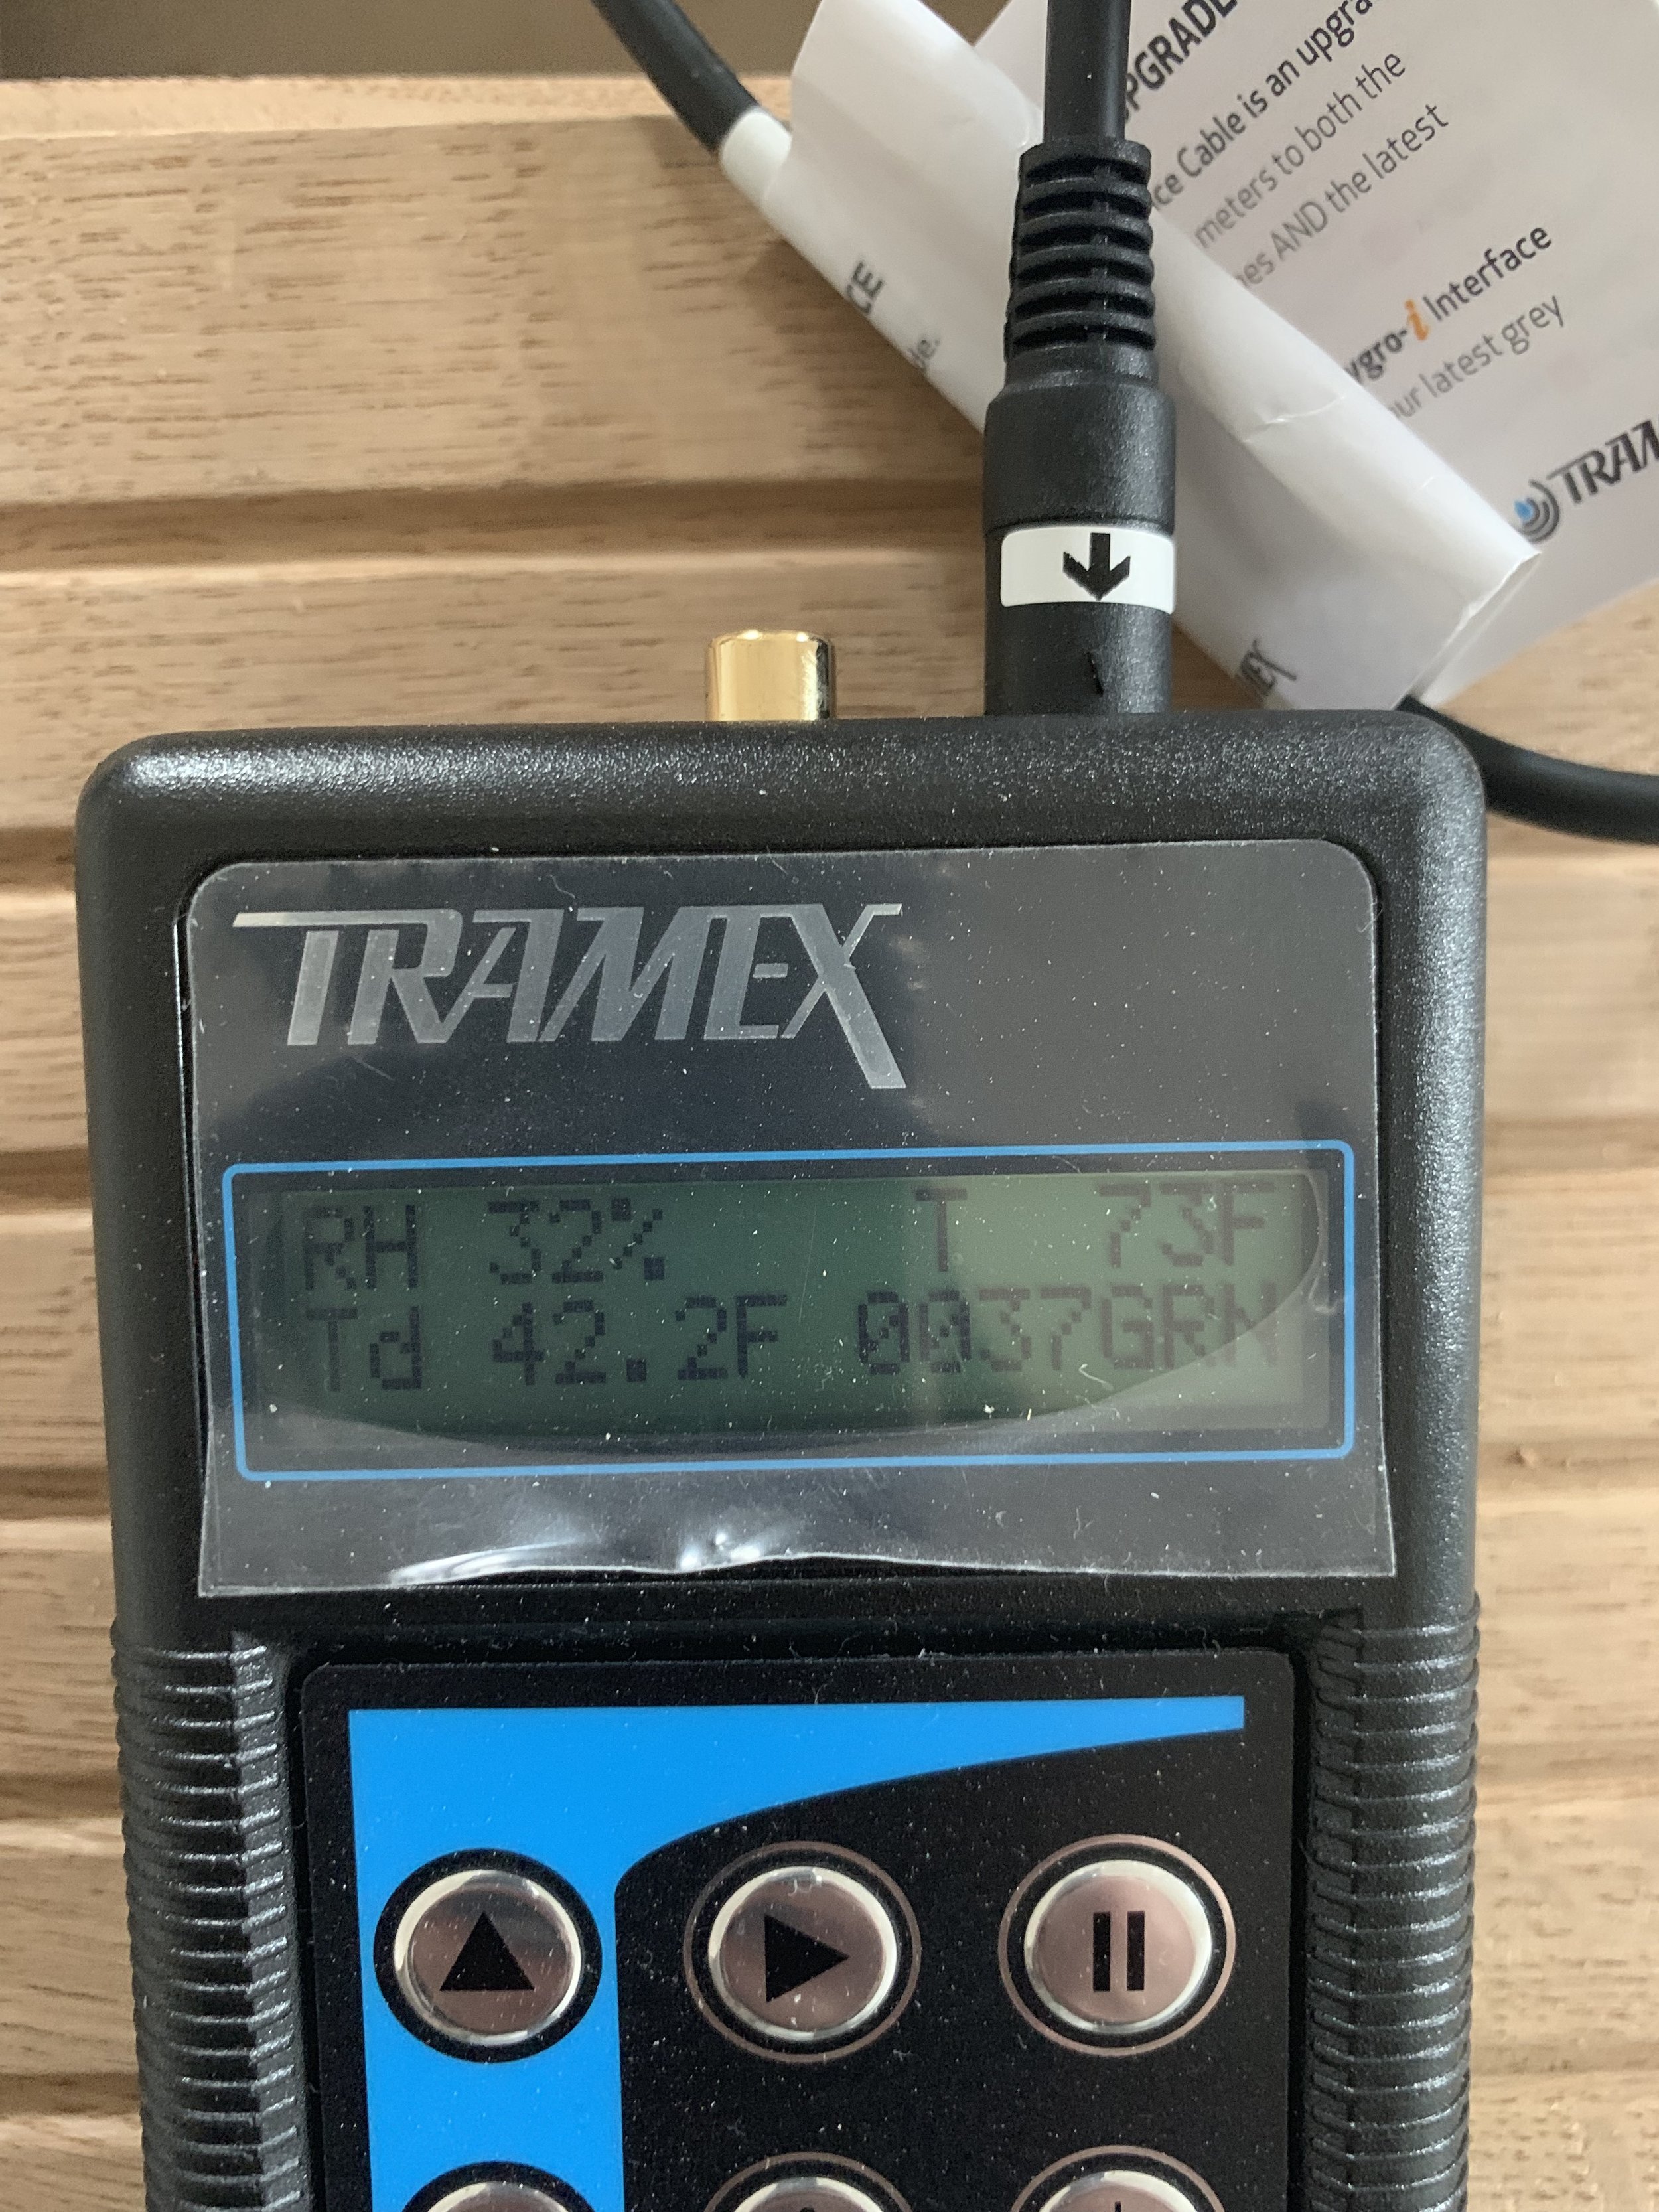
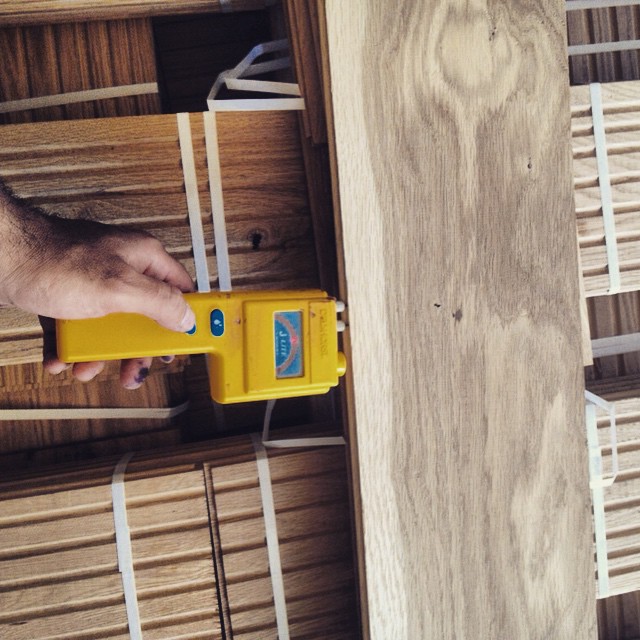
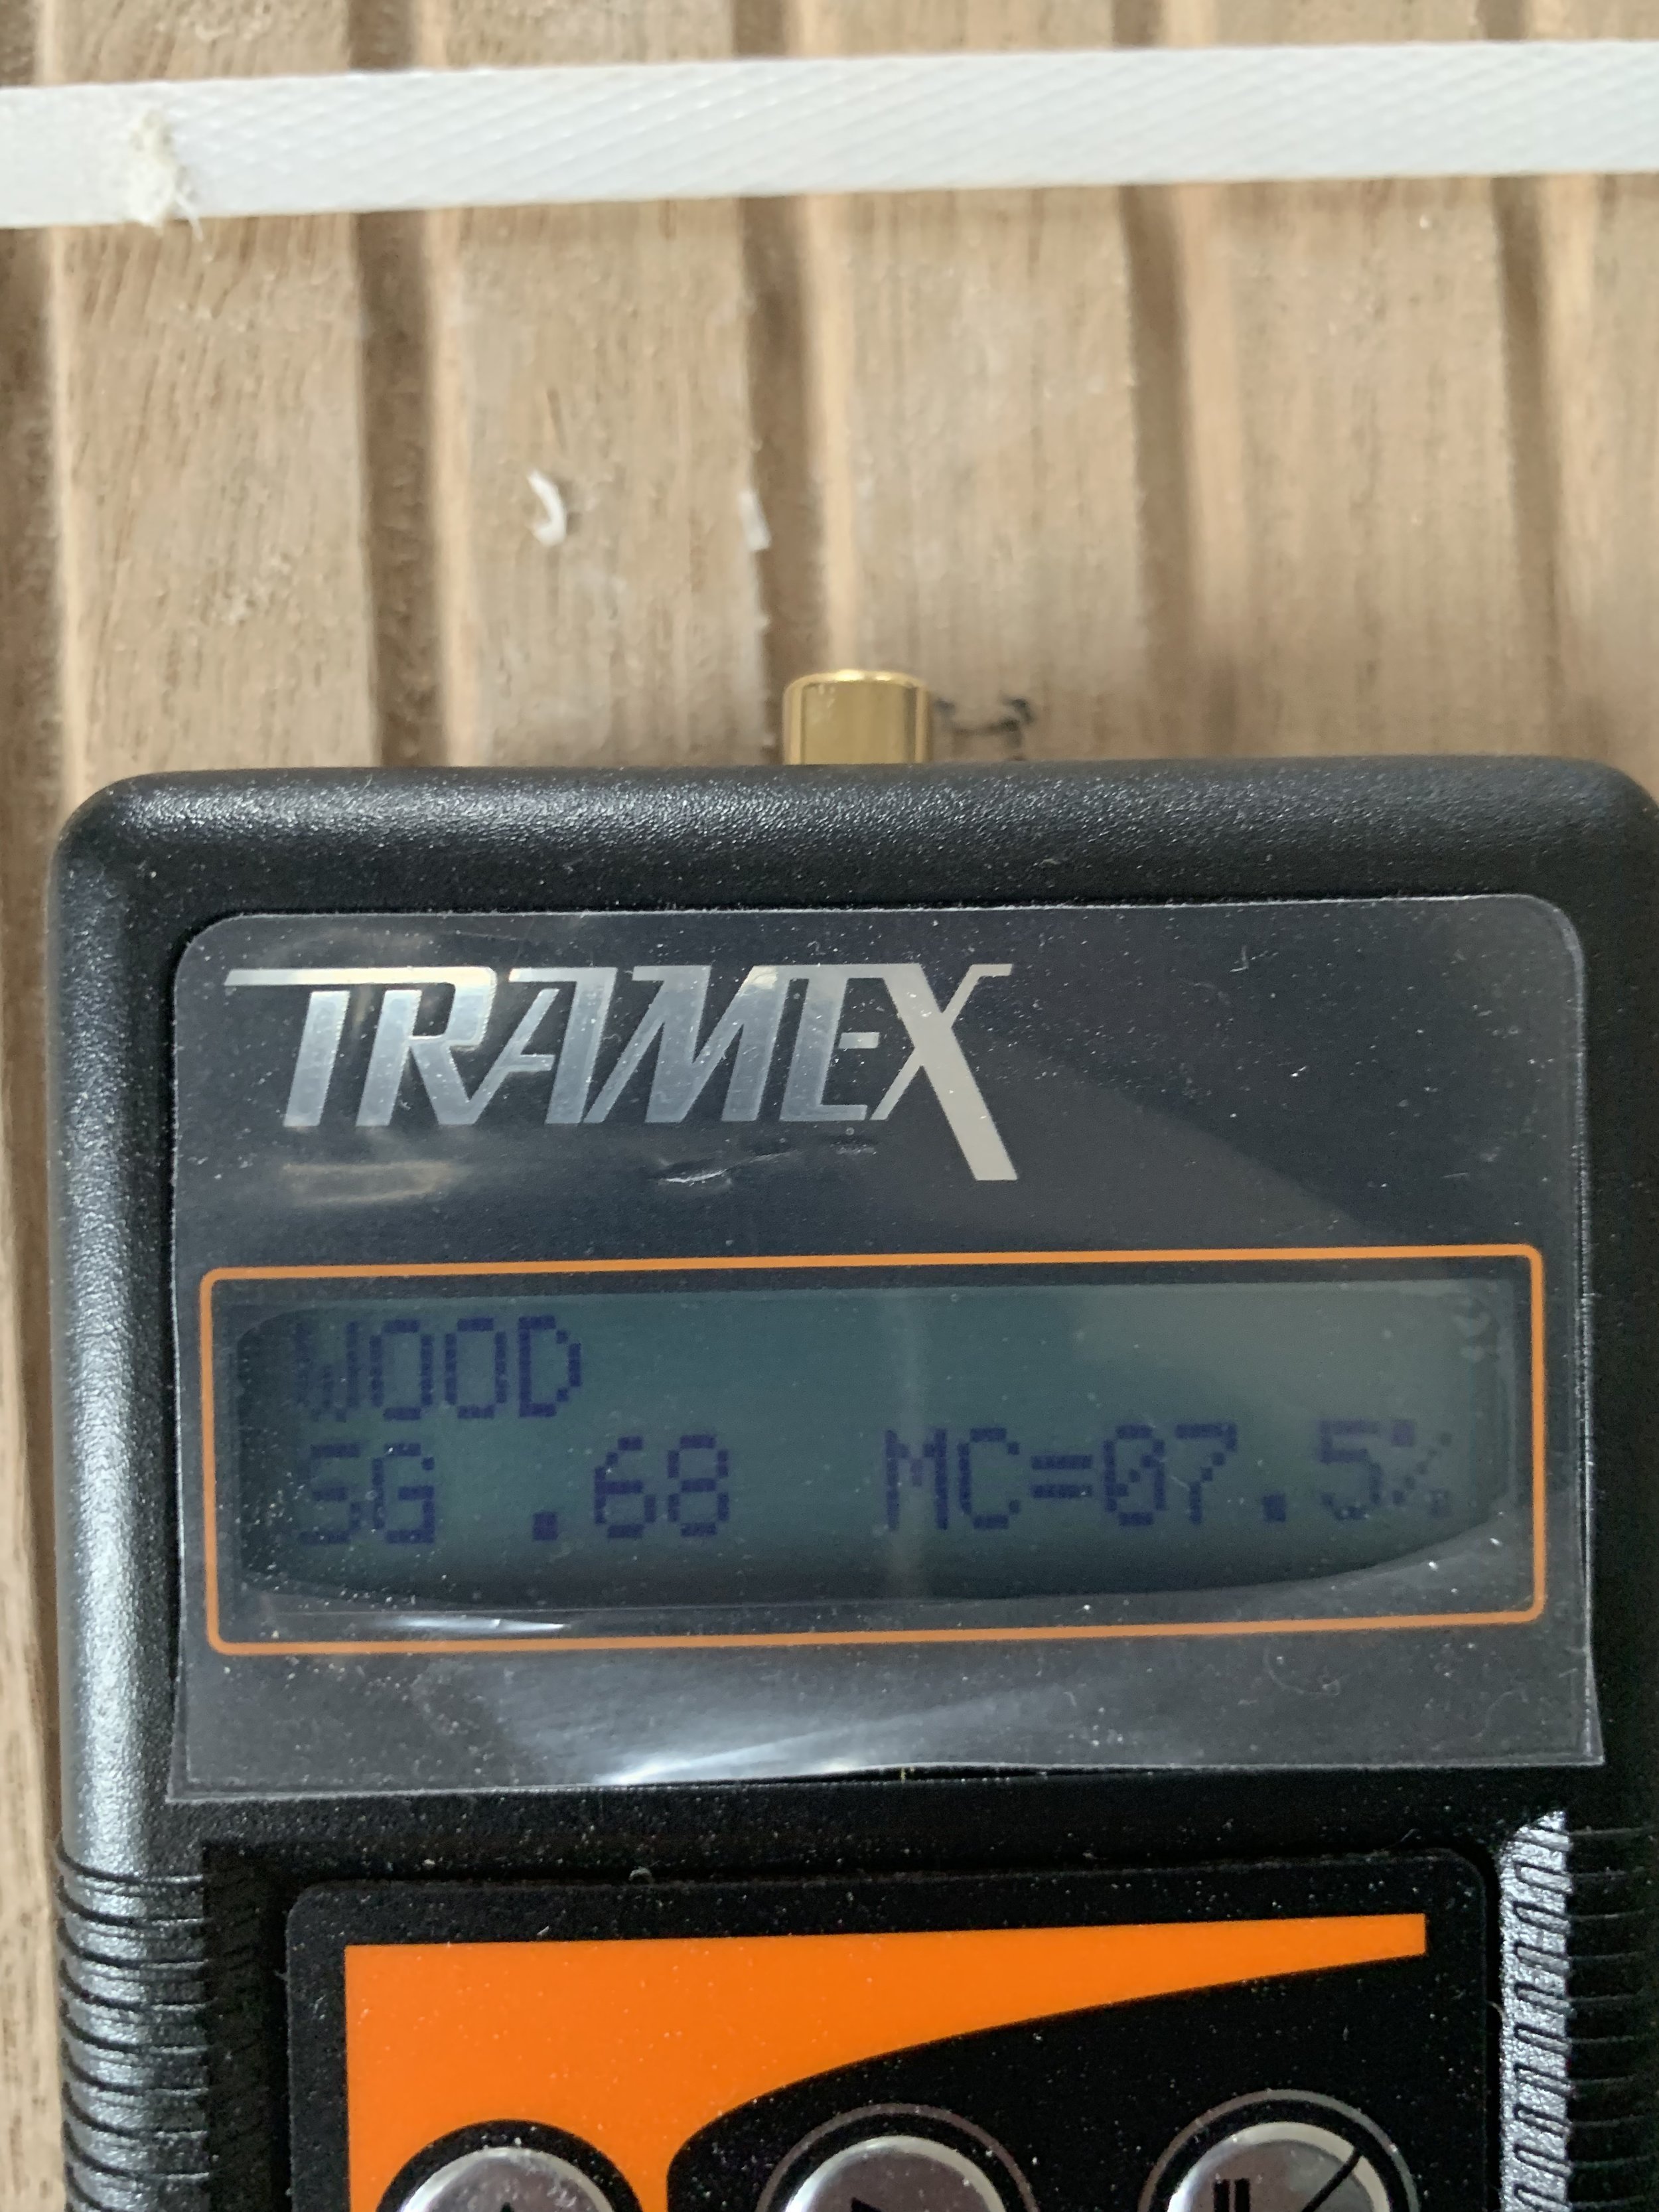

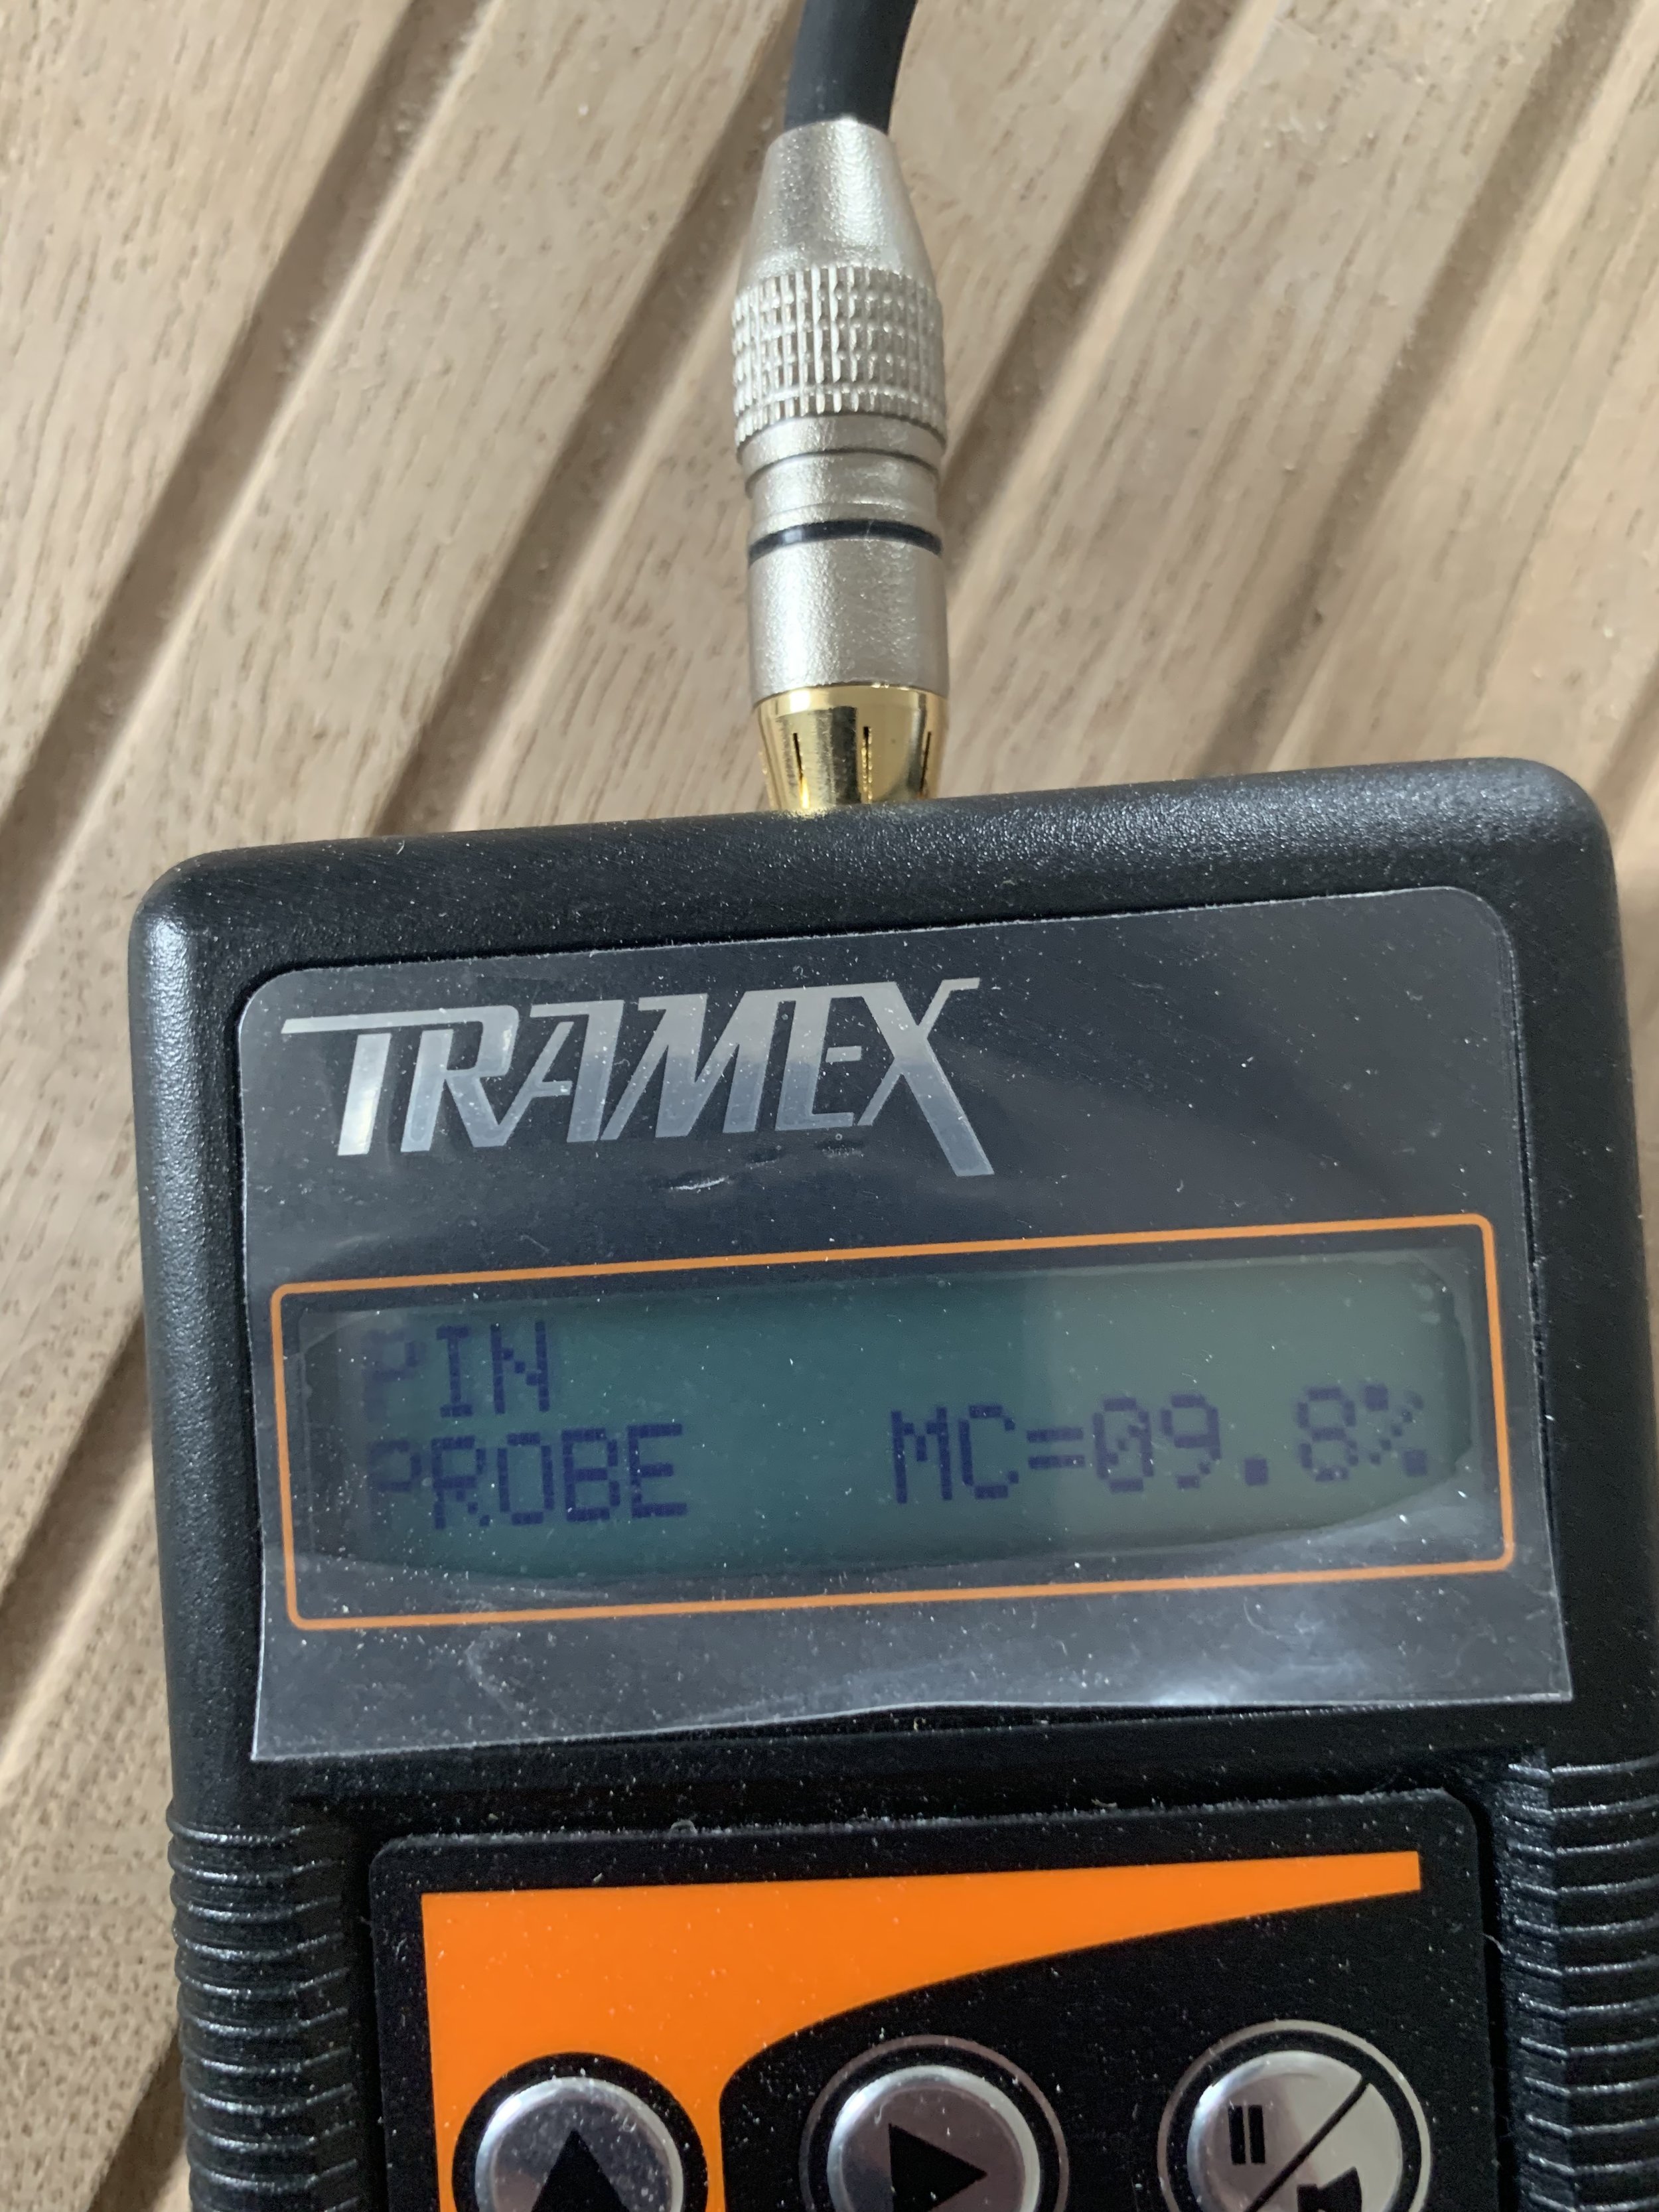
Various moisture meters pictured above from different jobs we have done from around Long Island and over several years!

The best thing you can do to keep the relative humidity of the home from falling too low or rising too high is to put Humidity Controls on your hvac system! They really help!
In summary, acclimation is critical to the success of a hardwood floor, but continuing to monitor the climate conditions of the home after the floor is installed is equally important. With that being said, we know it is difficult to keep a home at an exactly constant relative humidity and temperature year-round. I have offered some tips for ways to do that, but a big part of having hardwood flooring is having realistic expectations for them. If you don’t make an effort to keep the relative humidity levels and temperature in your home as constant as possible, then you should expect to see more movement in your hardwood floors. To quote Hardwood Floors Magazine (published by the NWFA) from Dec 6 2016, Equilibrium moisture content is based on an “unchanging” environment. After a wood floor has been installed, changing conditions within the environment will change the equilibrium moisture content of the wood floor, ultimately resulting in dimensional change. Always remember: If you change the conditions, you change the dimensions. Embrace it…wood is wood and that is part of its charm! And if you are lucky enough to be in search of a new hardwood floor, consult with a professional on the actual job site before making your decision!

And if you don’t have an hvac system or don’t want to spend the money on fancy upgrades, use a humidifier in winter to keep the humidity levels in your home from dropping too low! It is good for your health as well!

This is the time of year when I get lots of calls and messages about gaps in floors. Not just from our customers, but from people all over the country! Why do floors look beautiful and perfect when they are newly installed and then some separation between boards occurs down the road? Why do old wood floors that looked good in summer then separate and creak in the winter?
Let’s go back to the source of wood flooring: the tree. Remember your hardwood floor was once a tree, right? Wood flooring is an organic material, meaning it comes from nature. Our favorite NWFA (National Wood Flooring Association) t-shirts proudly proclaim “Nature Creates, We assemble.” Trees absorb water and moisture up through the trunk from the roots, and trees can withstand long periods of low moisture, but the cells of the wood will be drier and shrink up with this lower moisture content. Guess what? When you cut the tree down into wood floor boards, they are still wood, still organic, still able to absorb and retain moisture, and that is exactly what they do. Wood floors will “move,” meaning expand and contract, throughout their lifetime.

That’s right! Your wood floor was once a tree. :)

Nash Valenti and Phil Valenti at NWFA Inspector School & Training at NWFA Headquarters in Chesterfield, MO. Nash is modeling our fav NWFA T-shirt.
When wood absorbs moisture, it expands, or swells up, and when it loses moisture, it shrinks, or contracts. Wood flooring responds to the conditions immediately surrounding it. It takes in moisture from the air in your home, or loses it if the Relative Humidity (RH) of the home drops. What is Relative Humidity? Relative humidity is the amount of water vapor that is in the air, expressed as a percentage of the maximum amount of water the air can hold at the same temperature. Warm air holds more water than cold air, so hot days are typically far more humid than cold days. In winter, the air outside is generally dry and cold and the RH inside of people’s homes drops, which is why I get more calls about this issue at this time of year. Not only do RH swings affect wood flooring, but they can also affect cabinetry and trim.
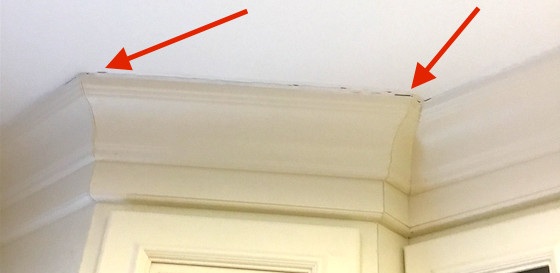
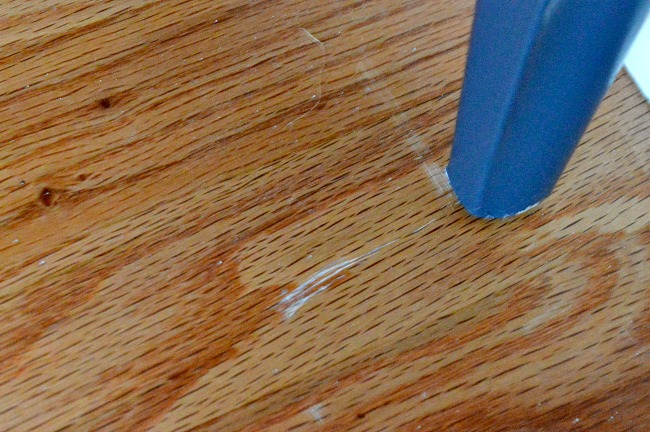
Wood molding also responds to moisture fluctuations!
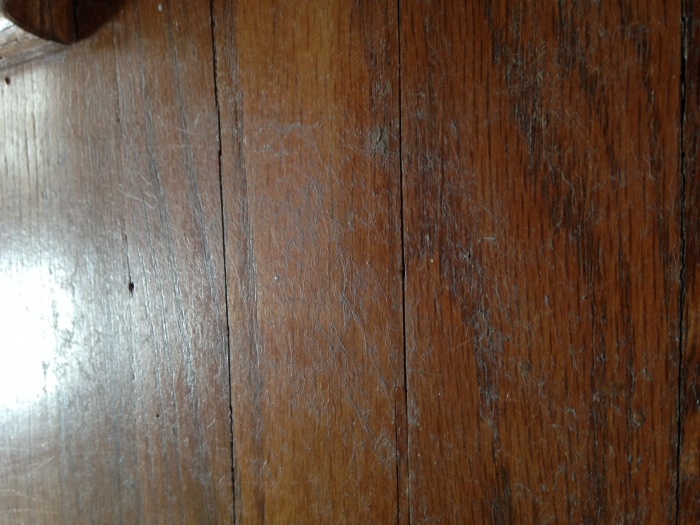
Check out your moldings in greater detail if your floor is gapped…

Base molding is also made of wood - if you think your floor was not installed correctly but your molding is separating, you probably have a moisture problem in your home!
Cold winter months require more heating. Dry air is forced into the environment. Moisture is now removed from not only the environment but the cells or pores of the hardwood. Contraction occurs. Ventilation also plays a major role in this winter-time drying. When you bring cold outside winter air into a house and then warm it up, the RH of that air drops significantly. Old, leaky homes with old windows will present a real challenge keeping the RH inside the home at a constant level. Oftentimes people don’t realize how dry the air in their house becomes in winter!

If this is your old house, you will have problems with every kind of hardwood flooring. LOL

Lovely old home where we did a major flooring project in Centre Island, NY. These older homes are gorgeous and have a lot of character, but it is common to have problems with excessive ventilation!
Now that we know what causes wood flooring to gap (shrink), how do we prevent this from occurring? If you can maintain a constant relative humidity and temperature in your home, you will see much less floor movement. The NWFA teaches us that, “If you change the conditions, you change the dimensions.” Dimensions refers to the actual dimensions (measurements) of the individual boards themselves. Maintaining constant conditions in the home is critical to the success of a hardwood floor. If you have wood flooring in your home in NY and you turn off the heat entirely while you go off to your winter home in Florida, you will return home to a house full of large gaps, and possibly cracked and split boards! On the flip side, if you live in Florida and go away for a long summer vacation to NY and turn off all the air conditioning in your home while you are away, you are likely to return to a cupped, or rippled floor.
Once you make the commitment to wood flooring in your home, you are making the commitment to keeping the conditions of the home somewhat constant, year-round, whether you are in the home or not. If you don’t want to run the A/C, at least turn the switch on your thermostat to FAN ON, which will keep air moving through the house continuously. Remember that ventilation decreases RH. Some examples of common flooring issues that are a result of dramatic swings in RH:


The acceptable RH range for wood flooring in the Northeast USA is between 30% - 50%. If the RH in your home is below 30%, you can be certain that you will see gaps in your wood flooring, and probably cracks as well! Humidity controls can be installed in your HVAC system to control the RH level, which can greatly improve the low RH that most people experience in their homes in the winter time. If you don’t have an HVAC system, Humidifiers can help to bring up the RH inside the home in the winter. Humidifiers are not a permanent solution to winter-time dryness because a high interior RH when it is very cold outside can be bad for a home as it can lead to condensation and mold formation. Some simple ways to at least increase the RH levels in your home in the winter are to leave the dishwasher open after running it, and after showering, to leave the bathroom door open! If you have problems with excessive ventilation (lots of air entering home from outside), weatherization and home energy audits can help to identify leaky areas, and they will suggest sealing efforts to reduce ventilation and the drying effect it has in the home in winter.

Purchase an inexpensive hygrometer to keep track of the Relative Humidity (RH) in your home!
At the end of it all, hardwood flooring is made from wood, an organic material, and science is science. There is no way to prevent winter and there is no way to prevent wood from losing some moisture in the winter. While there are things we can do to improve the conditions that cause seasonal gapping, we cannot eliminate them completely.
If you are lucky enough to be planning a new floor installation, keep these things in mind when making your selection. Some species are more dimensionally stable than others. Maple and Hickory expand and contract more than Oak or Pine under the same conditions. Wider planks will move more than smaller, skinnier boards. Wider boards have a greater surface area, and thus they will expand and contract more dramatically as conditions in the home change. A 5-inch-wide plank will shrink twice as much as a 2¼-inch-strip. So the size of the gap between 5-inch boards will be twice as big as the gap between 2¼-inch boards.
Other types and cuts of flooring such as Engineered Flooring or Rift & Quarter Sawn flooring are more dimensionally stable than others. We install a lot of wide plank Engineered flooring because it’s a pretty safe bet to be looking great year-round with minimal movement. Where you live and the specific conditions of your home should always be a factor in selecting species and board width. Do gaps really bother you? Select a very stable species and cut, such as Rift and Quarter Sawn Oak, with a narrow plank width for the best results. If you don’t care about gaps, go for that wide plank Hickory floor that you’ve always wanted! Keep these things in mind when selecting a new floor – expectations should be in line with reality. If you choose a wide plank Maple floor and you live in Minnesota, you should expect to see big seasonal gaps in the winter!

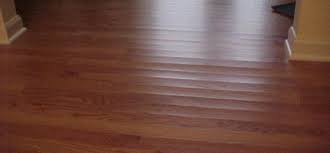
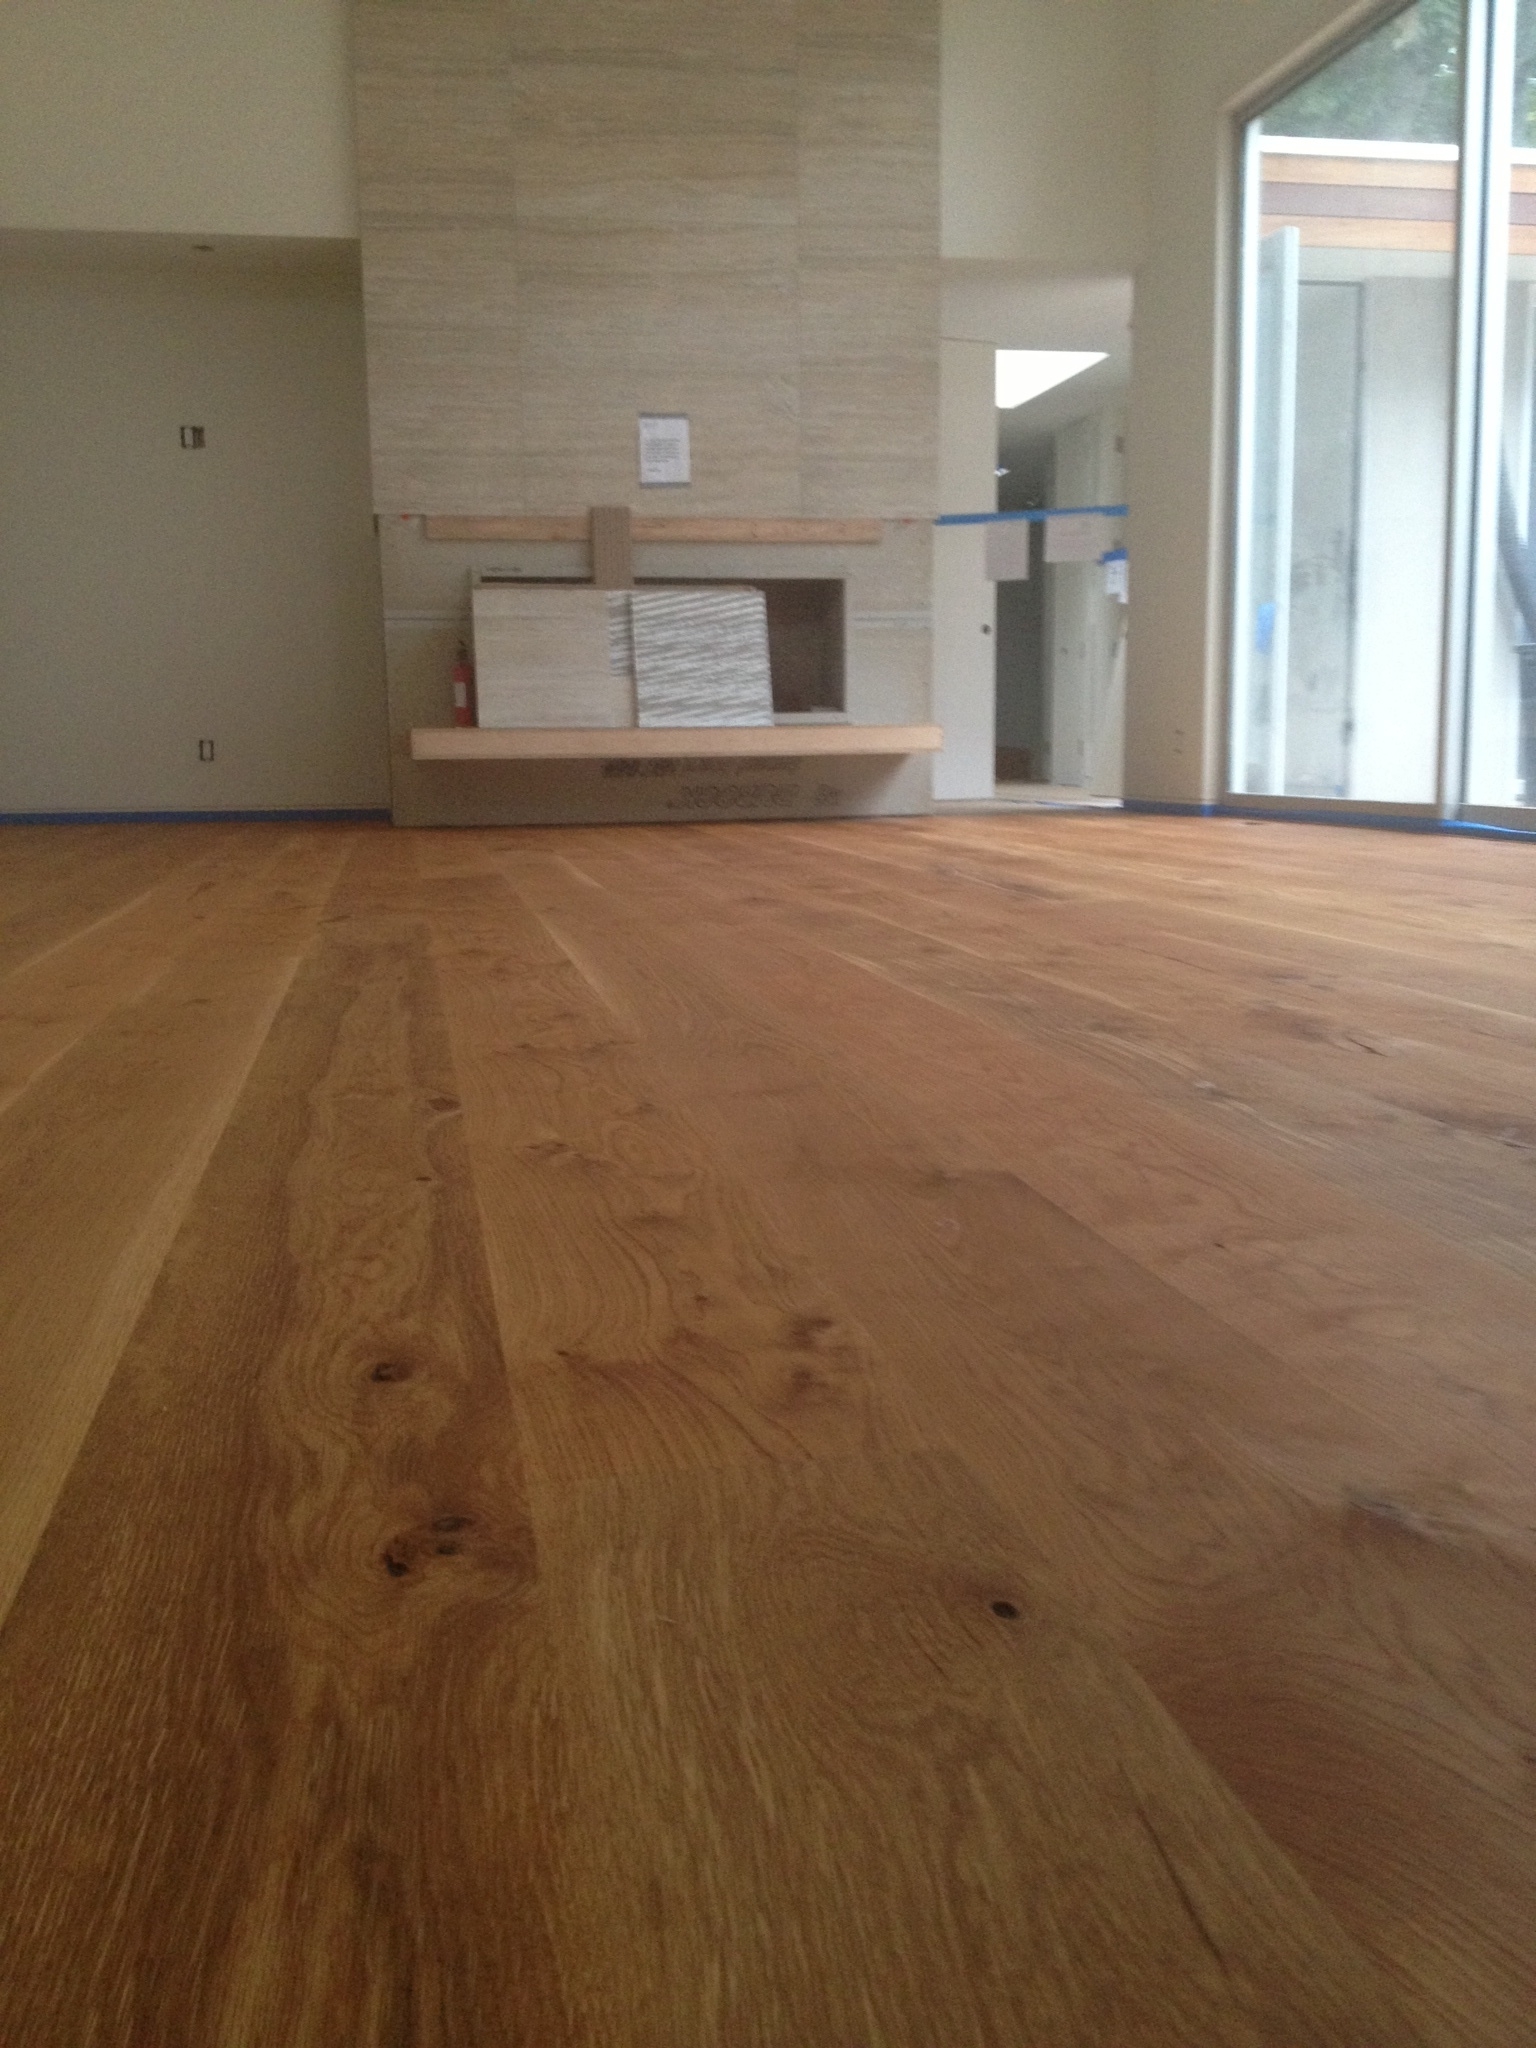
7” Engineered White Oak Hardwood flooring that we installed & finished with Woca penetrating oils in Amagansett, NY in 2016. This picture was taken more than a year later and look! There is hardly any separation in the floor.
If you own an old house that had old, gapped flooring when you purchased it, there is not really too much to do about it unless you want to rip out the floor and install a new one. Incorrect nail spacing, improper acclimation and species/board width selection all can contribute to seasonal gapping and floor movement, all of which which you cannot do anything about if you have purchased a home with existing hardwood flooring.

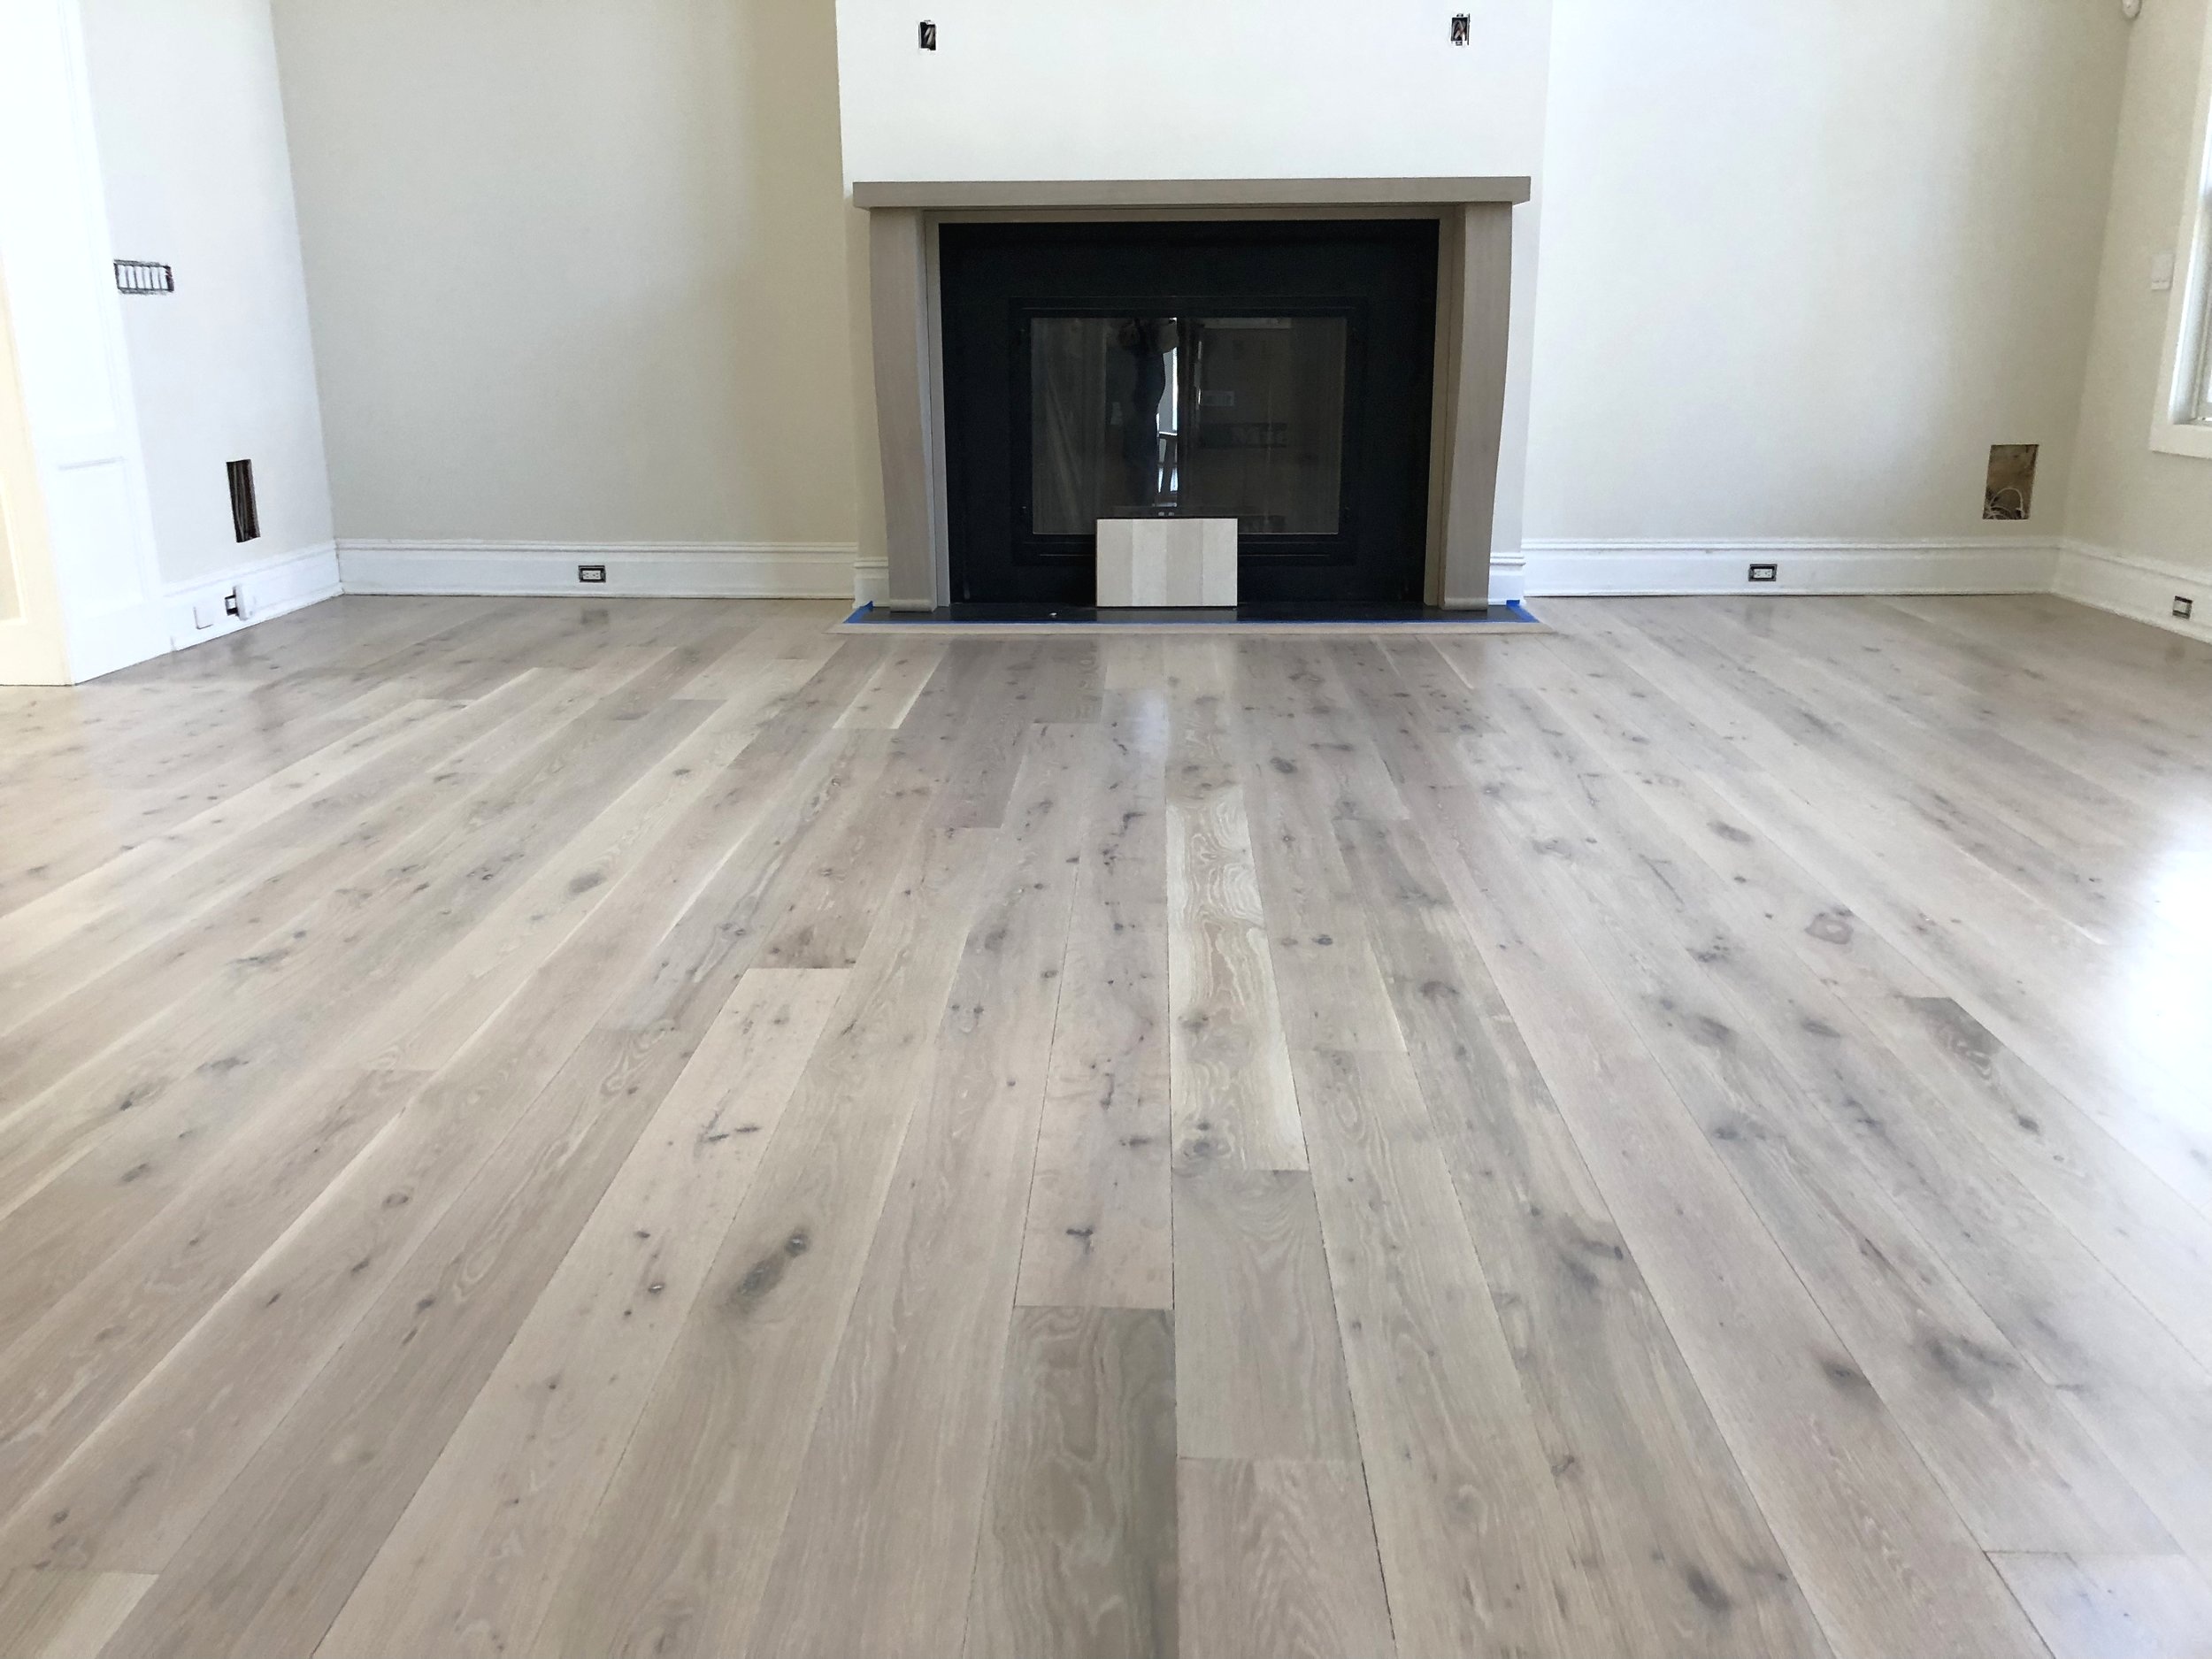
This is a stunning home we sanded and finished in Sagaponack, NY. The homeowner inherited these 4” Red Oak hardwood floors when the home was purchased. Note that climate controls were turned off in the winter prior to our arrival in Spring and the floor exhibits significant gapping.
Wood filler is not a cure for gaps. Don’t forget that your wood floor will continue to move throughout its lifetime. The wood filler will dry hard and will look good at first, but then when your floor begins to expand in the warmer, more humid months of summer, that woodfiller will crack and will look like kitty litter between the boards. In our professional opinion, if your old wood floor has gaps, just live with them. They will look worse if you fill them and the wood filler cracks. Try to bring up the humidity in your home or wait for summer to come around to see them close up a bit.
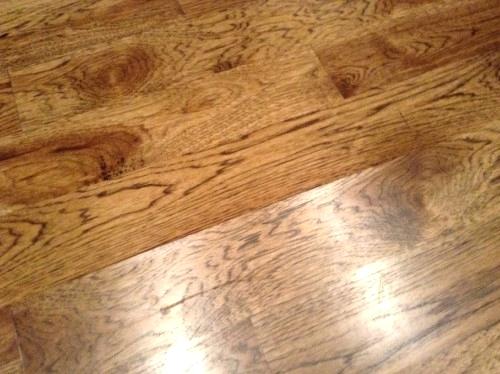
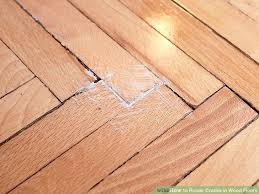
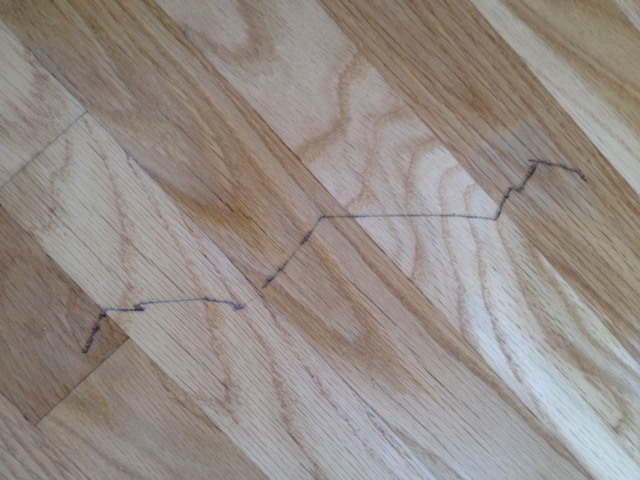
Here you can see wide plank White Oak flooring that had the gaps filled with wood filler (not by our team)…now the wood filler appears cracked and jagged in the gaps, which in my opinion looks worse than just a gap.

See how woodfiller cracks in between the boards?

Beautiful Red Oak floor we sanded and finished in East Hampton New York with Jacobean stain and oil poly in winter 2015. You can see some slight hairline gaps - we did not fill them. They will close up again in summer.
I hope that this blog post has been helpful to everyone with questions about gaps in their wood floors. Don’t forget part of the charm of wood flooring is its imperfect nature!

I get asked these questions all the time, so I figured this should be a helpful post!
1) How soon after the floors are finished can I be back in the house?
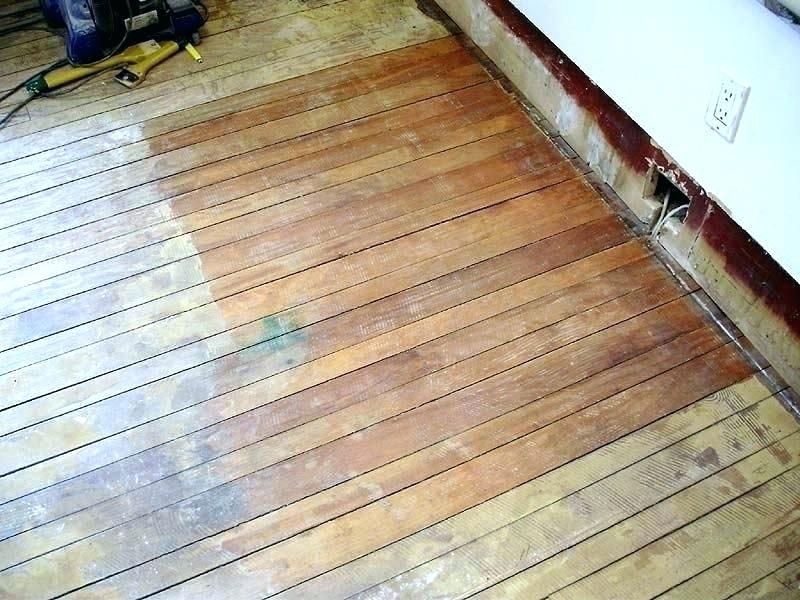
The answer to this question all depends on what products were used in sanding and refinishing your wood floors:
For polyurethane products, we prefer and recommend what in our opinion is the best product on the market – Bona Traffic HD. Not only is the Traffic HD a great-looking, crystal-clear polyurethane, it has extremely low VOCs (less than 150) and dries very quickly. If your house is finished with Bona Traffic HD, you can safely be walking around in the house with socks about 2-3 hours after the project is finished. If there are other rooms in the home that do not have wood floors and were not displaced of bedroom furniture, you can totally sleep there the same night the floors are finished as well! Socks only across the floors to access any other rooms in the evening... We recommend socks only for the first 24 hours after project completion. The manufacturer recommends the following for floors finished with Bona Traffic HD: The curing process takes approximately 3 days (80% cured after 1 day, 100% after 3 days). The floor may be walked on after 24 hours, but remains susceptible to scuffing or marring until completely cured. Do not replace area rugs until the floor has fully cured - 3 days.

Bona Traffic HD Water Based Polyurethane
Commercial grade, 100% non-yellowing, and fully cured in 3 days!
Bona also makes a very good mid-line poly that we use frequently, Bona Mega Clear HD. Mega Clear is a very good product for a bargain price. 100% non-yellowing, clear, and quick drying, though longer on the cure times and slightly higher in VOC-content, though still GREENGUARD Certified for Indoor Air Quality. If your hardwood floors have been sanded and finished with Bona Mega Clear HD, it is safe to sleep in the home about 2-3 hours after the project is finished, but again, only if there are other rooms that have not been robbed of their furniture – furniture should stay off floors for at least 24 hours after ANY project is completed. The manufacturer recommends the following for floors finished with Bona Mega Clear HD: The curing process takes approximately 7 days, (75% cured after 1 day, 90% after 3 days). The floor may be walked on after 24 hours, but remains susceptible to scuffing or marring until completely cured. Furniture can be moved back in carefully after 3 days. Do not replace area rugs until the floor has fully cured – 7 days.

Bona Mega Clear HD Water Based Polyurethane
100% non-yellowing, quick drying, low odor/fumes!
If your floors were finished with oil polyurethane, not only should you cry because the house will stink for days and days after they are finished, but also because they will turn an ugly yellow/orange color in a few years…but there is more on that topic in an older blog post Oil Based polyurethane vs Water Based Polyurethane. We haven’t used oil poly in a long time. If your floors are finished with oil polyurethane, there is no traffic AT ALL for a minimum of 24 hours after the job is finished. 48 hours after the job is completed, socks-only traffic on the floor. We recommend a minimum of 2 days of socks-only traffic for floors finished with oil polyurethane. The house is not inhabitable for a minimum of 2 days after the job is completed, and better to stay out for at least 5 as the fumes/off-gassing is not advisable to breathe in, even if there are other rooms to sleep in. No area rugs on floors finished with oil poyurethane for at least 14 days, though most manufacturers of oil polyurethane specify to allow 30 days to full cure.

I don't have any photos of recommended brands of Oil polyurethane, because we don't recommend to use it!!
This photo exhibits the way you may react upon walking into a house recently finished with oil polyurethane.
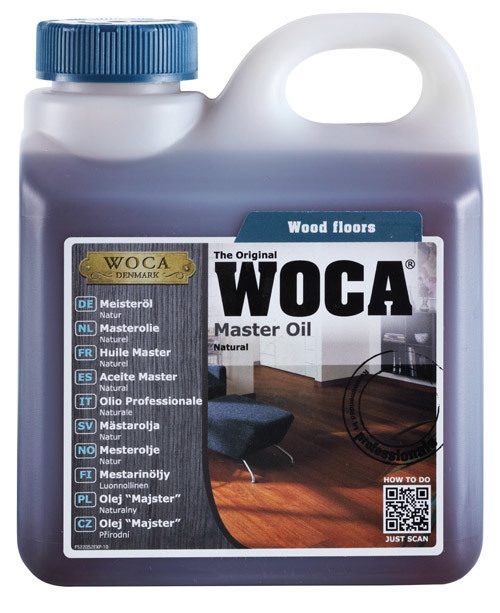
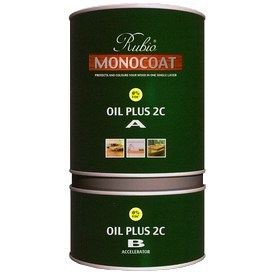
We are doing a lot of hardwax oil finishes these days. Both Rubio Monocoat and Woca, our favorite, are 100% VOC-free, natural, plant-based products. Both can be walked on in 6-8 hours with socks only to access other rooms in the house. Obviously there are no fumes or smells with these all-natural hardwax oil hardwood flooring products. Floors finished with hardwax oils are useable for light traffic in 36 hours. It is advisable with hardwax natural oil finishes to use cardboard in the high traffic areas if moving in furniture prior to full cure. Make sure to take up cardboard at the end of every work day until the floors are fully cured, if putting down for ongoing construction. Rubio Mononocoat is fully cured in 7 days. Woca Hardwax Oil is fully cured in 5 days. With hardwood floors that have been finished with hardwax oils, it is very important to avoid getting ANY liquids on the floors during the curing process!
2) How soon after the hardwood floors are finished can I move my furniture back onto the wood floors?
Bona Traffic HD – Furniture can go back onto the floors after 24 hours. No area rugs for 3 days.
Bona Mega Clear HD – Furniture can go back onto the floors after 24 hours (EXTREMELY CAREFULLY), though 2 days is more advisable for this product. No area rugs for 7 days.
Oil polyurethane – Furniture after minimum 3 days. No area rugs for 14 days.
Hardwax Oil finish – Furniture can go back onto the floors in 36 hours. No area rugs for 7 days with both Rubio Monocoat and Woca is advisable. It is also important to mop the floors after fully cured with their respective cleaning products, as it will create a patina of sorts and help to strengthen the floor - keep this in mind before moving in furniture!


3) How soon after the wood flooring project is finished can I cover the floors for painting?
All floors can be covered for painting after they are fully cured. Covering floors prematurely can lead to peeling finish! Covering floors stops the curing process because it is blocks the wood floors from getting air/oxygen. Also, NEVER tape anything directly to floors – we recommend ONLY to tape paper to paper or cardboard to cardboard!
Bona Traffic HD – fully cured in 3 days
Bona Mega Clear HD – fully cured in 7 days
Oil poly – fully cured in 7-10 days
Rubio Monocoat 2C Hardwax Oil – fully cured in 7 days
Woca Hardwax Oil – fully cured in 5 days
4) Why no area rugs or covering the floors before full cure, but furniture is OK? Most furniture is on legs, thus not extinguishing much of the floor from getting air. Covering the floors with area rugs or paper will inhibit the flow of oxygen and air to the floor surface, thus stopping the curing process. Covering floors prematurely with area rugs or paper/drop cloths for painting before they are fully cured can lead to peeling finish, easily-scuffed floors, and general underperformance.
5) How soon after finishing can I clean wood floors?
Do not use any liquids AT ALL for cleaning any newly refinished hardwood floors until they are fully cured. See above for full cure times of our most frequently used wood flooring finishes. 24 hours after floors have been sanded and finished, they can be swept with a soft bristle broom ONLY. No vacuums until floors have fully cured. Please follow manufacturer’s recommendations as to recommended cleaning products. For floors finished with any type of polyurethane, we recommend to use ONLY the Bona Hardwood Floor Cleaner, which is an excellent product that will not damage the finish. Stay away from Swiffer, Mop N Glo, Murphys Oil, etc.!

BONA HARDWOOD FLOOR CLEANER + MOP
Each hardwax oil manufacturer, like Rubio Monocoat or Woca, makes an accompanying cleaning product, and we recommend to use the specific products and guidelines as prescribed by the manufacturer. It is also important to mop the floors after fully cured with their respective cleaning products, as it will create a patina of sorts and help to strengthen the floor!

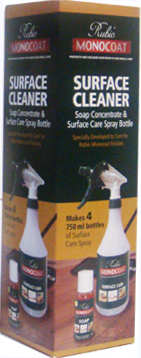

PICTURED ABOVE ARE VARIOUS CLEANING PRODUCTS MADE BY RUBIO MONOCOAT AND WOCA
Thanks in advance from your flooring professional for following these guidelines!!! :D
This week we are working on some rift and quarter sawn white oak hardwood floors at a house in Asharoken, NY that is closely surrounded on both sides by water. Why is rift and quartered flooring the best choice for this home? The answer also explains why the appearance of rift and quartered wood flooring is so uniquely different than that of Plain Sawn floors!
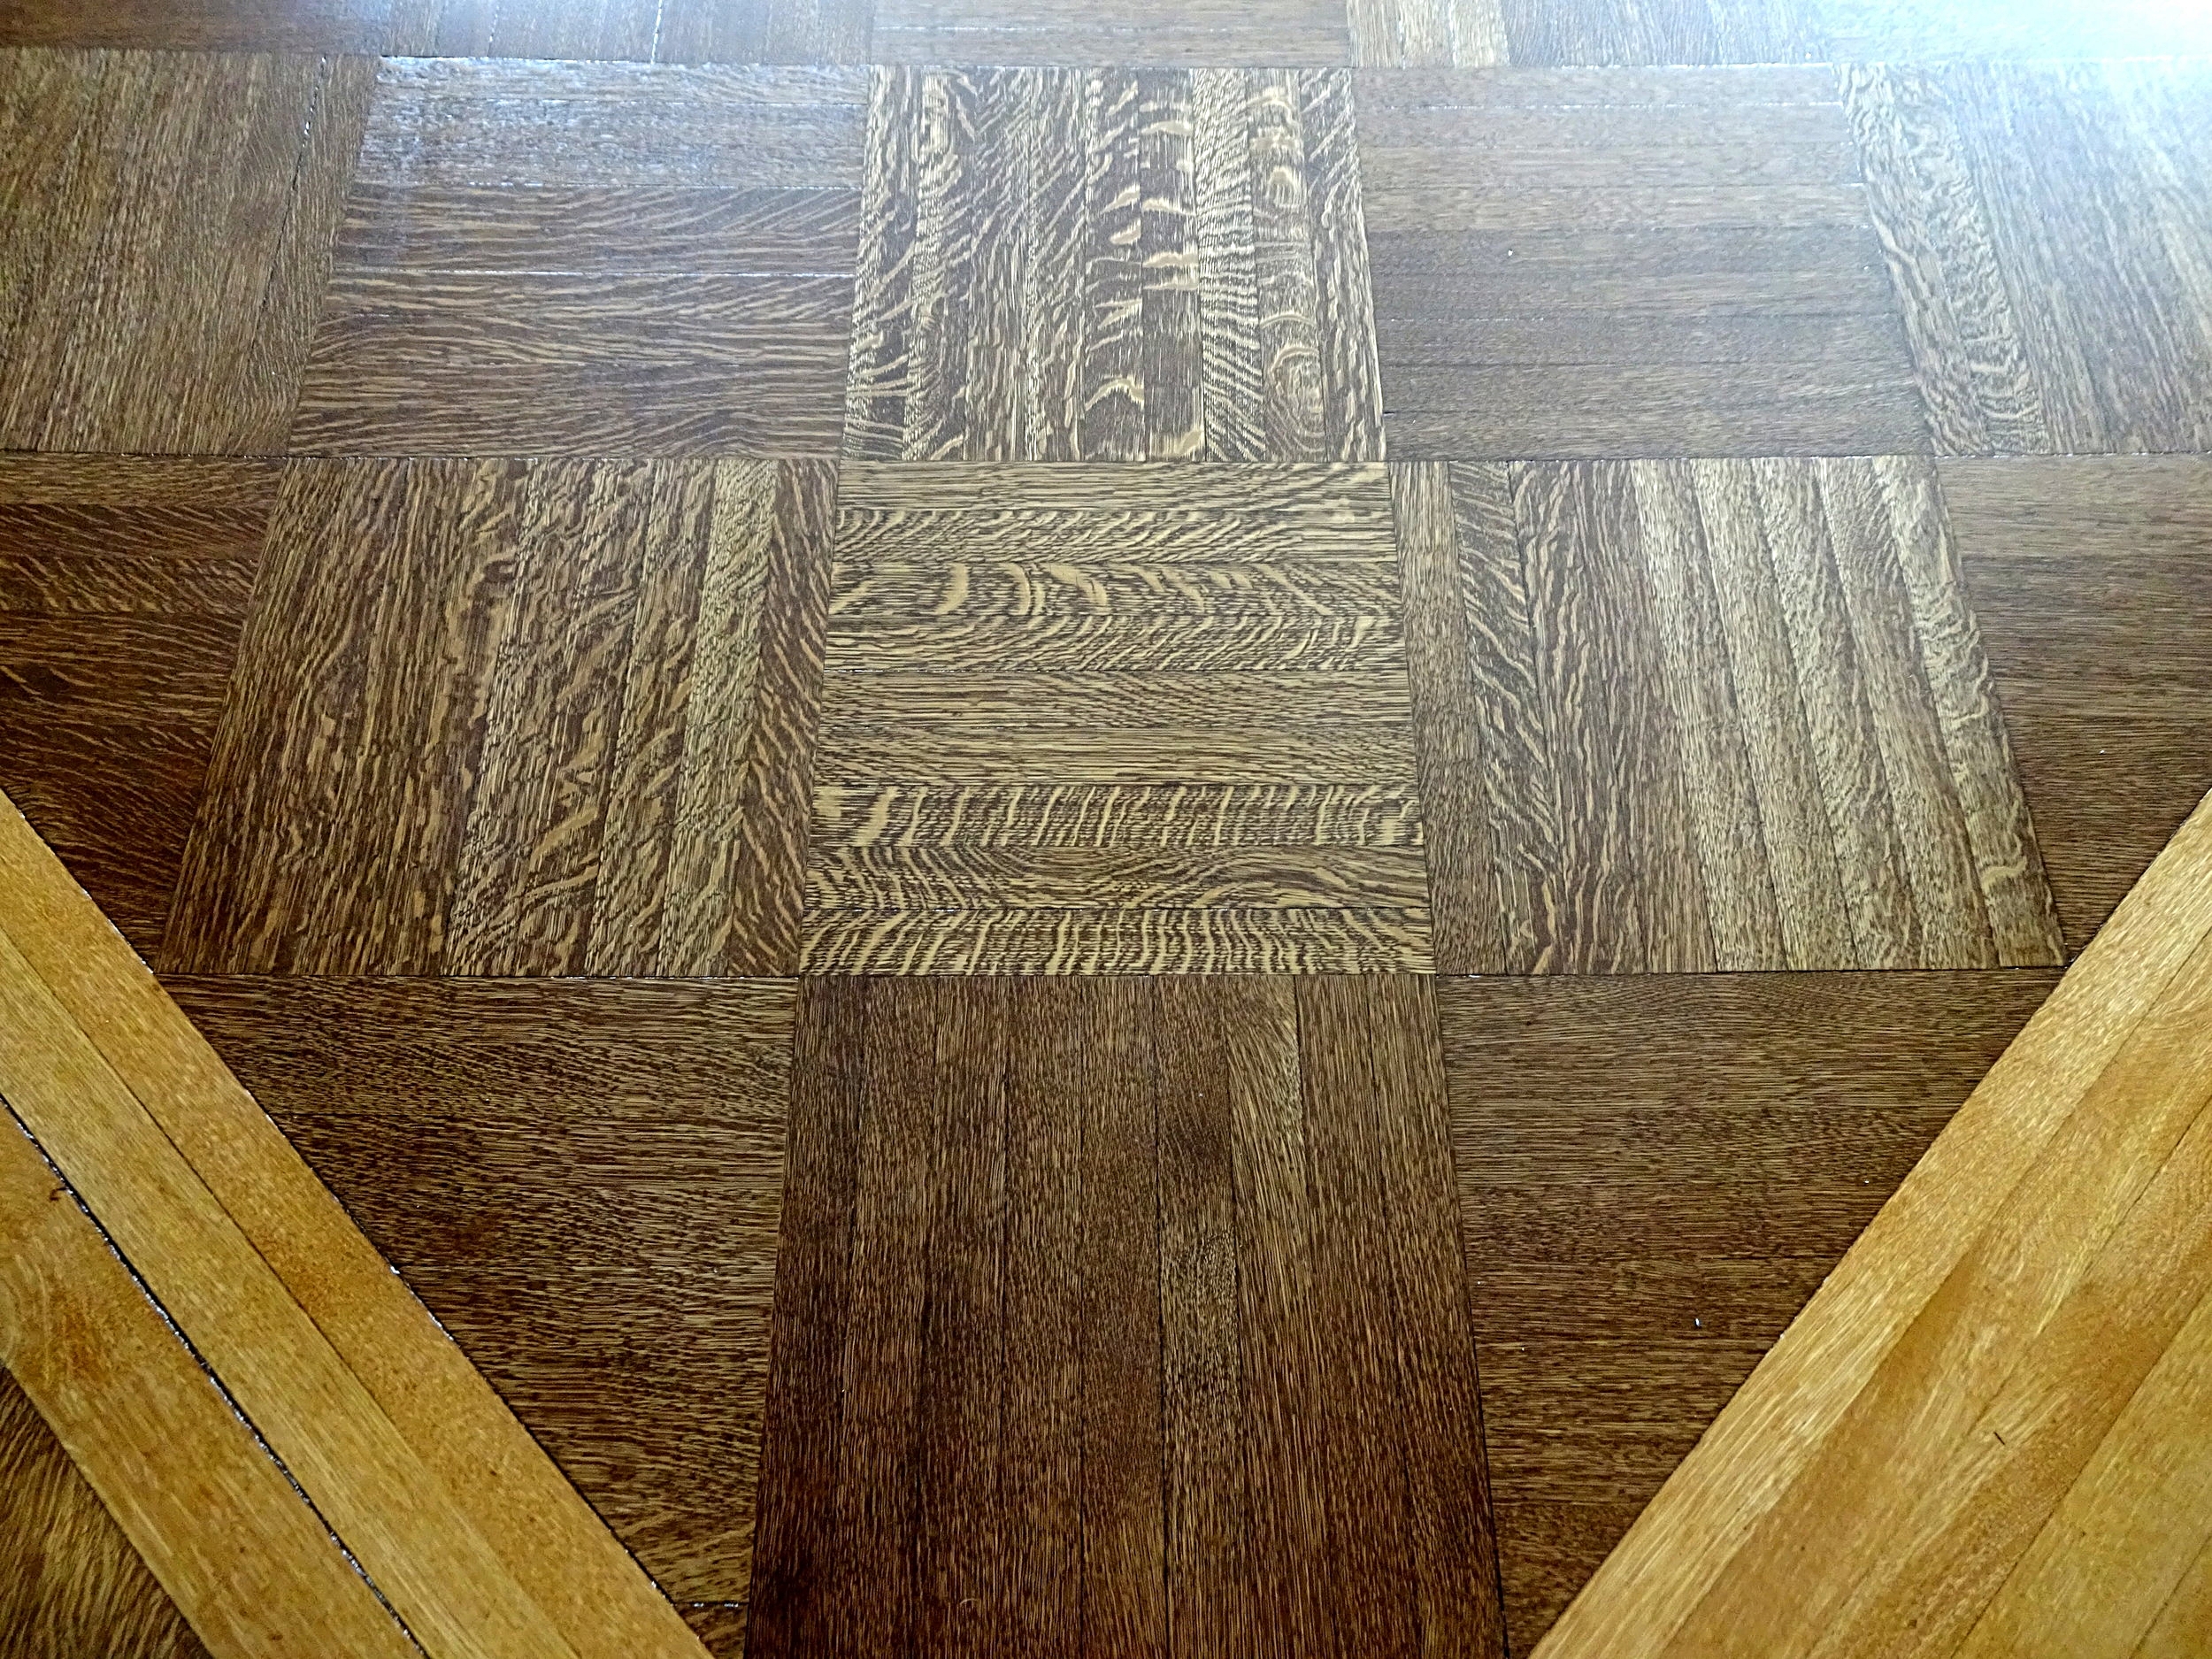
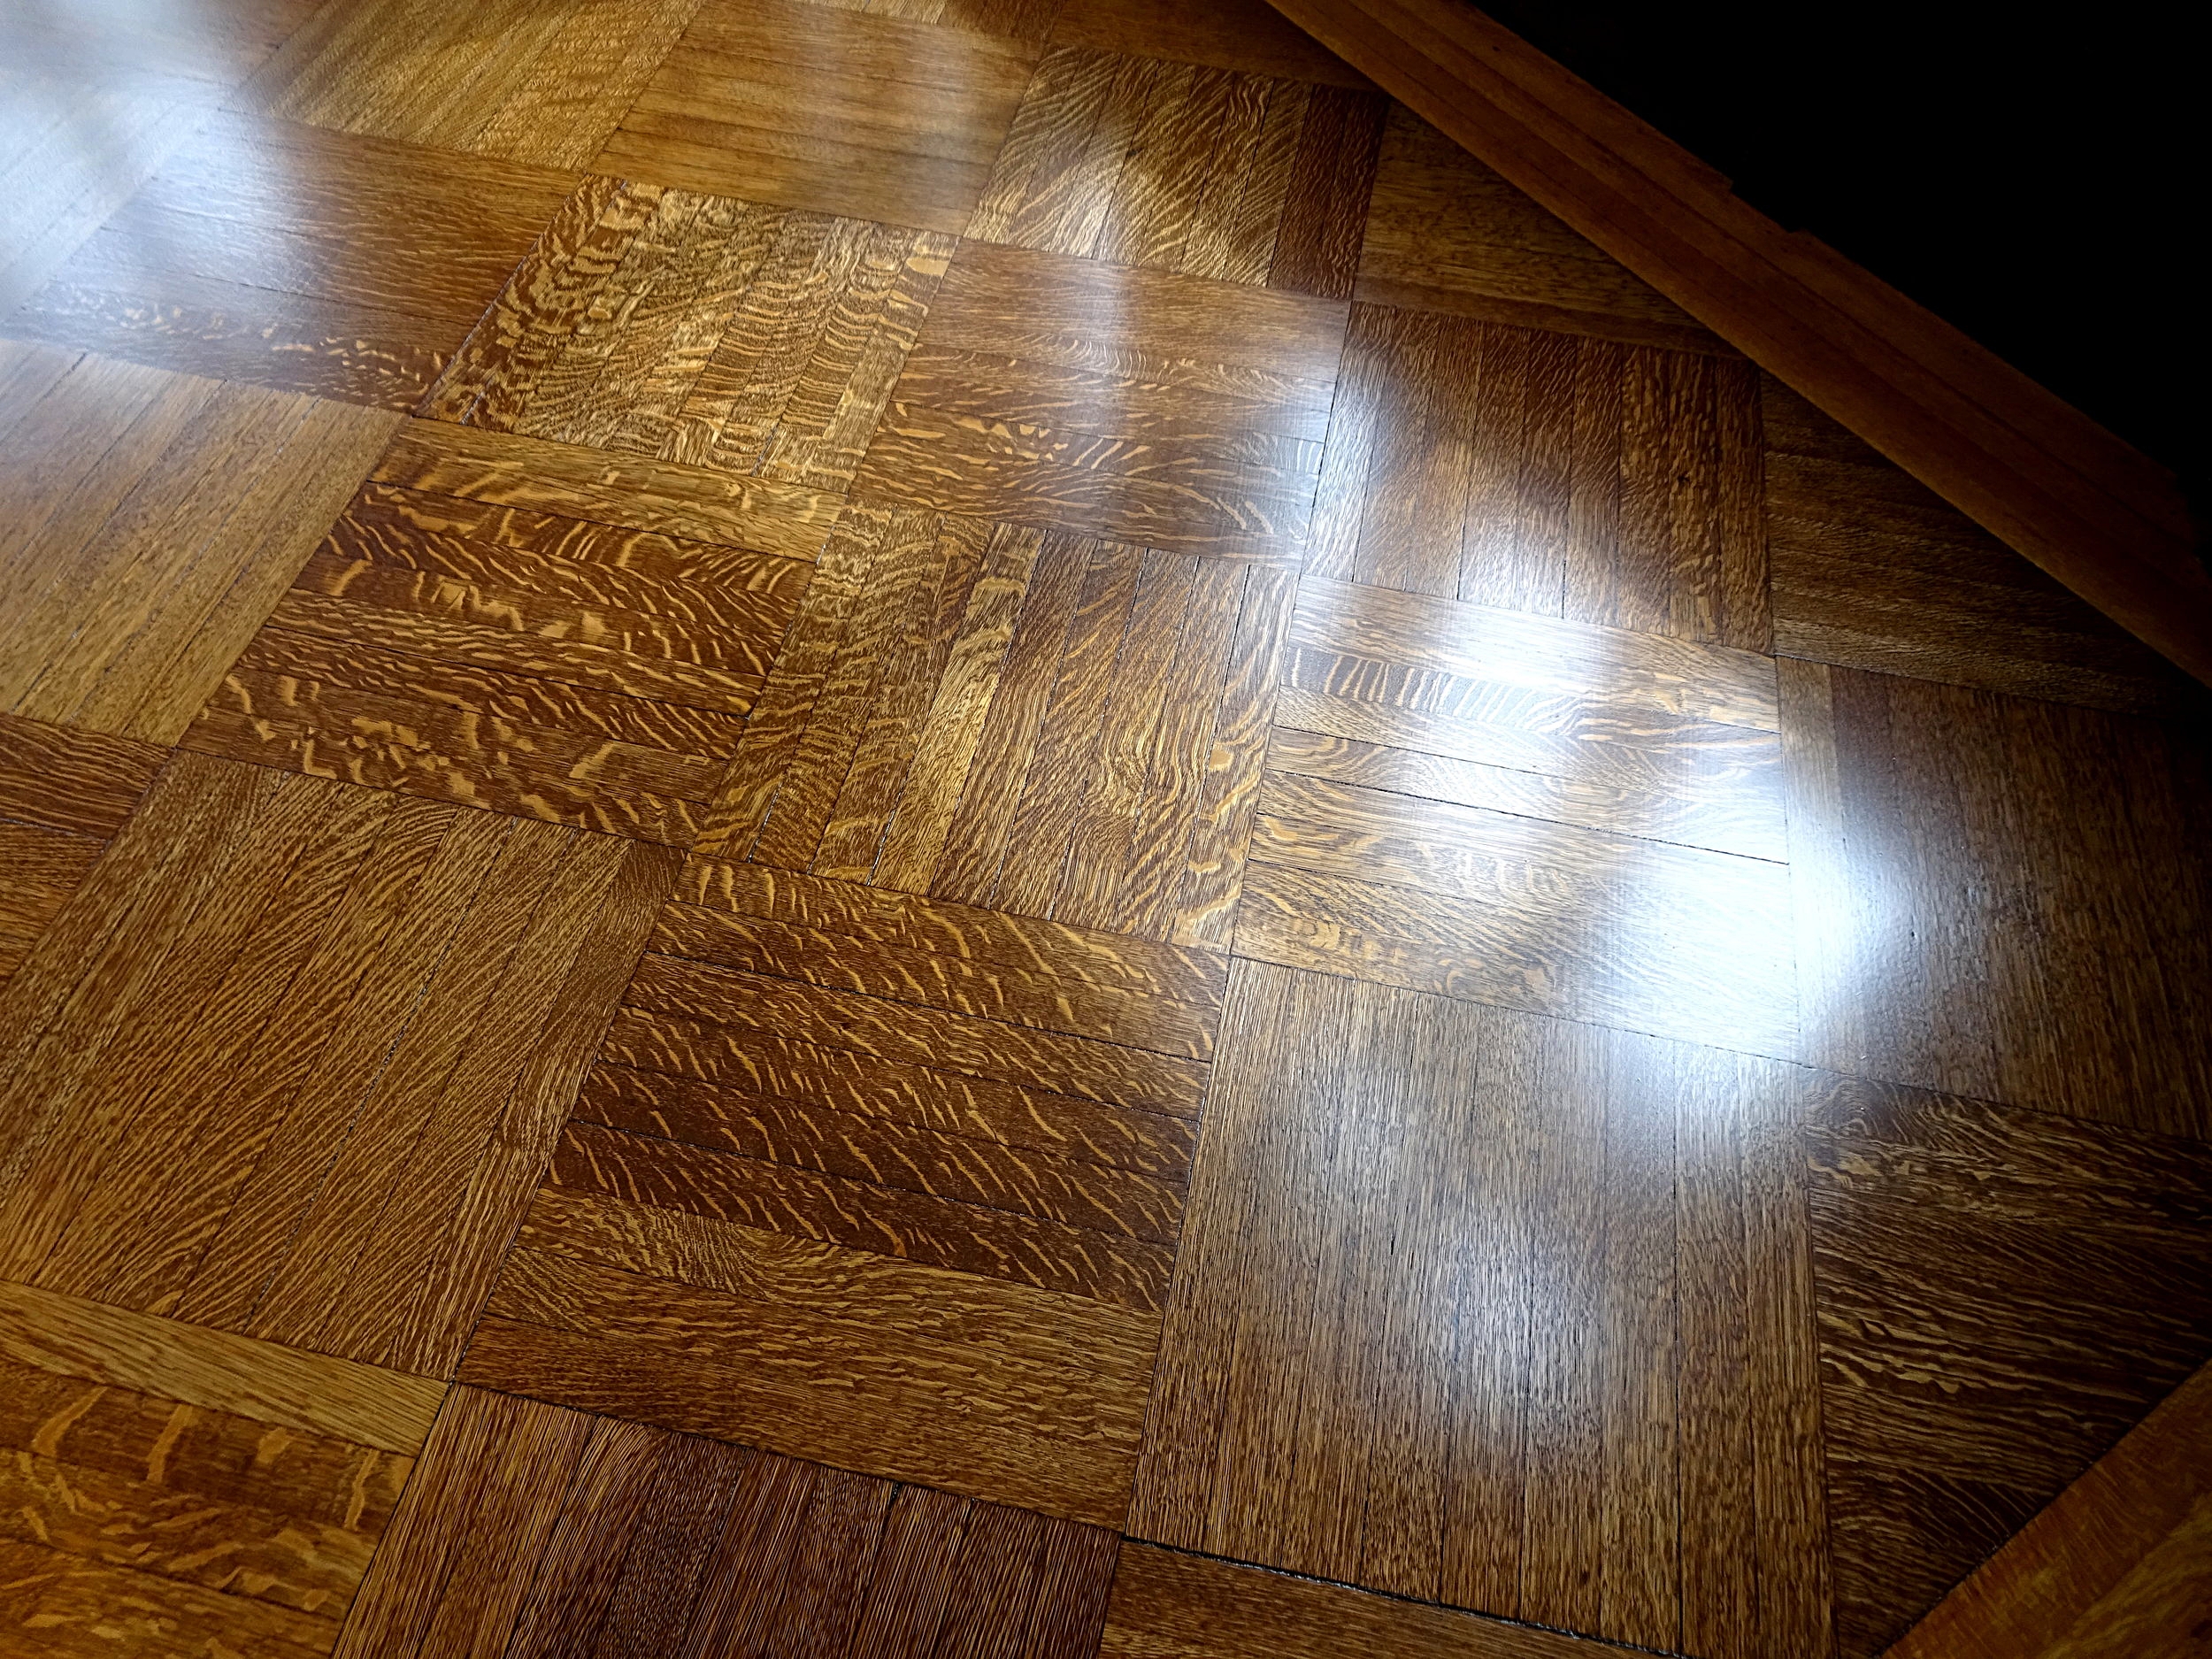
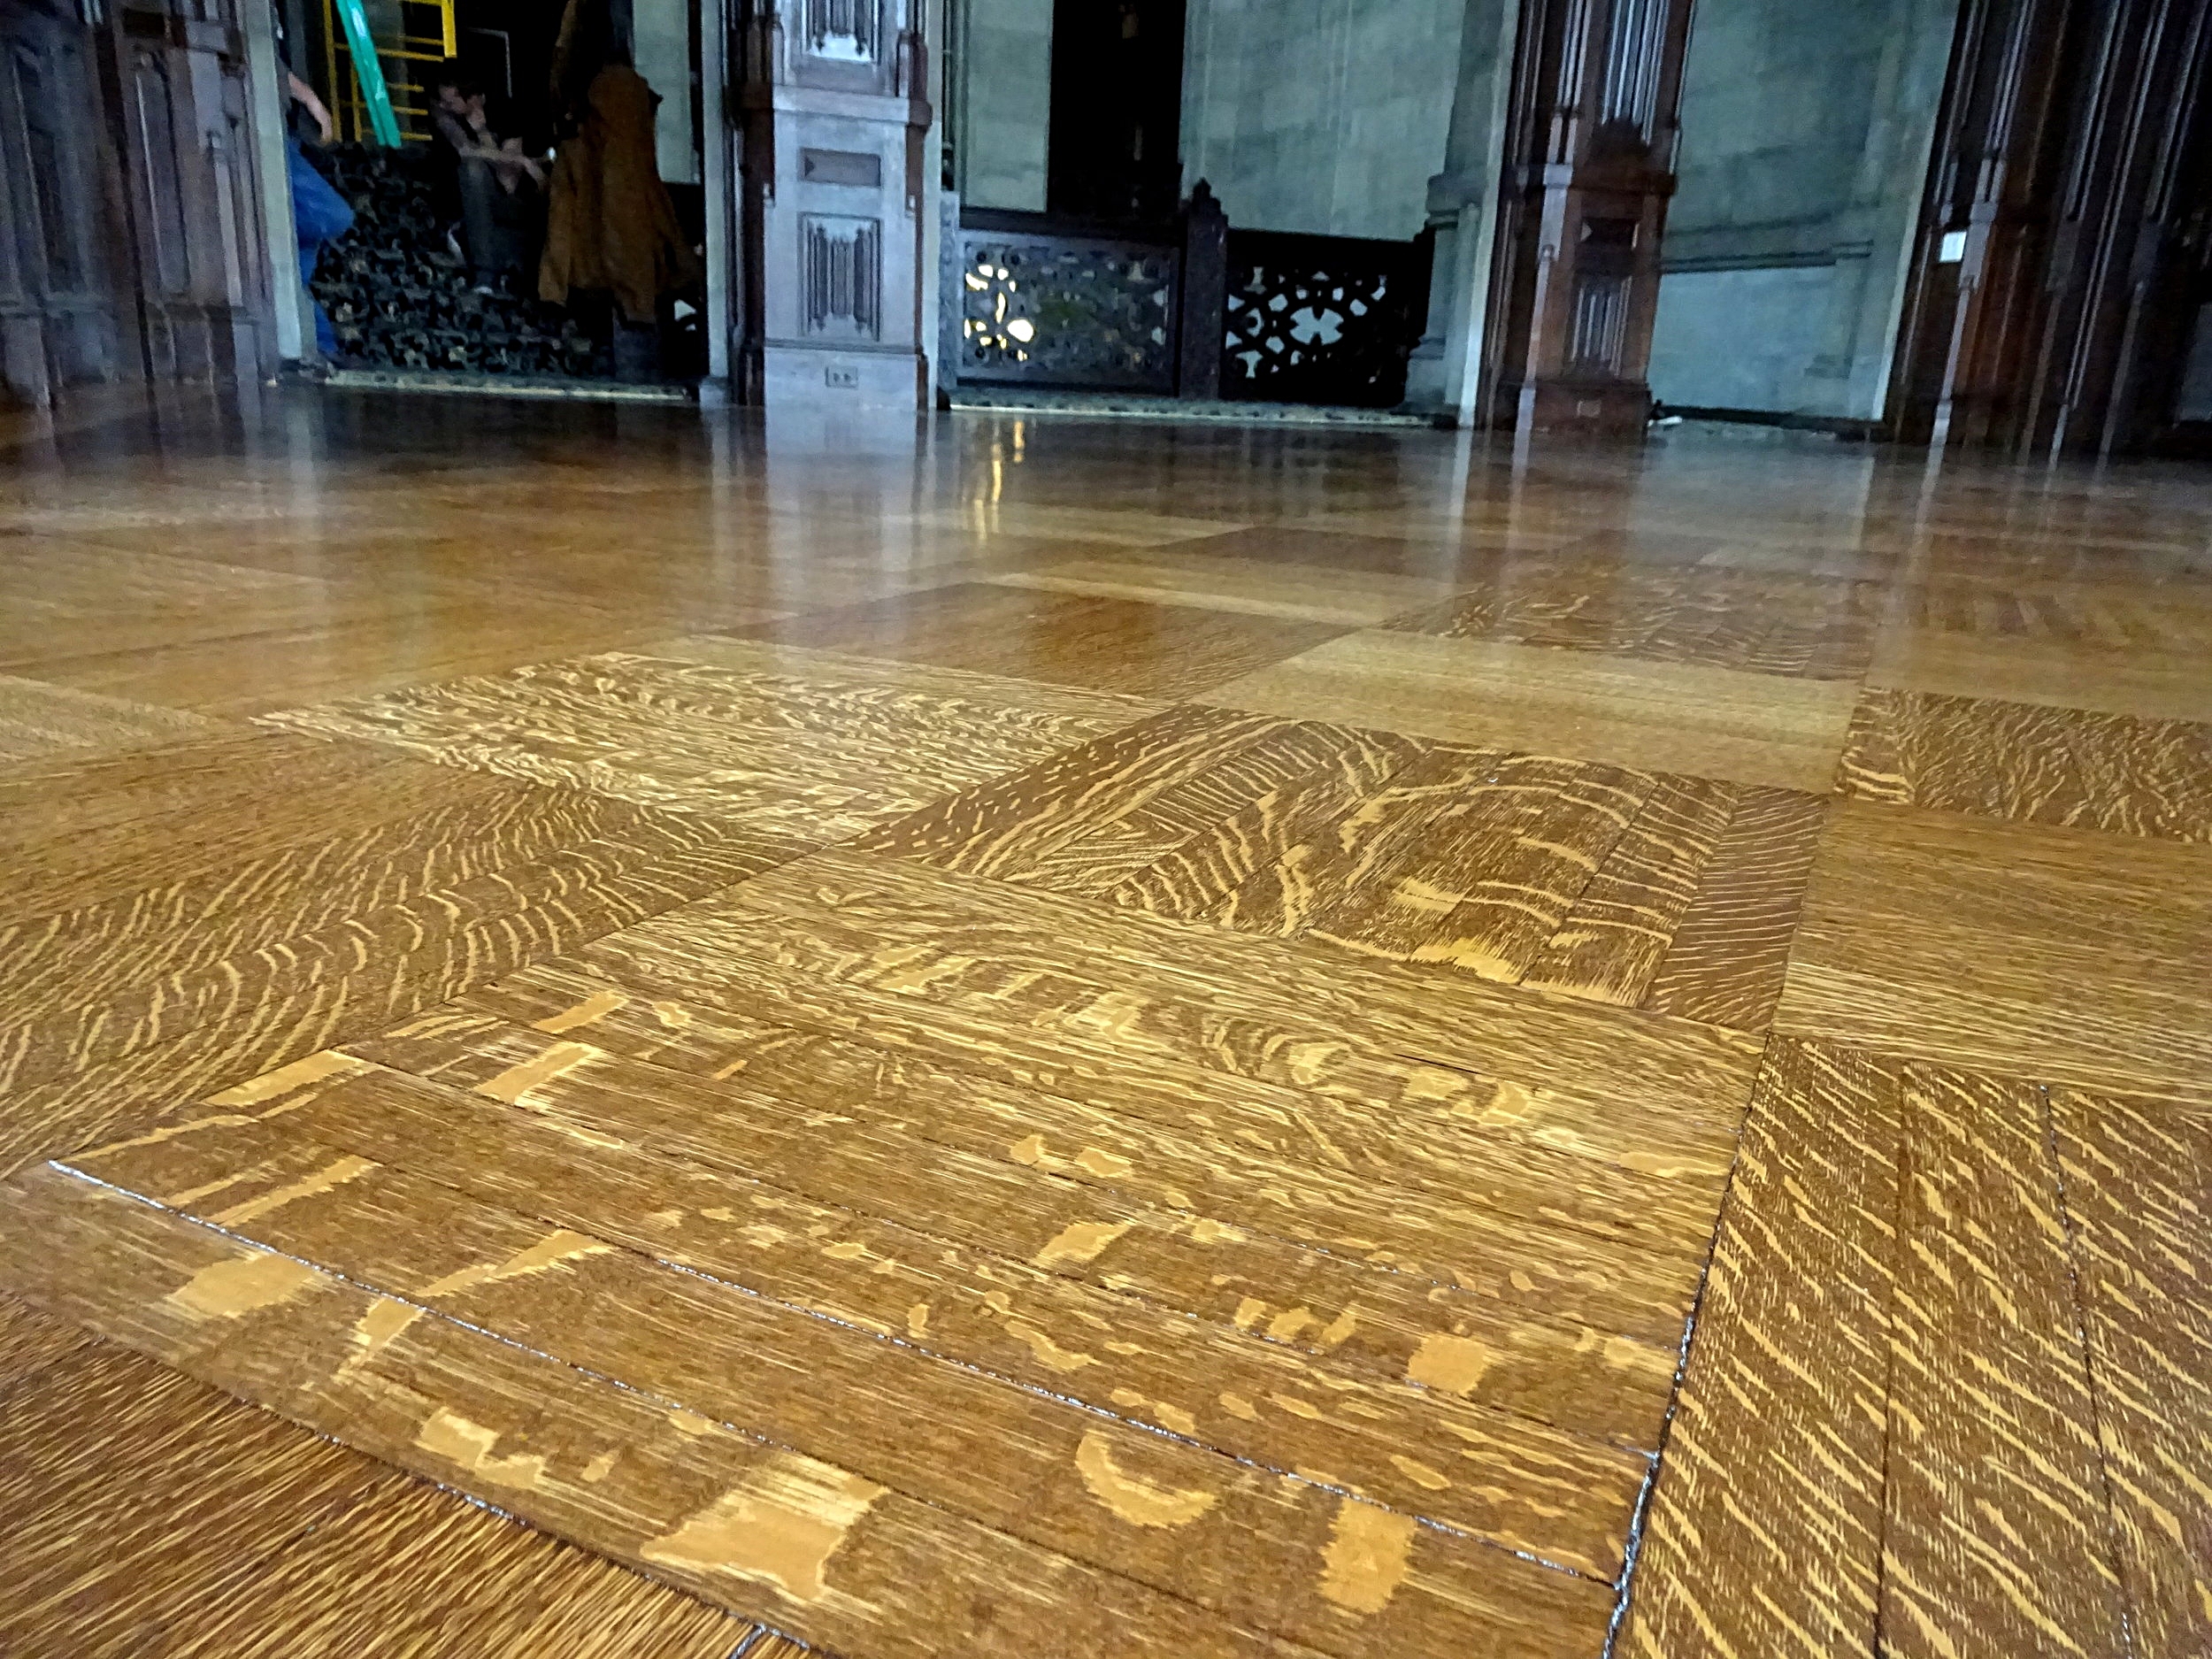
Amazing 105-year old Quarter Sawn parquet floors we restored in the Hempstead House Mansion at the Sands Point Preserve & Conservancy, Winter 2018.

Arched Peaks of Plain Sawn
Amazing 10" Plain Sawn Country Grade White Oak installed and finished with custom Ebony/Espresso blended stain and 3 coats Bona Traffic HD water based polyurethane. Amagansett, NY.
First off, let’s start with the word Sawn. Sawn is the past participle of the word saw, which is the action of sawing the tree trunk to create floor boards. The face appearance of the floor board is determined by the way the wood grain is exposed to the saw itself. What creates the wood grain? As a tree grows, it makes concentric annual growth rings, beginning in the center and moving outwards. The direction or angle of the saw cutting the log will determine the pattern/direction of how those annual growth rings (wood grain) will display on the face of the board.

Different ways to saw a log...
Notice the direction of the blade cuts will determine the way the annual rings display themselves on the face of the board.
Plain Sawn floors are the most commonly milled material today. This is the least expensive way to make wood flooring, because there is very little wasted material. Plain Sawn (aka Flat Sawn) material is made from cuts flat down the center of the log. The log is passed through the blade cutting off plank after plank without changing the orientation of the blade or the log. In plain sawing, the character markings and figures are brought out more fully, including the characteristic “Cathedral Window” grain pattern, with its dynamic flame-like peaks and arched grains.

Recent project completed in Amagansett, NY. 7" Plain Sawn White Oak installed and finished with Woca Pre-Color White + 2 coats Extra White Color Oil. Notice the dynamic arched grains and Cathedral Window pattern characteristic of Plain Sawn (Flat Sawn) material.
In Quarter Sawn flooring, the log is first quartered, and then each quarter is cut again into slices. This method also produces rift sawn flooring boards. The blade of the saw slices perpendicular to the wood’s annual growth rings, resulting in a straight, line-like grain appearance. The center boards (true quartersawn) will have growth rings positioned at 60-90 degrees to the board’s surface.

Beautiful 6" Rift And Quarter Sawn White Oak floor installed and finished with custom blended Fruitwood/Weathered Oak stain + Bona Traffic HD water based polyurethane in Oyster Bay, NY. Notice how the medullary rays feature prominently on the Quarter Sawn pieces!
In rift sawn lumber the annual rings are typically between 30-60 degrees, with 45 degrees being optimum. Rift sawn flooring is manufactured by milling perpendicular to the log’s growth rings producing a linear grain pattern with no flecking. This method produces the most waste, increasing the cost of this lumber. Rift sawn flooring is usually manufactured as a compliment to Quarter Sawn flooring, but logs can be cut specifically as Rift Sawn or Quarter Sawn flooring.
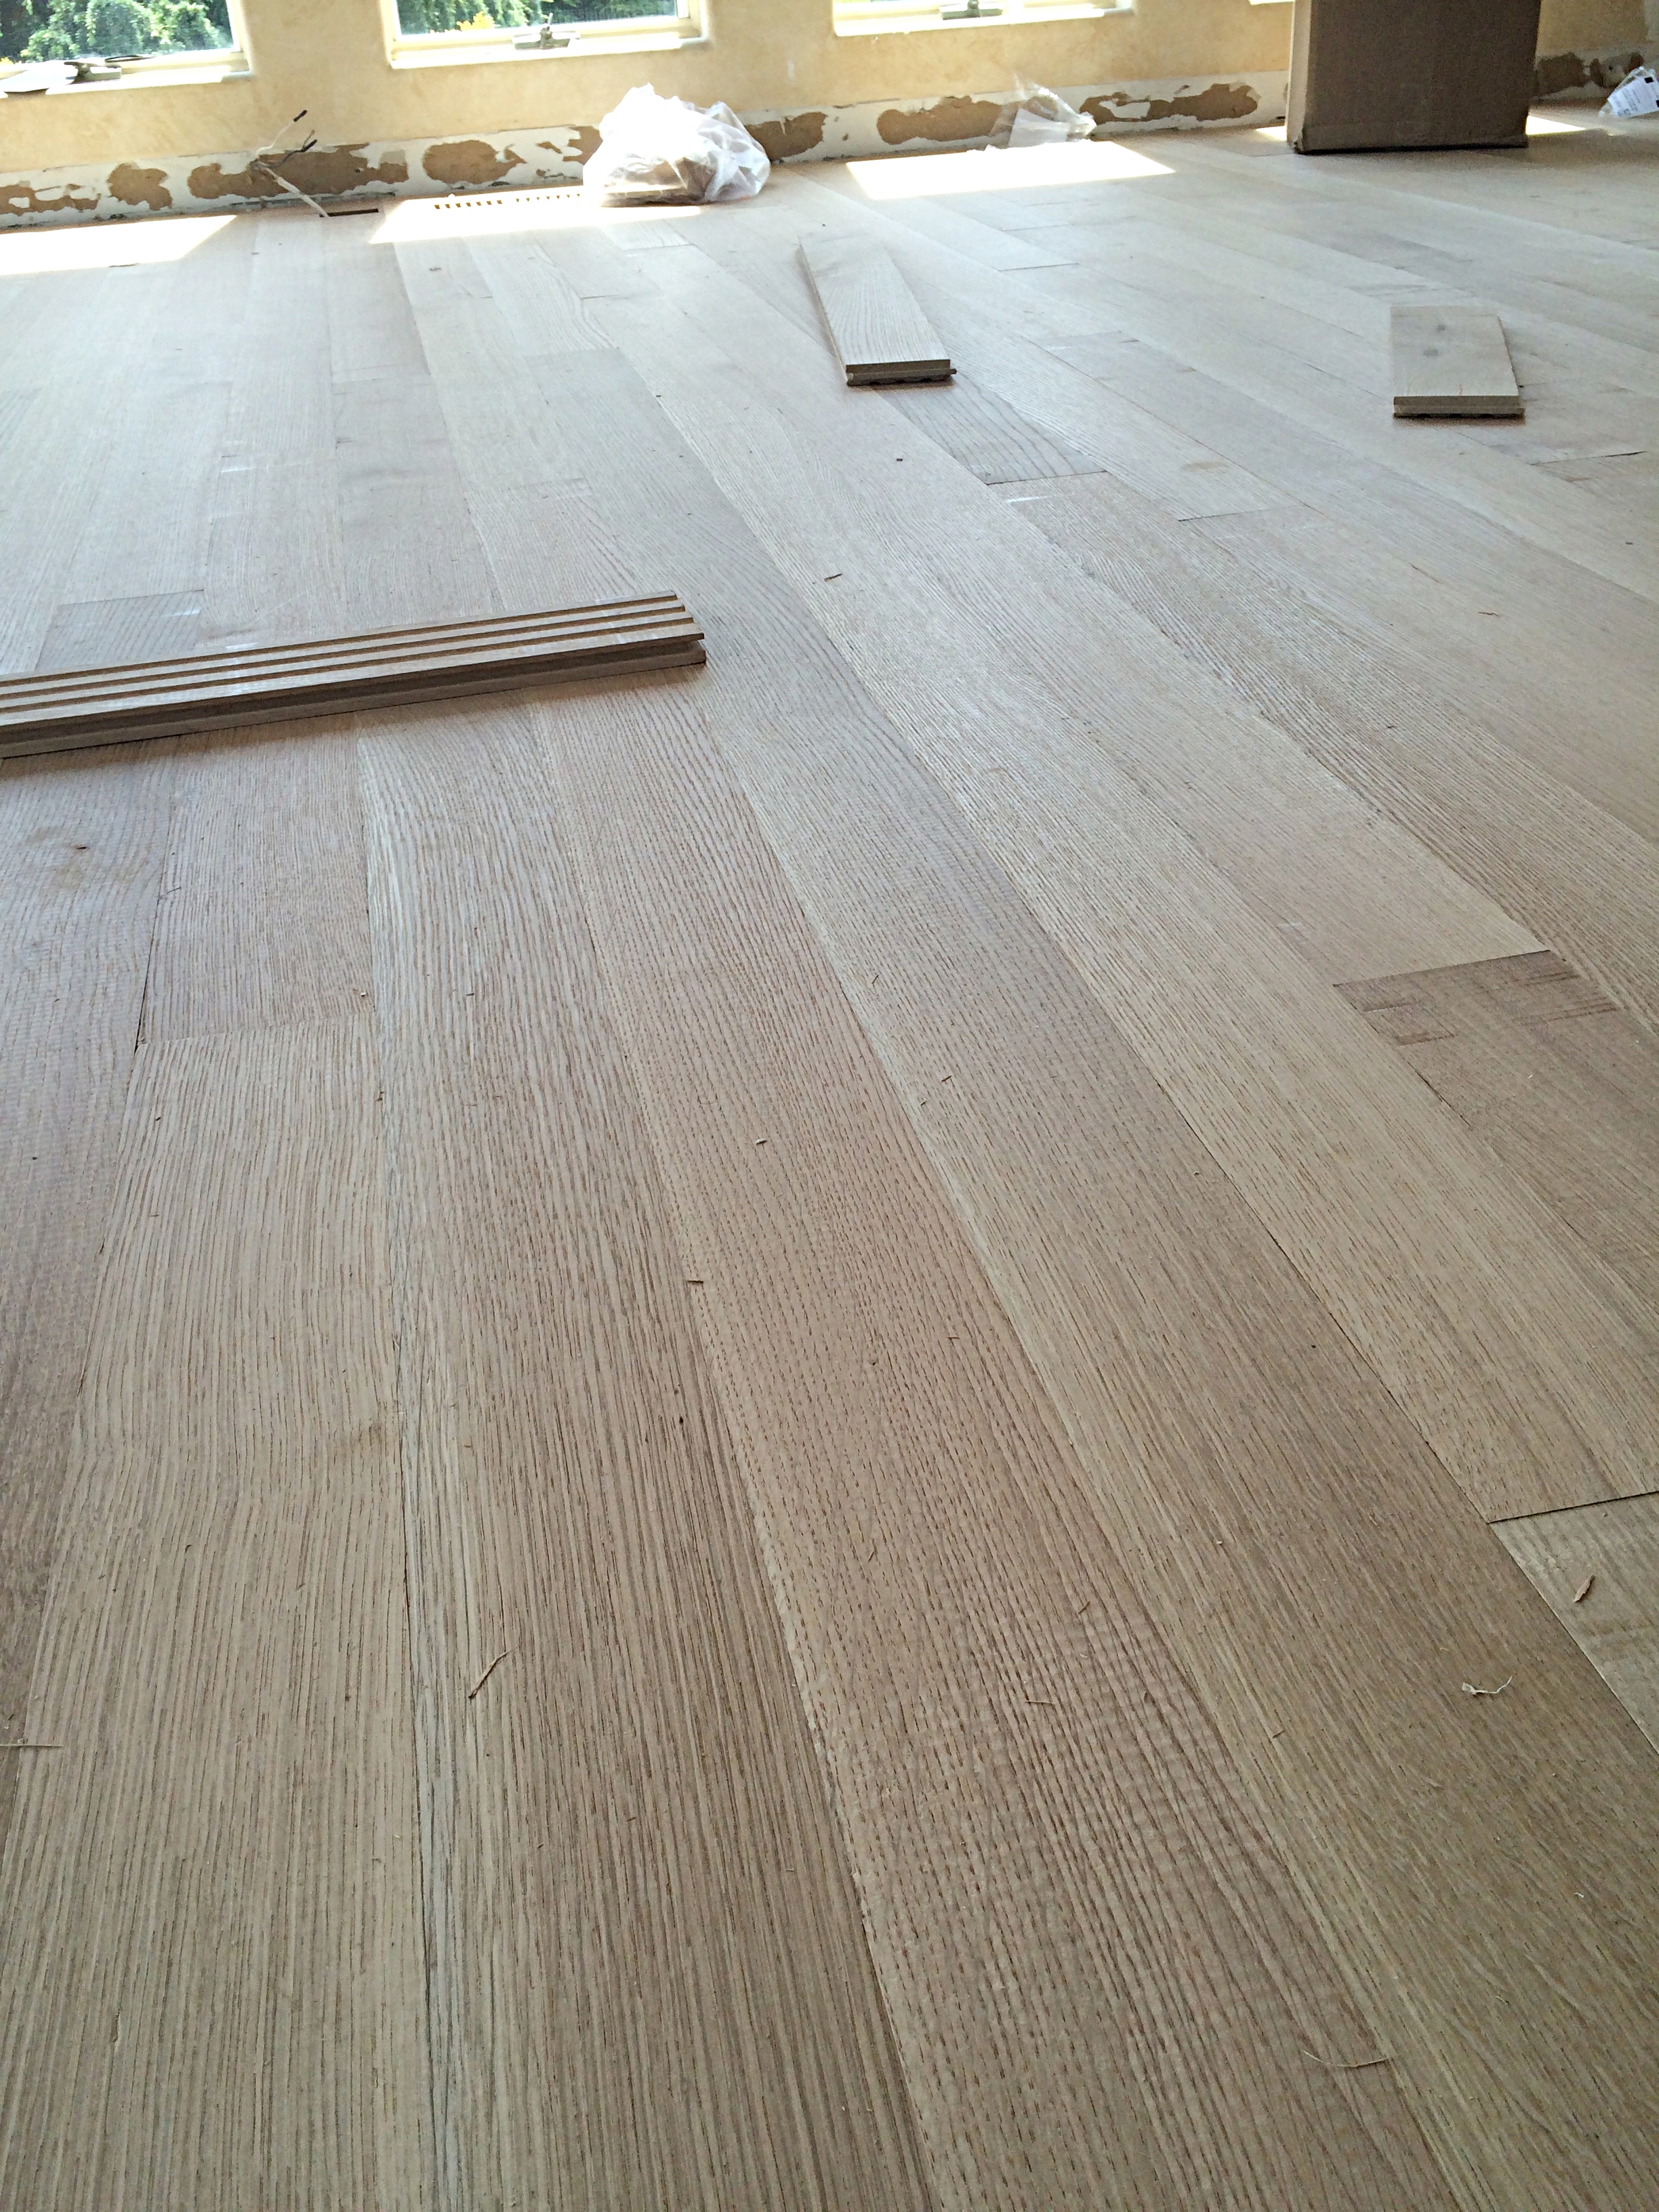
Straight grains of Rift Sawn Flooring
Installing an entirely Rift Sawn White Oak floor in West Islip. Notice the straight grain with NO Ray Fleck (Medullary Rays).
Quarter Sawing also exposes the medullary rays of the tree. Medullary rays are cellular structures found in wood, and they present very dramatically in Red and White Oak. These rays are small capillaries inside the wood that run from the center of the tree to the outer growth ring. Medullary rays grow in a radial fashion in the living tree, so while plain-sawing would cut across the rays making them invisible to the eye, quarter-sawing puts them right on the face of the board. They create a distinct, wavy ribbon-like effect on the lumber known as flecking. It is important to note that this only appears in quarter sawn floor boards. In rift sawn flooring there is no flecking effect from the medullary rays, but there is still a unique straight grain appearance on both sides of the board.
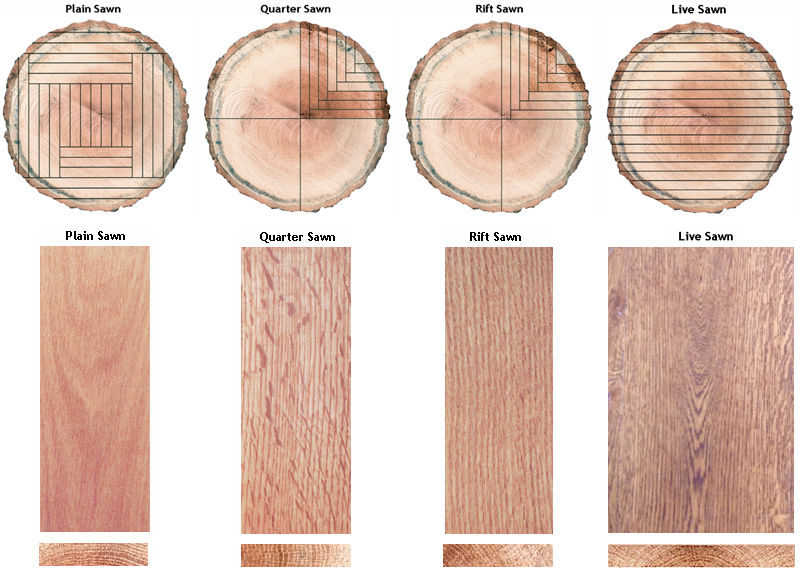
Diagram shows clearly the most prominent characteristics of the different milling cuts of flooring. Live Sawn to be discussed in a future blog post. Note the dramatic medullary ray fleck present in the Quarter Sawn piece.
The most common design is mixing the rift and quartersawn planks which helps to offset some of their increased cost as compared with plain sawn material. When flooring companies refer to quarter sawn wood, they are usually referring to a combination of quarter and rift sawn boards.

Gorgeous 4" Rift & Quarter Sawn Red Oak floor installed over radiant heat, sanded and finished with 50/50 Ebony/Weathered Oak stain and 3 coats Bona Traffic HD water based polyurethane. Note the mixing of both Rift and Quarter Sawn pieces in this floor.
Besides the unique appearance, rift and quartered wood flooring is highly prized for its stability.
In general, wood flooring adjusts to the climate that it is in by regularly absorbing and releasing moisture from the environment. This causes floor boards to expand and contract as its surrounding conditions change. Wood expands through the grain, in the direction of the curve of the annual rings. Why is that important?

A Quarter Sawn board on the left, with growth rings perpendicular to the face of the board, while on the right is a Plain Sawn board, which exhibits growth rings parallel to the face of the board.

Boards expand and contract through the annual rings.
Notice that a Plain Sawn floor will expand and contract along the sides of the board, while a Rift and Quarter Sawn board will expand up and down, which means less seasonal gapping and a floor much less prone to cupping.
When lumber is rift and quartered and sawn, any shrinkage or expansion of the lumber is greatest in thickness (as opposed to width) because the grains run perpendicular to the face of the board. For wood flooring, this means that rift and quarter sawn material is less prone to seasonal gapping, expanding/contracting, or cupping, making it very desirable for flooring. An RQ flooring board expands up and down, as opposed to side to side, as Plain Sawn floor board would. For these reasons, Rift and Quartered hardwood flooring can be used over radiant heating and in homes near the water. Homes near the water, like the one we are working on in Asharoken, have a much higher interior relative humidity than most homes and also have much more dramatic swings in conditions through the seasons. White Oak Rift and Quarter Sawn wide plank flooring is a great choice for this house, both for its stability and its style!

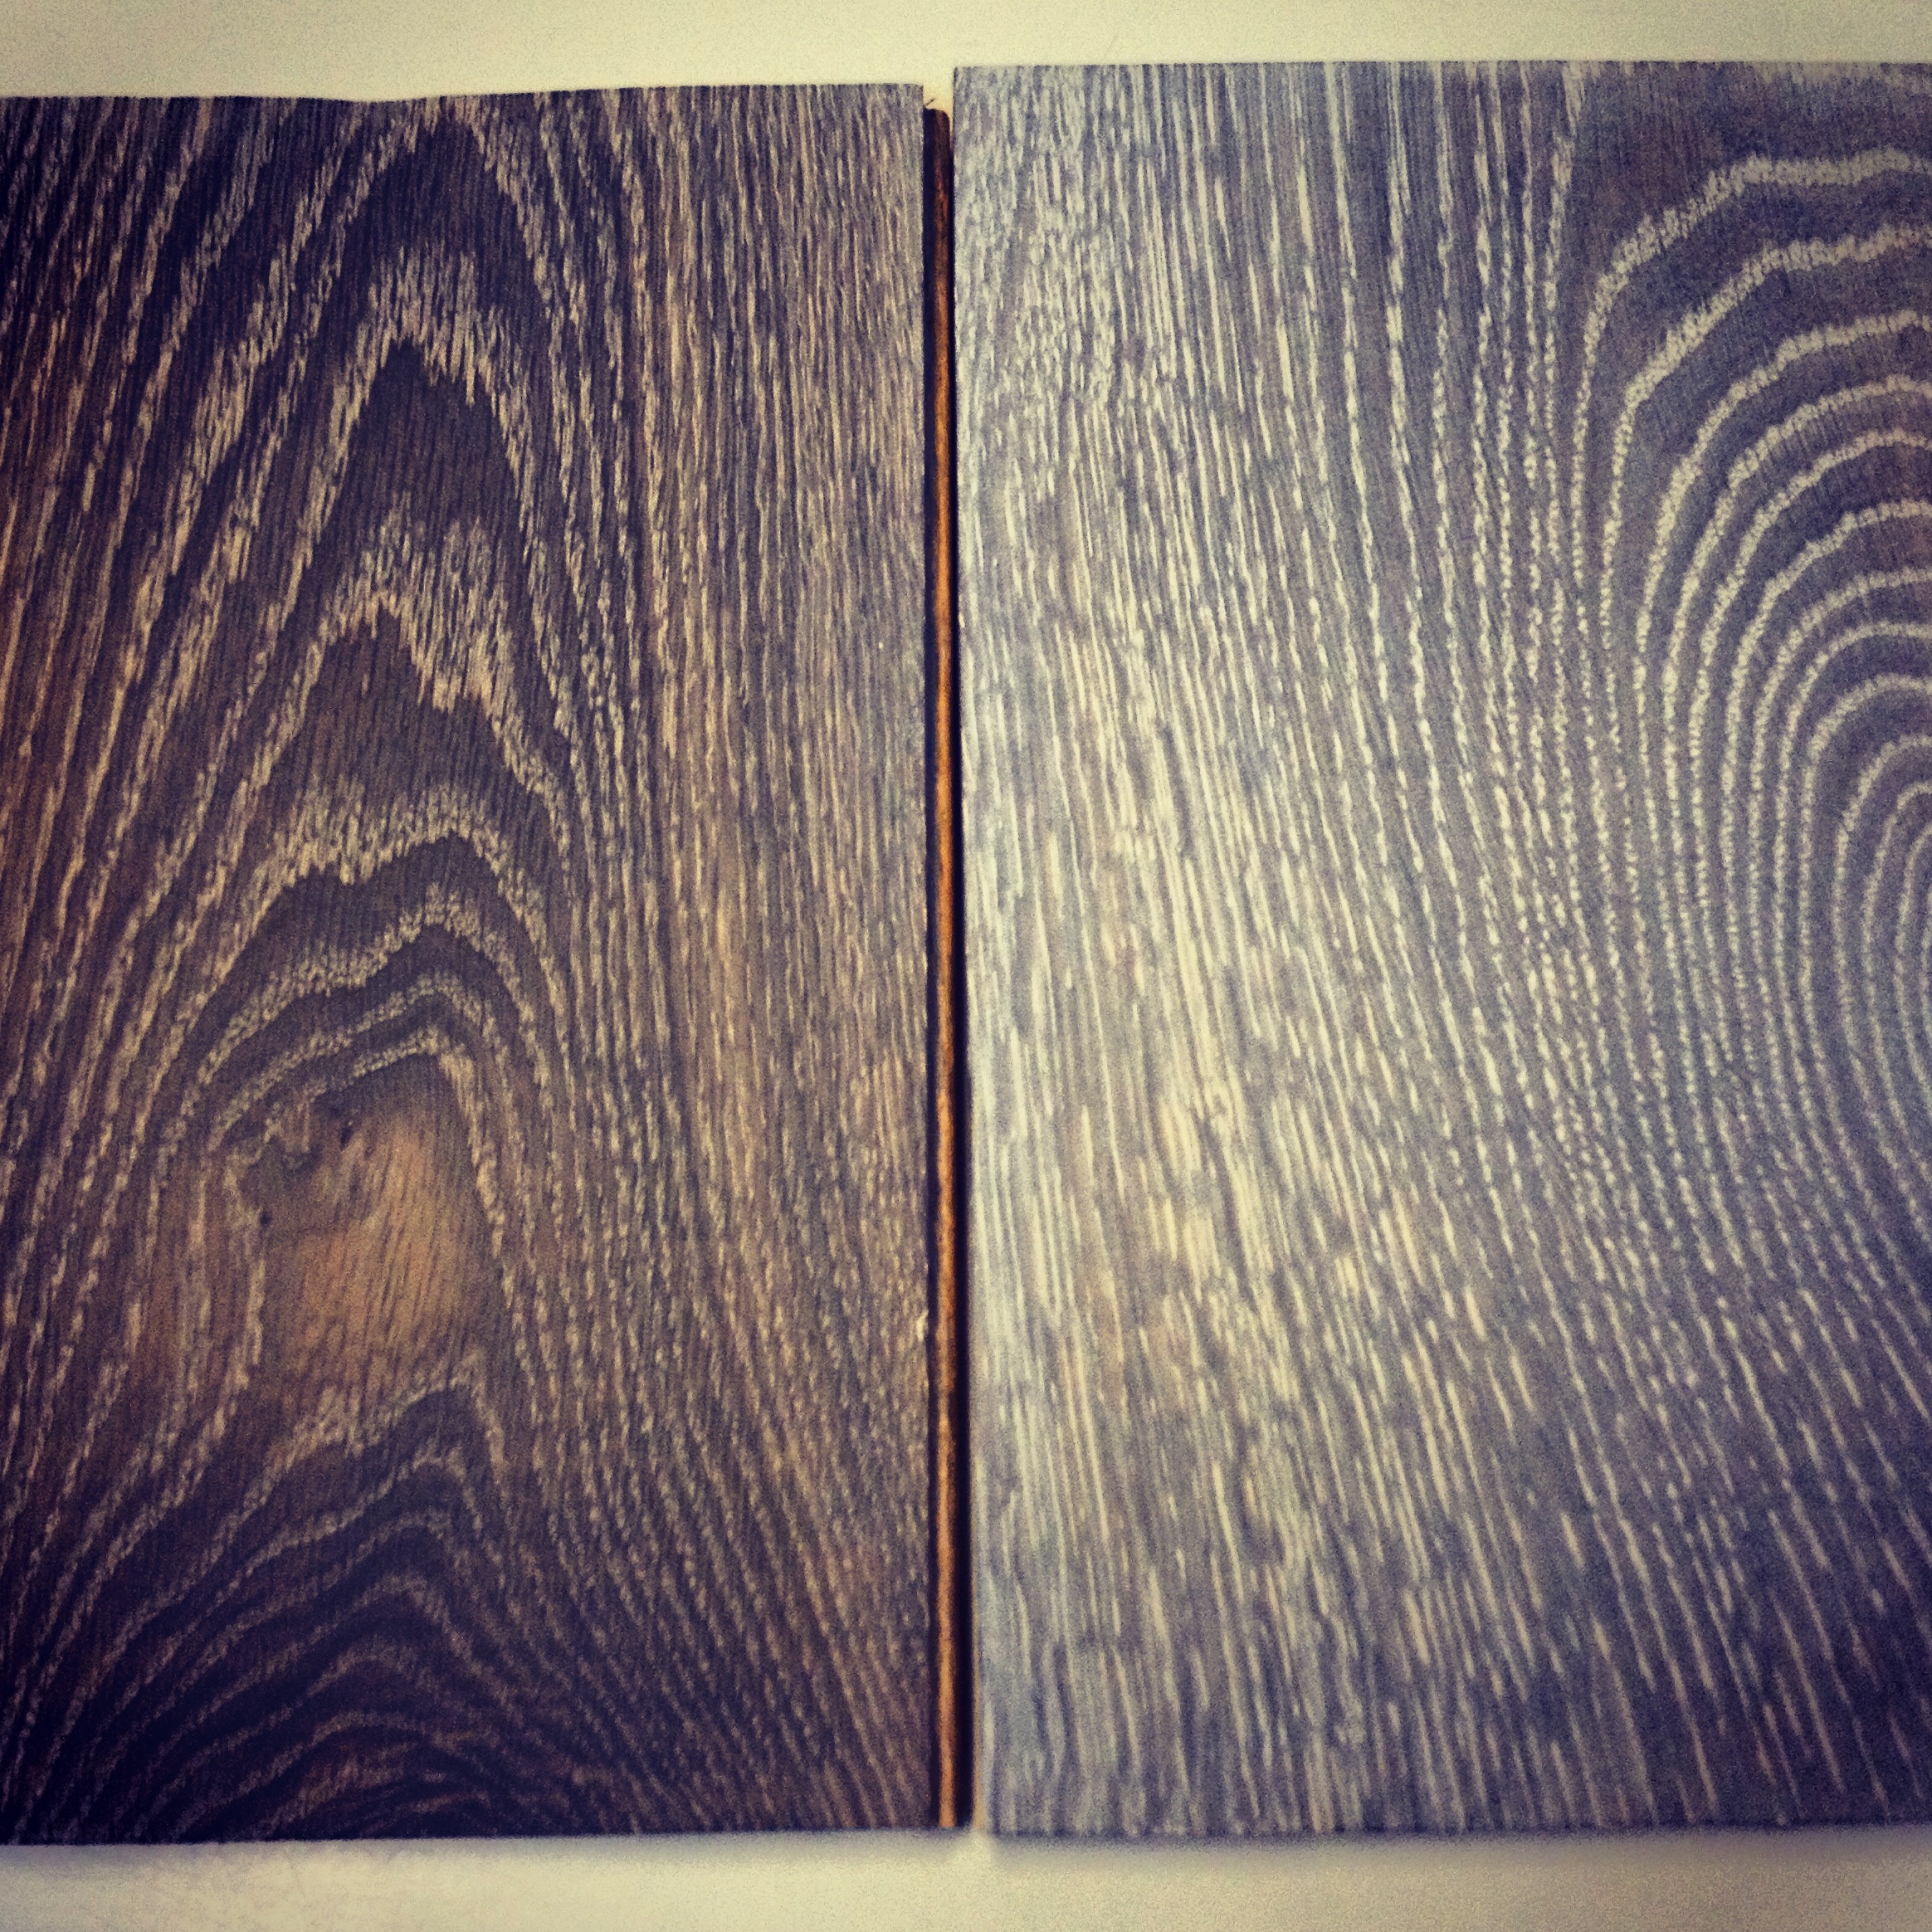
Asharoken, NY: Making WOCA Samples on 8" Rift and Quarter Sawn White Oak flooring, basketweave pattern. Samples from left to right are: Woca Softwood Lye, Woca Pre-Color White, Woca Driftwood Lye White, all with Woca Color Oil Extra White.
We are always so proud of our work and love to share it with the world, so we were psyched when our Instagram account was featured in the most recent issue of NWFA Hardwood Floors Magazine! Check out the article, link below: "Instagram: Why It Matters (Part 1)"

June / July 2018 NWFA Hardwood Floors Magazine
Find us in the Business Best Practices Section!

What is Engineered hardwood flooring and when do you need it? Well, after so many people telling me how helpful my blog has been, I’m making a renewed commitment to getting back on the horse! But enough about me…on to the topic at hand! To start, Engineered flooring is real hardwood – not laminate, which looks like wood but is fake. Engineered flooring is made of several core layers of plywood, high density fiberboard, or other type of hardwood glued together and a thin layer, or veneer, of a particular hardwood flooring species glued on top of those layers. This creates a more stable floor. What does that mean? Is hardwood flooring unstable? In general, hardwood flooring is a wonderful choice for long-term enjoyment, but it is an organic substance that responds to its environment. Mainly, the elements in the environment that cause hardwood to move are: moisture, humidity levels, and heat. Yes, wood floors do move throughout their lifetime! If it is very humid, boards can swell, while in very dry/cold conditions, they will shrink up, which leads to what we call seasonal gapping. Going even farther, under very adverse conditions, solid wood floors can warp, cup (edges of the boards turn upwards), swell, or split apart. Because Engineered hardwood flooring is a multi-ply plank of several different layers glued together, as opposed to one solid piece of wood that moves as a whole, it resists twisting and cupping and remains flat and intact.
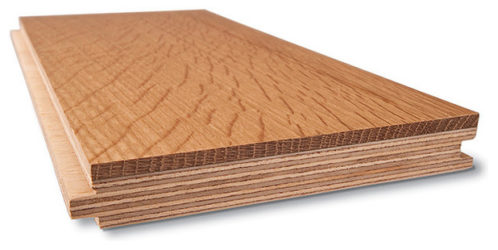
Notice the multiple layers of plywood with the veneer of hardwood on top. This particular piece is Quarter Sawn White Oak.
Engineered flooring, like solid hardwood, is available both as an unfinished product and a prefinished product. There are more prefinished Engineered flooring options out there than there are people to buy them! As discussed in an earlier blog post, our opinion remains staunchly the same – that no prefinished product can ever compare to the beauty of a professionally site-finished wood floor! If you go with Engineered, get unfinished Engineered and have someone sand it and customize the finish to your exact specifications! #justsaynotoprefinished
Engineered wood flooring is also available in different species and grades, just like solid hardwoods. There are just as many options with Engineered wood flooring as there are with a solid hardwood floor.

Character Grade Maple Engineered Wood Flooring
Making samples on 6" Character Grade Maple Engineered wood floors in Head of the Harbor, NY. This floor was installed over radiant heating.
Finished product is very striking and unique! 6" Character Grade Maple Engineered wood flooring installed over radiant, sanded and finished on site with custom blended Dura Seal stain and 3 coats Bona Traffic HD water based polyurethane. Head of the Harbor, NY.
When should you use Engineered flooring? Isn’t solid hardwood better? Answer to this question is that there are advantages to both, but there are also specific situations where Engineered flooring can be used and a solid cannot:
1) Because of its more stable construction, Engineered flooring can be installed directly over concrete. It does not need a plywood subfloor as solid hardwood flooring does. If you have a concrete subfloor, it can often be less expensive to install engineered flooring because you don’t have to purchase plywood and/or pay for the labor to install it. Also, there are rarely clearance issues to deal with when installing Engineered wood flooring directly onto a concrete slab. Oftentimes, installing a 3/4" plywood subfloor and a 3/4" hardwood floor to a slab formerly carpeted will necessitate that doors be cut and baseboard heating pipes raised to accommodate the 1.5" height increase of the new flooring.

Installing Unfinished 4" Select & Better Grade Red Oak Engineered hardwood flooring directly onto concrete slab in Dix Hills, NY. Homeowners did not have to cut any of the doors or raise any baseboards, and we were able to install the flooring at the same height as existing tile, eliminating the need for transitions. Sanded and finished on site with Special Walnut stain and 3 coats Bona Traffic HD water based polyurethane.
2) Engineered flooring is a great choice for below-grade applications, such as basements, which can often be prone to greater swings in humidity and moisture levels. We do not recommend to install solid hardwood in below-grade applications.

Southampton basement Engineered White Oak Installation
Installing Unfinished 4" Select Grade White Oak in a basement in Southampton, NY. Notice it looks just like a solid hardwood once installed.
3) People love the trend toward wider planks, but wider planks are more susceptible to dramatic seasonal gapping due to their larger surface area. Gaps drive some people crazy! Because Engineered flooring has a multi-layer plywood core and only a small veneer of hardwood, it is less prone to seasonal gapping.
4) Because of its more stable construction, Engineered flooring can be installed over radiant heating. The only solid hardwood that can be installed over radiant heat is Rift & Quartered material, which is a particular cut of hardwood flooring that I will discuss in a future post. With very wide planks over radiant, we recommend to use Engineered flooring as opposed to a Rift & Quartered solid.
Unfinished 8" Select & Better White Oak Engineered flooring being installed over radiant heating in West Islip, NY. Though you can install Rift & Quartered solid flooring over radiant heating as well, we suggest Engineered flooring as the best choice for very wide planking like this. We will be coming back to sand and finish this project soon!
So this Engineered hardwood sounds wonderful! Why doesn’t everyone use it all the time? The main drawback to Engineered hardwood is that it has a small layer of actual hardwood on top of the multi-layer plywood core. Why is that a drawback? As hardwood floors show wear over time, one of the great benefits of hardwood flooring is that it can be sanded and refinished and be made to look new again. With its smaller layer of sand-able wood, Engineered flooring is not able to be sanded as many times as a solid floor. However, with its many benefits, many homeowners are choosing to use Engineered flooring. Once installed and finished, it looks identical to a solid, and how often do our customers re-sand their flooring? Maybe every 20 – 25 years on average? If you purchase an Engineered floor with at least a 4mm “wear layer,” the floors should last at minimum 60 years.
Beautiful 4" White Oak Engineered wood floor we installed in a basement in Sag Harbor, NY this winter. The floor was unfinished, and we recently sanded and finished it with Woca Driftwood Lye White and Woca Color Oil Extra White hardwax oil. Engineered flooring gives you the opportunity to make your basement flooring look just as high end as the rest of the house! In this particular project, we installed a 4" White Oak solid on the upper 2 floors, and sanded and finished all the floors exactly the same.
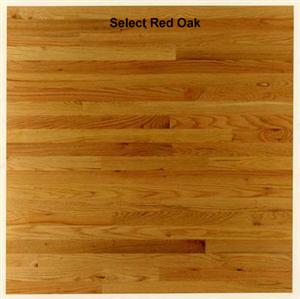
I’m beginning to realize that a lot of people out there don’t know that there are different grades of hardwood flooring! Each grade has its own particular characteristics and appearance. Especially pertaining to Oak hardwood flooring, the 3 most commonly used grades are: Select, #1 Common, and #2 Common, which is also known as “Rustic” grade, or “Builder’s” grade. The grading scale is a measure of what is known as “Character” markings or natural characteristics, e.g., variation in color from board to board, mineral streaks, presence of knots or worm holes; but they also reference average board length, milling imperfections, and other irregularities. None of these 3 different grades are better or more durable than the others – the grading is primarily a way to qualify appearance. Some people prefer the uniformity of Select grade, while others prefer a more rustic look with more character in the floor. Less character markings costs more, because there will be less of a tree that is usable. Select grade is the most expensive of the three, with #1 being a bit cheaper, and #2 Rustic grade costing considerably less than Select. SELECT grade has very few imperfections or character markings. Select grade will be almost uniform in color, with very few knots or holes, and longer, similar length boards. Small, tight knots are permitted only every 3 feet.

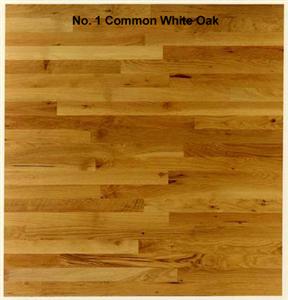
#1 Common has more variation in light and dark colors from board to board, knots, holes, and more variation in the length of boards.

#2 Common or Rustic grade is very rustic in appearance, with great variation in color from board to board, visible mineral streaks, prominent, larger-sized knots and worm holes, and lots of shorter boards.


In our opinion, #3 Common, also known as “Tavern” grade or “Utility” grade is not worth purchasing to use for wood flooring, because even though it will be significantly less per square foot, so much of it will be unusable that this negates the lower price. #3 or Utility grade frequently has dark machine burns, shattered ends, large broken knots, broken pieces, a high percentage of boards 1' or less, etc. For those who like a floor full of character, we recommend going with a #2 or Rustic grade.
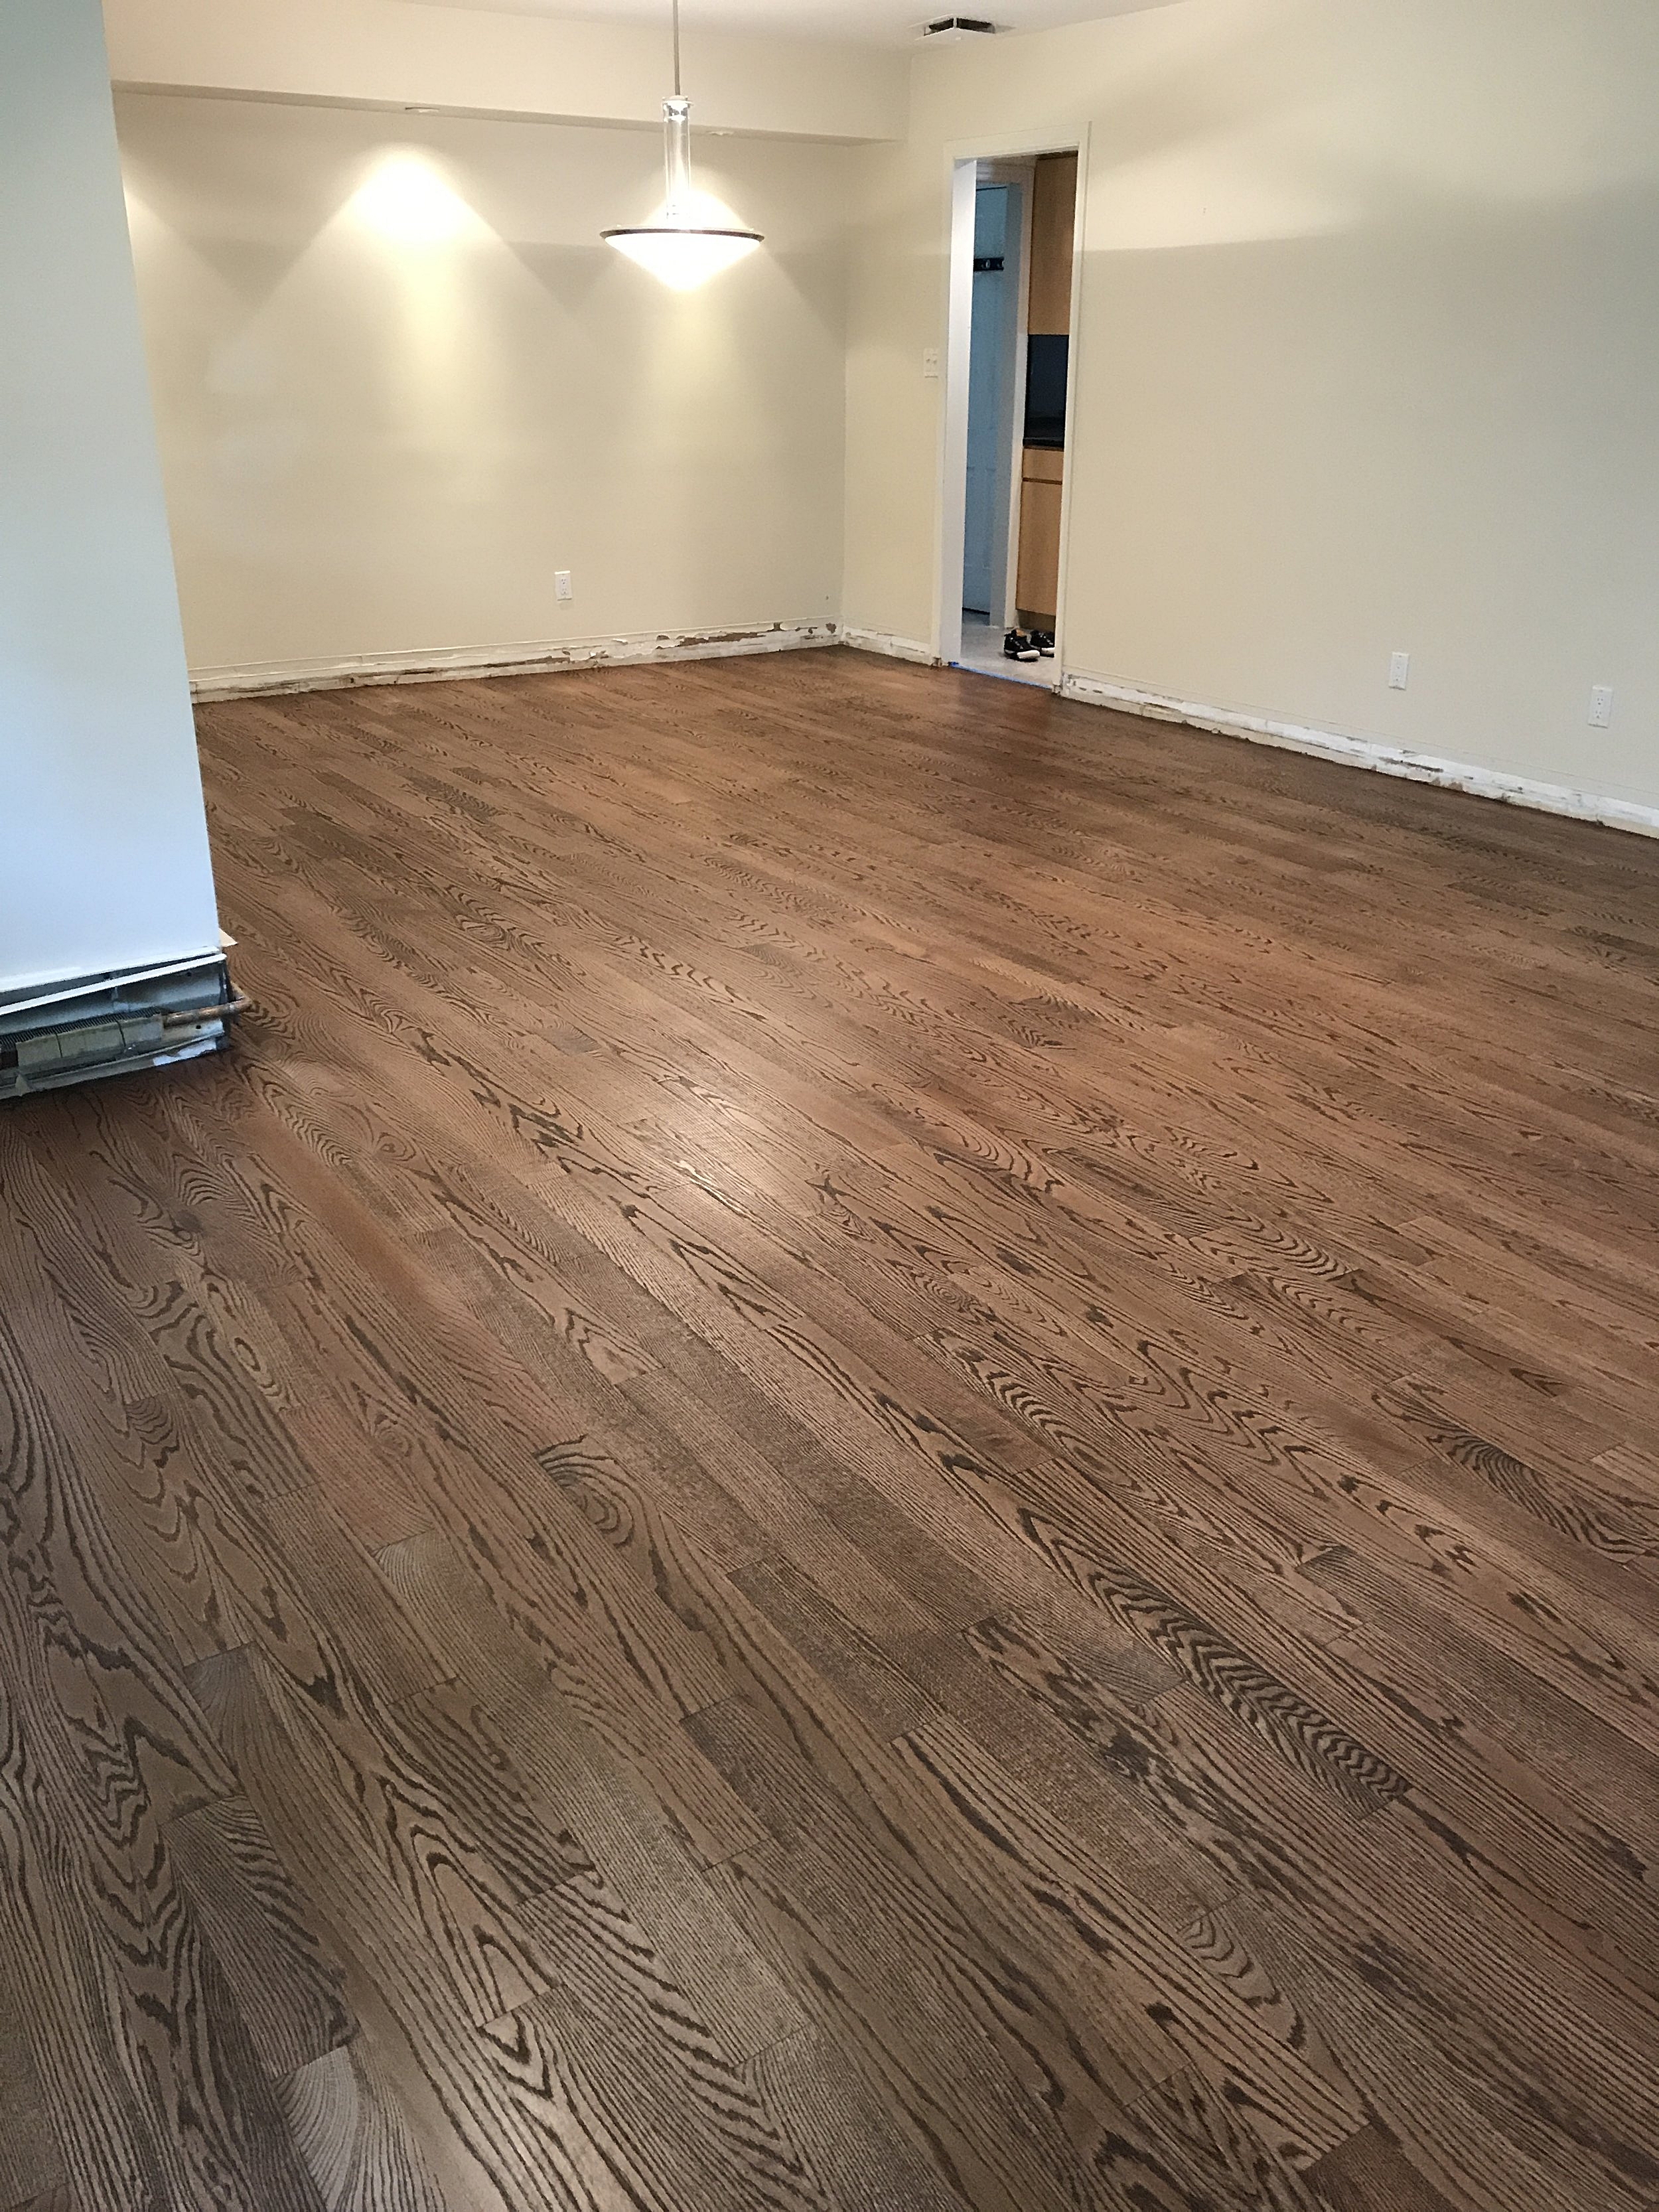
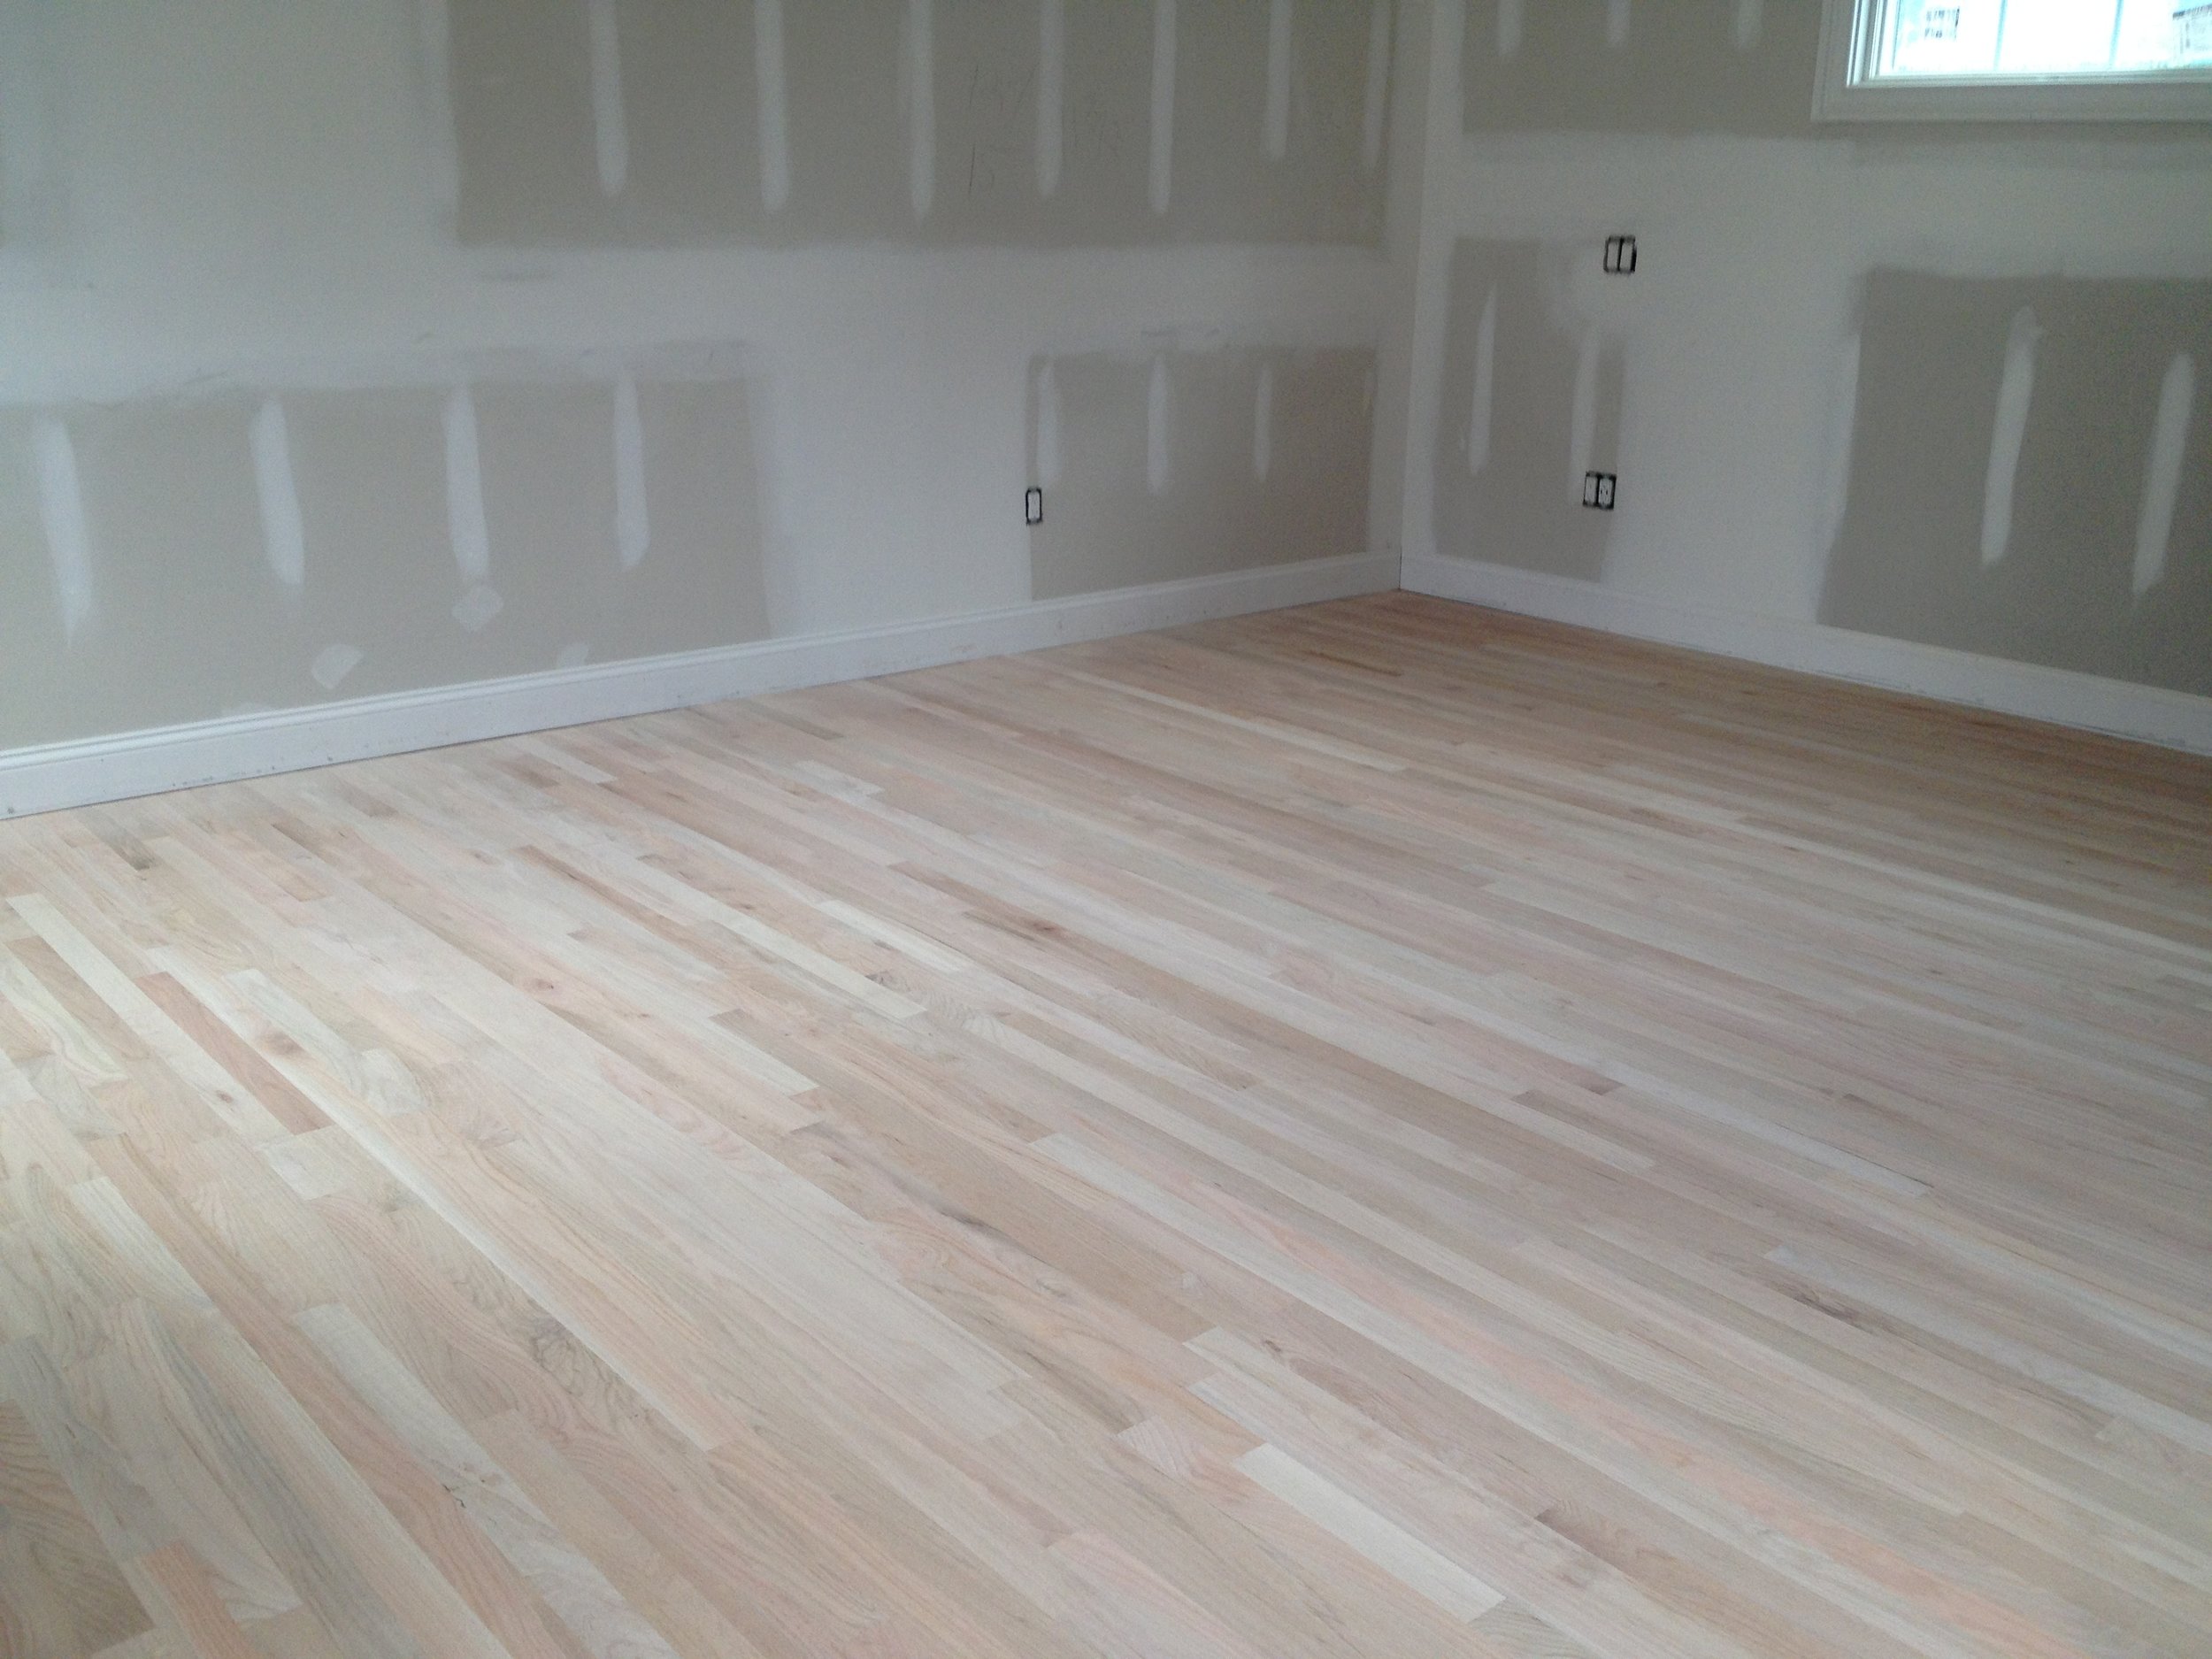
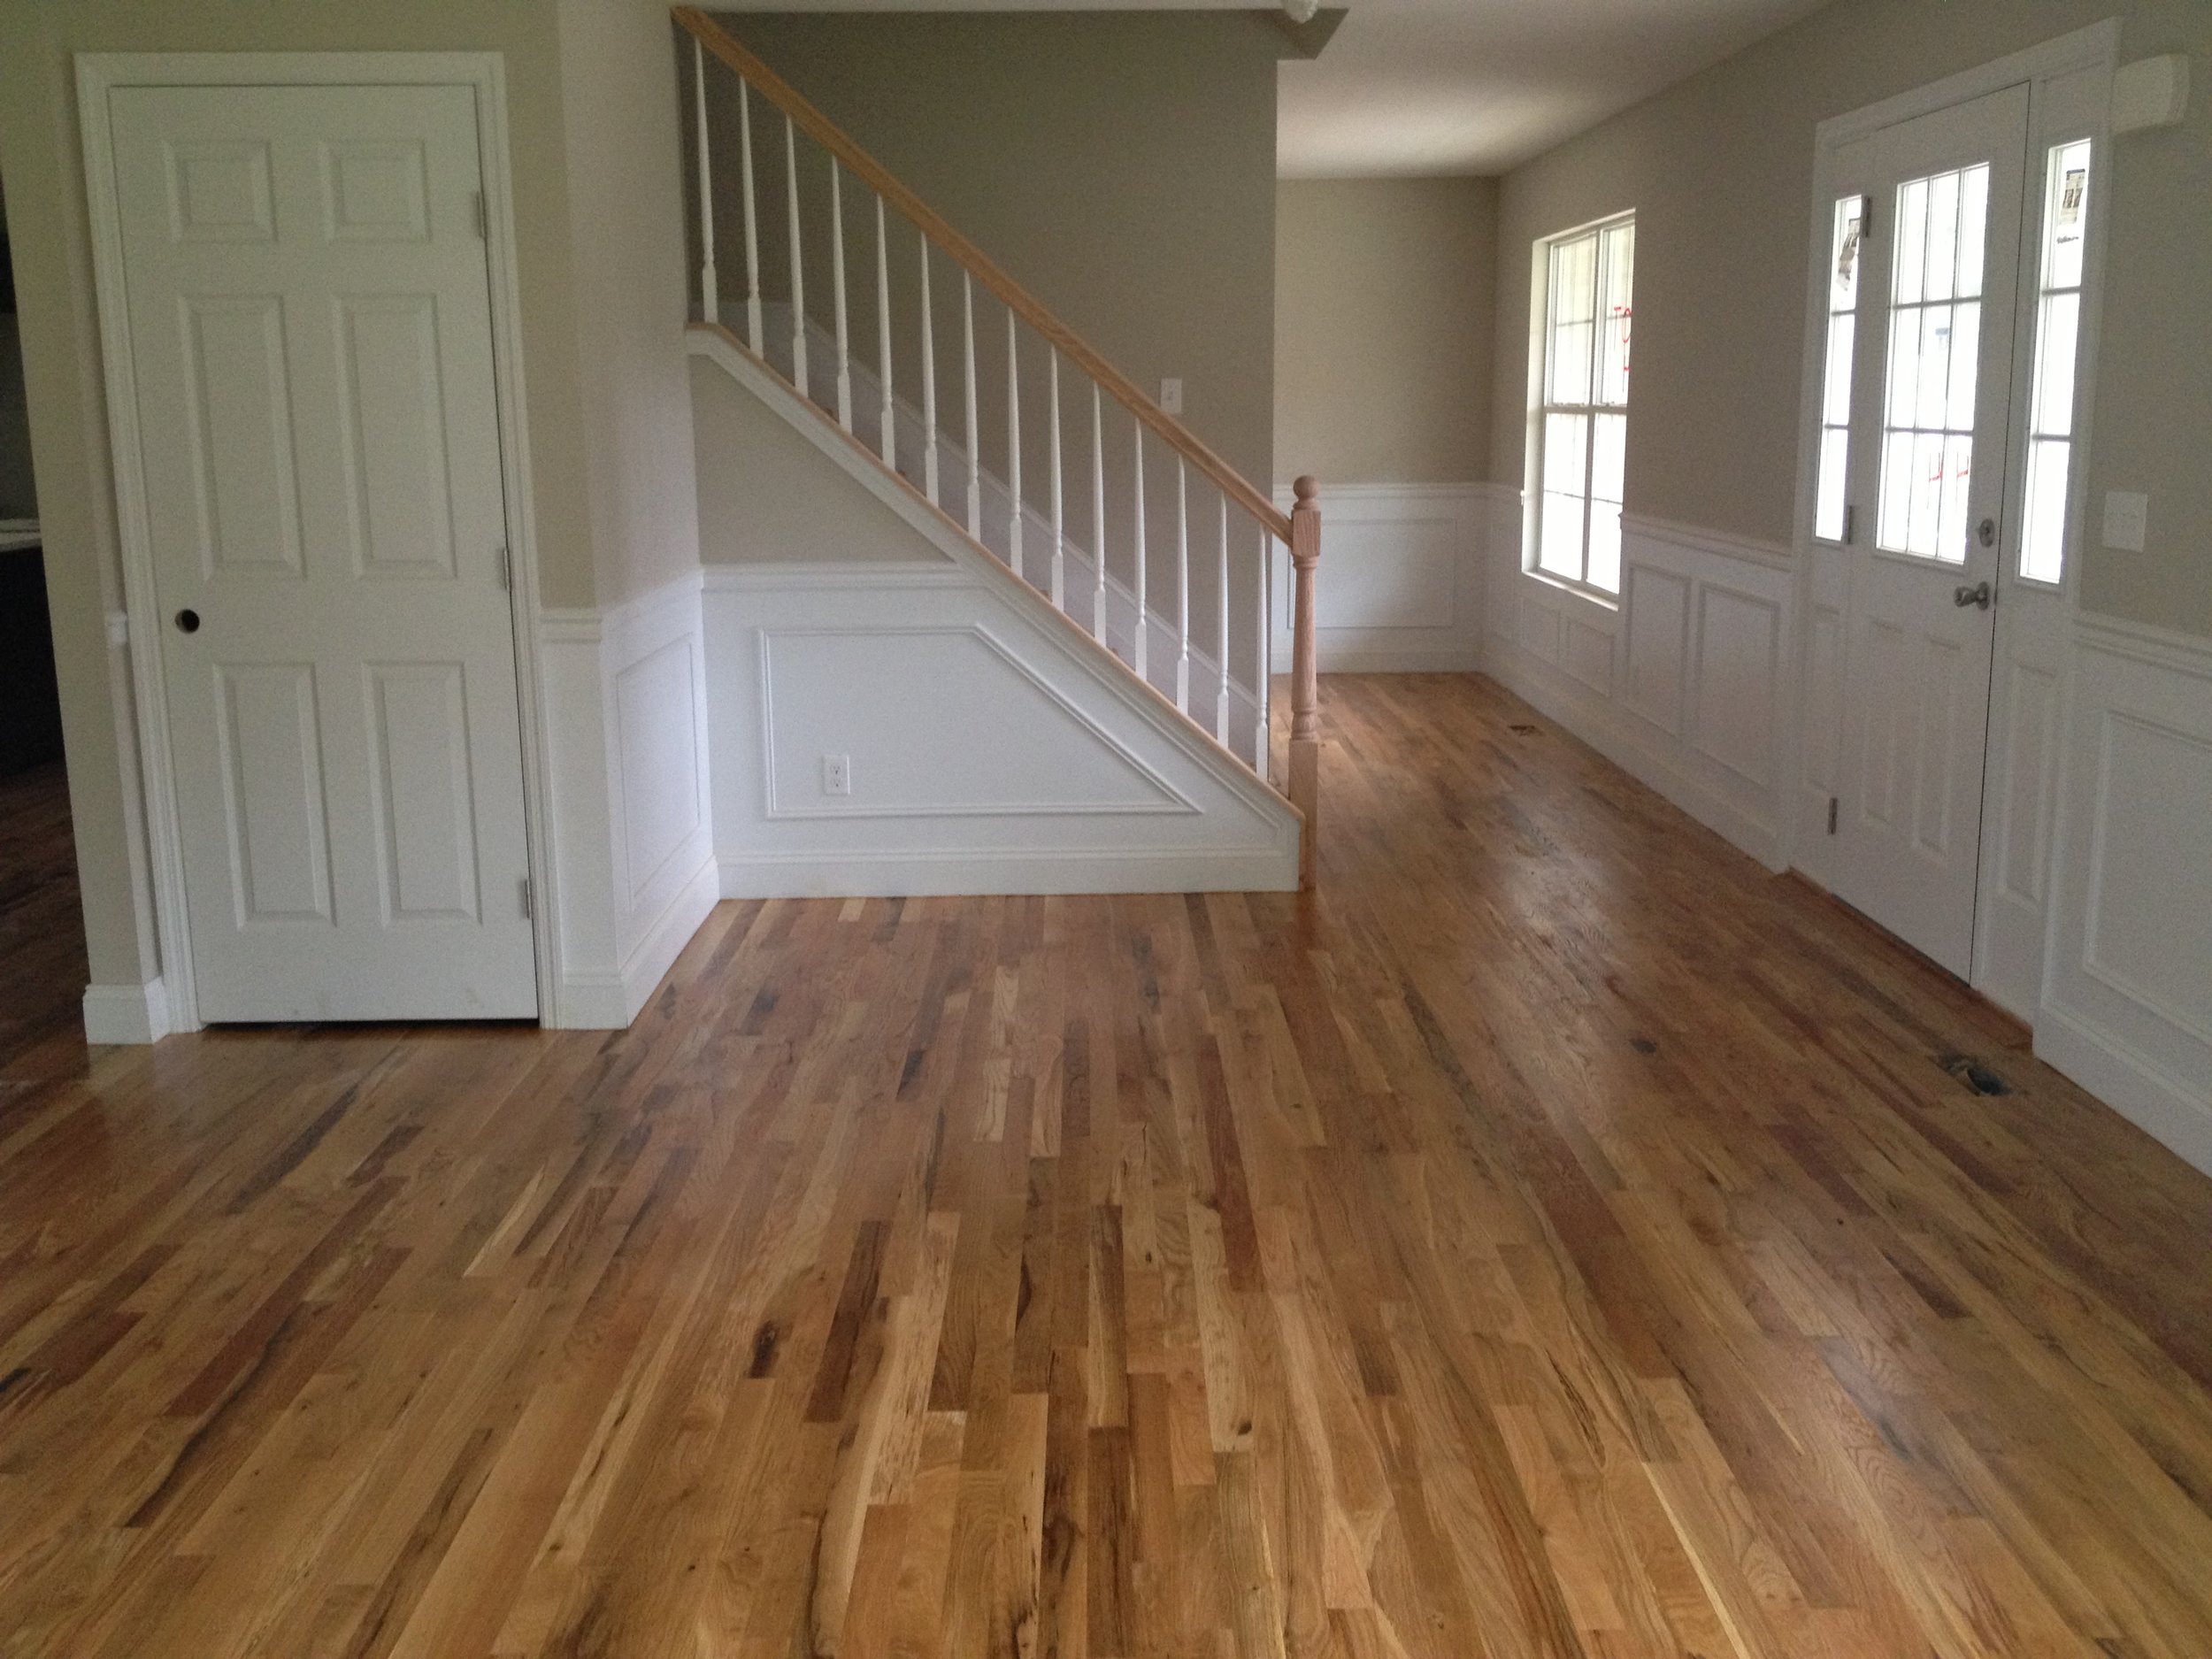
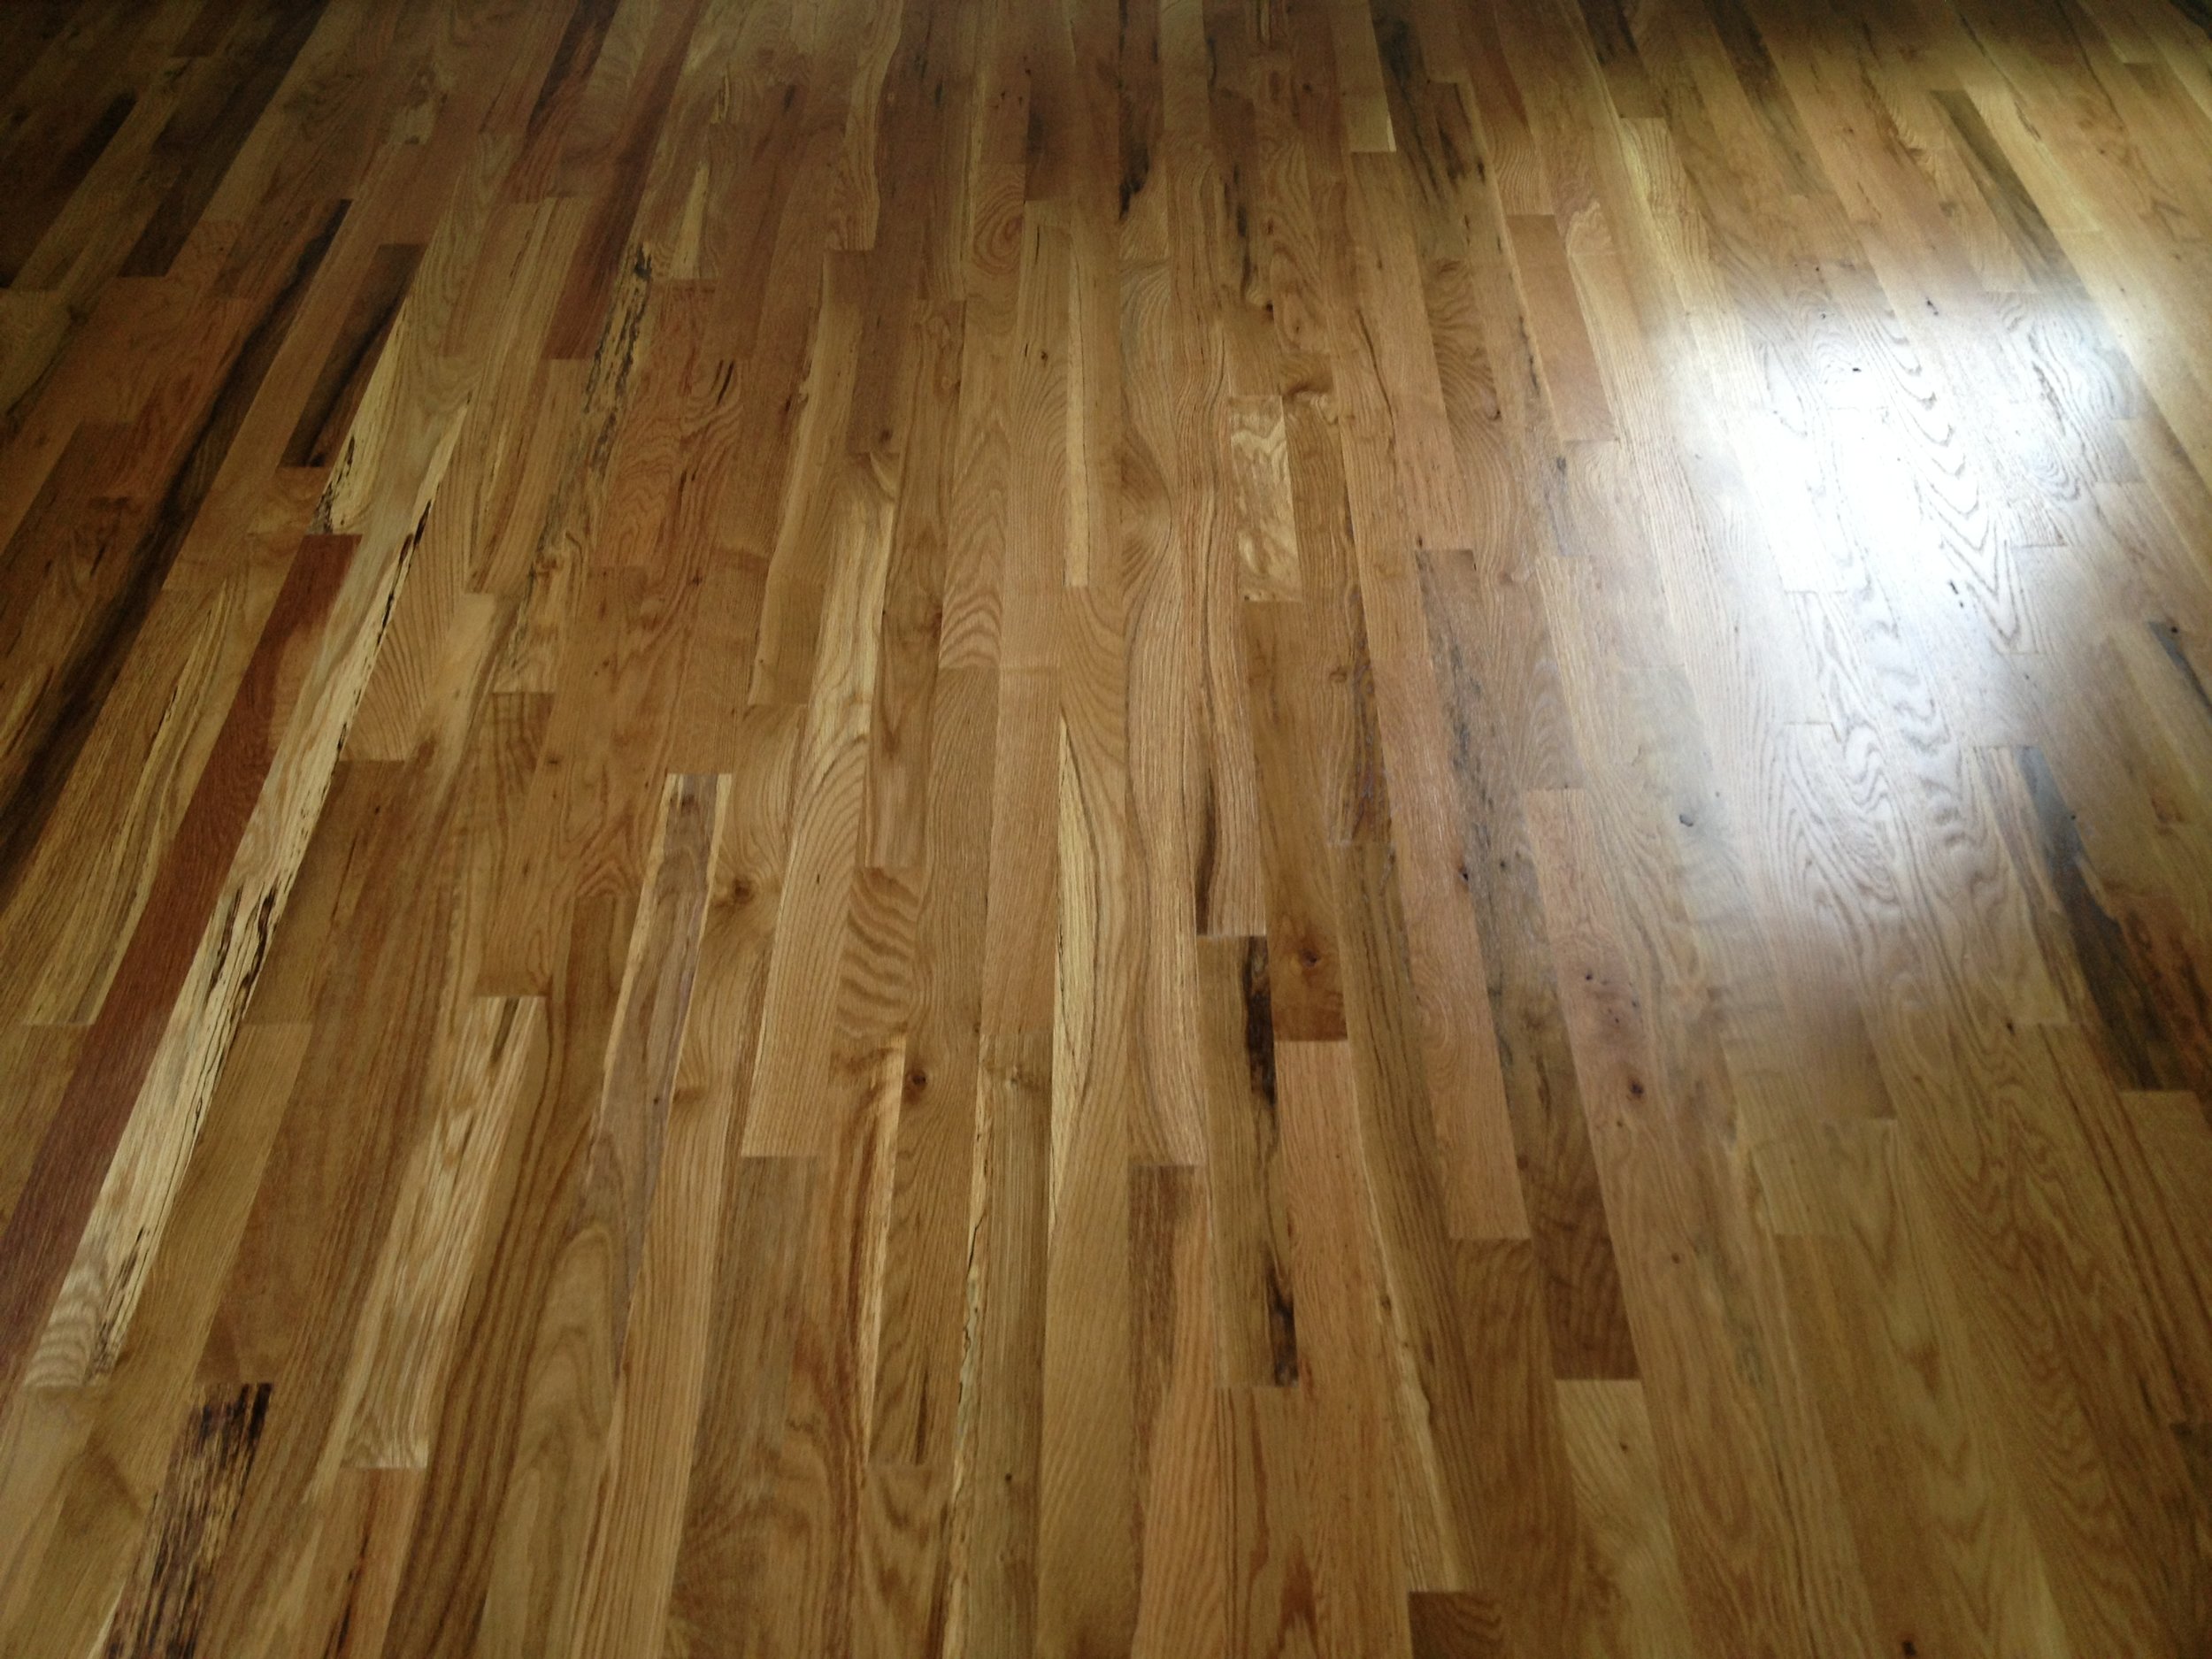
Here are some different grades of Red Oak hardwood floors that we have installed, sanded and finished, all natural without a stain:
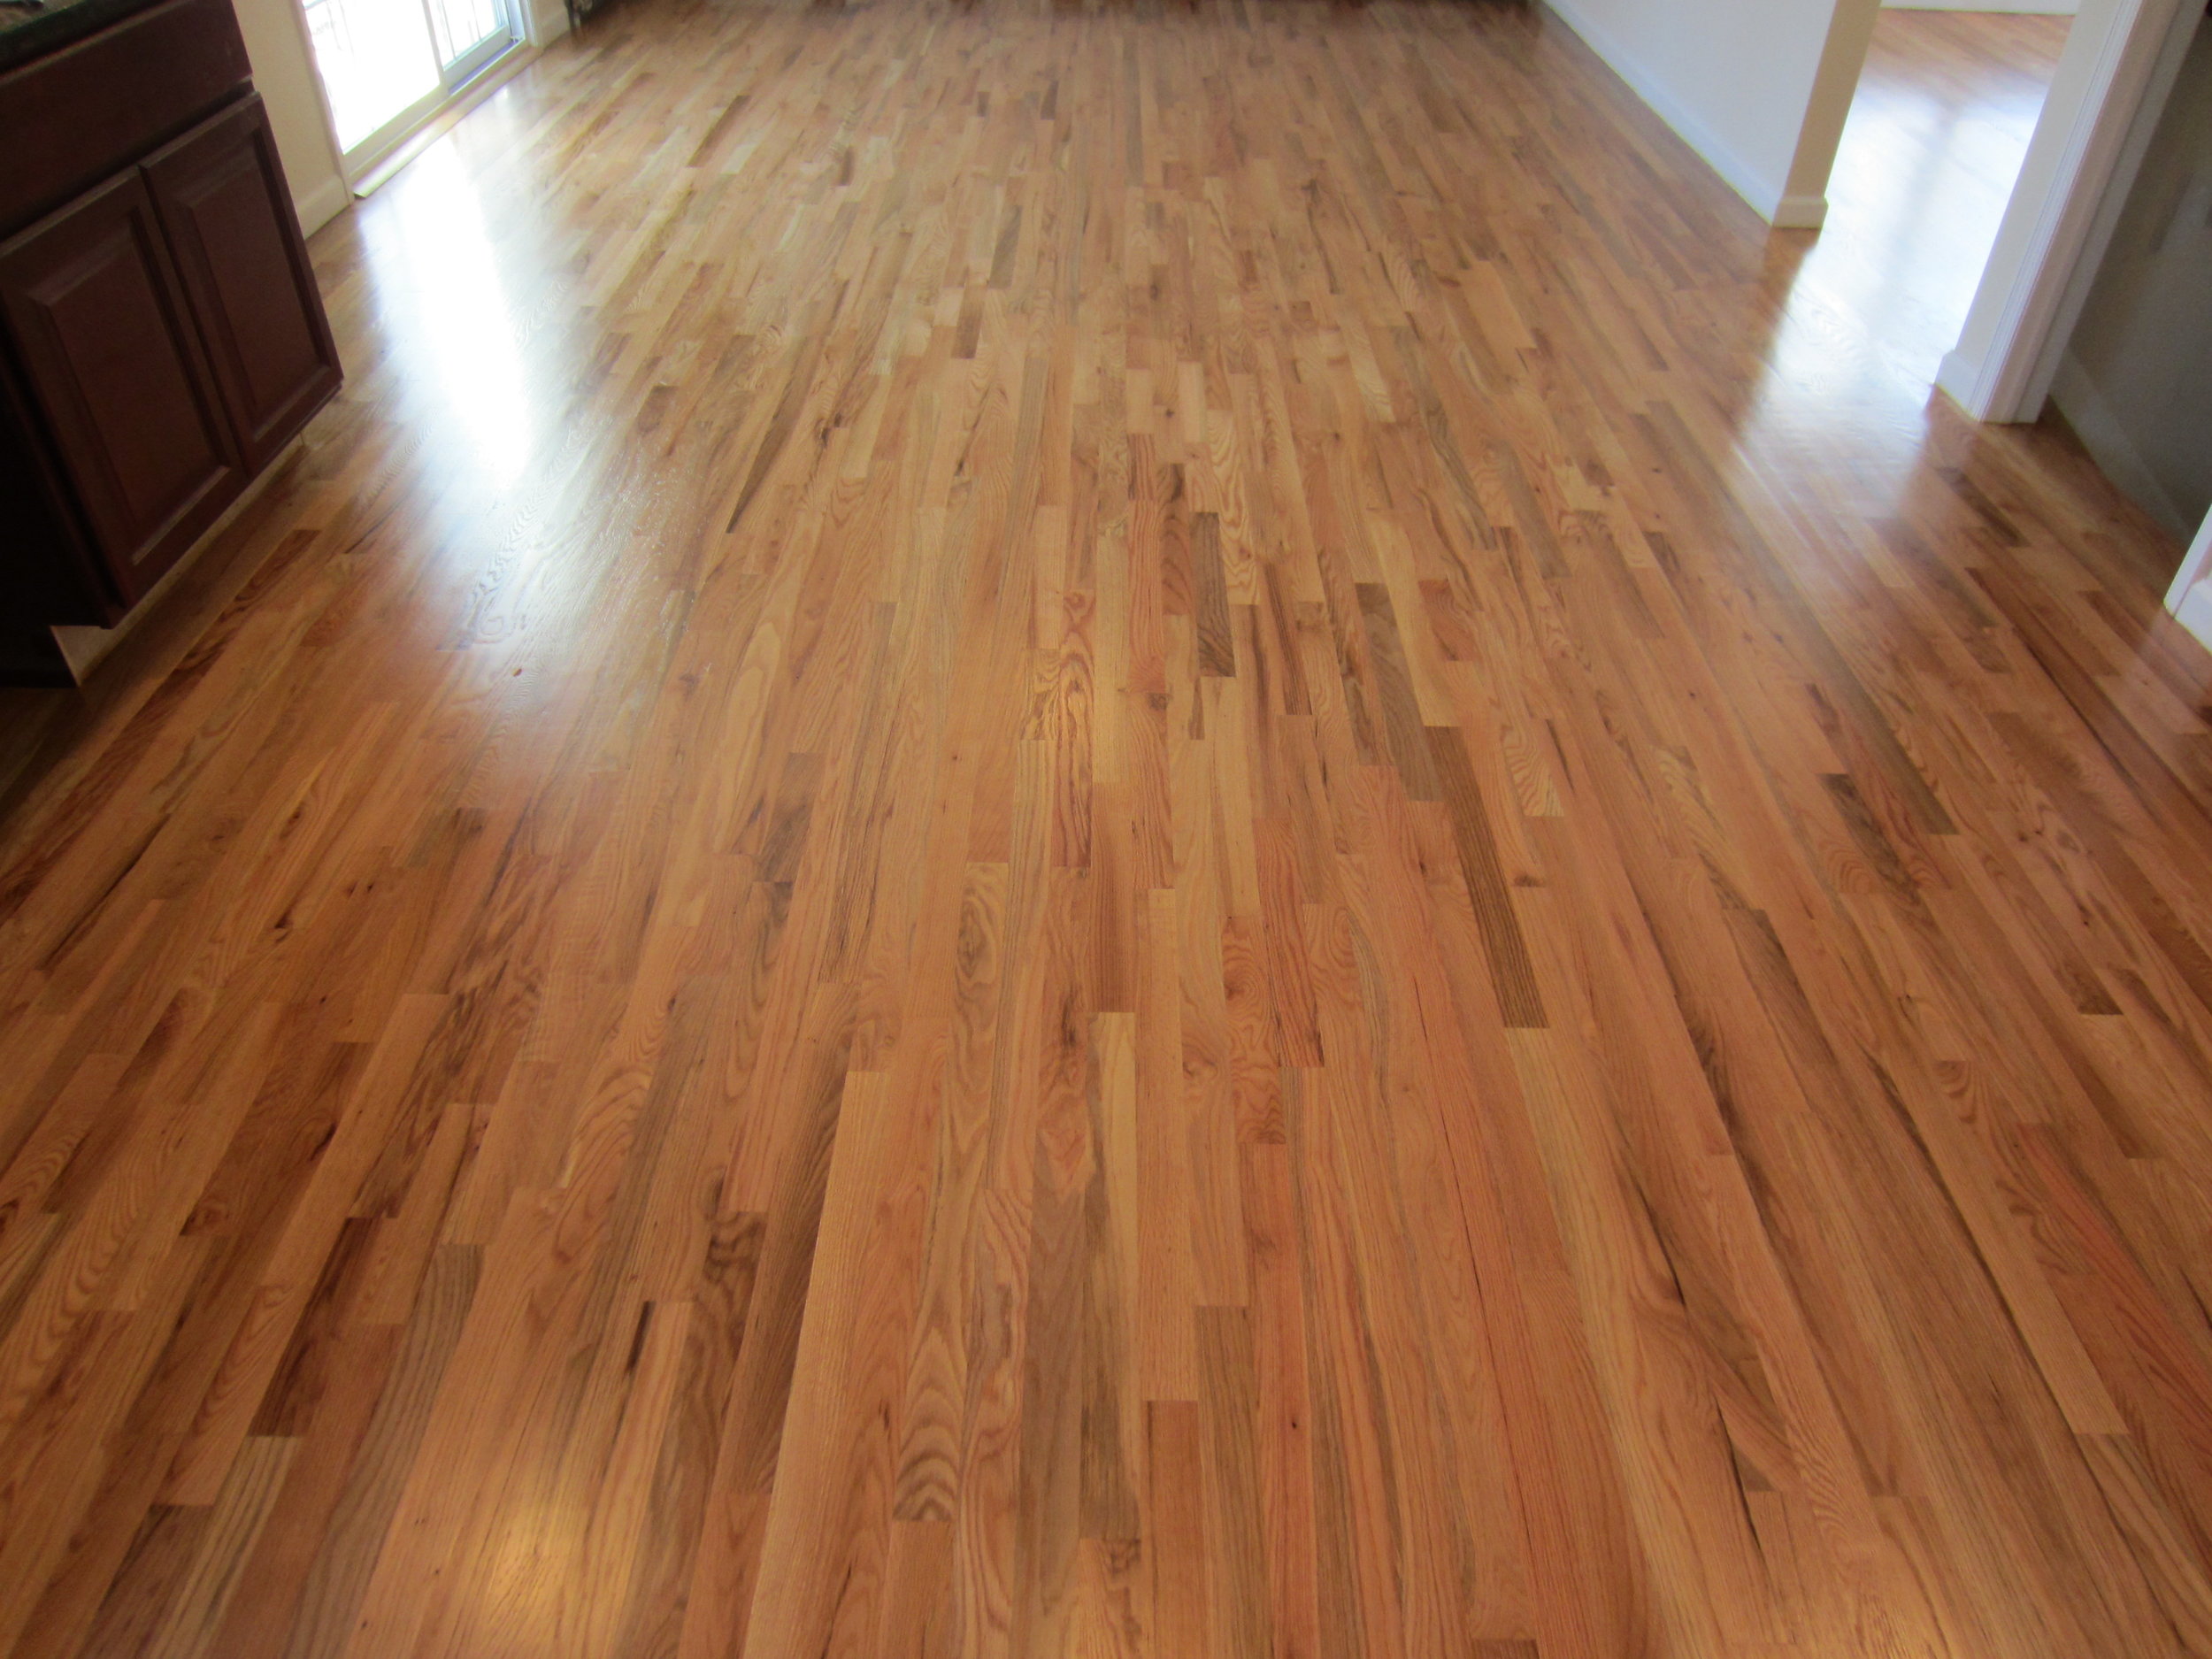
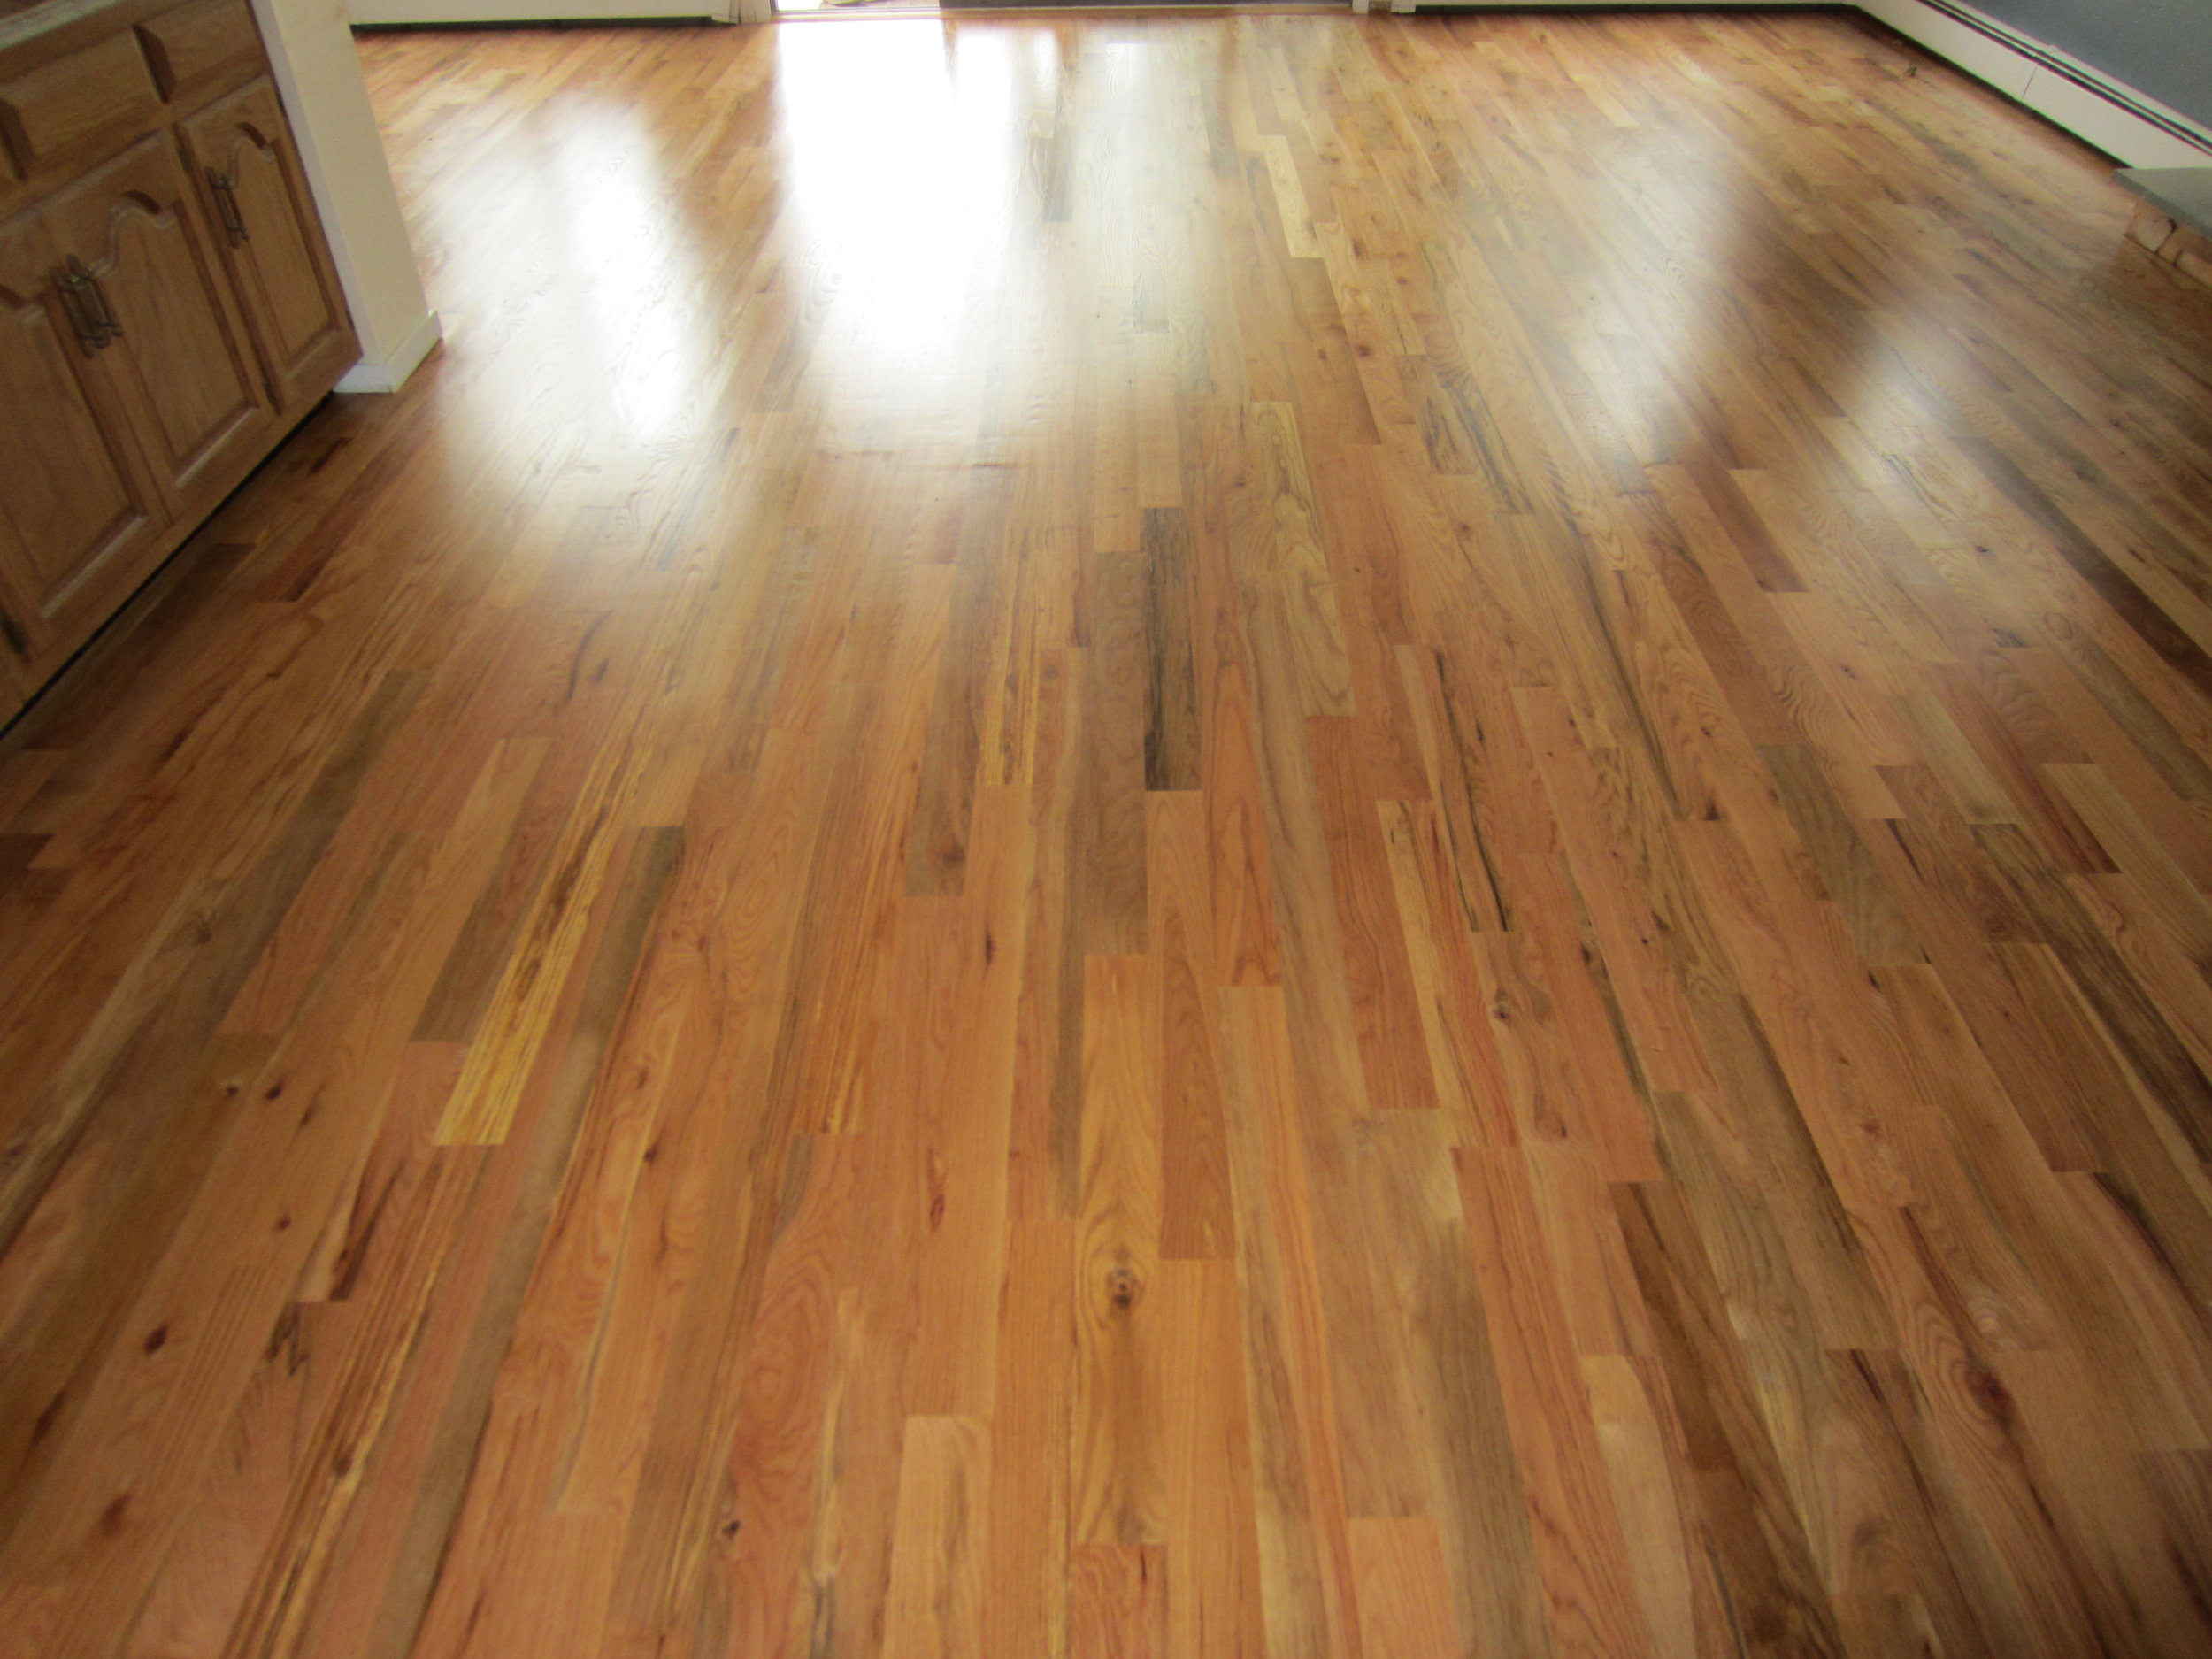
And here are some White Oak hardwood floors that we've installed and finished:
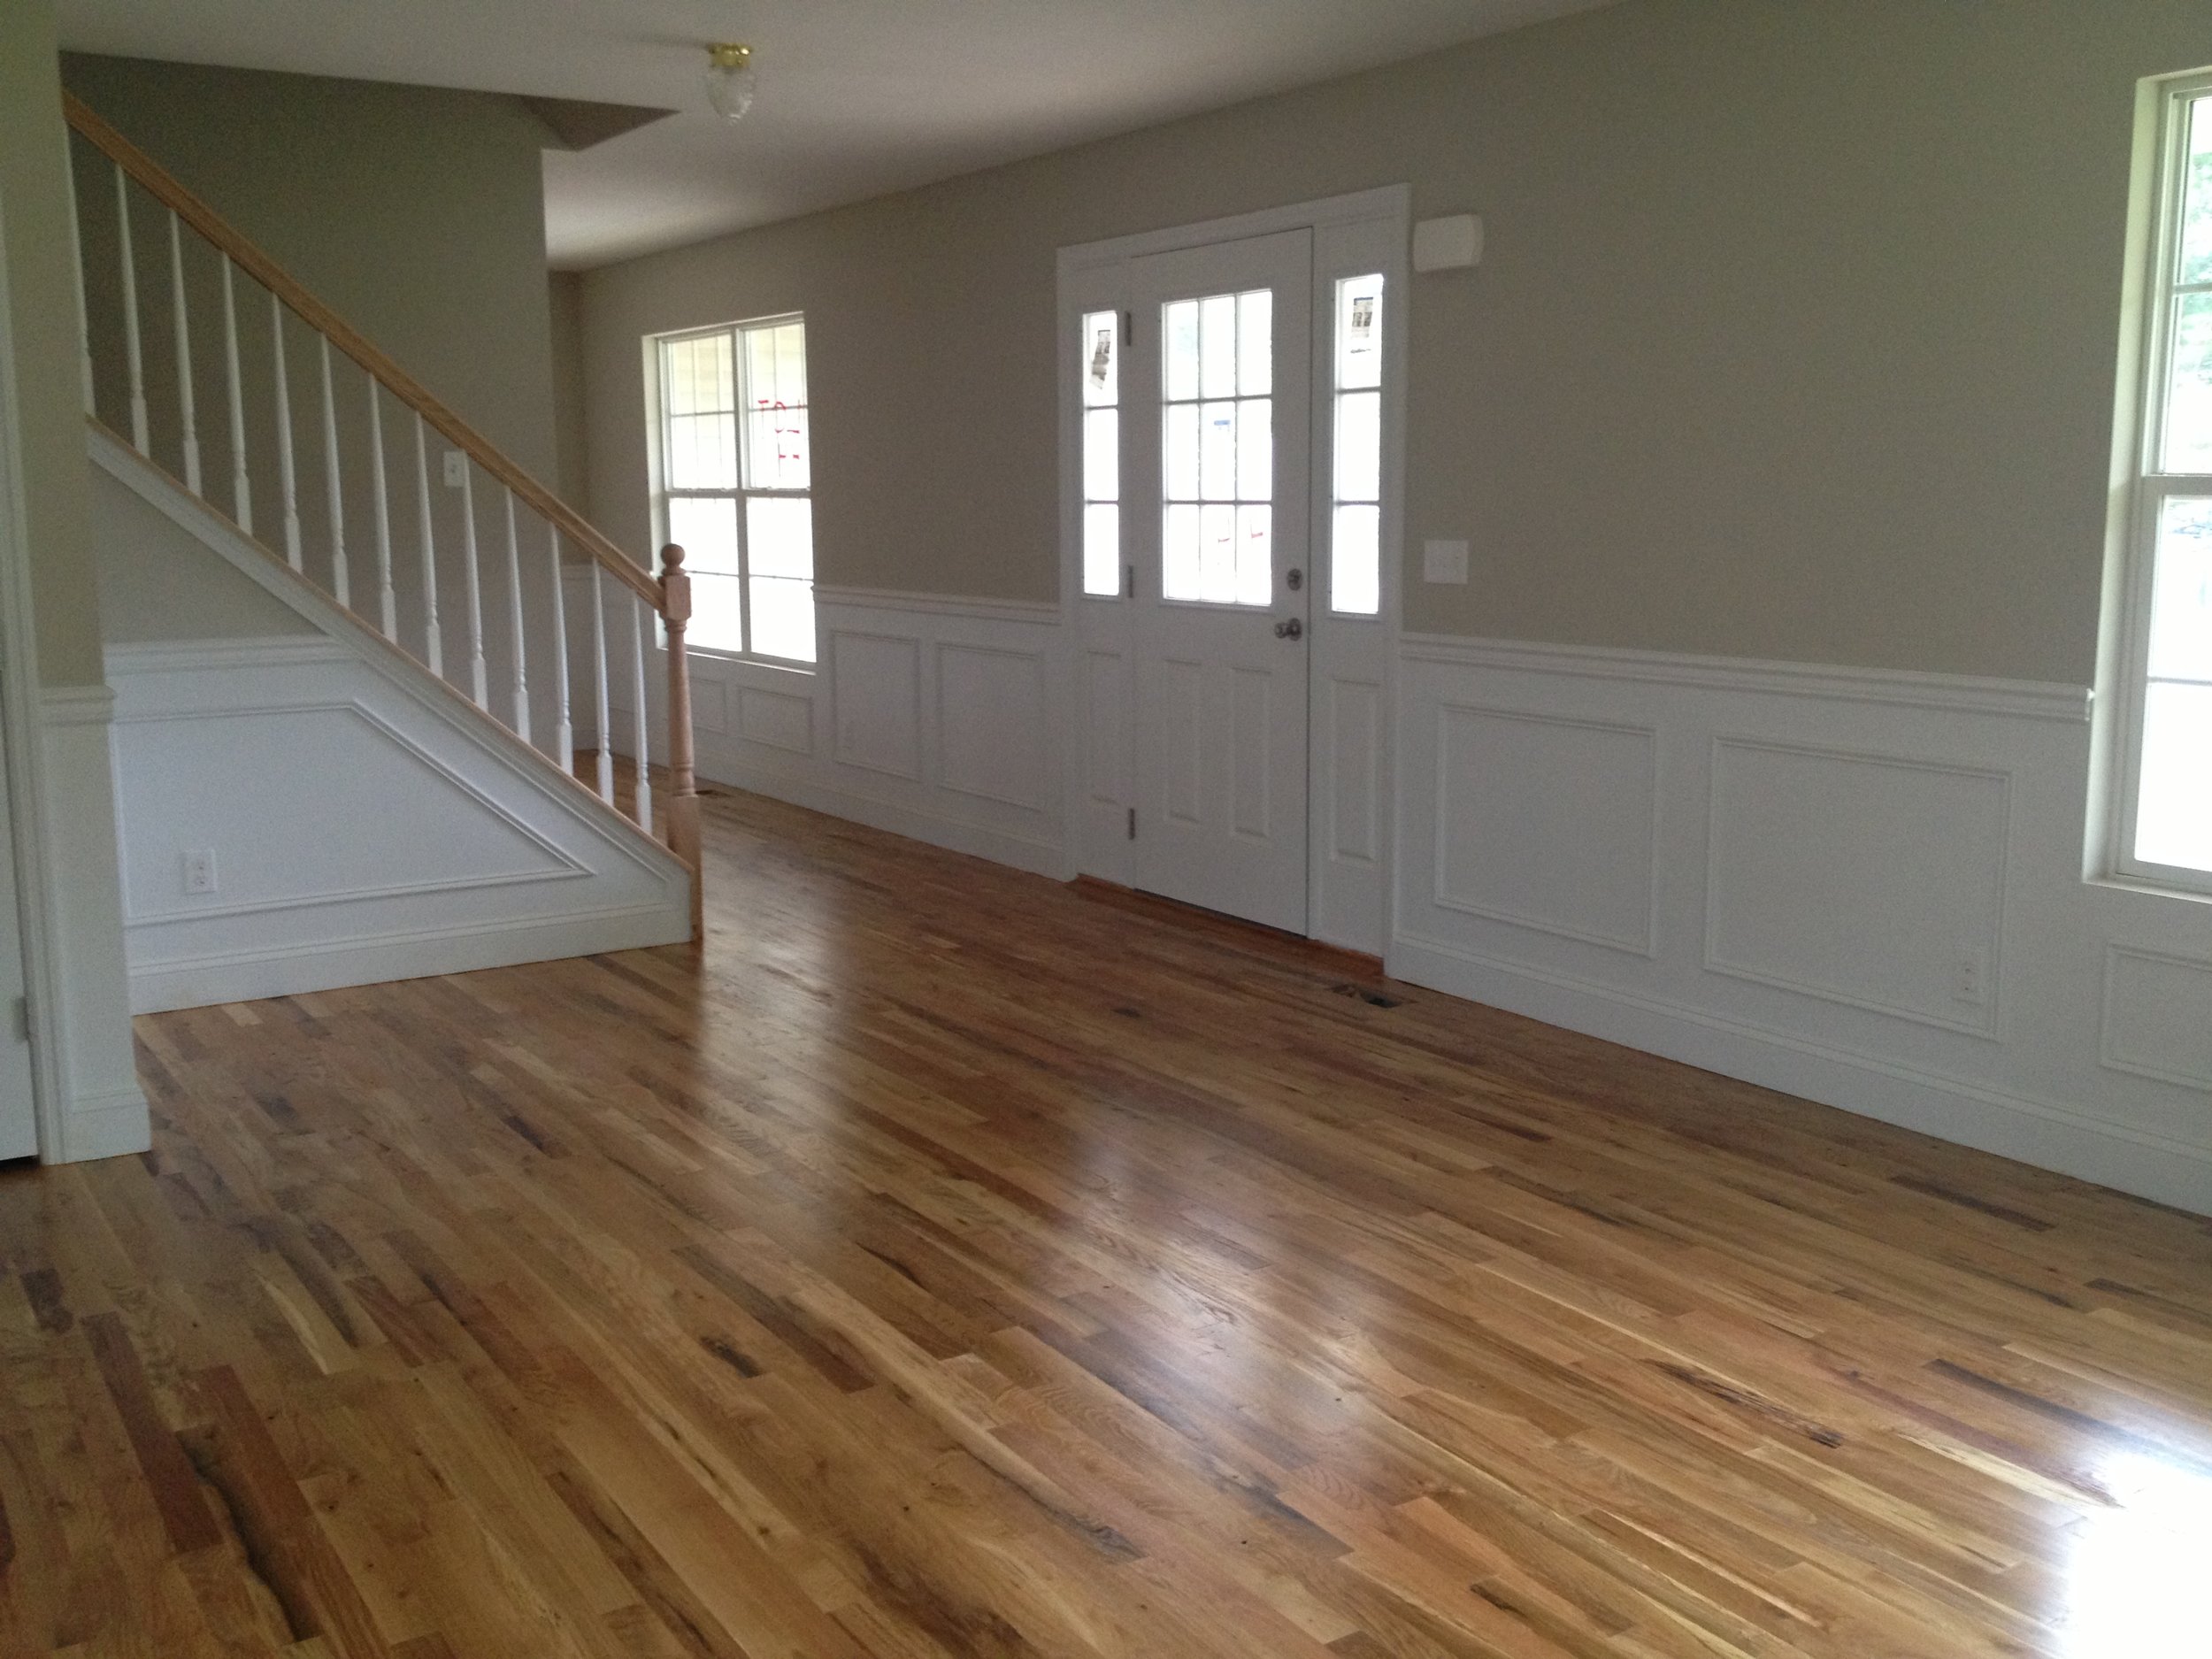
Keep in mind that the above pictures are all of natural floors with no stain. When you intend to apply a stain to the floor, especially a darker stain, the color differences between boards are less noticeable. With a dark stain, the differences between #1 Common and #2 Common will be nearly indiscernible, and you can save a lot of money by going with a more rustic grade of wood!
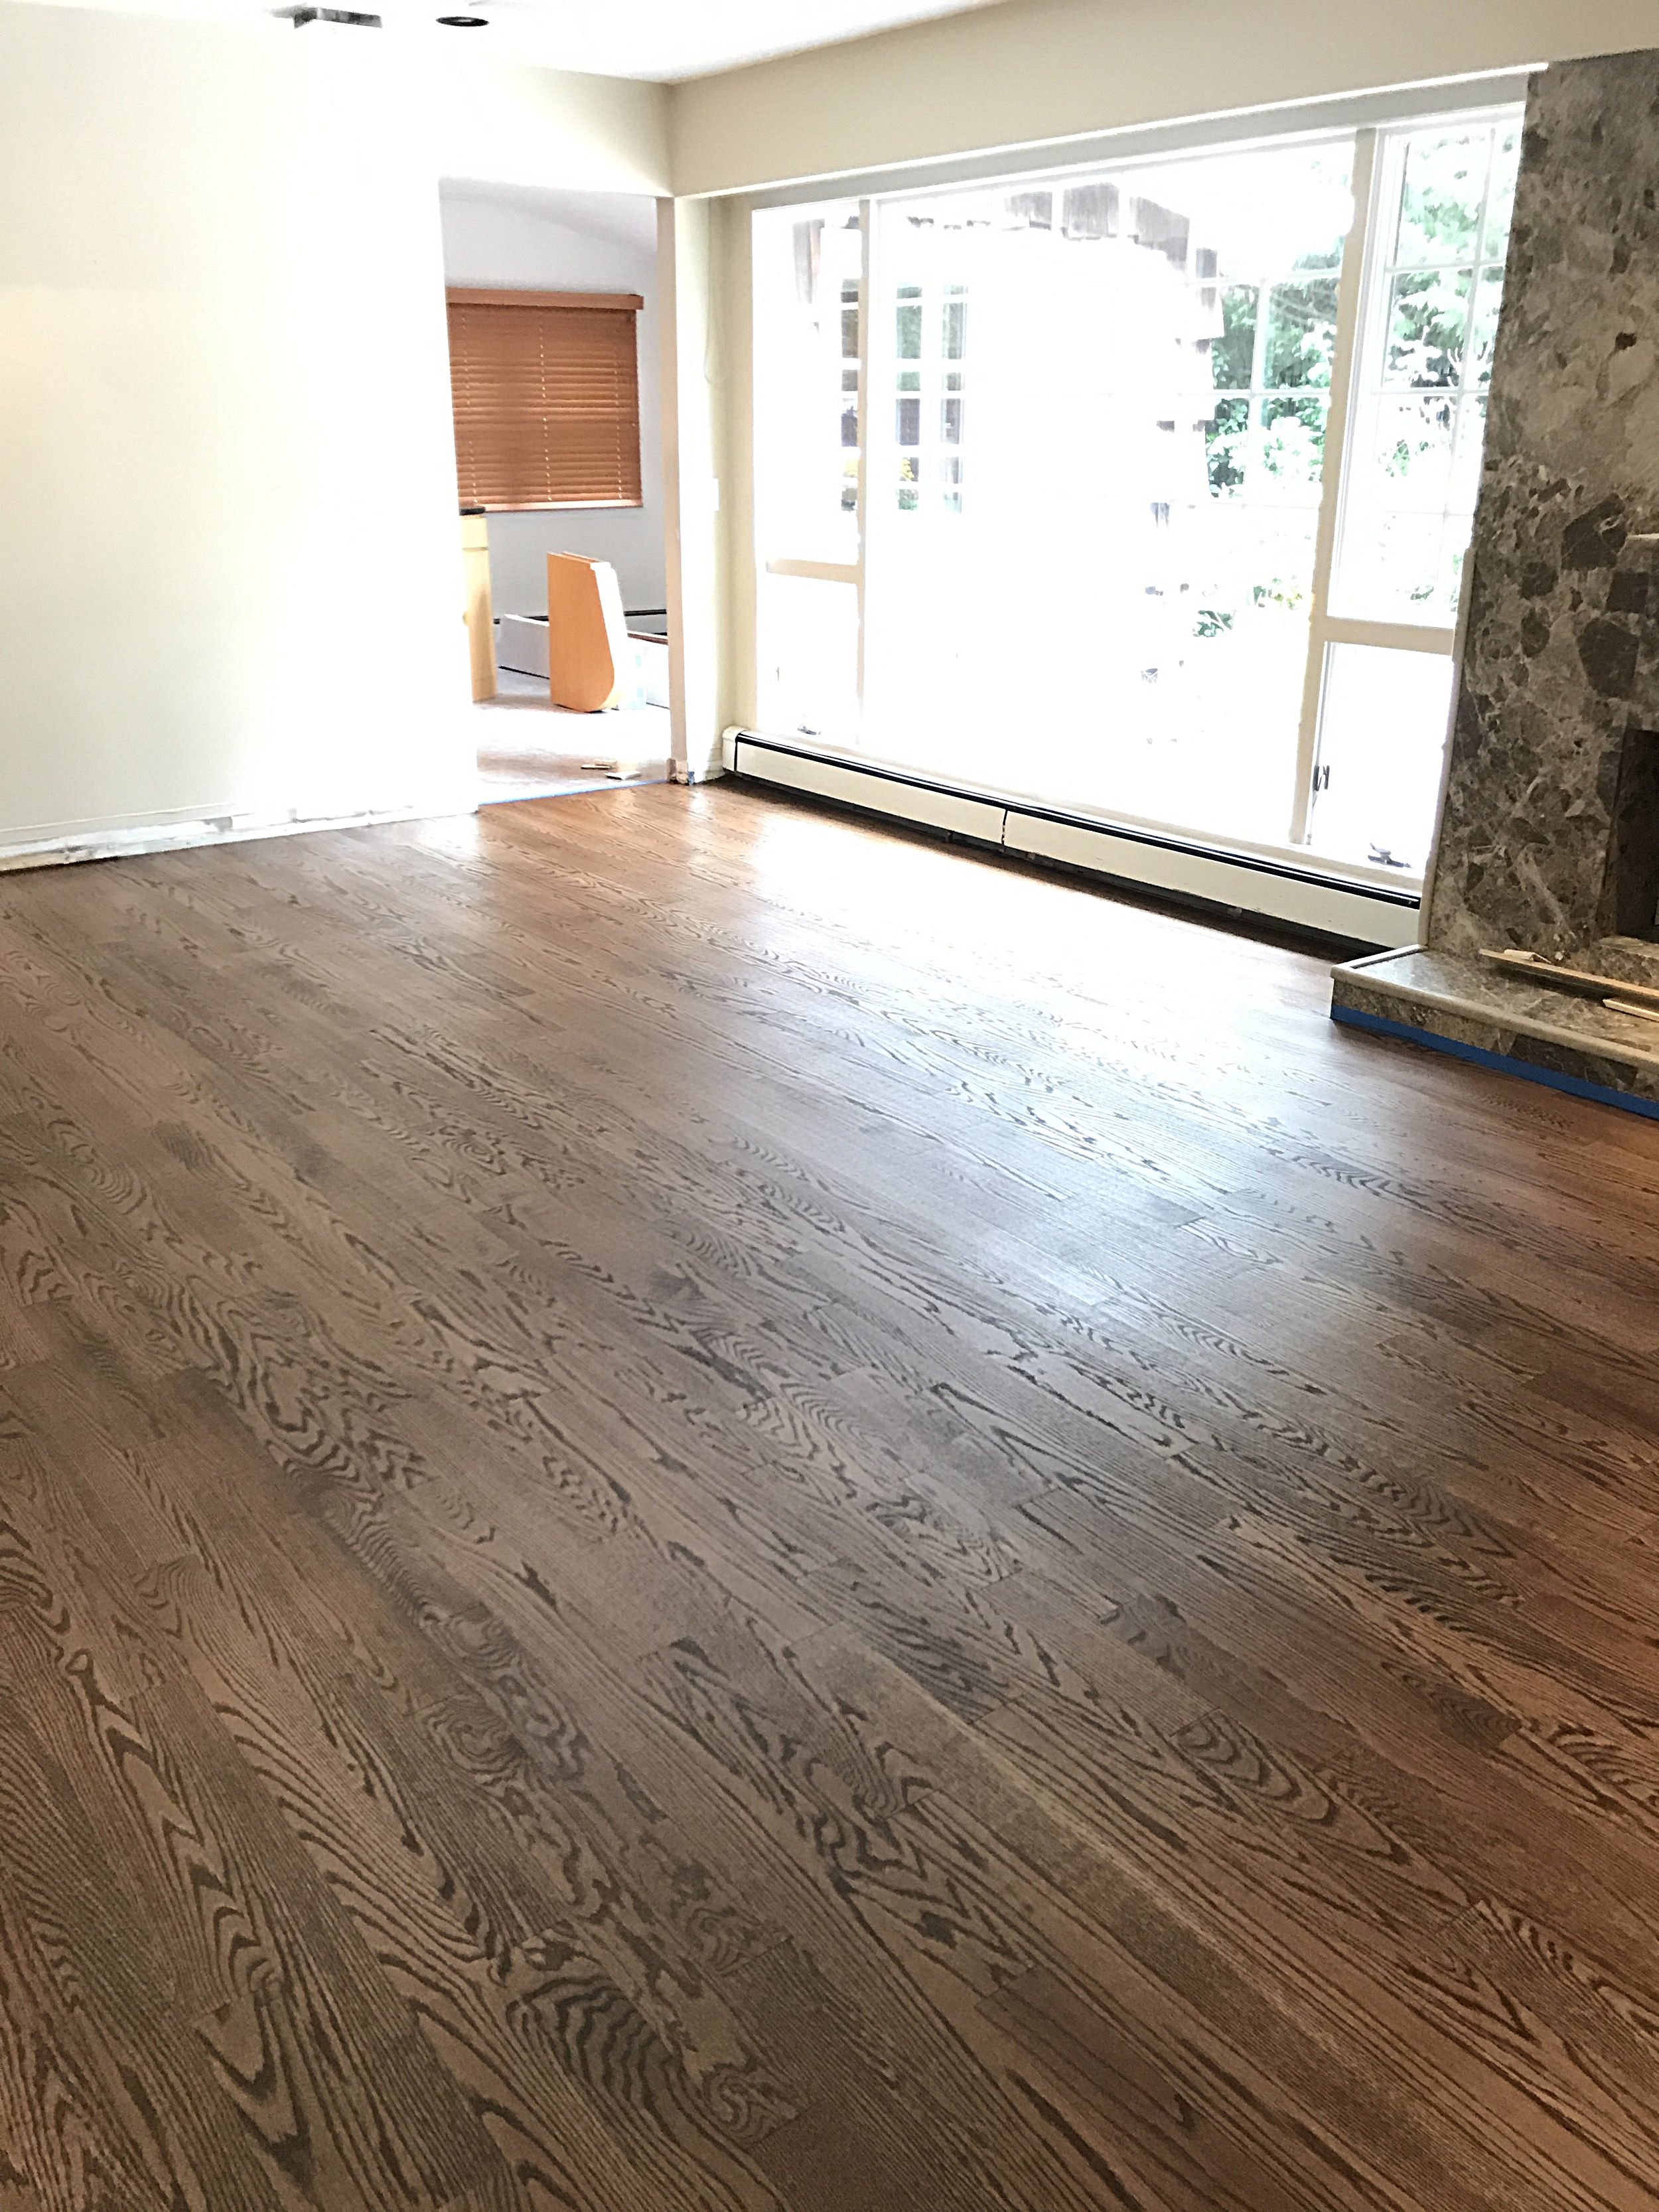
Here are some different grades of Oak hardwood floors that we have installed, sanded and stained with darker colors:


and
Can you tell the difference (especially between #1 and #2 Common)? With a natural floor, the differences in grades of Oak are more noticeable. With a dark stain, much less noticeable. A hardwood flooring expert can help you achieve your design goals in the most economical way possible -- call us!!

I just got called today by a customer looking for a buff and coat, also known as a screen and coat. Some people refer to this process as a “light sanding.” There is no such thing as a “light sanding.” A flooring professional can either sand the floor, which means sanding off the top layer of actual hardwood and getting to a fresh new layer of wood; or, they can buff the floor with a buffer machine that has been equipped with a screen, which is only a light abrading of the top layer of polyurethane and does not touch the actual wood at all.
The phrase “screen and re-coat” really describes the process of sprucing up an existing coat of polyurethane by top-coating it. As I mentioned, this is also sometimes referred to as "buff and coat" because the screen is often driven across the floor by a buffer. In order to get a new coat to adhere to the old one you must lightly abrade or ‘screen’ it. A screen is just a mesh encrusted with abrasive particles. Because it is a mesh, there are fewer abrasive particles per square inch, making it generally less aggressive than sandpaper (a 120-grit sanding screen, for example, will be less aggressive than 120-grit sandpaper).
Screens are also used under thick soft pads that further soften the cutting action of the screen. This is desirable because floor screening should only leave enough texture in the floor to allow a new coat of polyurethane to bond; screening should remove only a tiny fraction of the existing finish.
Many people are hopeful that they can get away with a buff and coat instead of a sanding. How do you know which process is right for you? Things to consider:


Cleaning products – Hardwood floors that have been cleaned with the dreaded Murphy’s Oil Soap, Orange Glo, Mop and Glo, or other wax cleaners cannot be re-coated. These cleaners leave behind waxy, soapy residues that are impossible to get off the floor without sanding it, and even then that makes for a lengthy and difficult floor sanding job! (See my previous blog post “7 Tips for Proper Hardwood Floor Maintenance!)
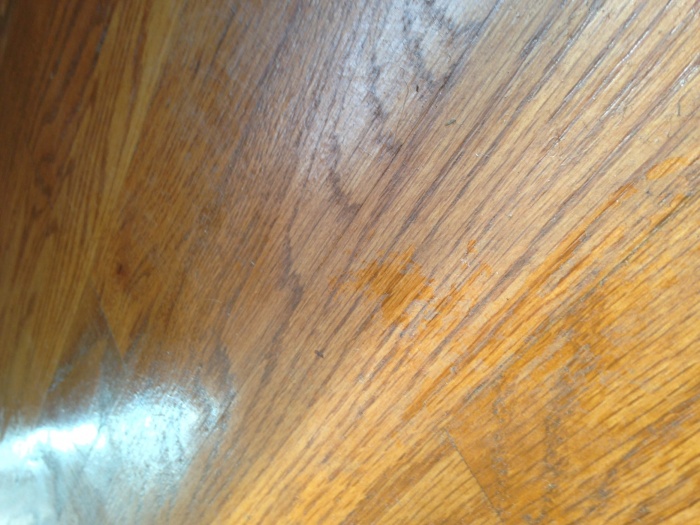
residue from murphys
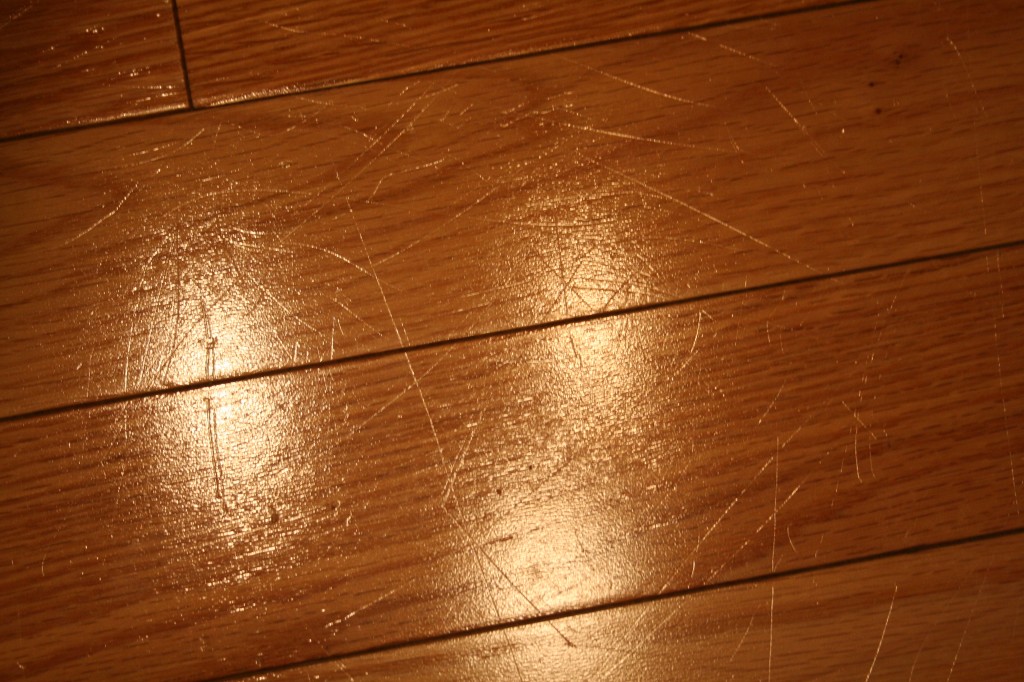
The buff and coat procedure should really be part of a regular hardwood maintenance program. A buff and coat every 3 years or so (or more frequently for floors with hard use and heavy traffic) can greatly extend the life of your hardwood floor, as it will refresh the top layer of polyurethane. Polyurethane is a sacrificial layer on top of the wood, and it functions to protect the wood underneath it. That layer of polyurethane gets thinner and more scratched each year—as it should—because its job is to keep damage away from the wood below. If you let that protective coat deteriorate for too long, it will eventually expose bare wood to assaults from shoes, pet nails, liquid spills, and dirt/grit, causing damage that can only be repaired by sanding the whole floor.
So, every few years, well before the protective coat has grown too thin, it is best to refresh it with another coat. The critical word is “BEFORE.” A floor has to be recoated before you see damage. This is a difficult concept for a lot of people because they think they are wasting money top-coating what appears to be a floor in very good condition. However, think of polyurethane like sunscreen. Sunscreen must be applied in a good, thick, even layer before skin is exposed to the sun, and it must be re-applied periodically because it wears off. Once a sunburn appears, it is too late to apply protection.
And in regards to hardwood flooring especially, protection is always less costly than the damage that results from not having it! A buff and re-coat is considerably less costly and less time consuming than doing a complete sand and refinish! If you are in the Long Island area, we would be happy to advise you on whether or not your floor could benefit from a screen and re-coat, or if it requires a complete sanding procedure.
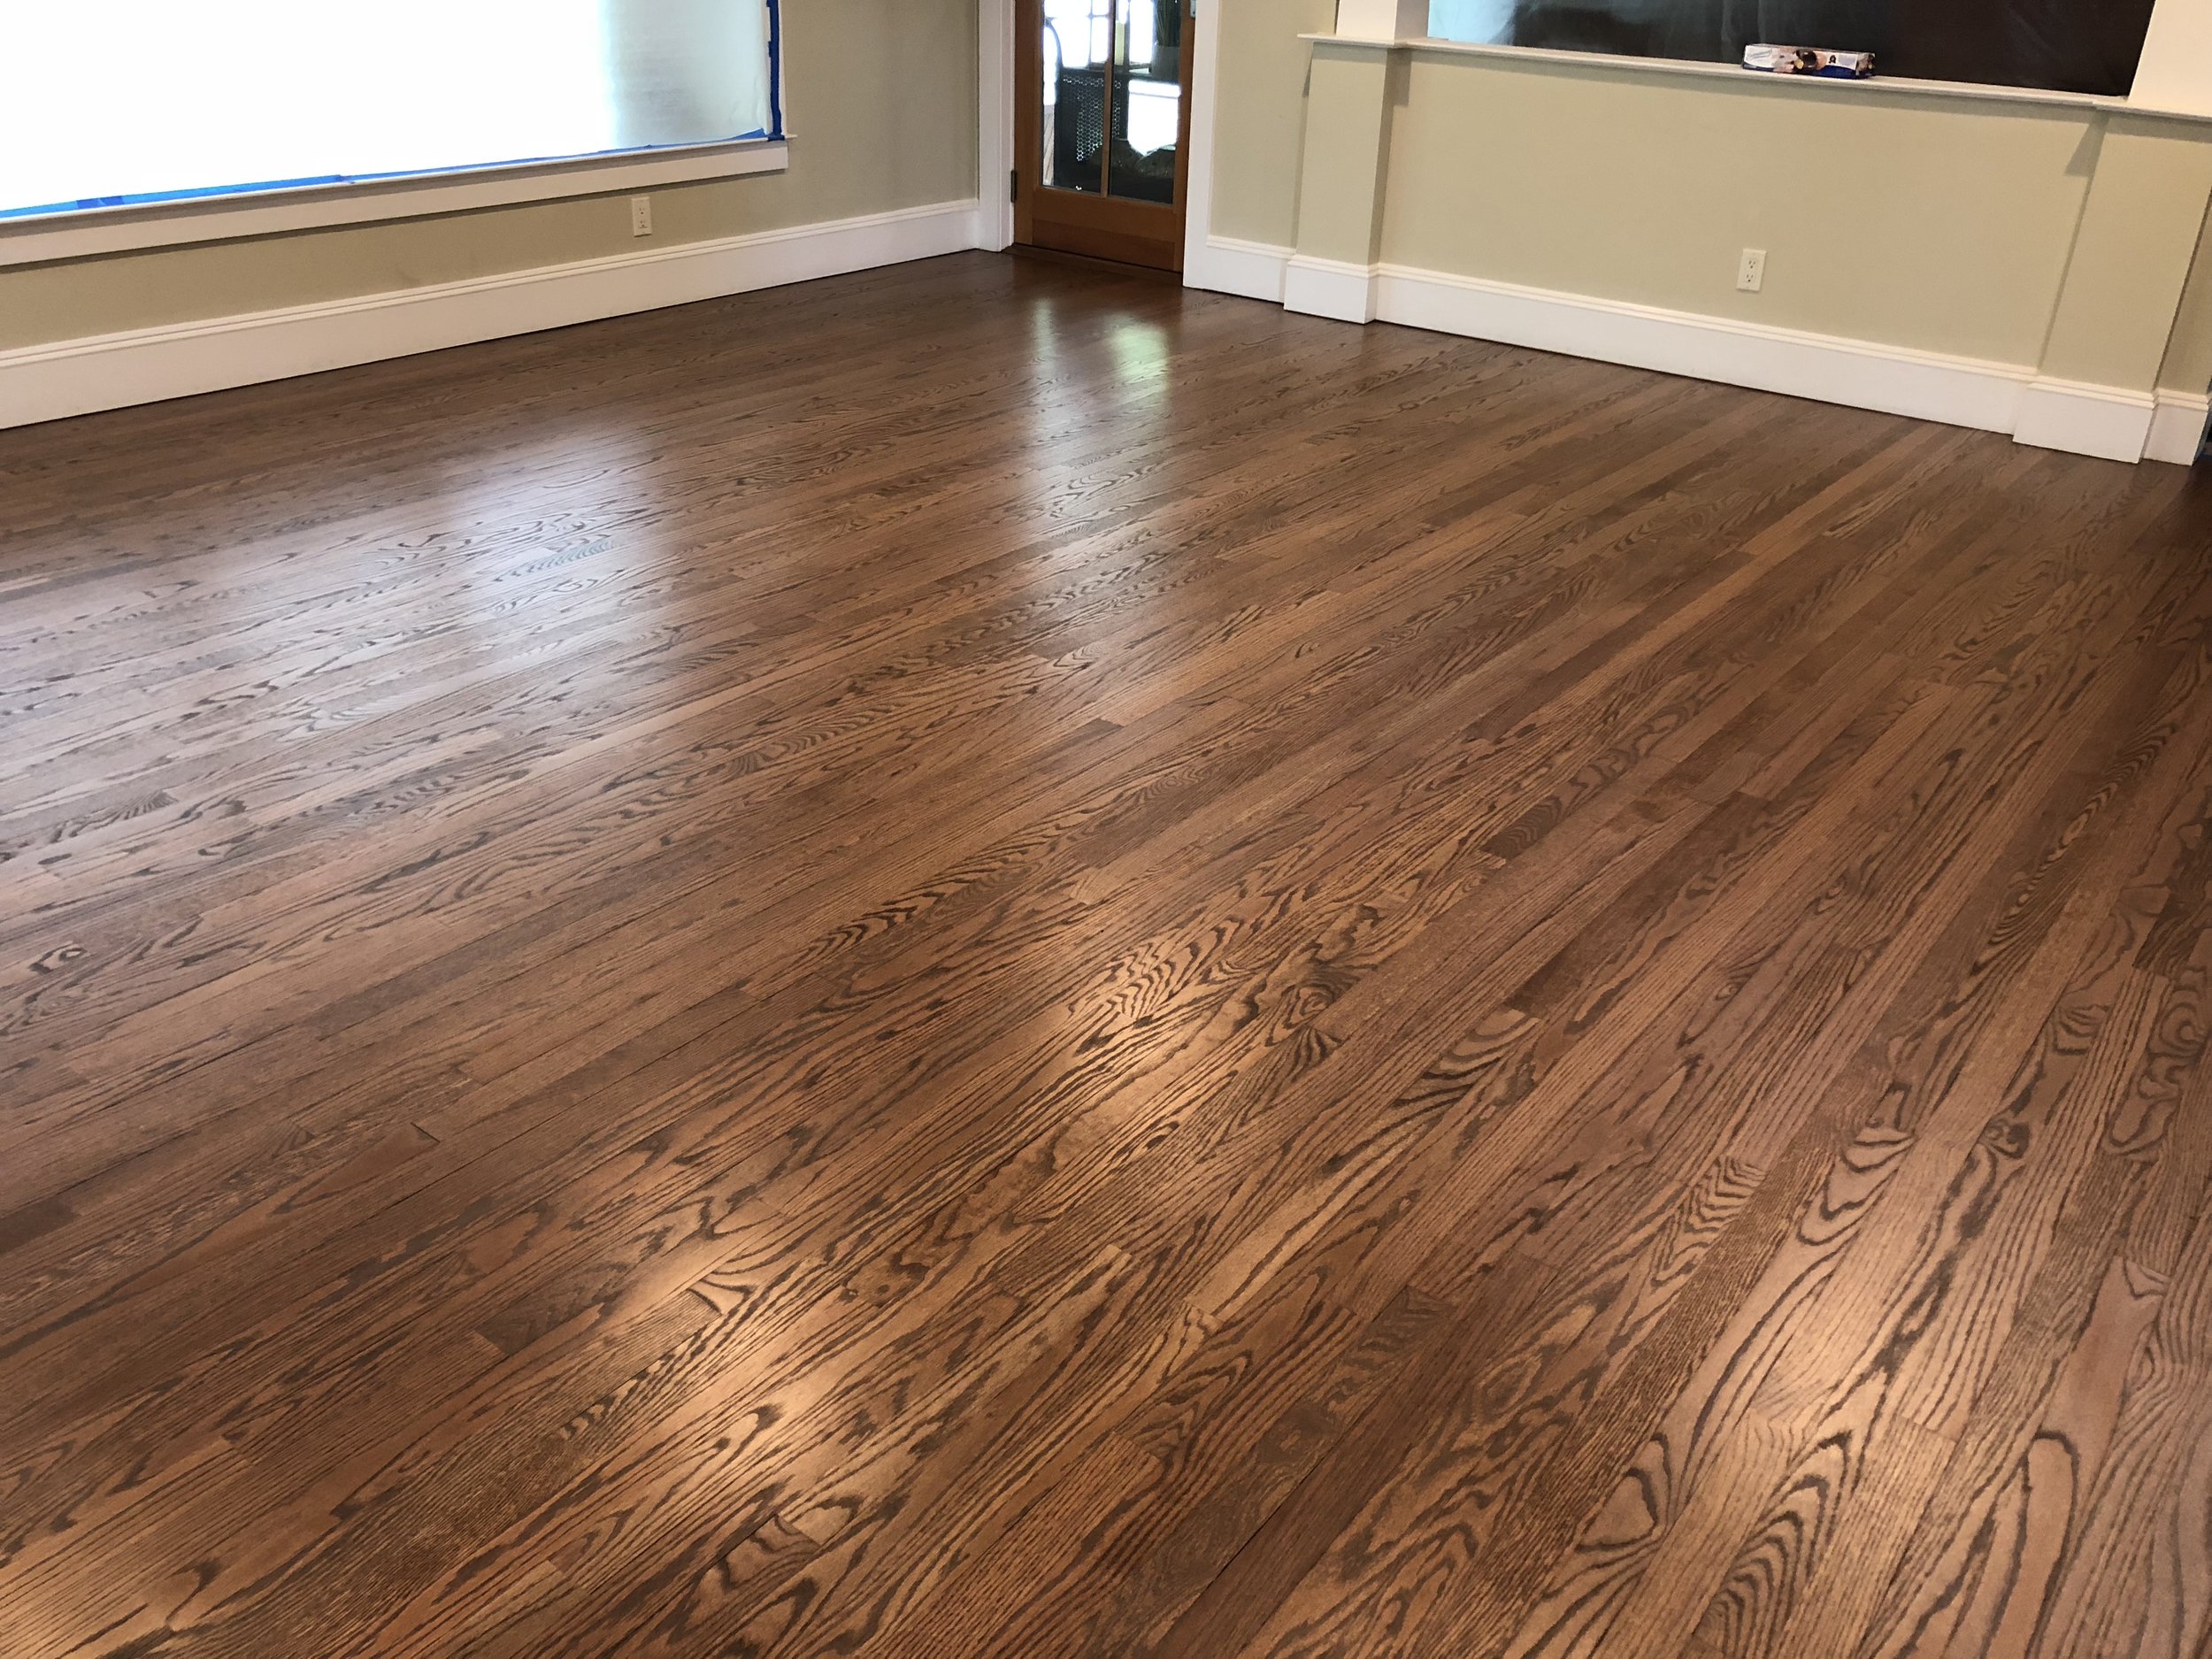
Oak is the most popular choice of hardwood flooring here in Long Island and in the United States in general. Oak is a very practical choice for hardwood flooring as it is a very durable wood that can last well over 100 years, as well as being readily available – it is grown and milled in the USA and especially here in the Northeast region of the country. It is very affordable when compared to other species of wood that are used for hardwood flooring and quite versatile as it can be stained almost any color of the rainbow. So what is the difference between Red Oak and White Oak and which is better? Most obviously, COLOR: Contrary to what the name suggests, White Oak is a darker wood than Red Oak. The color of White Oak is a mix of browns and tans ranging from dark brown to beige, while Red Oak is a lighter wood that ranges from almost white to a soft amber color. Red Oak has pinkish tones and red hues throughout. Either can be stained any color, and the visible differences between Red or White Oak diminish as you go darker with the stain color. Lighter stains and white washes on Red Oak will have a reddish or pinkish undertone to the color. Because White Oak is a darker wood, the same color stain applied to both Red and White Oak flooring will be darker on the White Oak floor than it is on the Red Oak floor.


HARDNESS: White Oak is a slightly harder wood than Red Oak. On the Janka hardness scale, White Oak flooring scores a 1360 and Red Oak flooring a 1290. White Oak is also very dense, which makes it more suitable for outdoor furniture and boat building. Some claim that the density of White Oak makes it a more stable species (less seasonal movement) than Red Oak, but both types of hardwood flooring will have some seasonal movement. Both Red and White Oak flooring are excellent choices for long-term durability for most homes.
GRAIN PATTERN: Red Oak grain patterns tend to be more unique or ”wild” than the finer, less pronounced grain pattern common to White Oak. The grain in White Oak runs straighter and tighter than Red Oak, with fewer swirls, circles or deviations. Red oak also has wider grain lines that can run in zigzag patterns, or subtle, wavy lines that are absent from White Oak. Another reason that Red Oak flooring displays a more prominent grain pattern than White Oak is because it is a lighter wood than White Oak. And on the other hand, the smoother look of White Oak can also be attributed to the fact that the dark grain is less noticeable against the darker wood.

MATCHING EXISTING ACCESSORIES: Red Oak is far more frequently used in stair treads, Newel posts, handrails and banisters. If you have Oak stair treads already in your home that you need to match, chances are good that they are Red Oak. If you are installing new treads or railings in your home, White Oak will be slightly more costly since it is less commonly used, but not severely so.
ENVIRONMENTAL IMPACT: Both Red and White Oak are considered to be a "greener" use of a National natural resource because they are farmed and grown in the United States. The carbon footprint of both types of wood is lower than that of exotic wood species like Brazilian Cherry or Tigerwood, for example, and because of forestry protection programs, Oak trees are constantly being replanted here in the U.S.
PRICE: There is not a major difference between the price of Red and White Oak. Because unfinished hardwood flooring is a commodity item, the price fluctuates from week to week. At times, Red Oak is more expensive, and sometimes White Oak costs more. The price will also vary based on width of the boards and grade of the wood.

We hope that this has been helpful if you are planning a new hardwood flooring installation and are considering Red or White Oak. As previously stated, either is a fine choice for long-term durability and beauty. It’s really just a matter of taste as to which you prefer and what your overall goals are for a specific finish or look! A hardwood flooring expert can advise you as to which would be best for any particular color or finish. If you are matching an existing floor in your home, please be aware that there is more to matching hardwood than determining whether or not you have Red or White Oak! It is a bit more complex than that, as there are several different grades of hardwood flooring (Select & Better, #1 Common, #2 Rustic Grade, Character Grade, etc.) as well as different milling techniques -- Plain Sawn, Quarter Sawn, Rift Sawn (I will cover this topic in the next blog post) – to be aware of as well! If you are unsure of what type of hardwood floor you have or what would be the best for your home, call a hardwood flooring professional and get it right the first time around!
Many of our customers ask us whether prefinished or unfinished hardwood flooring is better, and my response is usually that both have their advantages! From an aesthetic perspective, it is our strong opinion that there is no comparison to the beauty and warmth of unfinished hardwood flooring that is sanded and finished on site by an expert flooring craftsman. However, there is no denying that prefinished flooring is a much faster process – you can walk on it right after it is installed…it’s done! With that being said, we tend to think of new hardwood flooring as an investment in your home, and it is something that is going to be there for quite some time. The hardwood floor that you choose is something that you will see, live with, and appreciate every day, and for those reasons, we feel that the extra days required for on-site sanding and finishing is of minimal inconvenience when compared with the many years that you will enjoy your new hardwood floors! What are the main differences between the two?
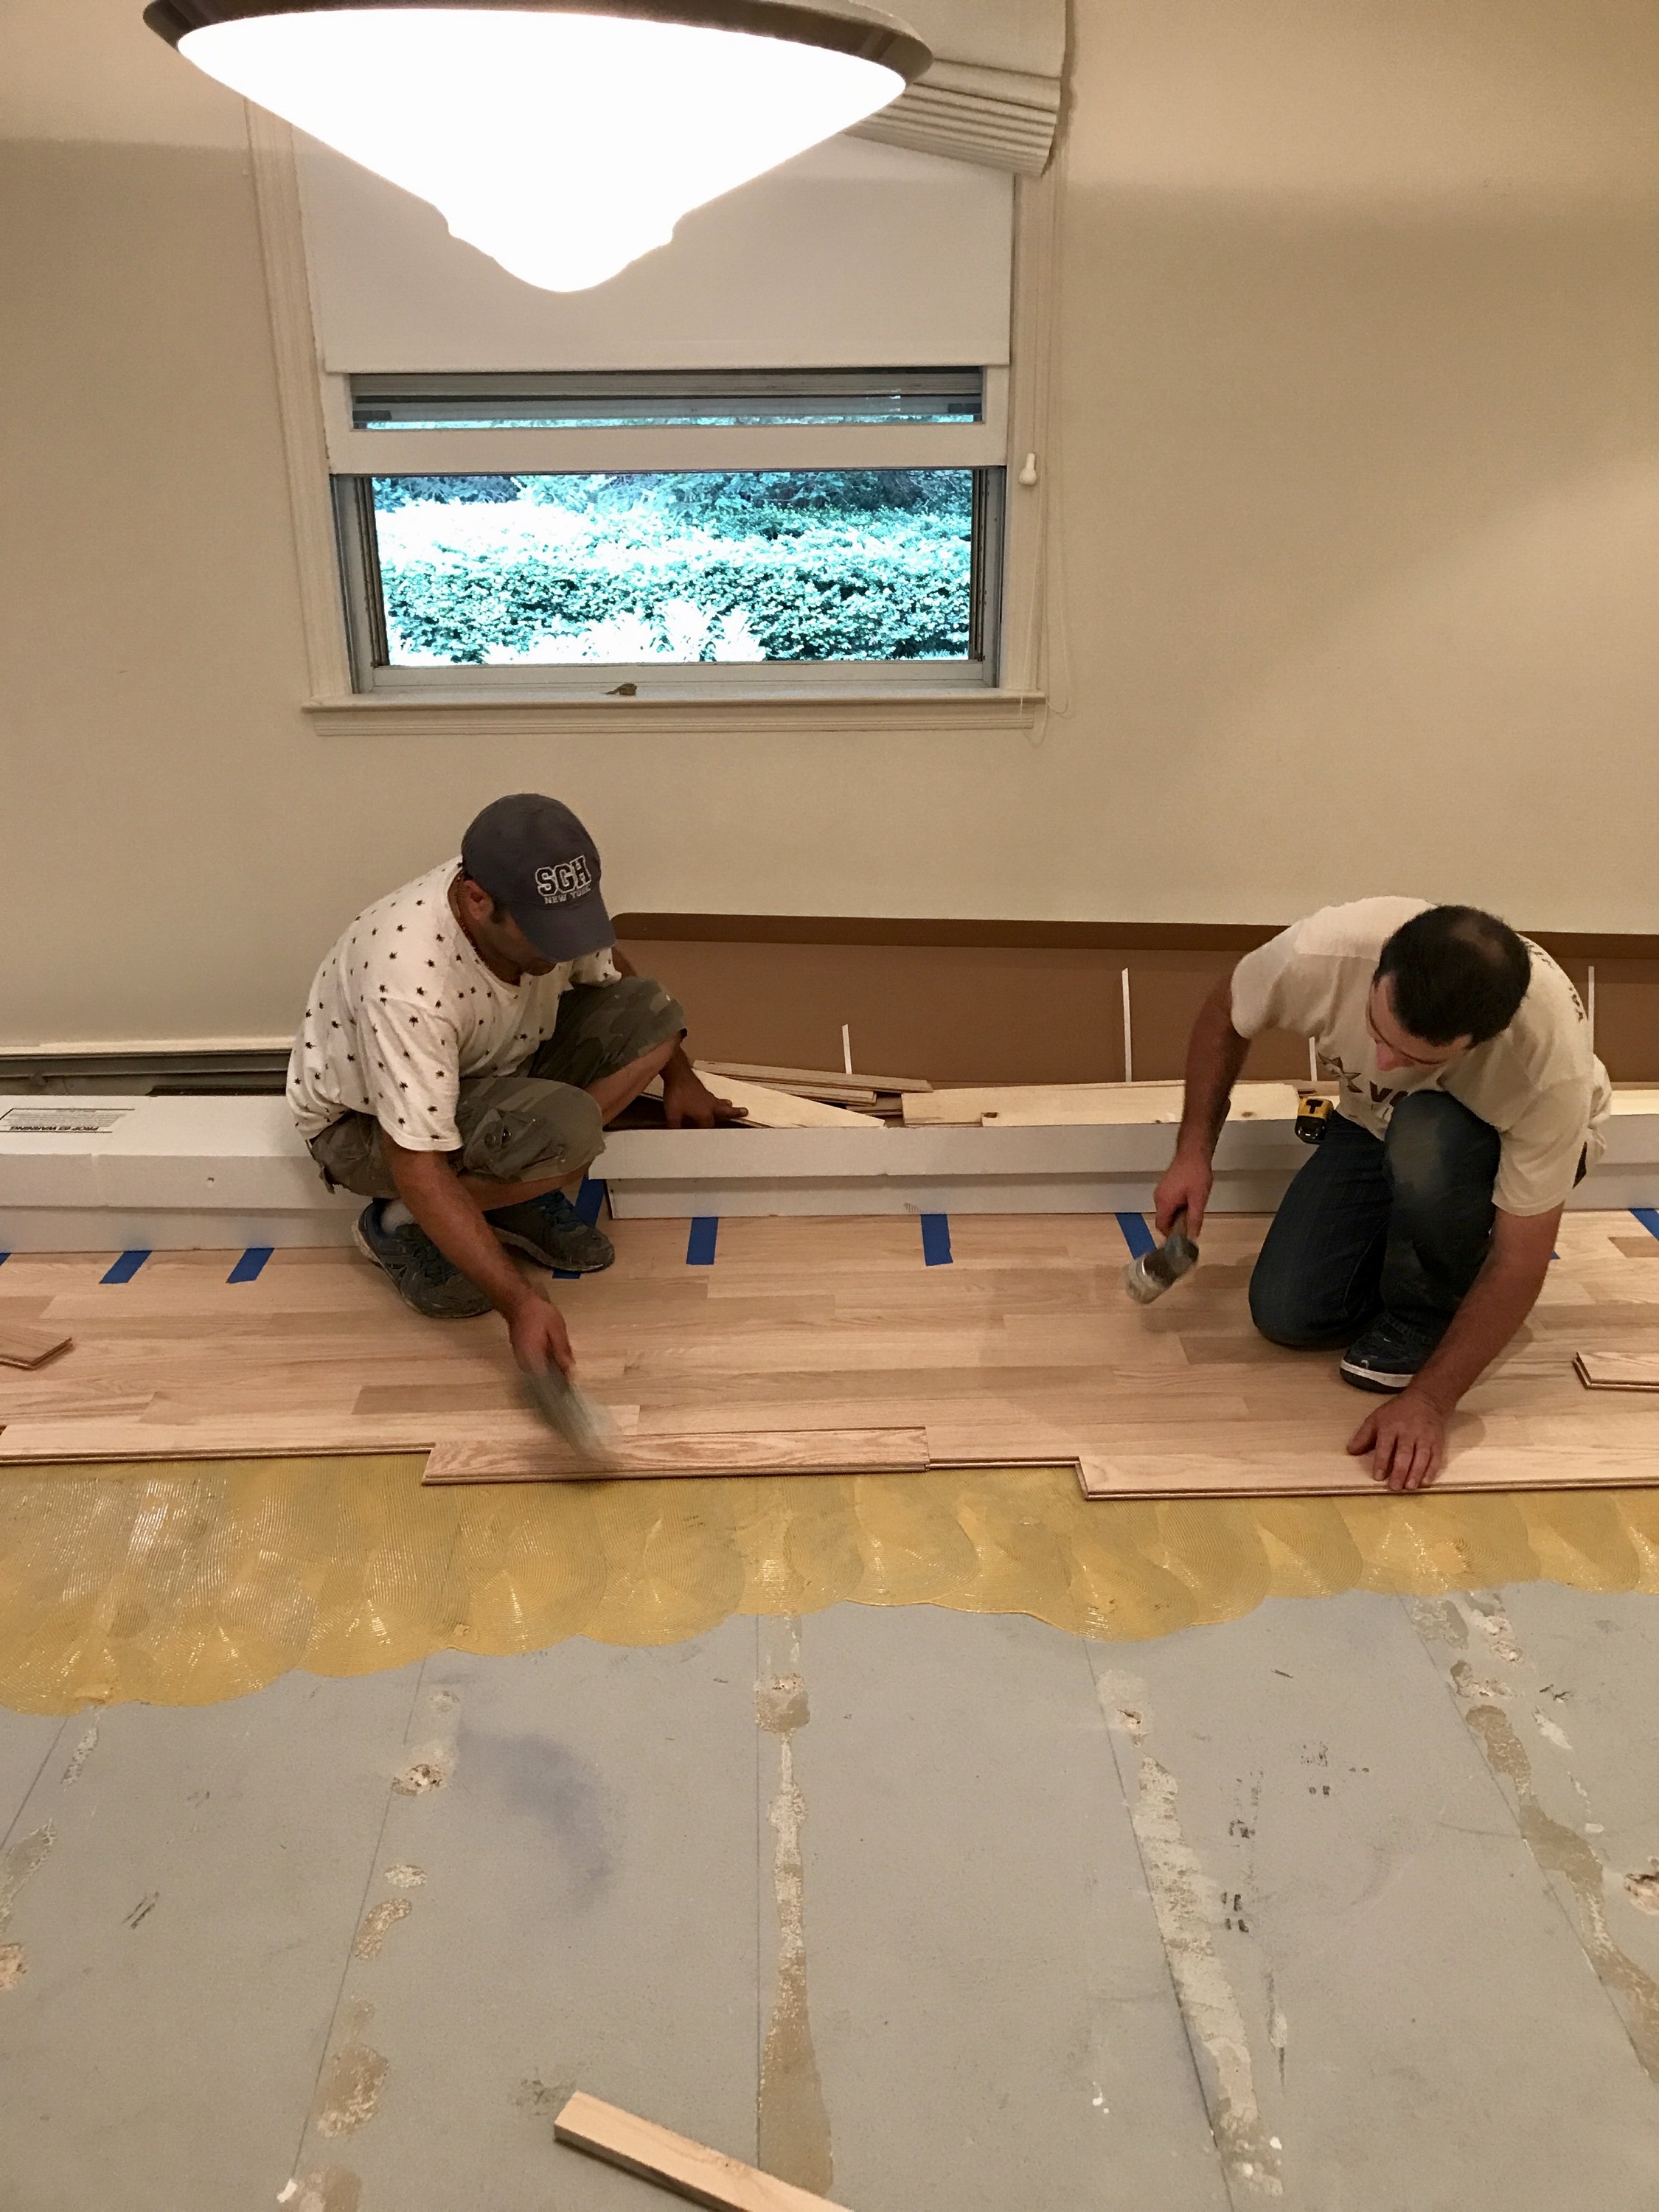
Prefinished hardwood flooring has been finished – sanded, stained, and coated with polyurethane -- in a factory. All you need to do is install it (cut and nail it to the subfloor) and it is done. Unfinished flooring is raw hardwood that must first be installed and then sanded and refinished on site.


Prefinished flooring is factory-finished, and thus each board has been finished individually with sprayed-on coats of polyurethane. The boards are then oven baked with aluminum oxide to create an extremely hard acrylic finish. Because each board is finished individually, this creates a beveled edge along each side of the board. When prefinished hardwood flooring is installed, there will be a micro-bevel or groove in between each board. This creates a floor that is not totally flat, and each board will have a visible line in between it. Unfinished flooring is raw wood with no beveled edges. When unfinished hardwood flooring is sanded and finished on site, there are no lines in between the boards, and you will get a perfectly flat, smooth floor.

Advantages to Prefinished flooring:
Time: Prefinished flooring is a faster process. Once prefinished flooring is installed, you can walk on it and put furniture on it immediately. With an unfinished hardwood floor, the sanding process may take several days and then you will have to wait another several days to put furniture back on the floor.

Less Mess: Prefinished flooring is less messy than an unfinished floor that will need to go through a sanding process. Sanding does create dust during the actual sanding process, though our dustless system definitely cuts down on the mess. And when we are finished with our cleaning process after the floor is sanded, you would never know that there was any dust at all!
No Smell: With prefinished flooring, there is no chemical smells because there are no chemicals being applied. The flooring has already treated in the factory where it was made. It is true that the smell from refinishing and applying an OIL BASED polyurethane is intense, difficult to deal with, and not healthy to inhale; however, with the new green products that we recommend and use, our clients do not have to deal with the harsh smell and/or chemicals of an oil based poly unless they want to. For applications of oil based polyurethane, we insist that our clients be out of the house. For most residential homes, we exclusively use Bona water based polyurethanes which have very low VOCs, are environmentally friendly, and have almost no smell at all. We also recommend and frequently use Rubio and WOCA Hardwax oils, which have NO VOCs and no smell.
Cost: Prefinished flooring usually costs less overall than unfinished flooring. Though prefinished flooring may cost more for the actual material, with the reduced labor costs of only an installation, prefinished flooring usually ends up being less expensive than unfinished hardwood flooring that is installed and then sanded and finished on site.

Advantages of Unfinished flooring:
Appearance: Unfinished flooring looks like real wood. Even though solid prefinished flooring is real hardwood, because of all the many factory sprayed-on coats of polyurethane and/or stain, it is our opinion that prefinished flooring looks plastic-y and factory-made, with a less noticeable grain pattern, and thus less warm. Unfinished hardwood that has been finished on site by an expert hardwood flooring professional looks like a work of art. There is nothing that compares to the natural warmth and beauty of a hardwood floor that has been sanded and treated by a real craftsman. Again, this is our opinion, and everyone has their own preferences. We don't care for the beveled edge and resulting lines in the floor that you get with prefinished flooring, but some people really like them!


Finish Options: The creative possibilities with unfinished floors are nearly unlimited. From the countless different species of wood available, to innumerable stain colors, to the many different finish options, the sky is the limit with unfinished floors. We also do all of the new finish options including hardwax oils like Rubio Monocoat and WOCA (which can be spot repaired if they are scratched), as well as other creative effects, which you cannot find in prefinished flooring. We can create a blue or even a green floor, for example, or do a French Bleed, wire brushed, or hand scraped floor to your liking! Prefinished floors have a much narrower scope of wood species, colors, and finish options to choose from. “Handscraped” or “wire brushed” prefinished flooring that we have seen looks far different from the real craftsmanship exhibited in the wood when this process is actually done by hand instead of in a factory.


Matching existing flooring in the home: If you have existing hardwood flooring in the home that you want to match, adding unfinished wood flooring is the way to go. You will be able to exactly match the species of wood, and an expert hardwood floor refinisher can play with stains and colors on the unfinished wood to exactly match the existing floor.
Uniform stain color: Prefinished flooring that is stained a dark color will only be stained on the face of the board. Because of the beveled edge, when a darkly stained prefinished floor is installed, sometimes you can see the underside or lighter portion of the wood along the edges when you look at the floor from far away. When unfinished hardwood is installed and finished on site, the wood is smooth and uniform, and stain is applied to all visible areas.
Cleaning: The beveled edges of a prefinished floor also create a trap for additional dirt, dust, and grime which can be more difficult to clean than a floor that has been finished on site and is totally flat.
Repairs: If a hardwood floor that has been finished on site gets scratched, it can be spot repaired by taping off boards and sanding those individual boards down to raw wood and then refinishing them. The new hardwax oil finishes Rubio Monocoat and WOCA that we are using more and more frequently in residential homes are even easier to repair as all they require is applying/rubbing in a bit of extra product to visible scratches/raw wood. The surrounding wood will not take the product, which makes it very easy for homeowners to do spot repairs themselves as scratches appear. If prefinished flooring becomes scratched, a whole section of the floor may need to be replaced, or the entire floor may need to be sanded in order to correct the problem.

Refinishing: Over time, both prefinished and unfinished flooring will get some surface scratches from normal wear and tear. Unfinished flooring that has been treated with a water based or an oil based polyurethane can be buffed and re-coated every few years to revitalize the top coat of poly and remove surface scratches. If a hardwood floor is well-maintained and this process is done every couple of years, homeowners will never need a complete sanding! This buff and coat procedure is not an option for prefinished flooring. Prefinished flooring can be sanded down to raw wood, but due to the high number of polyurethane coats applied in the factory, the wood must be sanded down deeper into the material than a hardwood floor that was sanded and treated on site. This means that a prefinished floor cannot be sanded as many times as an unfinished floor as it will more quickly become too thin to re-sand. And with prefinished flooring, the beveled edge will be decreased with sanding, but it will never go away completely!


We install (and refinish!) both prefinished and unfinished flooring, and in the end, it is up to the homeowner to decide which option works best for them! I’ve laid out what I feel are the benefits of both, so hopefully this post will be helpful if you are faced with this decision! And as always, feel free to call us for advice!
It is always best to plan ahead for a hardwood flooring project as you may have to be out of the house (and probably should be!) while the job is underway! Besides the overall size of the job, another important factor is the type of polyurethane that you pick. Oil based polyurethane takes twice as long to dry as a water based poly, and only one coat can be applied per day. If you are going with a stain on the hardwood flooring, this adds at least one additional day to the project as well. Rubio Monocoat and WOCA hard-wax oil finishes don’t involve any polyurethane, but both products have their own timelines, which I will cover!
SANDING TIMES:
In general, we can sand about 1,500 – 2,000 sq ft in one day. Newly installed, unfinished hardwood is easier to sand, while a re-sand of treated and/or older hardwood flooring is a slower sanding process.
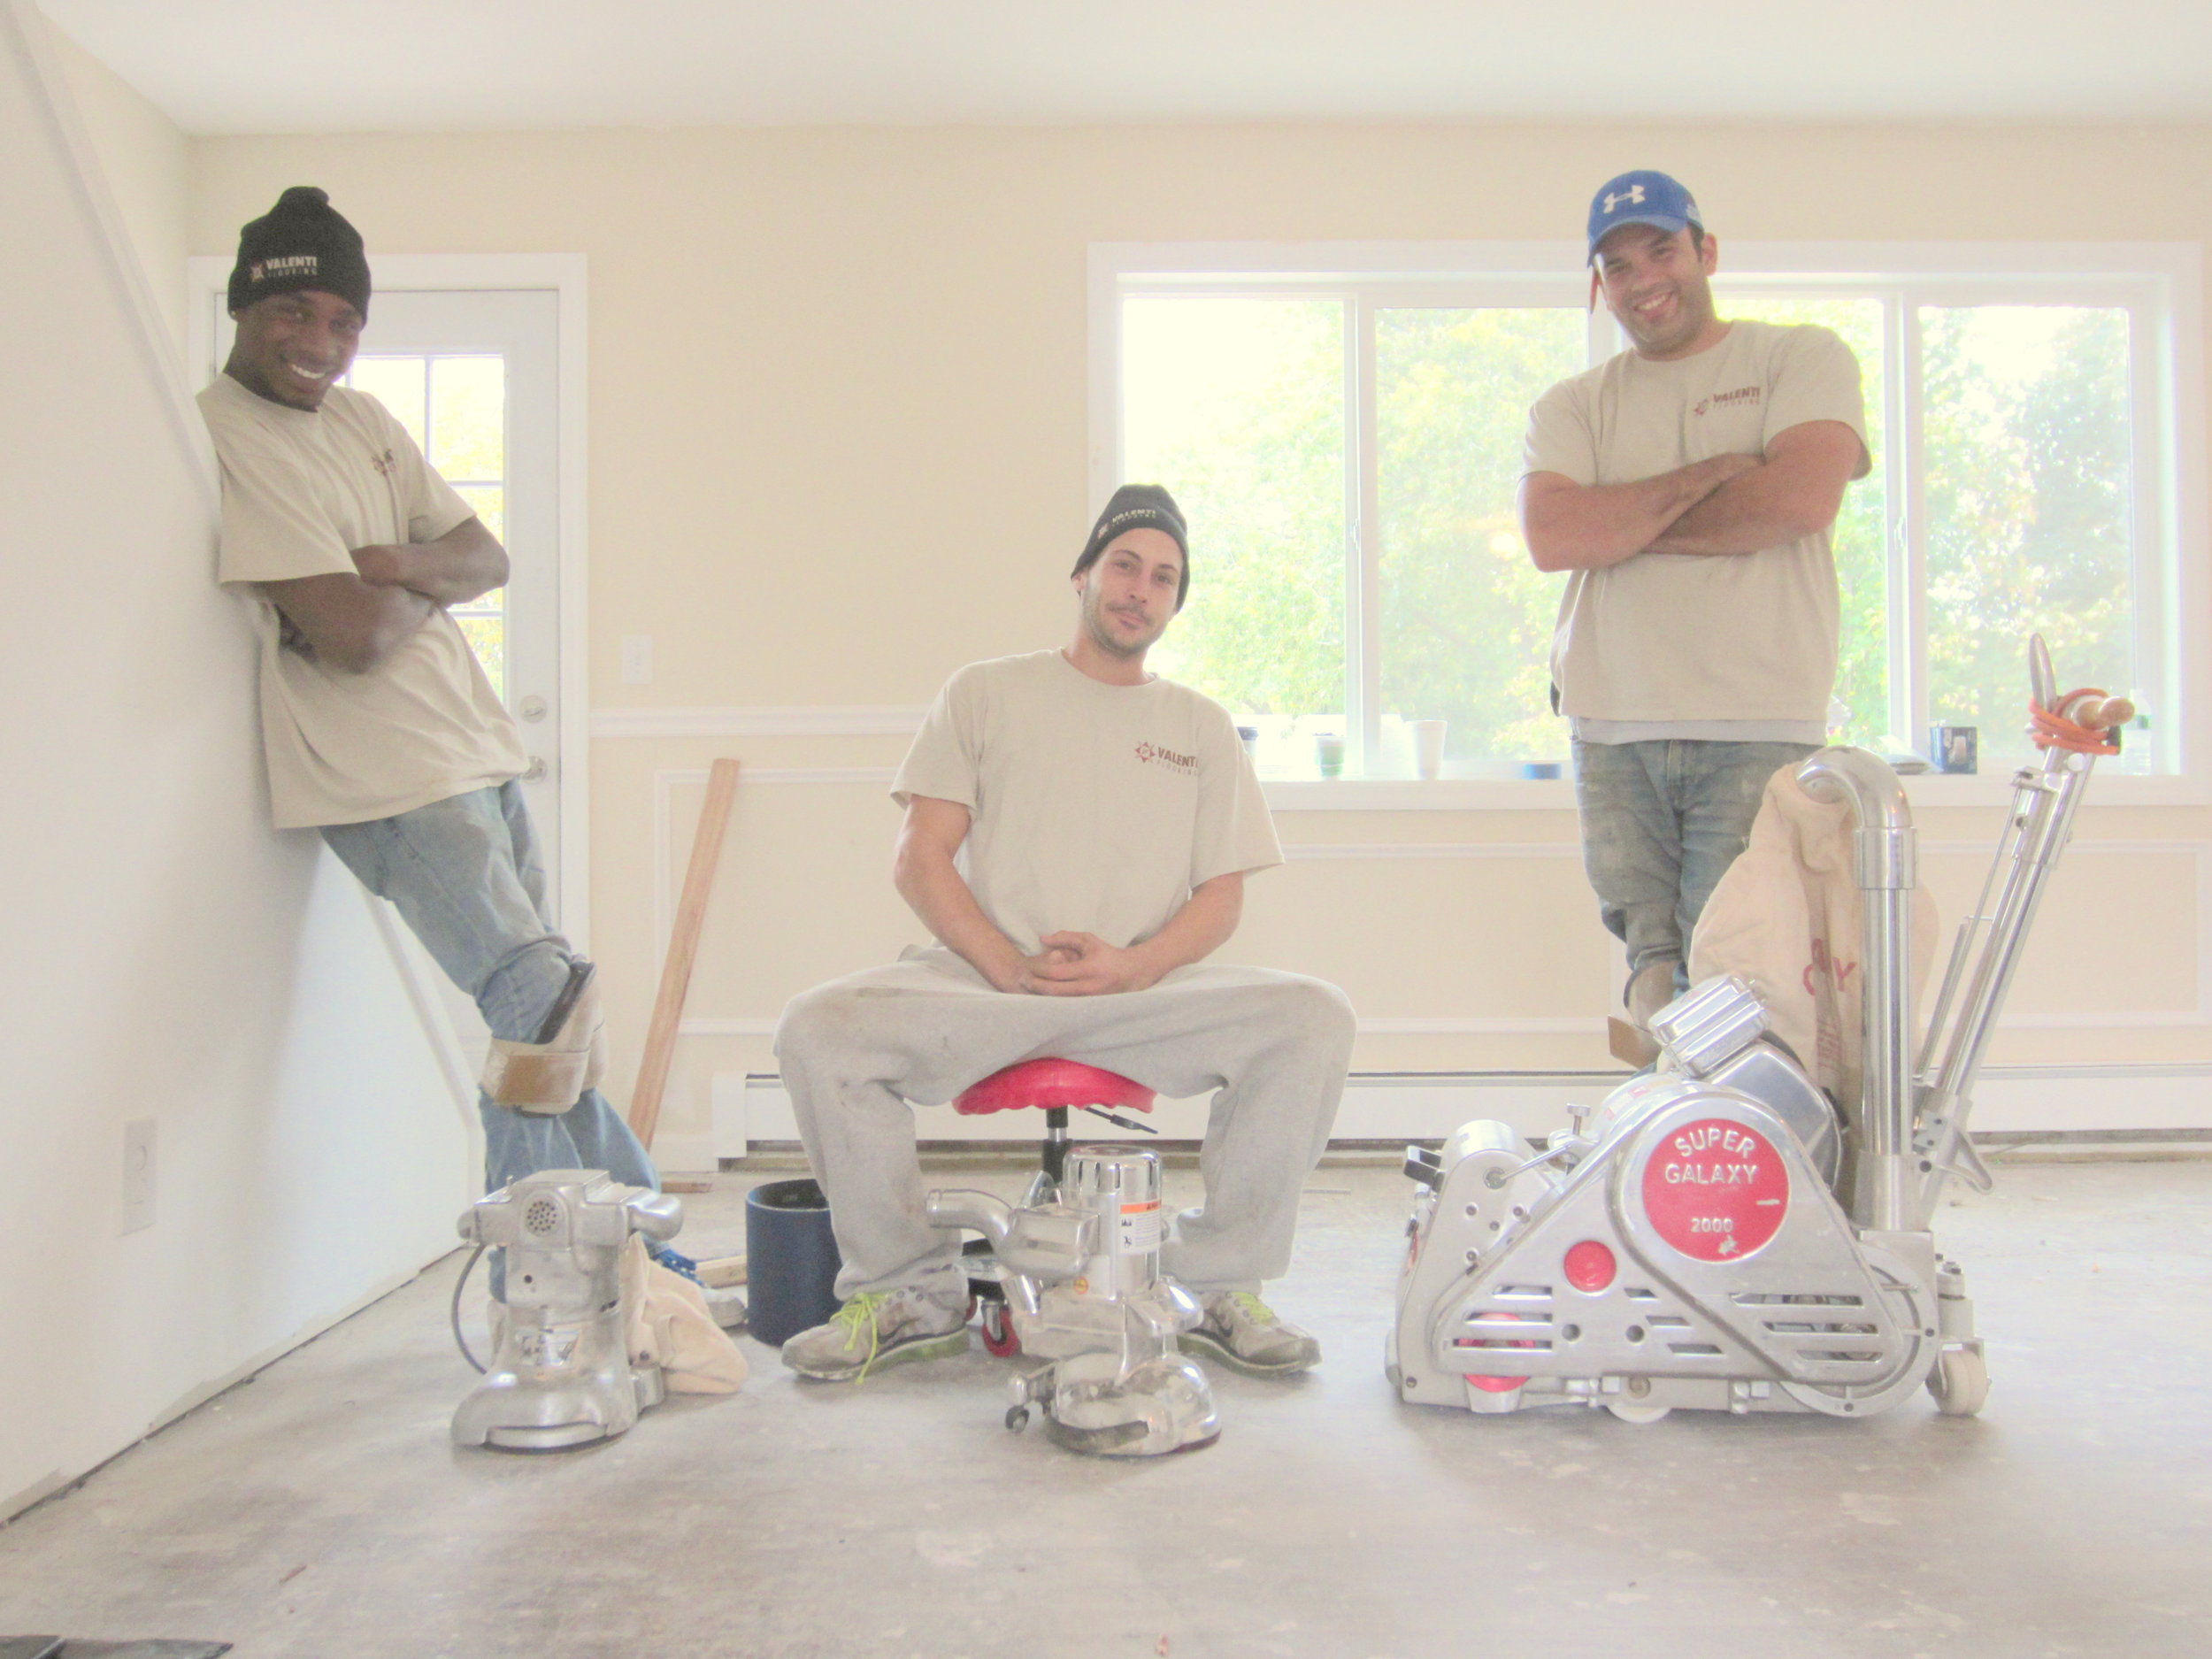
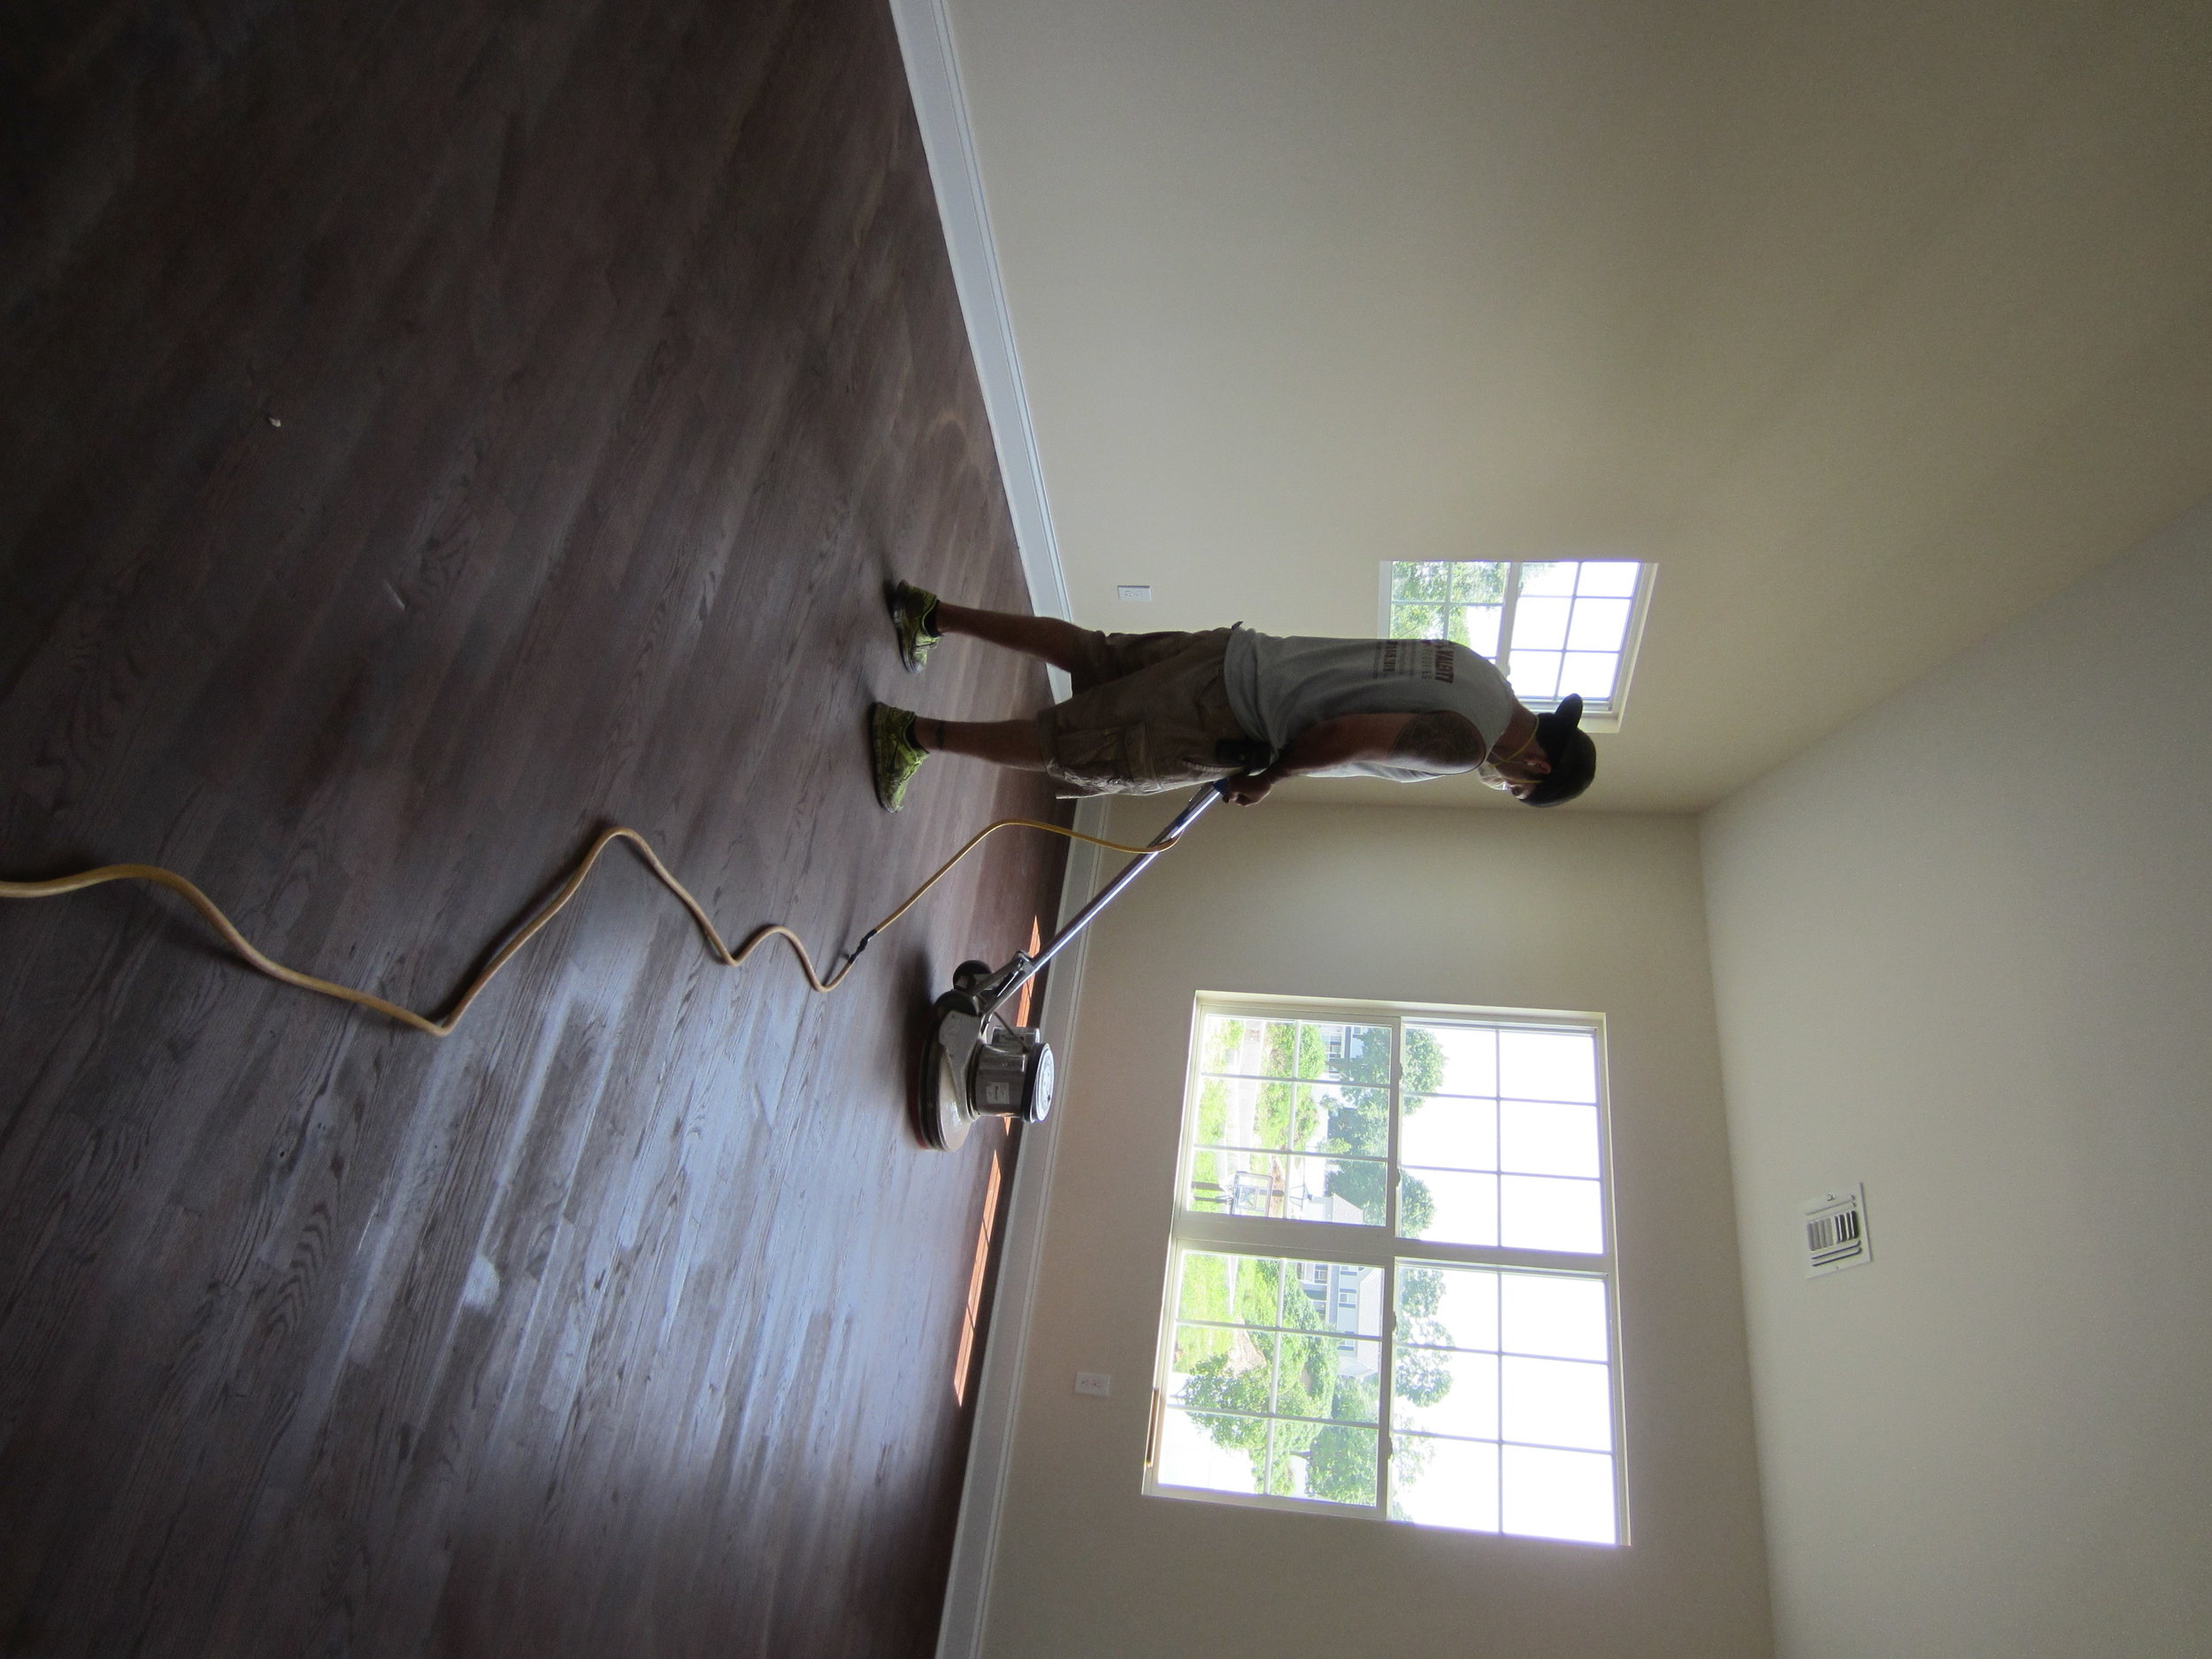
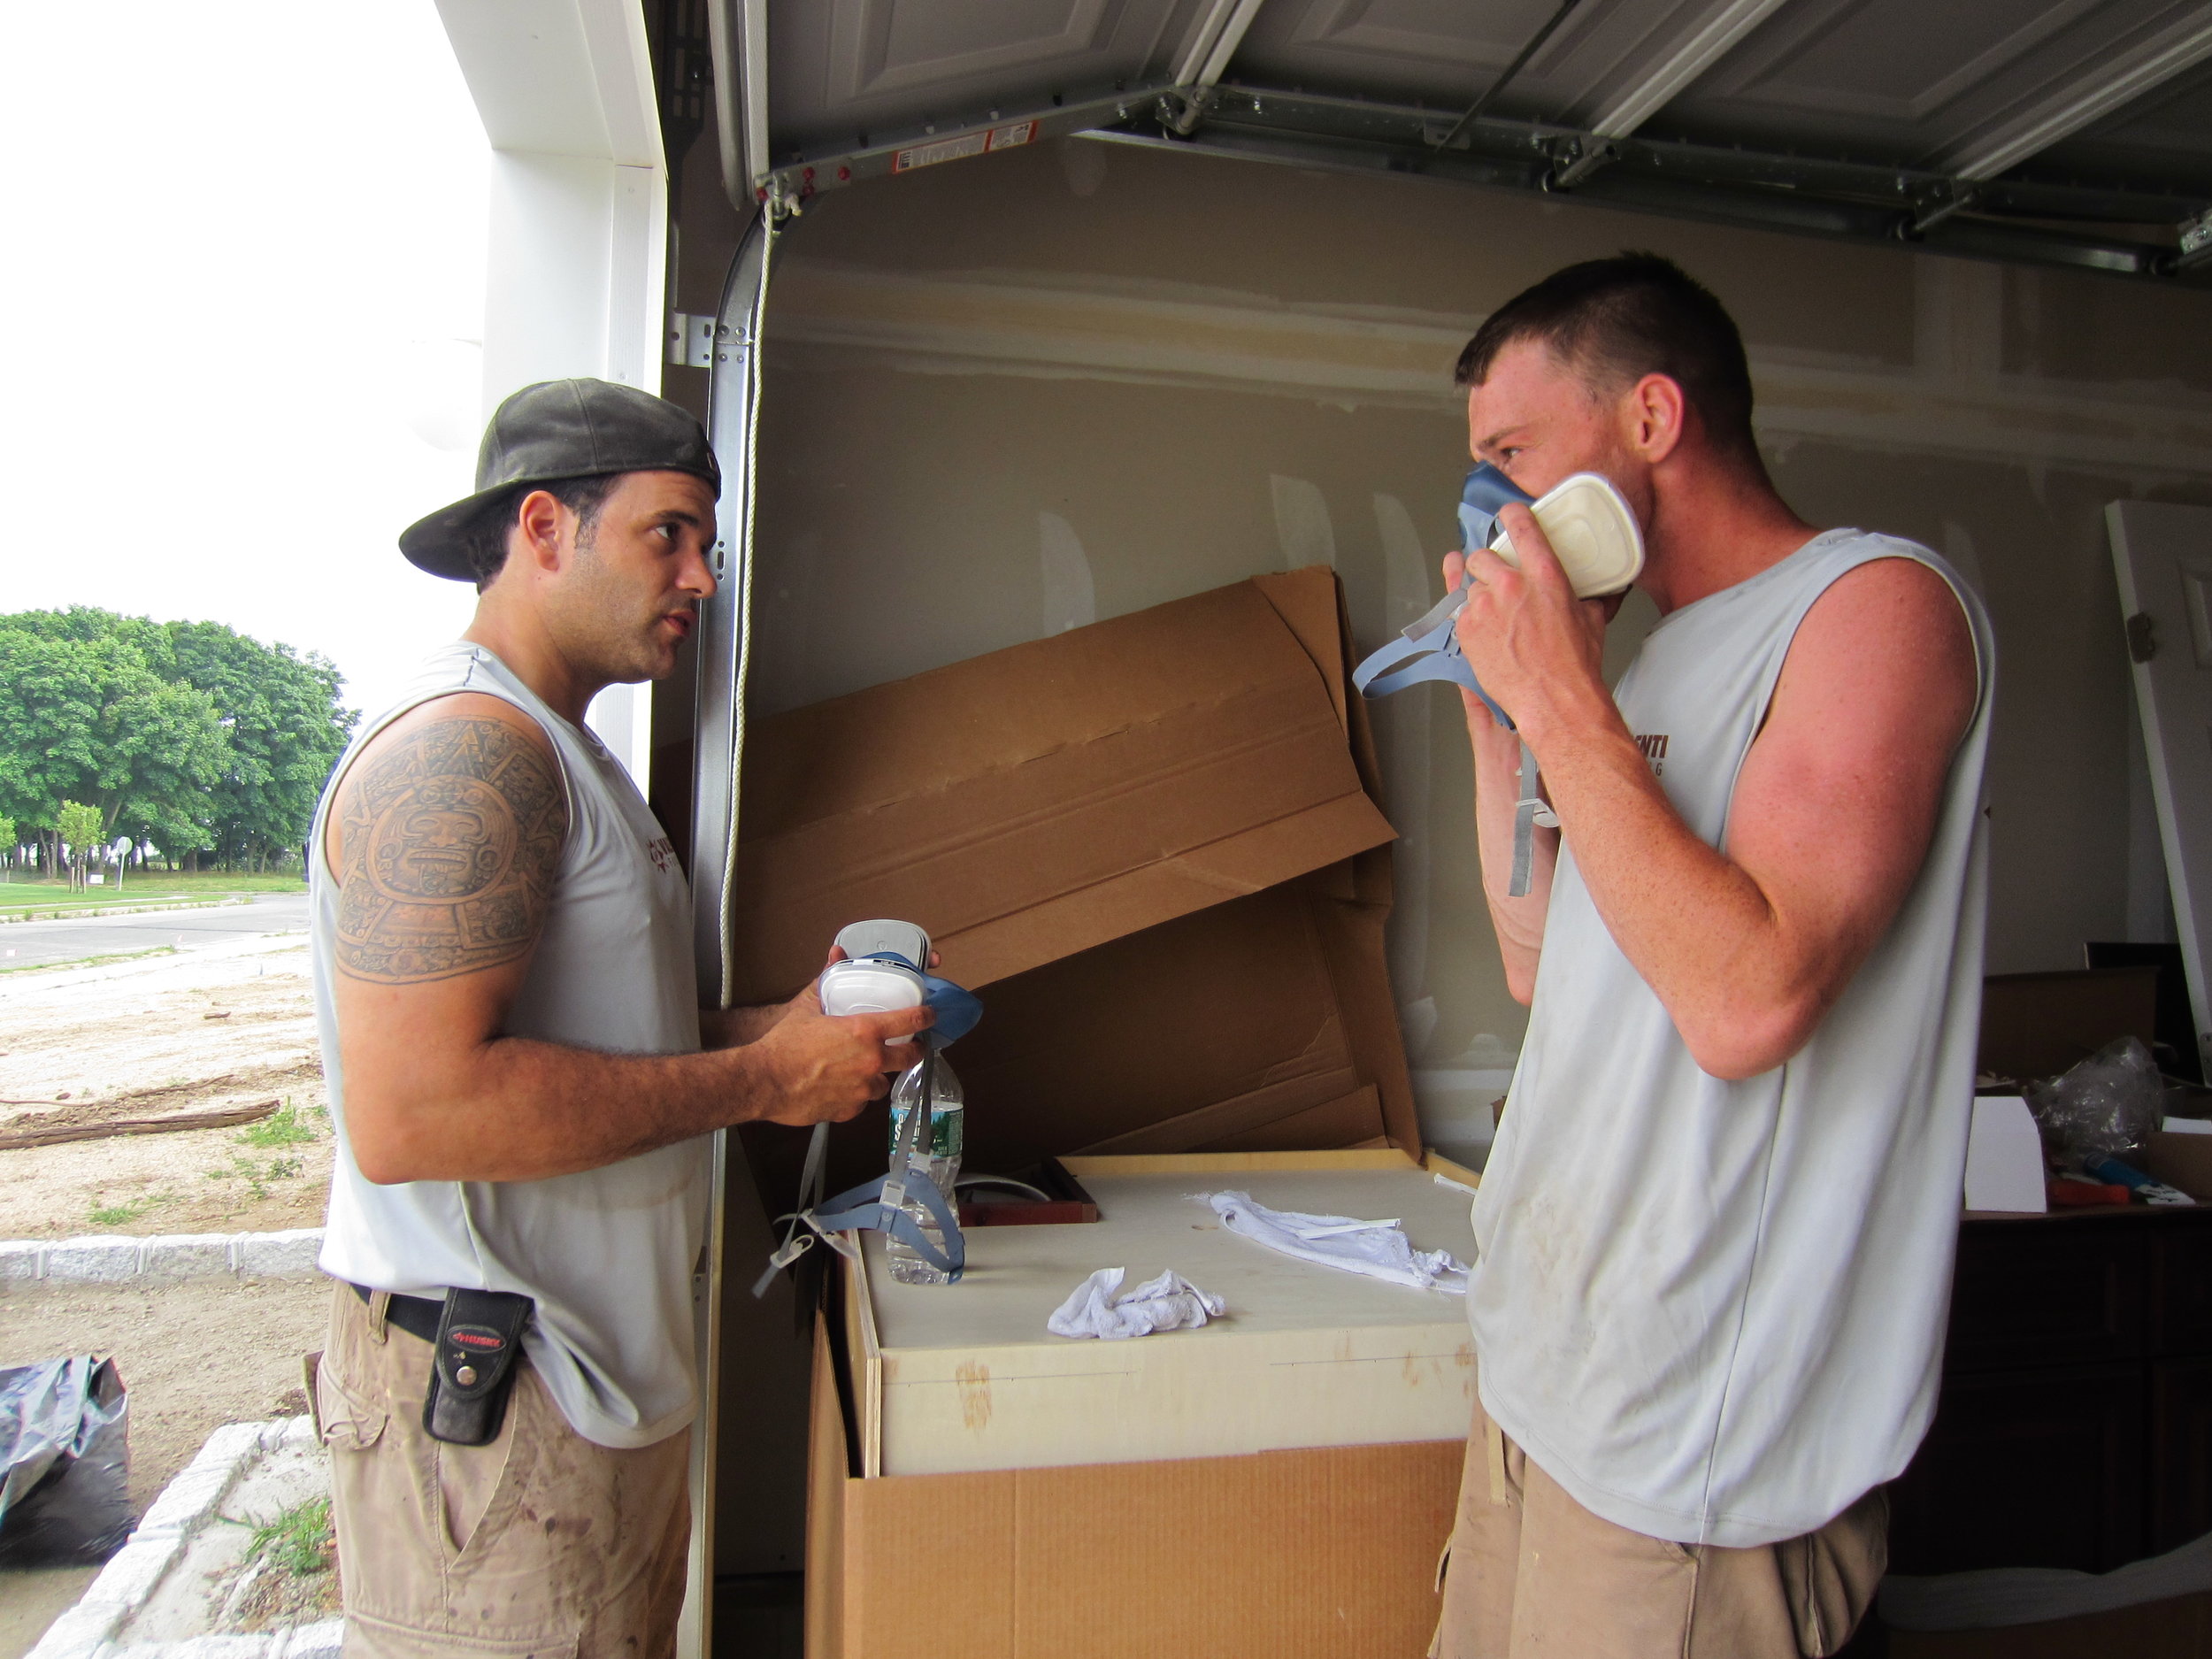
Our team models some of the newest and best hardwood flooring equipment in the industry. We have been doing this for years, and we are extremely efficient workers!
OTHER FACTORS THAT SLOW HARDWOOD FLOOR REFINISHING TIMELINES:

OIL BASED POLYURETHANE:
For a natural (no stain) sanding job with 2 coats of an oil based polyurethane finish, the minimum amount of time needed to complete a job of any size is 2 days, and for 3 coats of oil based poly a minimum of 3 days. We recommend at least 2 coats of oil based polyurethane + a lacquer sealer coat as a minimum for hardwood flooring. Extra coats = extra protection, but only one coat of oil based polyurethane may be applied per day, as it needs 24 hours to dry before applying another coat. For example, a job of 100 sq ft – 2,000 sq ft finished natural with 1 coat of lacquer sealer and 2 coats of polyurethane would take 2 days to complete (without any of the above mentioned time-delaying factors). The first day would be sanding the floor to bare wood, applying one coat of sealer and then applying the first coat of oil based poly. The sealer dries quickly and the first coat of poly is applied right after it is dry. The final, or second coat would be applied on the second day, after the first coat poly has had sufficient time to dry. If the customer has elected to get 3 coats of oil poly, one additional day would be added to this timeline.
For natural (no stain) jobs over 2,000 sq ft and under 5,000 sq ft, it would take us 2-3 days to get the floor sanded, sealed and one coat of oil based poly applied. Add one additional day for each additional coat of oil based polyurethane.

RECOMMENDATIONS AND DRYING TIMES FOR OIL BASED POLY: For a refinishing job with oil based poly, we recommend that customers and their pets be out of the house completely, as the fumes are noxious and are not safe to inhale while the product is drying. 24 hours after application, an oil based poly can be walked on with socks only, though the smell will still be very strong and not safe to inhale for extended periods of time. We recommend removing shoes to walk on a hardwood floor newly treated with an oil based poly for at least 3 days after the final coat is applied. Oil based poly takes a bit longer to fully cure and harden, and thus our recommendation is to wait a minimum of 5 days before putting any furniture on the floor. A week is most ideal! Do not allow pets (especially dogs) onto a floor newly treated with an oil based poly for at least one week after completion.
WATER BASED POLYURETHANE:
For a natural (no stain) sanding job with 3 coats of a water based polyurethane, we can complete a job of 100 - 1,500 sq ft in one day. We recommend a minimum of 3 coats of water based polyurethane as it coats in thinner, but harder layers, than an oil based poly. Water based polyurethane dries very quickly and up to 4 coats can be applied in one day.
Jobs 1,500 – 5,000 sq ft, 2-4 days for completion.
RECOMMENDATIONS AND DRYING TIMES FOR WATER BASED POLY: For a refinishing job with water based poly, it is possible to remain in the home while the project is underway if bedrooms are not being done. Water based poly can be walked on with socks only 3-5 hours after coats are applied. We recommend removing shoes to walk on a floor treated with a water based poly for at least 3 days after the final coat is applied. Water based poly dries and cures faster than oil based poly, but we recommend waiting a minimum of 3 days before putting any furniture on the floor. 5 days is more ideal! As with oil based poly, do not allow pets (especially dogs) onto a floor newly treated with a water based poly for at least one week after completion.
There is one water based product on the market that fully dries and cures in 24 hours…e.g., safe for furniture, normal traffic, etc. If a client is in a rush to have a project completed, we recommend and use Bona Traffic HD (High Durability), which is the top of the line water based polyurethane: it is extremely durable, a beautiful and contemporary finish, and is ready for normal traffic in a quick 24 hours. It is pricey, but worth it for many reasons!

STAINS:
Floor stains require additional sanding as well as an additional day for drying. We take the time to “water pop” or open the grain with a small amount of water applied to the floor via a damp rag, which also takes additional time, but the results are worth it! For a stain, add 1 day to project for jobs under 800 sq ft, 2 days for jobs 800 sq ft – 1,500 sq ft, 3 days for jobs 1,500 sq ft – 2,500 sqft, 4 days for jobs 2,500 – 4,000 sq ft, and so forth...
24 hours after a stain has been completed, 3 coats of water based poly could be applied in one day, and 1 coat per day for oil based polyurethane.


WOCA AND RUBIO PRODUCTS:
WOCA and Rubio Monocoat are both all-natural, hard-wax oils that do not require polyurethane – they are hardening oils that provide both color and protection that is part of the wood floor, as opposed to layers applied on top of hardwood. Both can be spot-repaired. Woca and Rubio products have their own guidelines.
WOCA products must be applied to a floor sanded to 100 -120 grit, which requires an extra pass of the sander (or an additional “cut”), which adds a day of sanding to projects 1,500 sq ft or larger. We recommend 2 coats of WOCA, a base coat, and a top coat which creates a matte, silky appearance. For WOCA applications, projects up to 1,500 sq ft will take 2-3 days, and add one extra day for every additional 1,000 sq ft.
Rubio requires an 80-grit sand, which is normal for all sanding procedures. Rubio necessitates only one coat, and wood treated with Rubio will not take more than one coat of the product. Rubio is, in our opinion, a “harder” product and does take longer to buff in than WOCA finishes. As a result, the timeline for Rubio products is about the same as WOCA, though it requires one less pass of the sander: projects up to 1,500 sq ft will take 2-3 days, and add one extra day for every additional 1,000 sq ft.
After treatment with Rubio Monocoat and WOCA products, floors can be walked on with socks only after 12 hours of drying time. WOCA is fully hardened and usable after 36-48 hours, though care should be observed during the first week after project completion. Be careful not to expose the hardwood floor to water during the hardening time.
Rubio floors require 7 days to fully cure, become water resistant, and harden completely. Rubio floors are useable 36 hours after the oil application, though care should be observed. After 48 hours, on areas with very heavy traffic (such as movers bringing furniture in) the surface should be protected with cardboard, but only during the traffic period. When heavy traffic is over with, remove the cardboard. Once the cure period has passed, the oil will be resistant to most liquids.


Rubio Monocoat and WOCA both make their own cleaners and maintenance products, and we always advise following the manufacturer's recommendations!
Now, with a better idea of how long a hardwood floor refinishing project will take, we suggest you plan a vacation accordingly and let us go to work! :) It really is much easier to be out of the house and out of the way, and then come home to a beautiful new hardwood floor... With that being said, we've worked with many clients who elected to stay in the home while the flooring project was underway, and we've made it work. Some houses make it more or less feasible to do this, and we are happy to advise as to what will produce the best results!
Another one of the most frequently asked questions we get from our customers is, “What is the difference between water based and oil based poly?” Both oil and water based polyurethanes are like a coat of armor for the hardwood floor below, protecting the wood from damage. Each type of polyurethane is a sacrificial layer that will show scratches and wear marks over time, and both oil and water based polyurethane have their strengths! DURABILITY: If each product is applied properly using quality products, the difference in durability is indiscernible. A lot of clients think that water based poly is not as durable as an oil based poly, but a newer brand, quality water based poly will last just as long if it is well taken care of! For water based polys, we recommend and use only Bona products, as we feel they are the highest quality water based polys on the market.


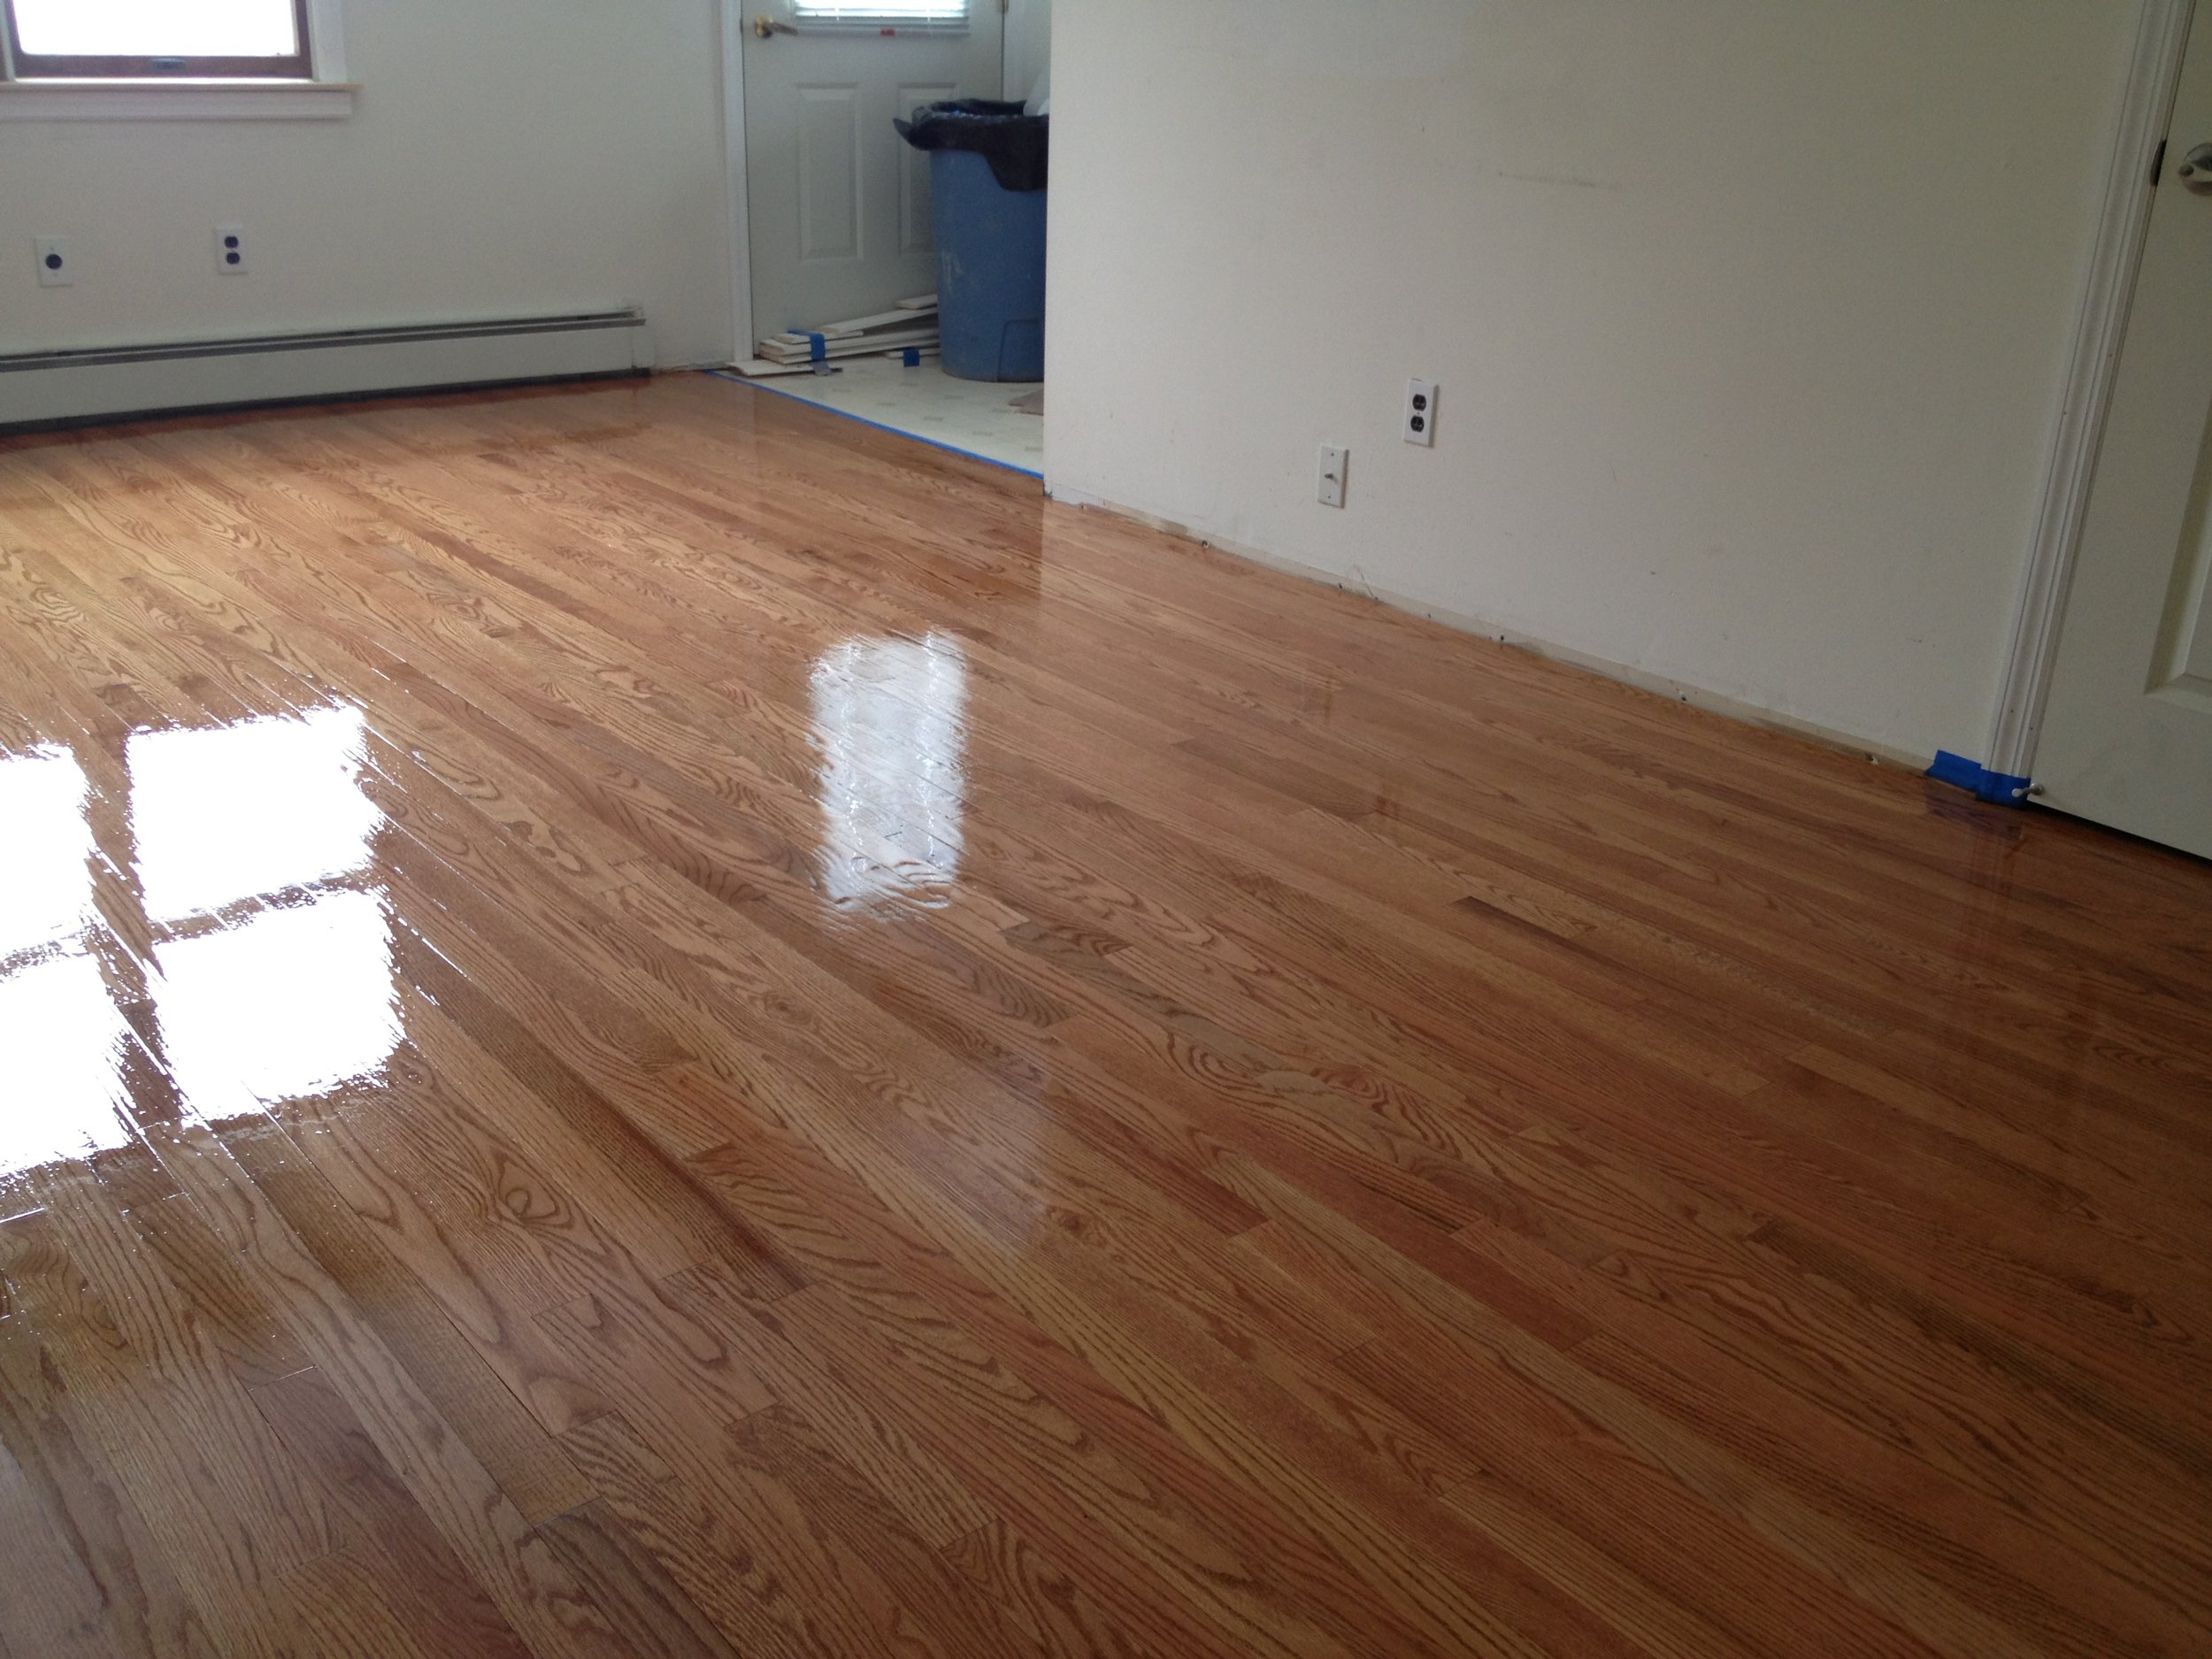
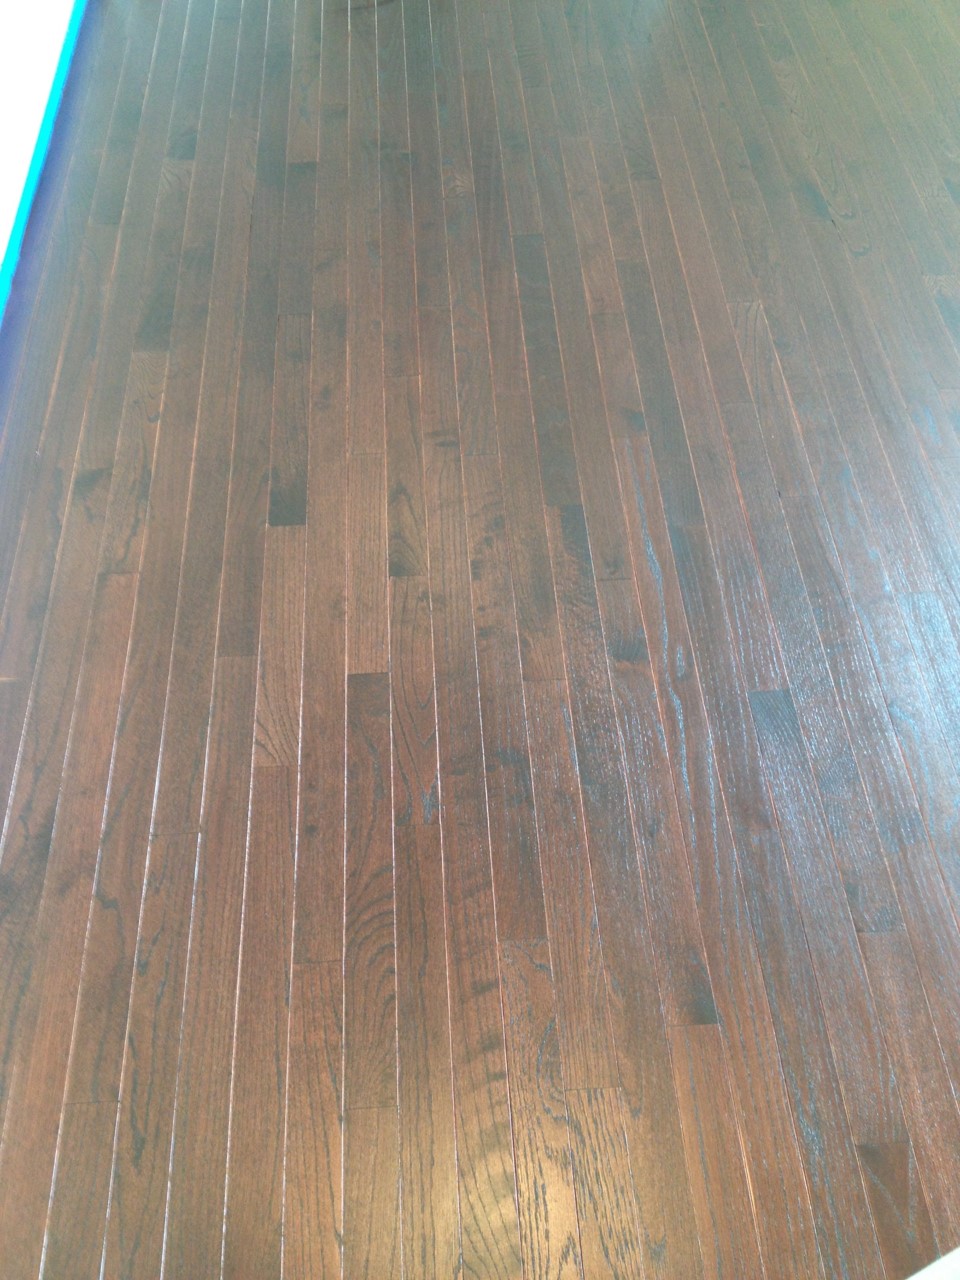
COLOR: Oil based poly has an amber hue, whereas water based poly is clear. An oil based polyurethane will continue to amber and darken over time, while water based poly will remain clear for the lifetime of the hardwood floor. This color difference is less noticeable over a stained hardwood floor, but an oil based poly will still exhibit an amber hue that will continue to darken over time.
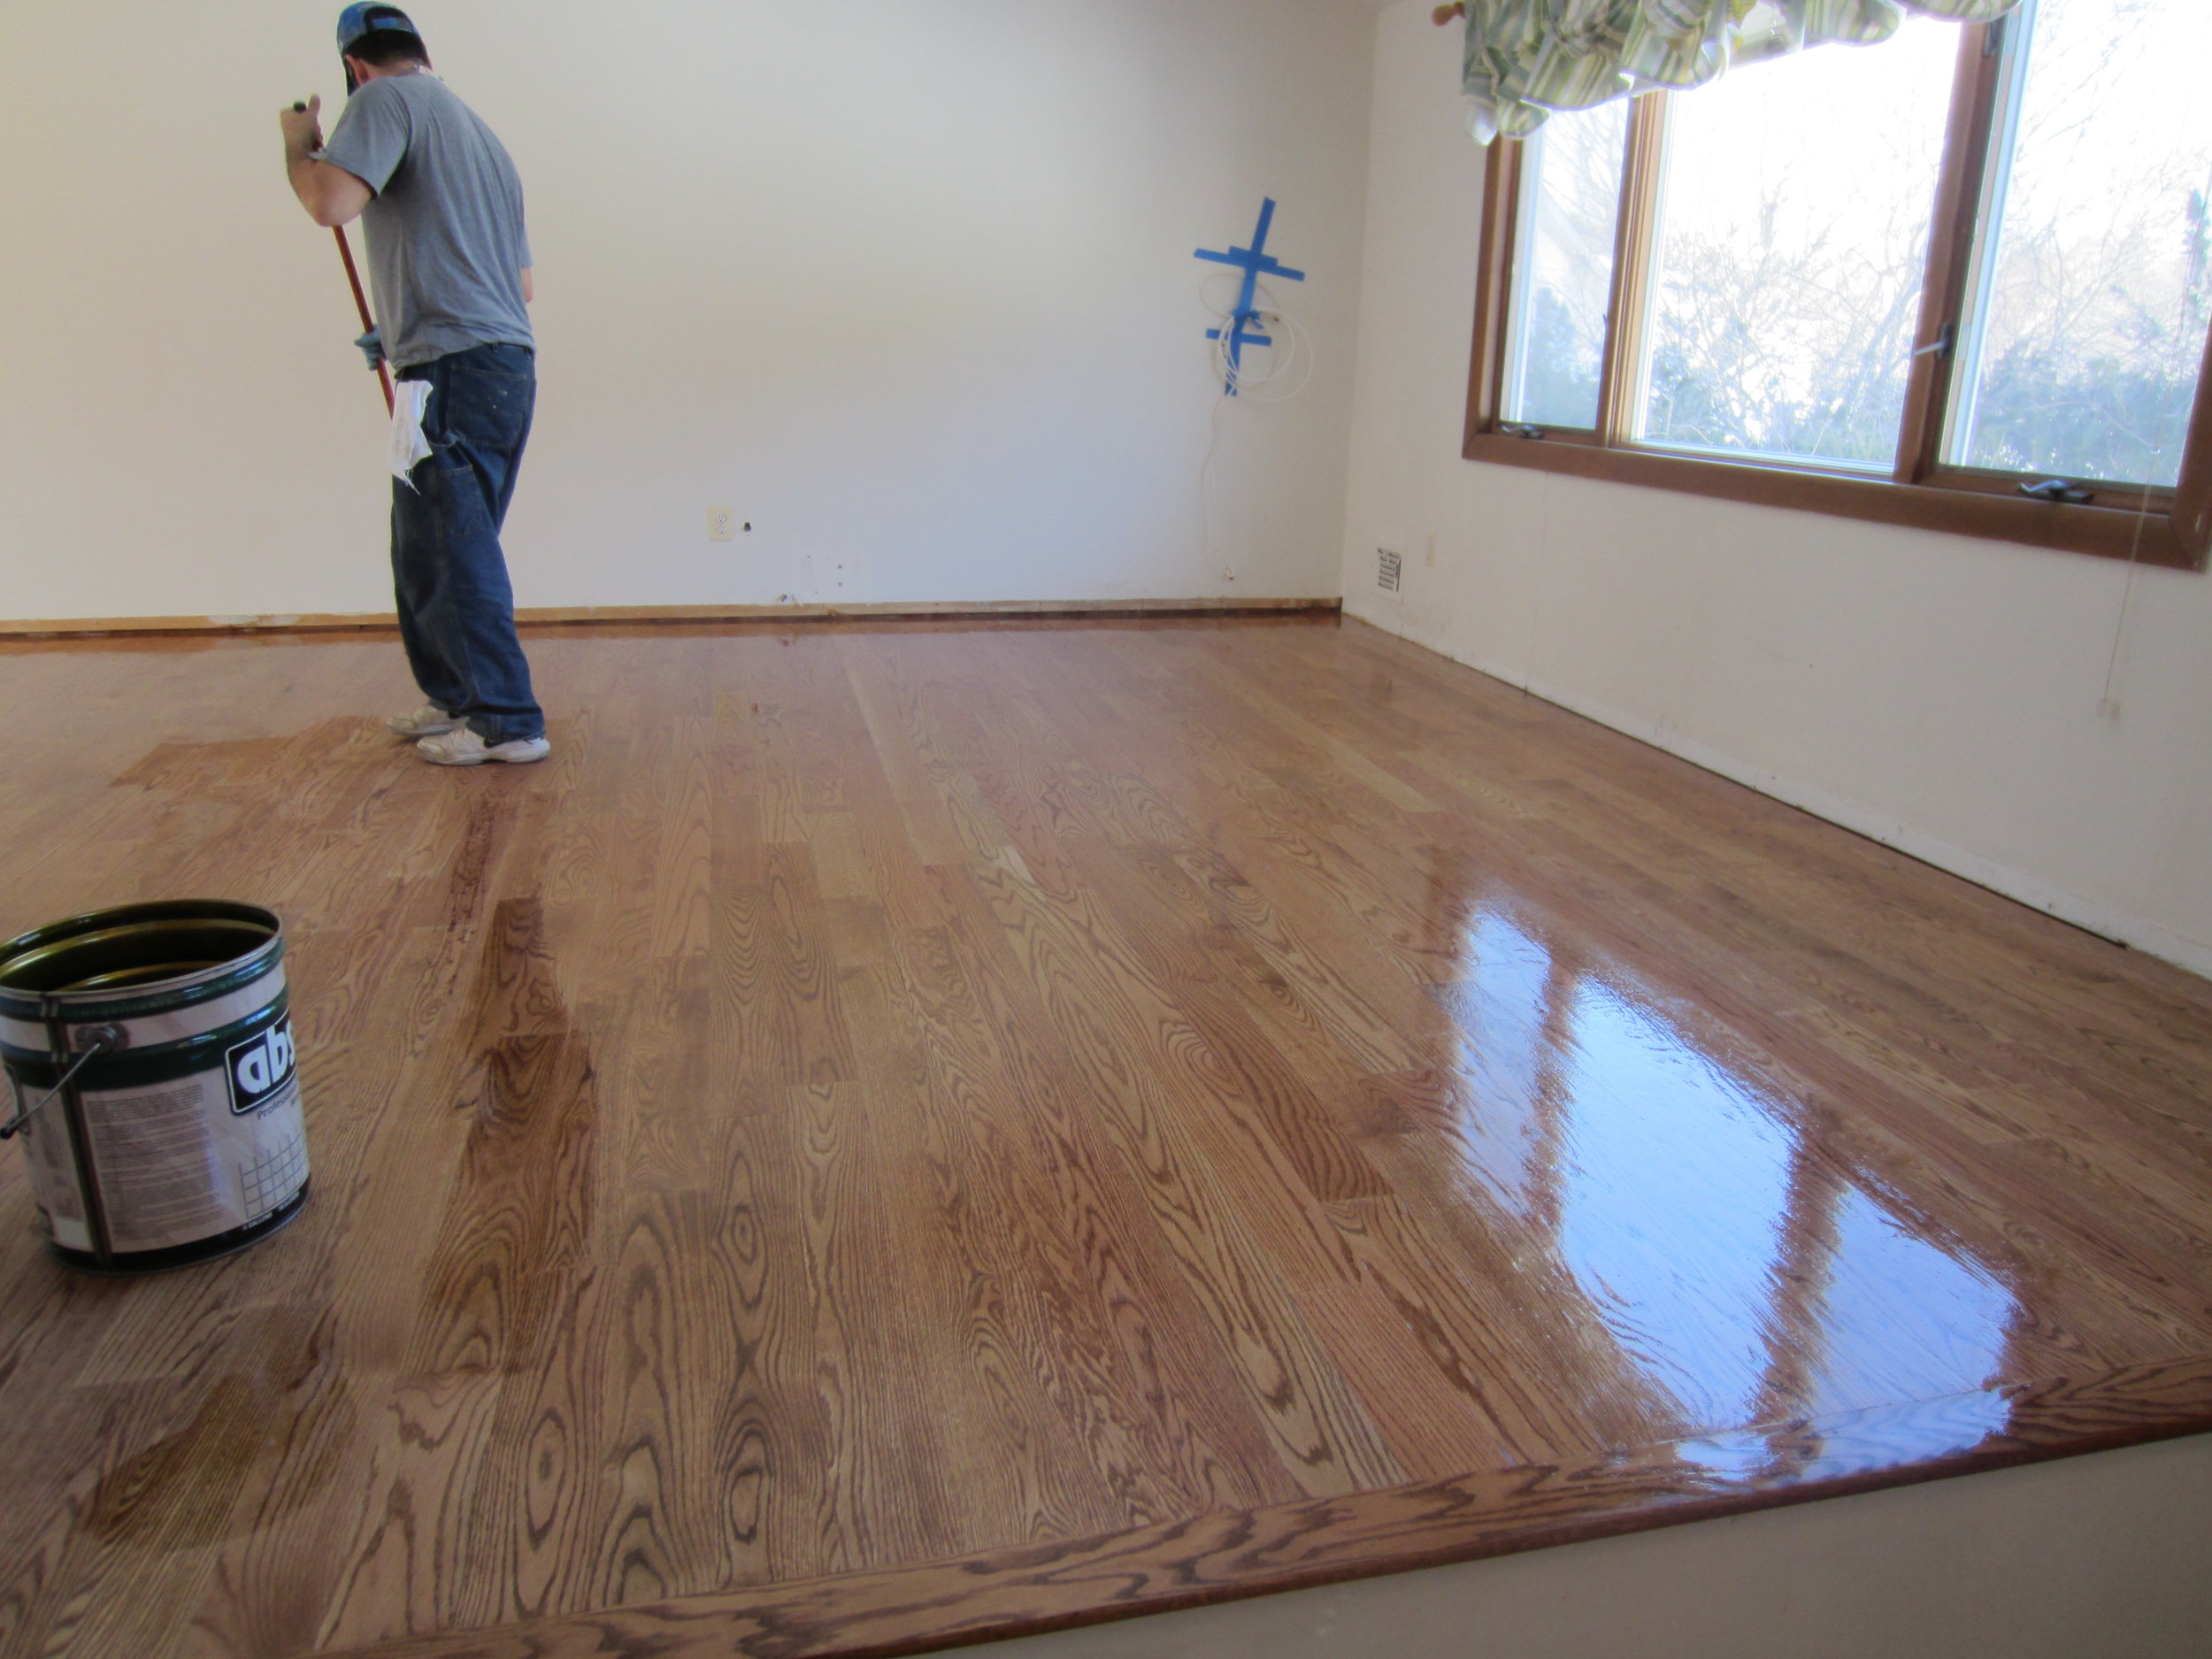
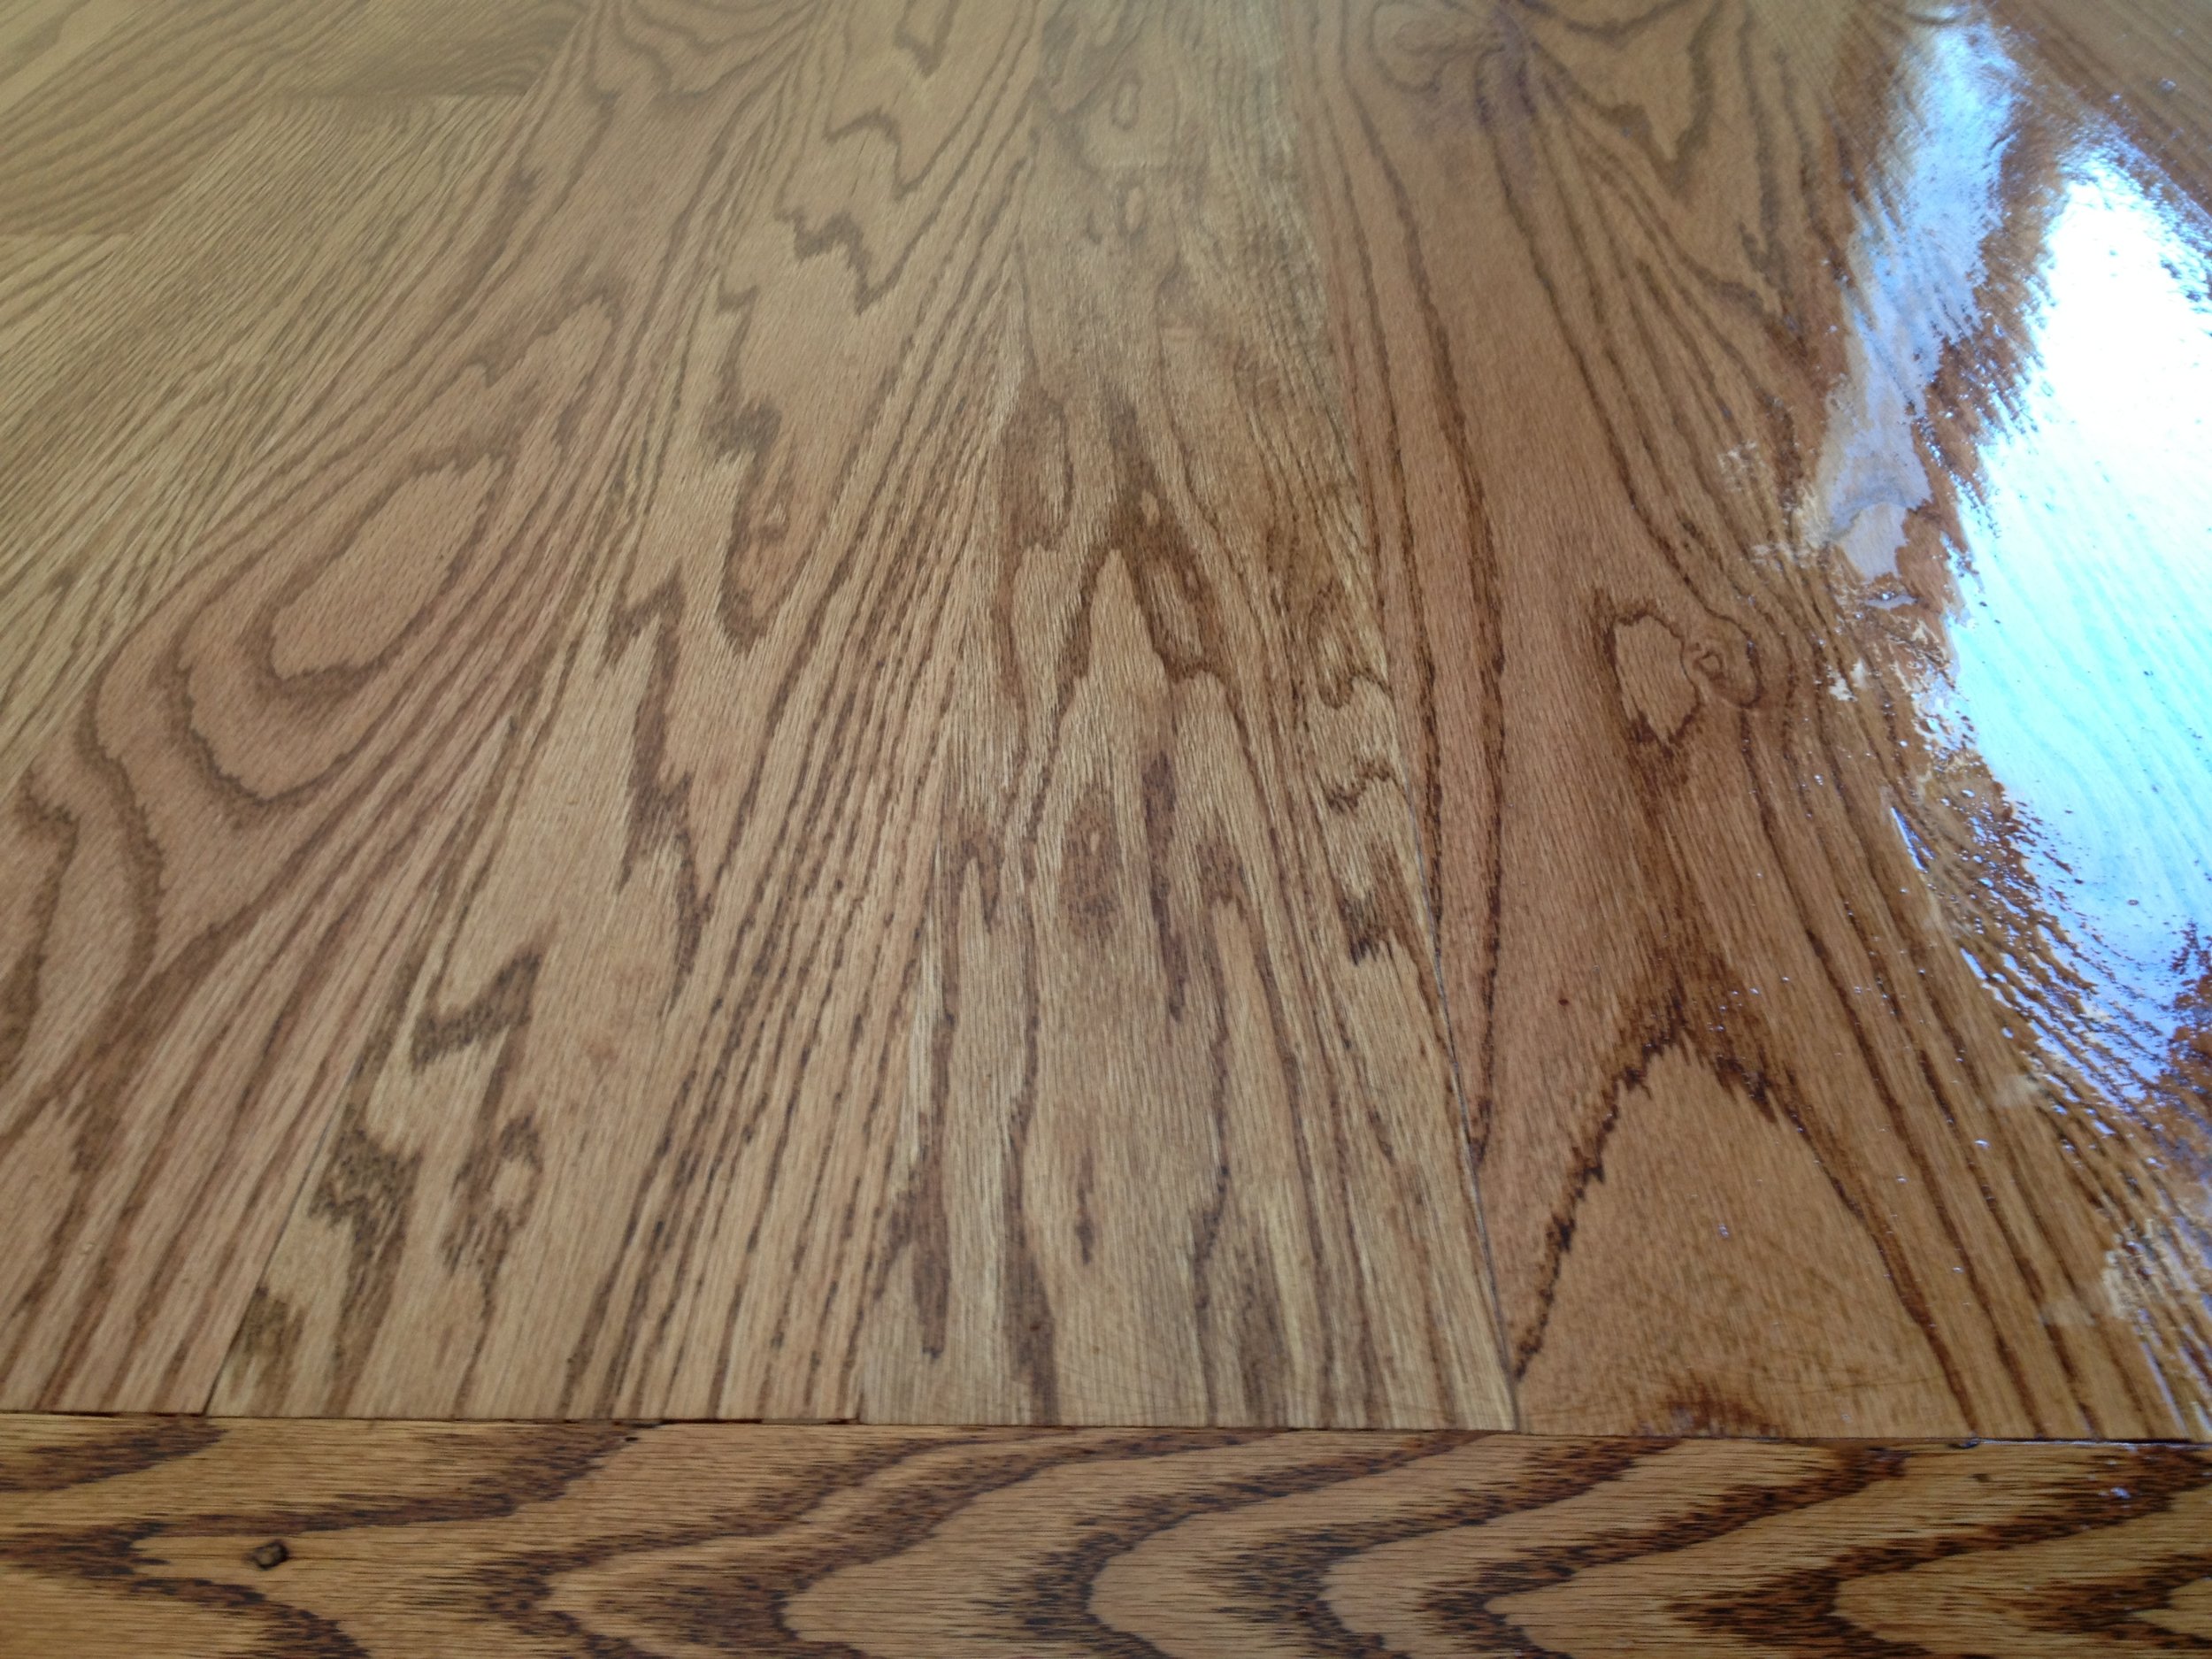
(To LEFT: Oil based poly on 2 1/4" Red Oak. Above: Water based poly on 2 1/4" Red Oak)
DRYING TIMES: Oil based poly takes much longer to dry and cure, and only one coat of oil based poly can be applied to a hardwood floor in 24 hours. Water based poly dries much faster, and several coats (up to 4) can be applied in one day. Water based poly can be walked on with socks in about 4-6 hours after last coat has been applied, while oil based poly must dry for at least 24 hours before walking on it with socks.
SMELL: Oil based poly has a very pungent smell and emits a strong chemical odor and noxious fumes while drying that should not be inhaled. Applying oil based poly requires the use of a respirator and your clothes will stink for hours afterwards! We normally advise our clients to be out of the house and also to remove their pets while oil based poly is being applied and drying. Water based poly, on the other hand, has almost no smell. Water based polyurethane is safe to apply without a respirator, and will not stink up the house like an oil based poly. It is safe for people and pets to occupy a house while undergoing coatings of water based poly.
THICKNESS AND HARDNESS: Oil based poly is a thicker poly, but it is also softer. Water based poly, an acrylic product, is a thinner, but harder coating. Oil poly can be more susceptible to dents, while water based poly can be more susceptible to surface scratching. Because water based is a thinner product, we recommend 3 coats of water based poly as a minimum, whereas with oil 2 coats are sufficient as a minimum. For people with large pets, we recommend either 3 coats of an oil based poly or 3 coats of Bona Traffic High Durability water based poly.
COST: Water based poly is a more expensive product. A 5 gallon bucket of oil base polyurethane costs us around $150.00 to purchase, whereas the same amount of water based poly costs us about $350.00. Expect to pay .50 - $1.00/sf more for a water based polyurethane finish. If your flooring contractor is not charging you more for a water based polyurethane, they are using a cheap brand that will not last! As previously stated, we use only Bona brand water based polyurethanes, as they are the most durable on the market.
FEEL: I have heard some people say that water based poly is a rougher finish and doesn’t feel as smooth as an oil based polyurethane. We apply both polyurethanes all the time, and if you hire an expert contractor, either finish should feel as smooth as satin under the feet!
INSTANCES THAT REQUIRE WATER BASED POLY: If you are going for a gray stained, white stained or a white-washed hardwood floor, you must use a water based poly, because an oil based poly will make those floors look yellow. Over time, they will continue to look more and more yellow-ish. ICK!! Also certain very light species of wood, such as Maple, look best with a water based poly for the same reasons. Beautiful light-colored Maple turns yellow with application of an oil based poly. We also recommend a water based poly for hardwoods that have a very yellow-ish tone to them naturally, such as Ash, Pine, or Fir, because application of an oil based poly only brings out the yellow tones even more! This is a matter of taste, however, all of our clients with the aforementioned hardwood species have been very happy with the application of a clear water based poly. I have seen Ash, Pine and Fir floors with oil based poly applied and they just scream YELLLLOOOWWWW (even more so over time)!!!
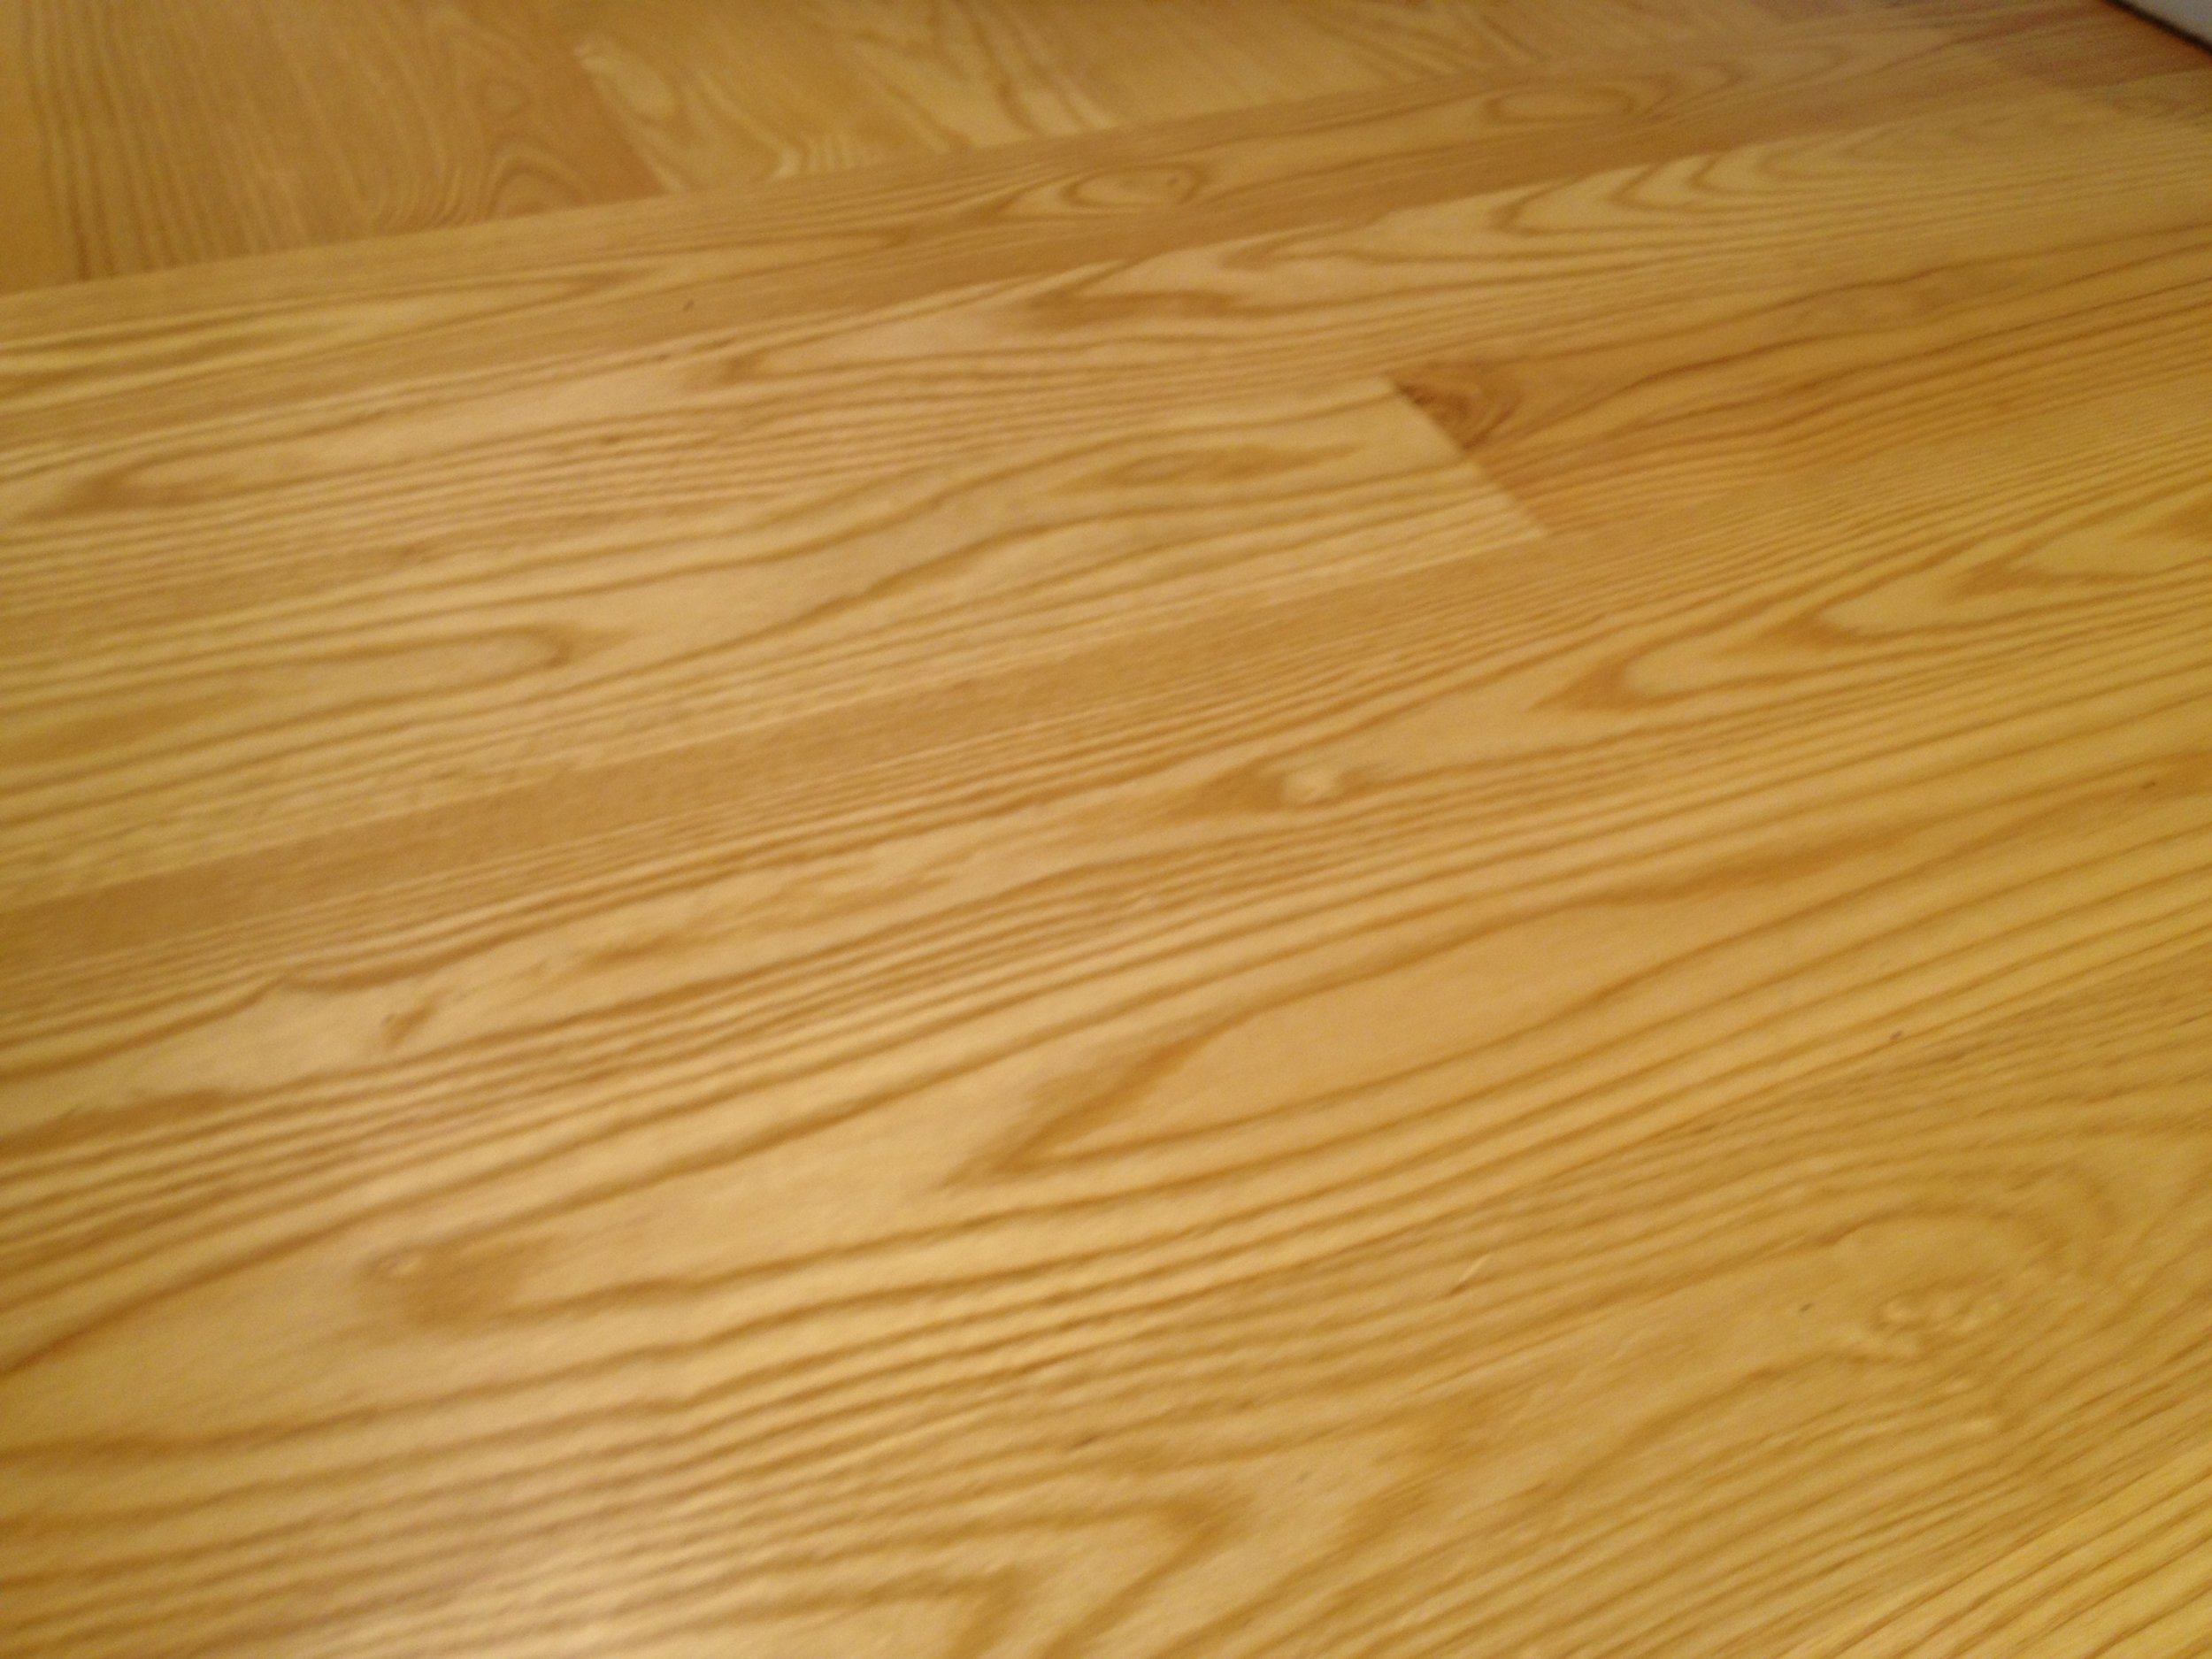
ASH WITH OIL BASED POLY
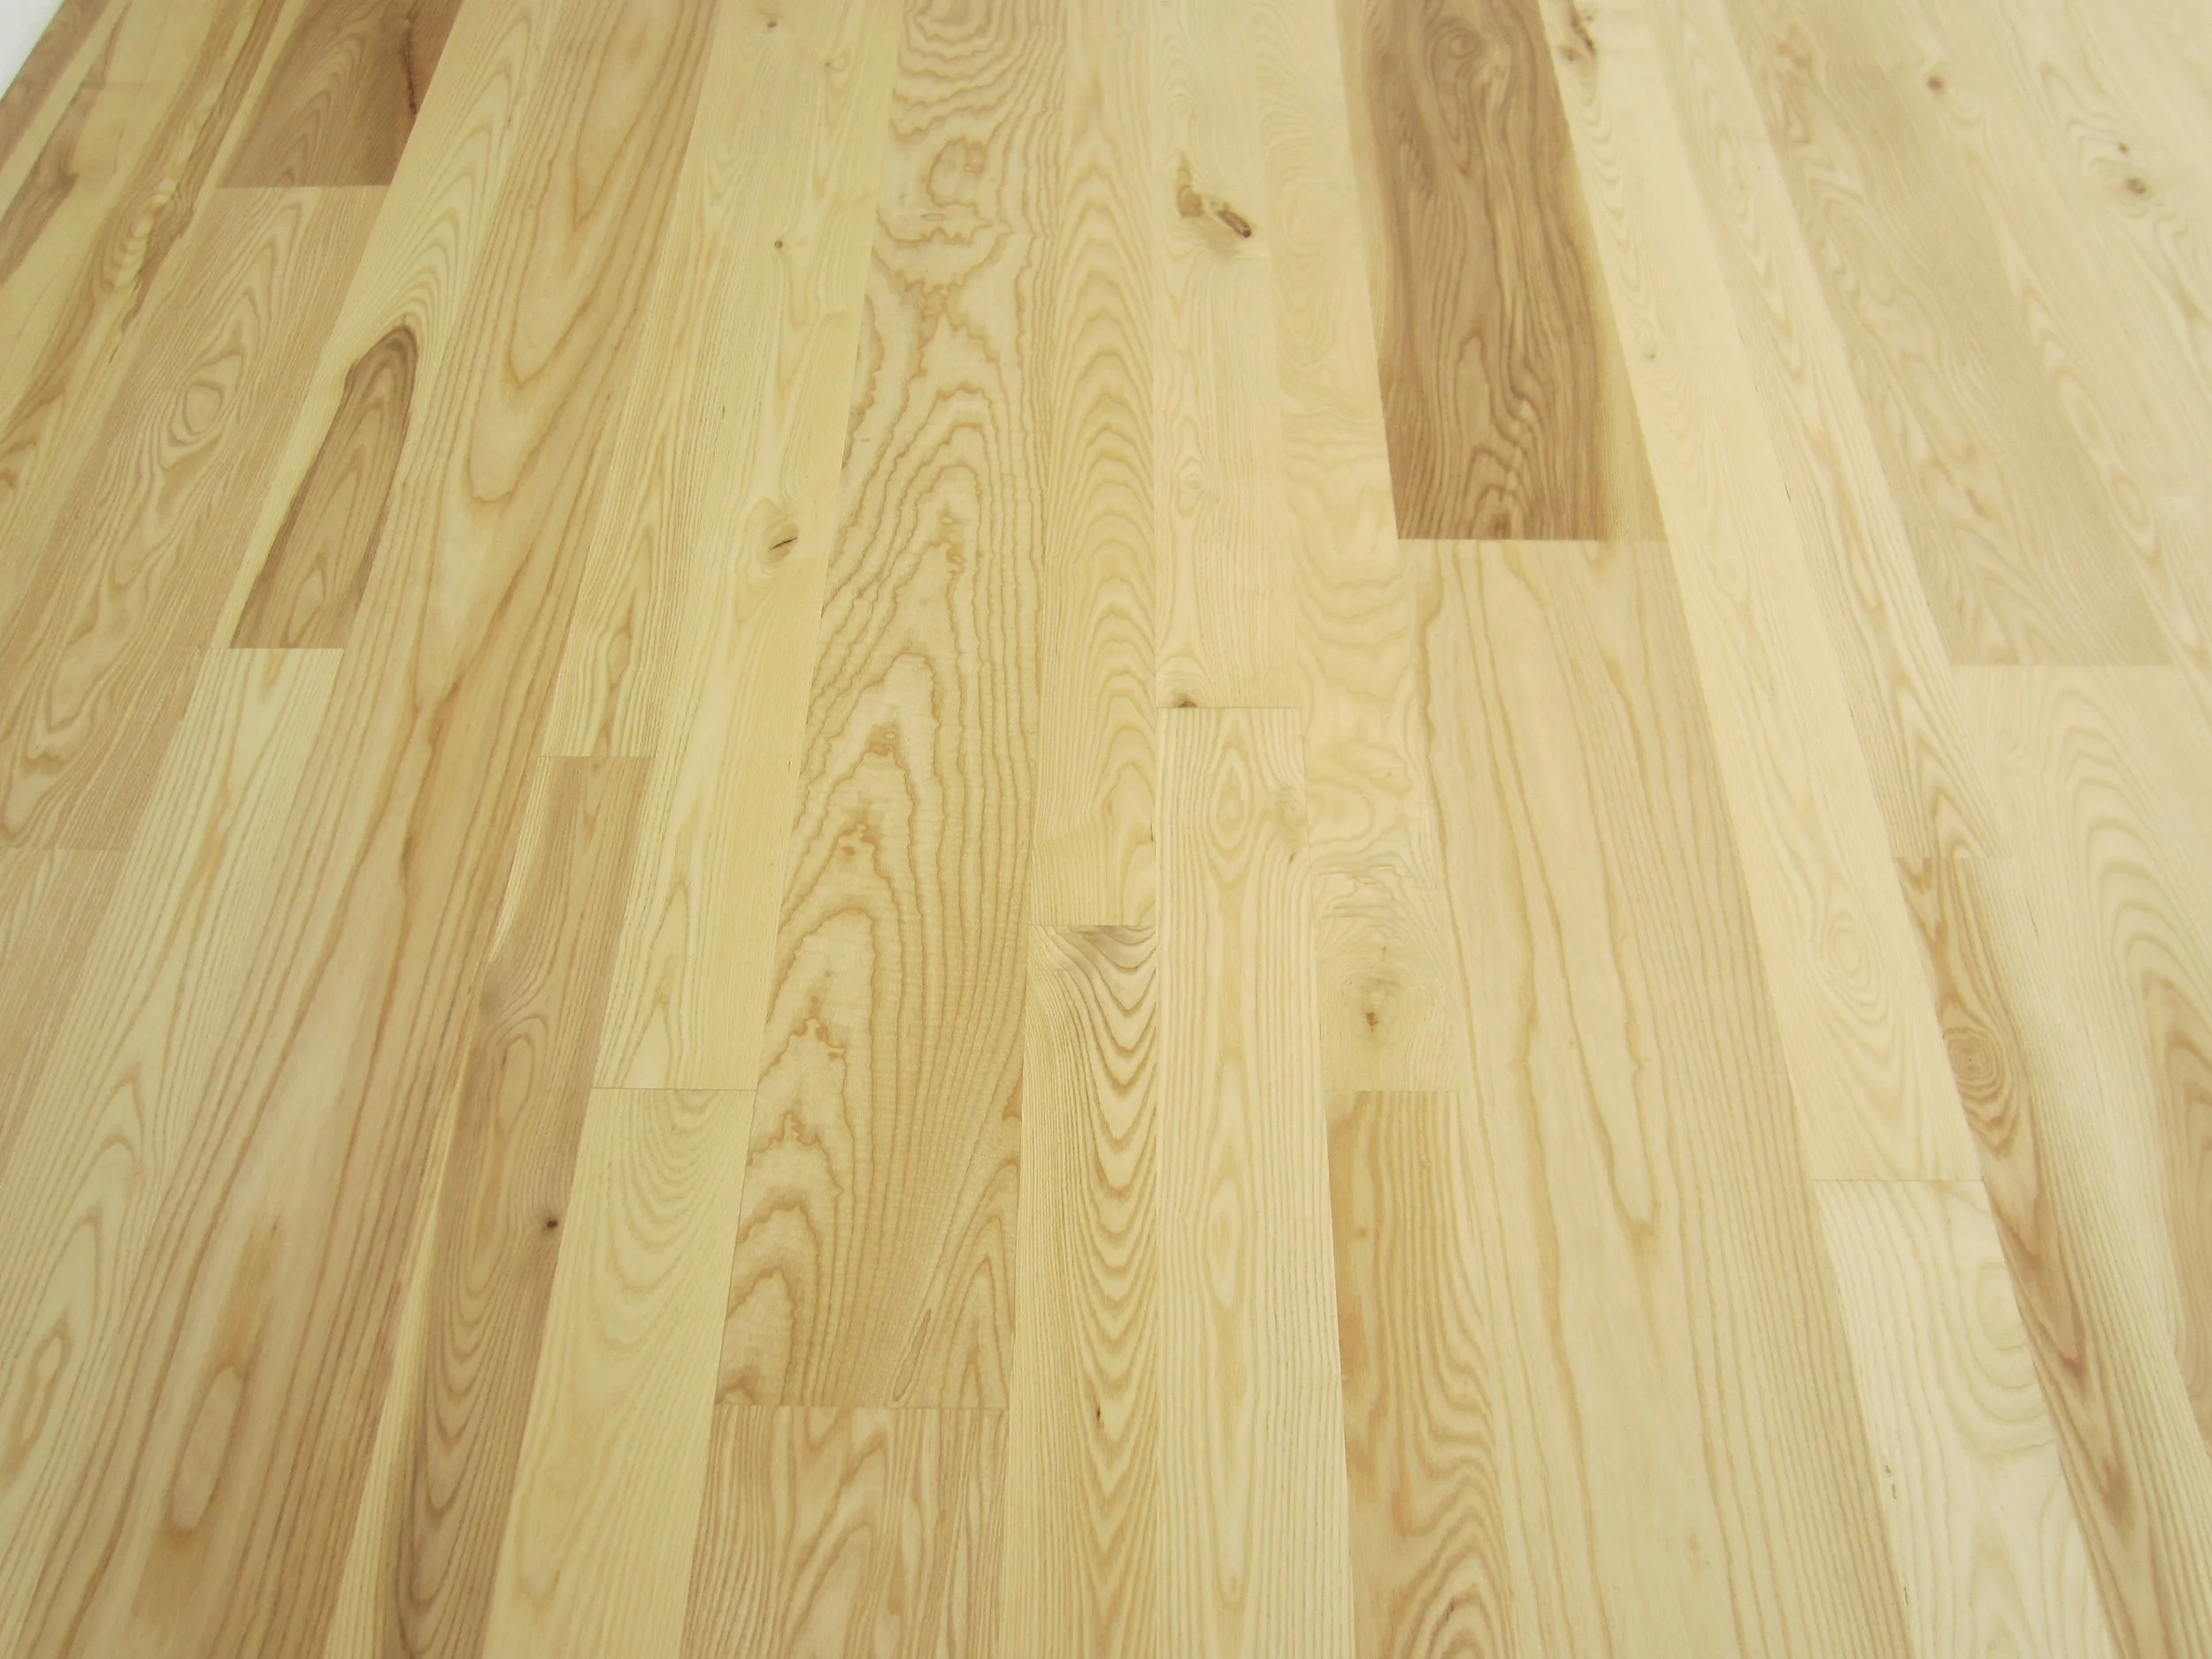
ASH WITH WATER BASED POLY
Everyone has different tastes and different living conditions, and any competent professional hardwood flooring contractor should be able to offer advice as to which polyurethane is best for any particular situation.
Proper maintenance of hardwood flooring will help prolong the life of your floor between sandings. Our customers always ask us questions in regards to proper maintenance of their hardwood floors, so we hope that this blog post is helpful! Let’s start with rule #1 of proper hardwood floor maintenance: Wood and water don’t mix well! Hardwood flooring can be severely damaged by excess moisture. Spills should be cleaned promptly and thoroughly. And on the cleaning side, using devices such as steam cleaners or floor steamer mops can really damage your new hardwood floor. There are a lot of commercials out there showing people happily sanitizing, disinfecting, deodorizing, and cleaning a wood floor with a steam cleaner, but steam is water and water damages wood! (Just look how happy this woman is steam cleaning away!! This actually damages the floors with excessive heat and moisture!)
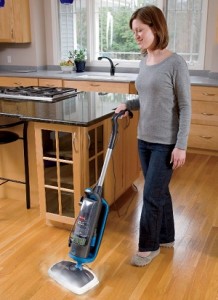
More accurately:
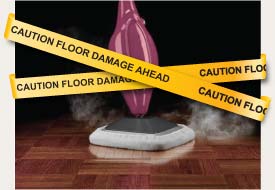
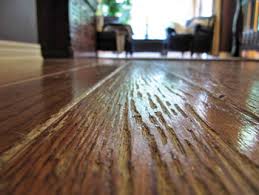
Steam cleaners can cause the finish to delaminate and the wood to swell. They can also lead to peeling finish, cloudy finish, and whitening finish. Using these devices is almost like leaving your wood floor out in the rain. So stay away from those steam cleaners! (Pictures to left and below are of floors damaged by repeated use of a steam cleaner.)

2) Do vacuum and sweep frequently! Dirt, grit, gravel, salt, etc. are abrasive, just like the grit on a piece of sandpaper. Your weight on top of those particles will grind into the finish just as effectively as any floor sander, so clean any dirt and grit off the floor as often as possible. Be sure and use a vacuum without a beater bar, as this can damage the finish on the hardwood floor. We recommend a canister vacuum with a very soft bristle wand head.

3) Use rugs or mats, especially at exterior doors, to help trap sand and grit that arrives with incoming traffic, while area rugs in high traffic areas can prolong the life of your hardwood floor between coatings or sandings. Be sure to use a natural underlayment (as opposed to synthetic rubber backings) if using one. Natural latex and natural rubber underlayments are best as they will not react with the polyurethane.
4) Do NOT wet mop the floor, ever! Even those long-stick squeeze mops just don't wring out the mop head thoroughly enough, and even small amounts of water can cause your floor to swell and cup over time.


5) Put felt floor protectors on the bottom of all furniture, as well as on anything else that may rub on the hardwood floor (baby exersaucers, etc.).
6) Keep pet nails trimmed. Be aware that dogs running through the house will most likely scratch any finish.
7) One of the most frequently asked questions we get from our customers is, “What products should I use to clean our hardwood floors?” It’s a great question to ask because there seems to be a lot of confusion out there! Do NOT clean your floors with Murphy’s Oil Soap, Mop and Glo, Orange Glo, Swiffer Wet Mop, furniture polish such as Pledge, vinegar, ammonia, or any pine cleaners! All of these cleaners, over time, will dull and damage the finish. And if they leave a residue, you will find that this residue is nearly impossible to get OFF of your floor! We are doing a re-sand right now in Fort Salonga, and much to our chagrin as we were setting up, spotted a bottle of Murphy’s Oil in the garage. It took us 50 sheets (!) of 36-grit belt sandpaper for our Galaxy2000 sander to get down to the bare wood, which added an entire day to the project as well as added hotel/furniture storage costs for the homeowner. This product in particular will eat right through your polyurethane finish, leaving your wood exposed to damage from spills, scratches, and stains. It also will prevent you from doing any sort of maintenance re-coat of polyurethane on your floor, which means that you will have to commit to a full sanding when parts of the floor start to look dull or scratched. Furthermore, most warranties from finish manufacturers and prefinished wood flooring manufacturers are voided with the use of an oil soap cleaner!What do we recommend for cleaning products? Bona Professional Hardwood Floor Cleaning Kits are great and are made for polyurethane-coated hardwood floors. The chemicals will not damage the finish and do not leave a residue. You can find Bona Professional Hardwood Floor cleaner online or at a local flooring store. Note that Home Depot, Bed Bath & Beyond, Lowe’s, etc. do not carry the Professional line, which we feel is superior to the regular Bona hardwood floor cleaner. Find the Pro kits on Amazon (18" Hardwood Floor Care System and 15" Hardwood Floor Care System), which have everything you need to get started. If your floors are finished with Woca oil or Rubio Monocoat, both of those manufacturers make their own cleaners, which should be used as directed.


Follow these 7 tips and you will prolong the life of your hardwood floors, keeping them beautiful for years to come!
Follow us on Instagram!